Hey all!
Thought I'd share my most recent endeavor. I was contracted in April to take a 1/18th scale 21st Century Toys P-38J Lightning and convert it to resemble P-38F-5-LO Lightning, 42-12652, known today as "White 33". Something as far as I know has only been done once before. I remember seeing a picture of a 1/18 P-38 on Facebook that someone had converted, but I didn't save it DOH!
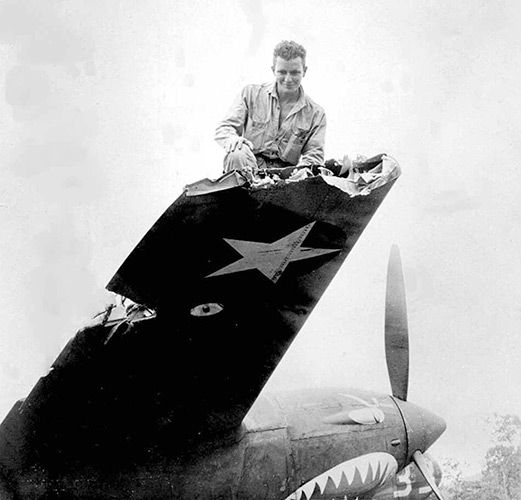
History:https://pacificwrecks.com/aircraft/p-38/42-12652.htmlBuilt by Lockheed in Burbank, 42-12652 was disassembled and shipped overseas to Australia and reassembled in 1942. On September 17, 1942 assigned to the 5th Air Force (5th AF), 35th Fighter Group (35th FG), 39th Fighter Squadron (39th FS). Assigned to pilot 2nd Lt. Kenneth C. Sparks. On December 31, 1942 Sparks took off from 14 Mile Drome (Schwimmer) near Port Moresby as one of twelve P-38s led by Thomas J. Lynch on a mission to escort a formation of A-20 Havocs, B-25 Mitchells and B-26 Marauders on a bombing mission against Lae Airfield. Over Lae, the P-38s engaged eight "Zeros" actually Ki-43-I Oscars from 11th Hiko Sentai (11th Flying Regiment). During the air combat, Sparks fired at a Ki-43-I Oscar and witnessed it crash. In the same engagement, a Ki-43-I Oscar collided with this P-38, damaging his right aileron and wing tip.
Here is an artist's depiction of "White 33" returning to 14 Mile Drome, although it appears he took off more from the wing then what is shown in the original photos.
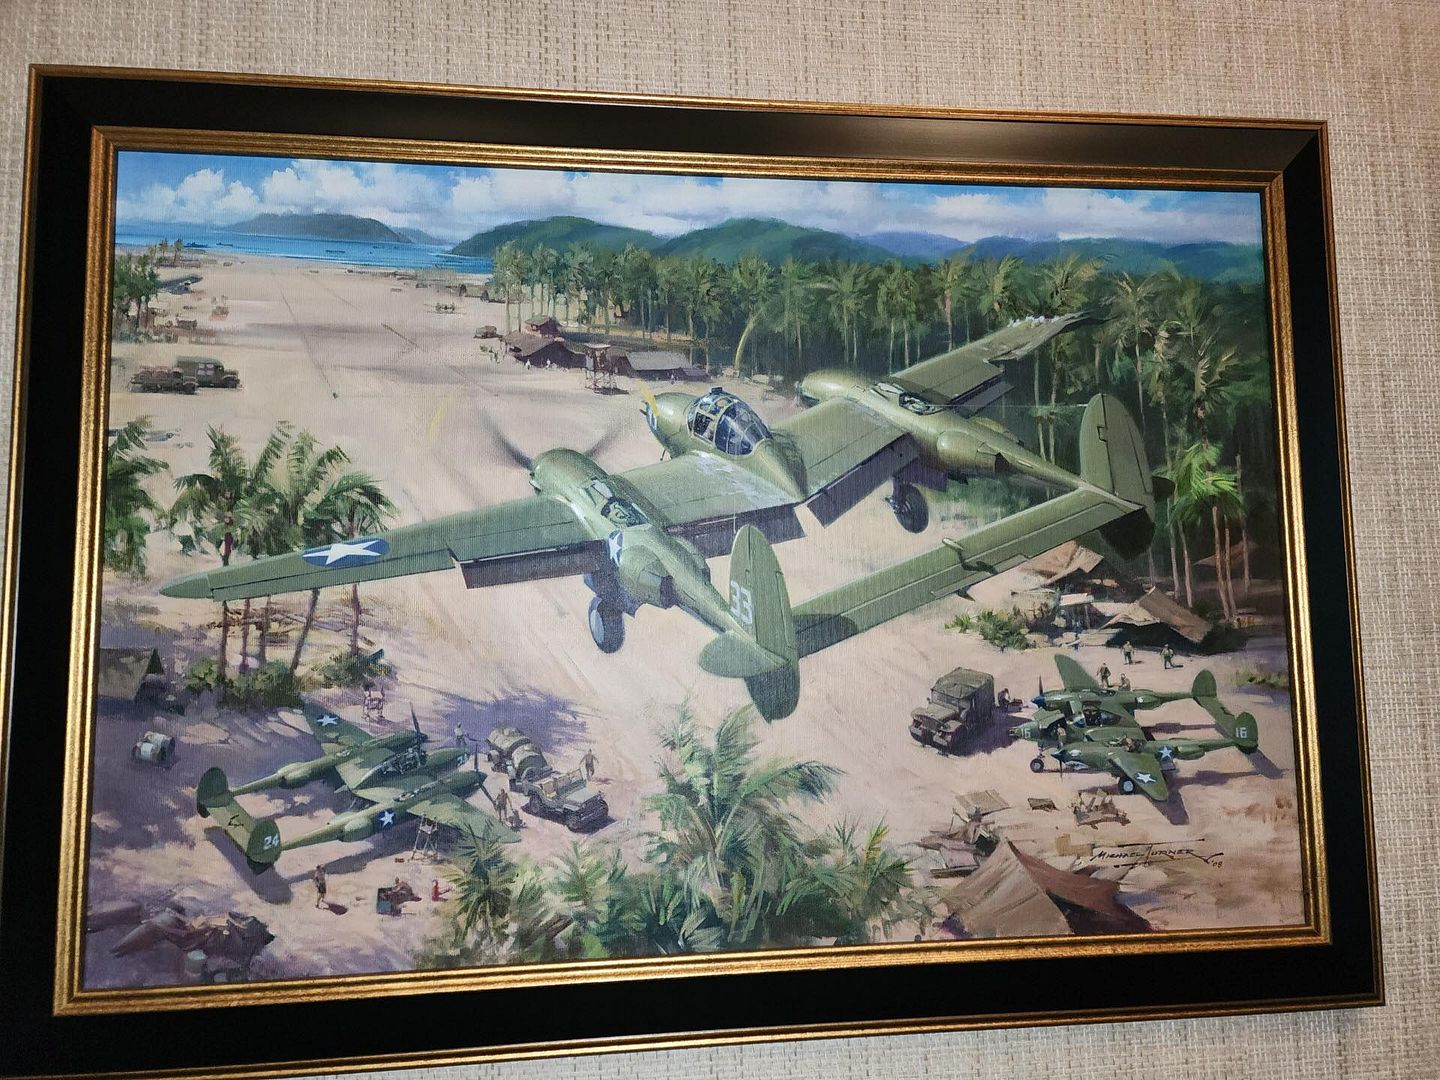
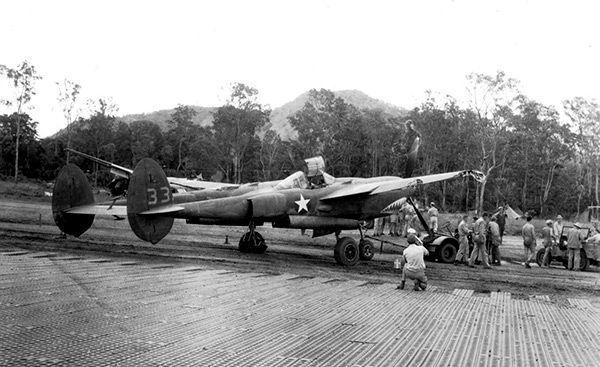
Returning to 14 Mile Drome, Sparks made a direct landing approach and nearly collided with P-38F Lightning pilot 1st. Carl G. Planck who was also damaged and landing from the opposite direction. To avoid a head on collision, Planck swerved off the runway. jammed on his breaks and narrowly missing the control tower. Afterwards, photographs were taken of this P-38 at the edge of the runway and Sparks atop the right wing inspecting the damage. Afterwards, the damage was repaired. During early 1944, this aircraft suffered a nose wheel collapse at Finschafen Airfield and was written off. The aircraft was stripped for usable parts and abandoned. At the end of the war, it was buried in a pit at Finschafen Airfield.
In 1999, this aircraft was dug up by an Australian salvage group and exported to Melbourne. Around 2003 this P-38 was shipped to Westpac Restorations at Rialto Airport in California. Around 2006 Westpac moved to Colorado Springs where the plane was restored to flight. Both engines were tested on October 26, 2015. Restored in the markings of the 39th Fighter Squadron "White 33". On October 29, 2016 the restored P-38 made its first flight over Colorado Springs. Today this Lightning is displayed and flown from the same location as Westpac, where the National Museum of World War II Aviation is based.
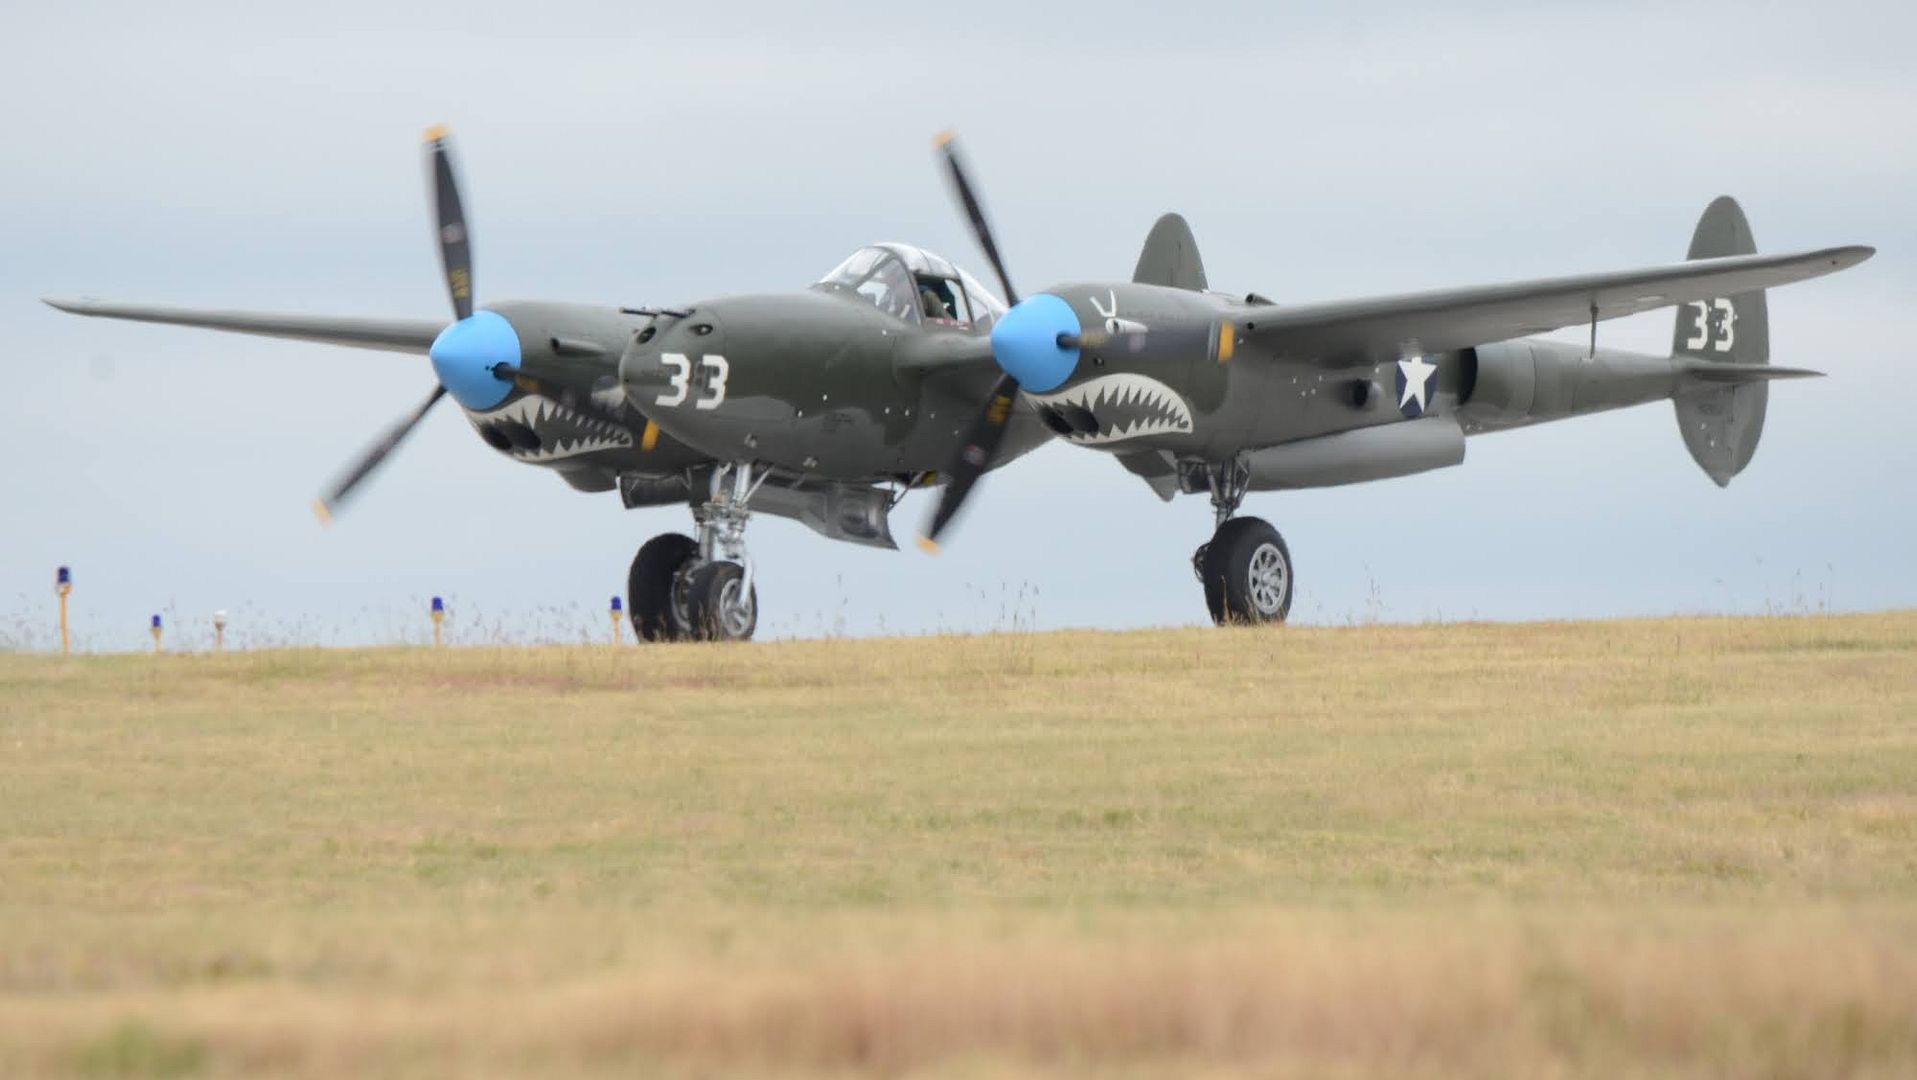
Photo credit: Paul Gordon
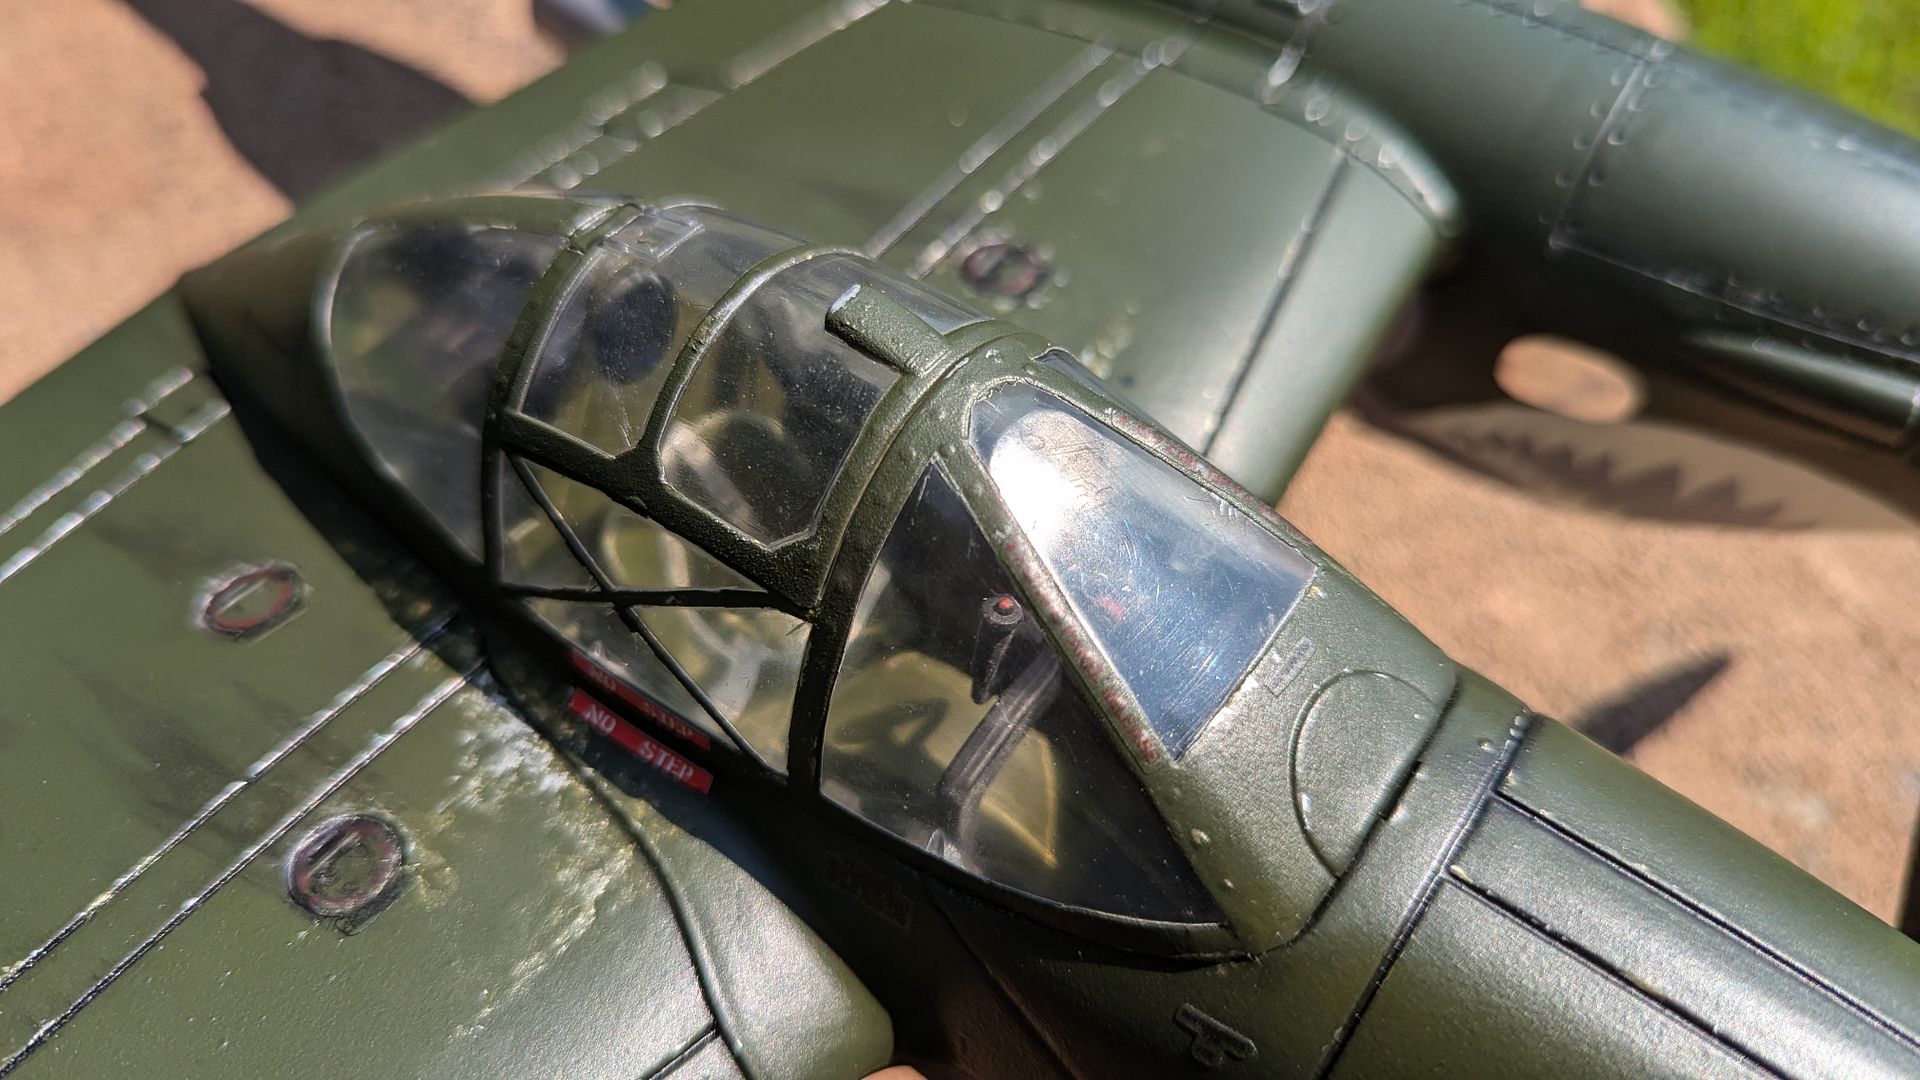
Project:The goal from the client was for me to recreate the P-38 "White 33" as she was when she returned from her mission on December 31, 1942 with her damaged starboard wing. Now... after some research I slowly found the nuanced differences between a P-38F and J are great. And as I looked more and more at reference material, I started to grasp at just how many difference there were. A truly detailed and near 100% accurate conversion of a P-38J to F model would have taken considerably more time then the allotted 3 months timeframe. So we decided on the "Big Ticket" items that were pretty obvious. Namely the tapered Intake scoops at the front, and the radiator intake housing on the tail booms. Both of which would have to be 3D designed and printed. They were (thankfully) okay with overlooking some of the smaller details. Namely the canopy, which would have had to been completely replaced and a major challenge that this project budget / time-frame didn't allow.
The client had a P-38 model to start with which was a huge leap up in getting the project rolling.
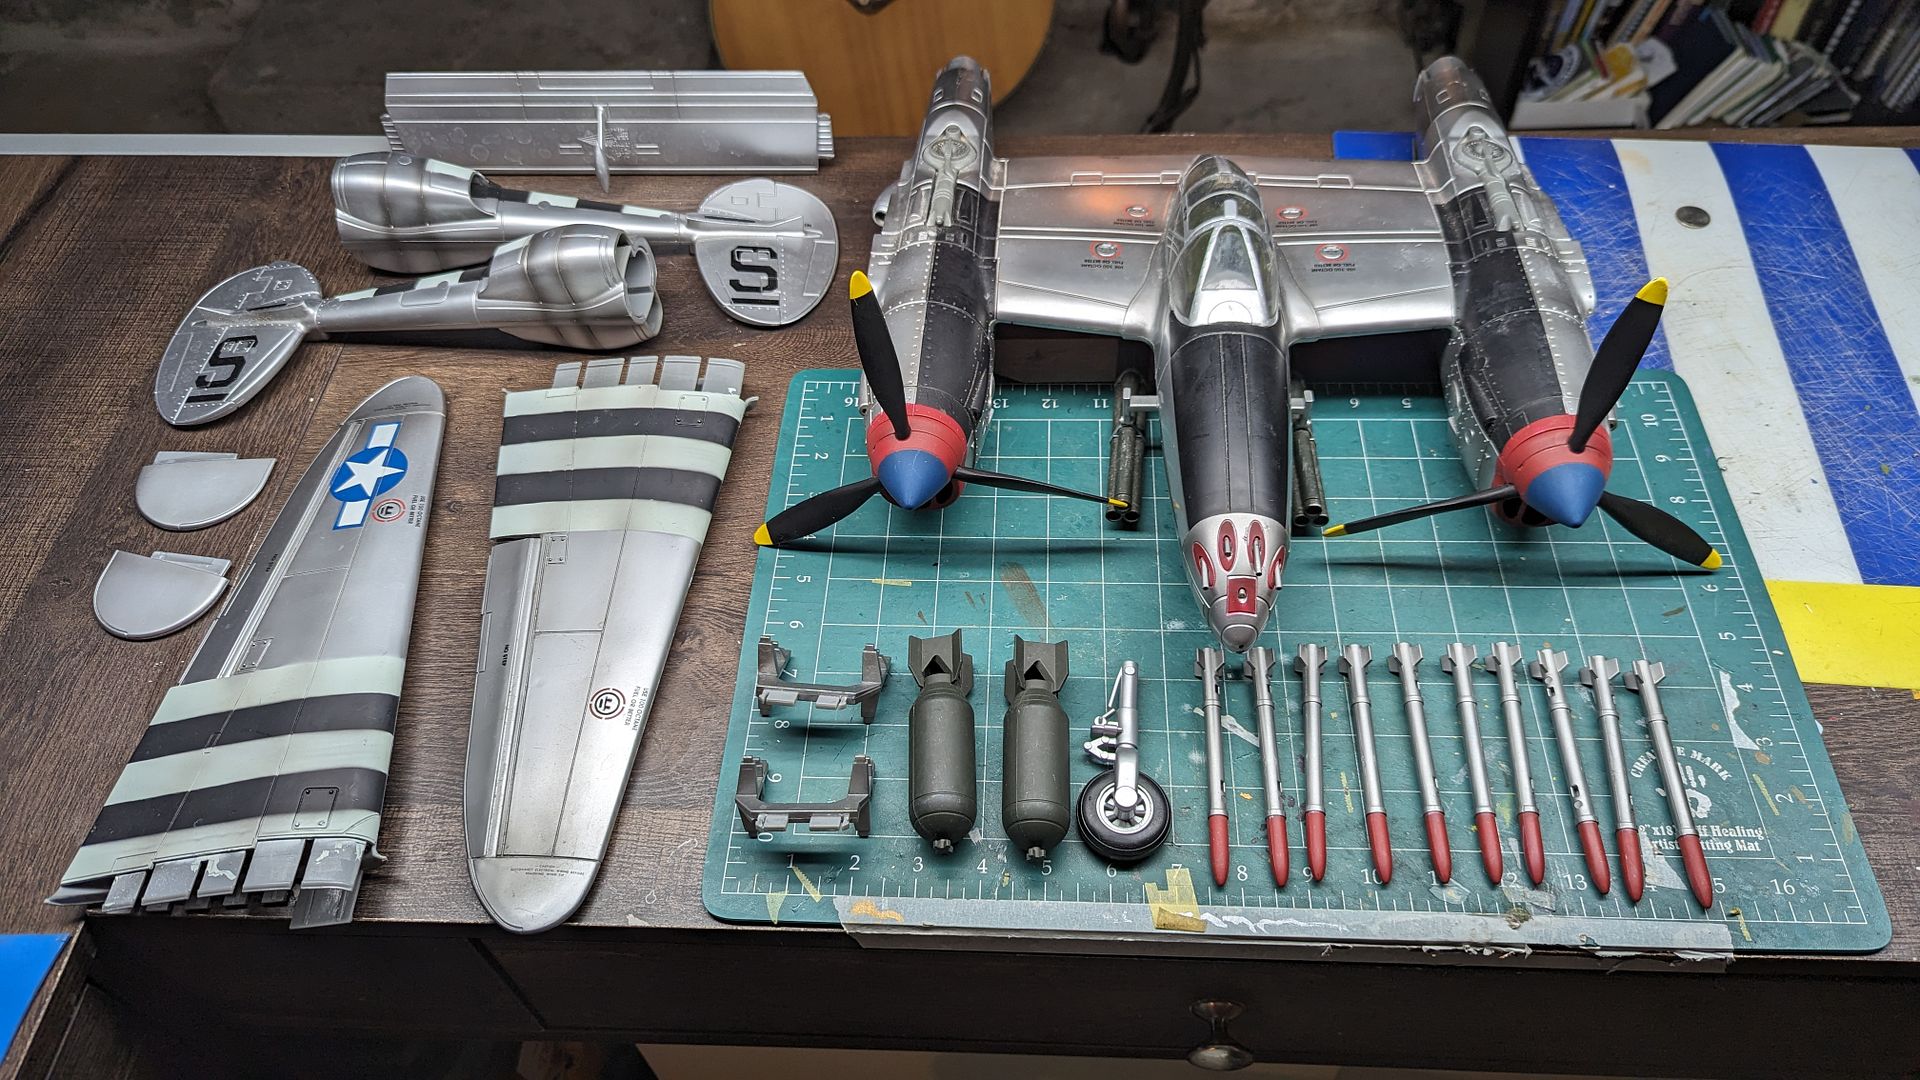
Thankfully the project 38 was a 1st edition example named "Wine, Women & Song" that is arguably the most produced and least valuable of the different 1/18 P-38s 21st Century Toys released in their short production run. This is what I started with. The nose gear had been busted off (probably because the original owner didn't know how to properly retract / extend the gear). Some of the gun barrels were also broken off, so I needed to redo those as well. I knew we wouldn't need the rockets, rails, bazookas, or bombs. So all of that was eliminated. Along with the rest of the 3d printed parts, I added a set of hard points with the fairings on them.
I contacted my friend Brian Lewis for assistance whose become quite the prolific 3D designer / printer for 1/18th scale planes. He's supplied myself, along with countless other modelers / hobbyists with replacement parts for these out of production 1/18th scale planes. Along with new parts / sets for conversions and other unique projects. If I could get Brian to design the parts I needed, I knew I'd be able to accomplish this project. It started with trying to communicate all of the needs into this build.
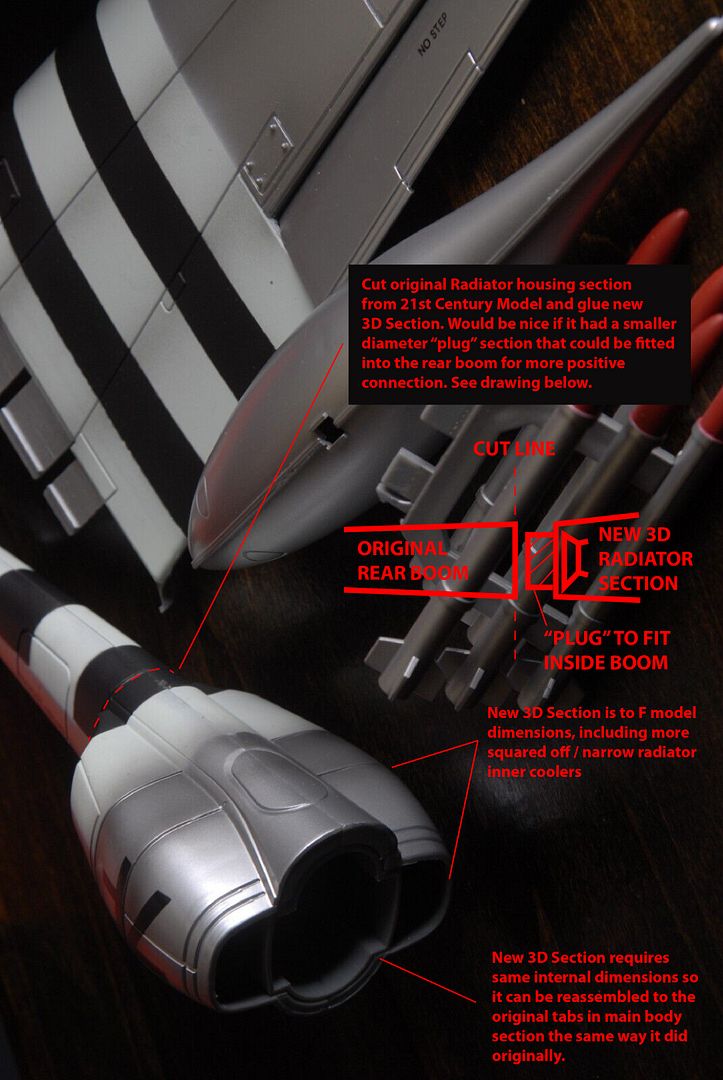
So we decided on the following:
1. F Model tapered fore Intakes
2. F Model thinner radiator intakes
3. Hard points with fairings on the end
4. I also found another 3D designer on Shapeways (R.I.P.) who was willing to resize a set of 5 gun barrels for me.
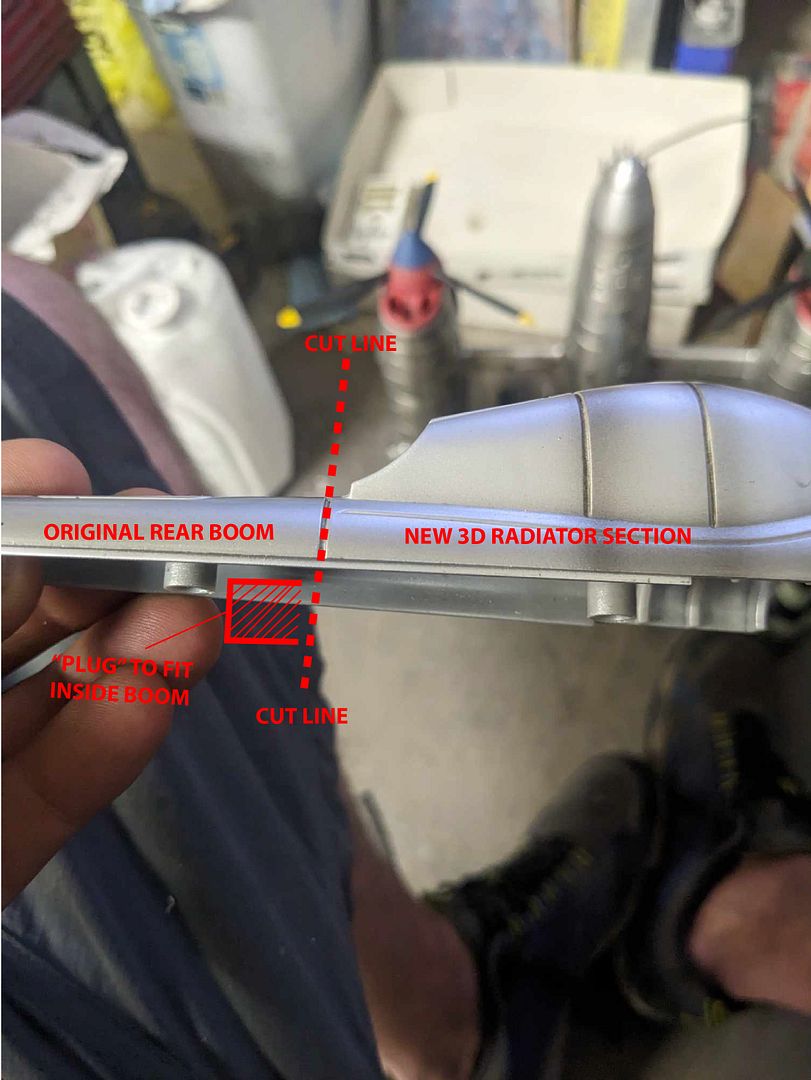
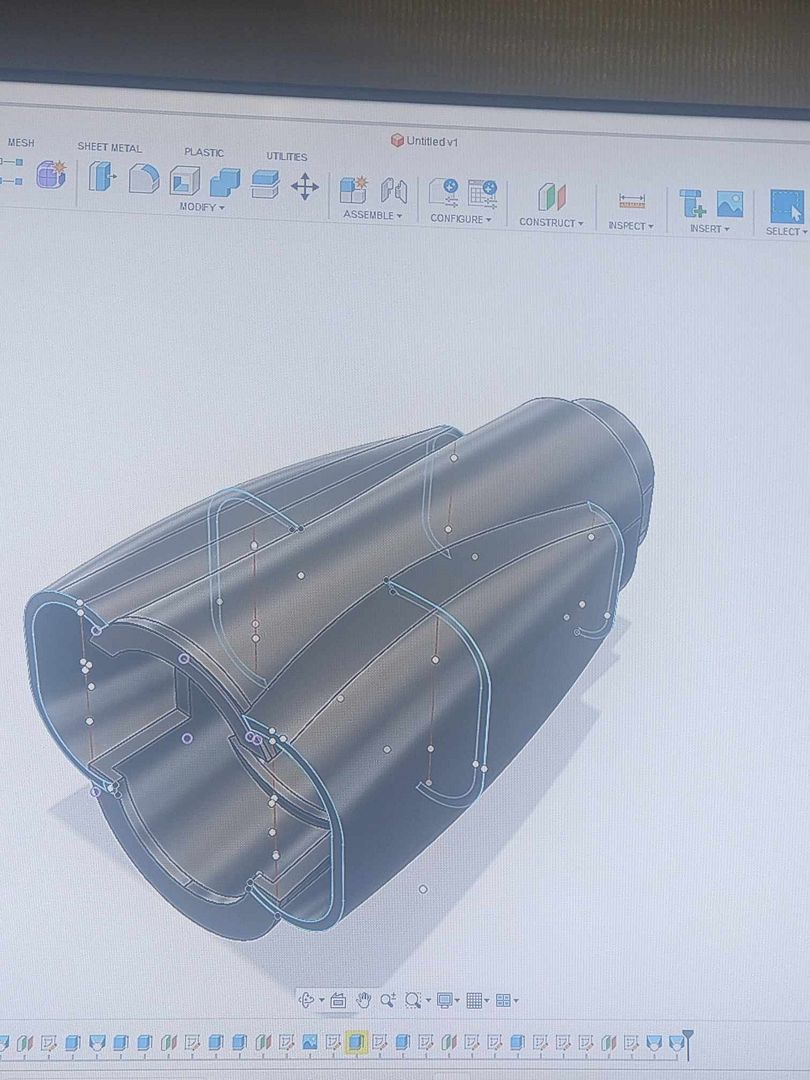
Here are a couple shots Brian shared with me on his process of the radiators.
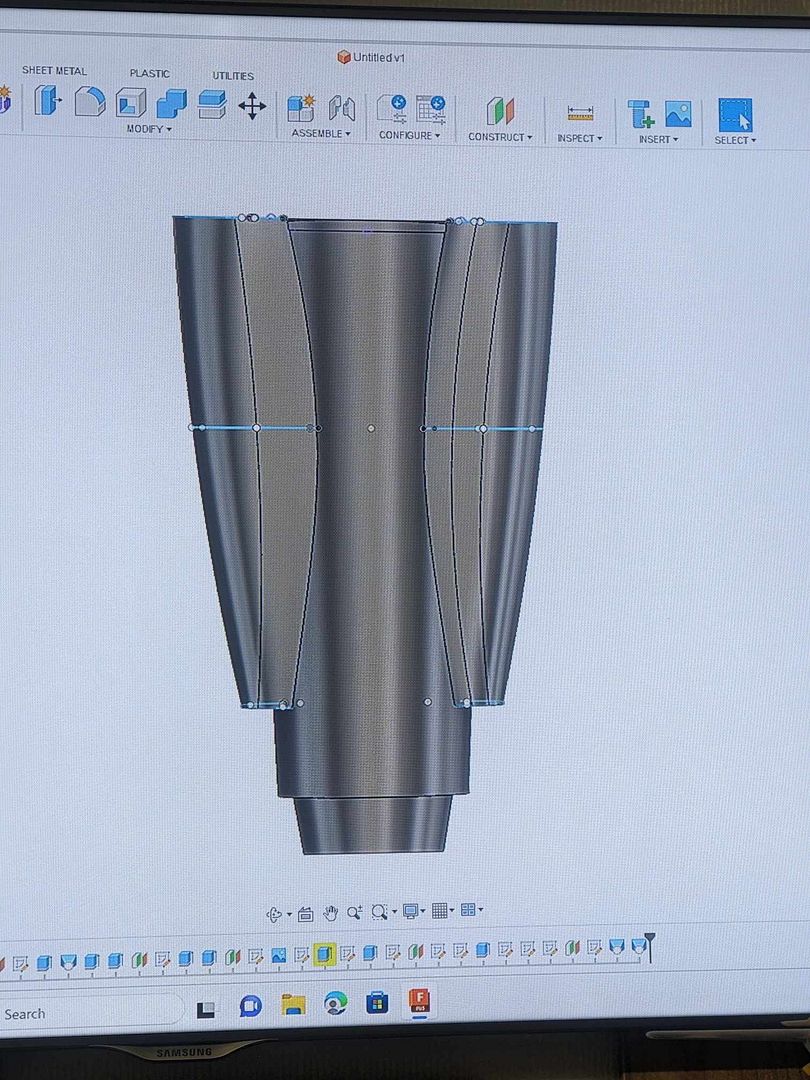
The challenge was to design and create these new parts as "plug-ins" to that of the original, so the model could retain its original modularity like the toy since it had to fit in a smaller box and would be eventually shipped. This resulted in my having to carefully cut the original parts off and graft these new parts on.
While I was waiting for the 3D parts to be designed, printed, and shipped I decided to start tackling what I could. I started with the wings...
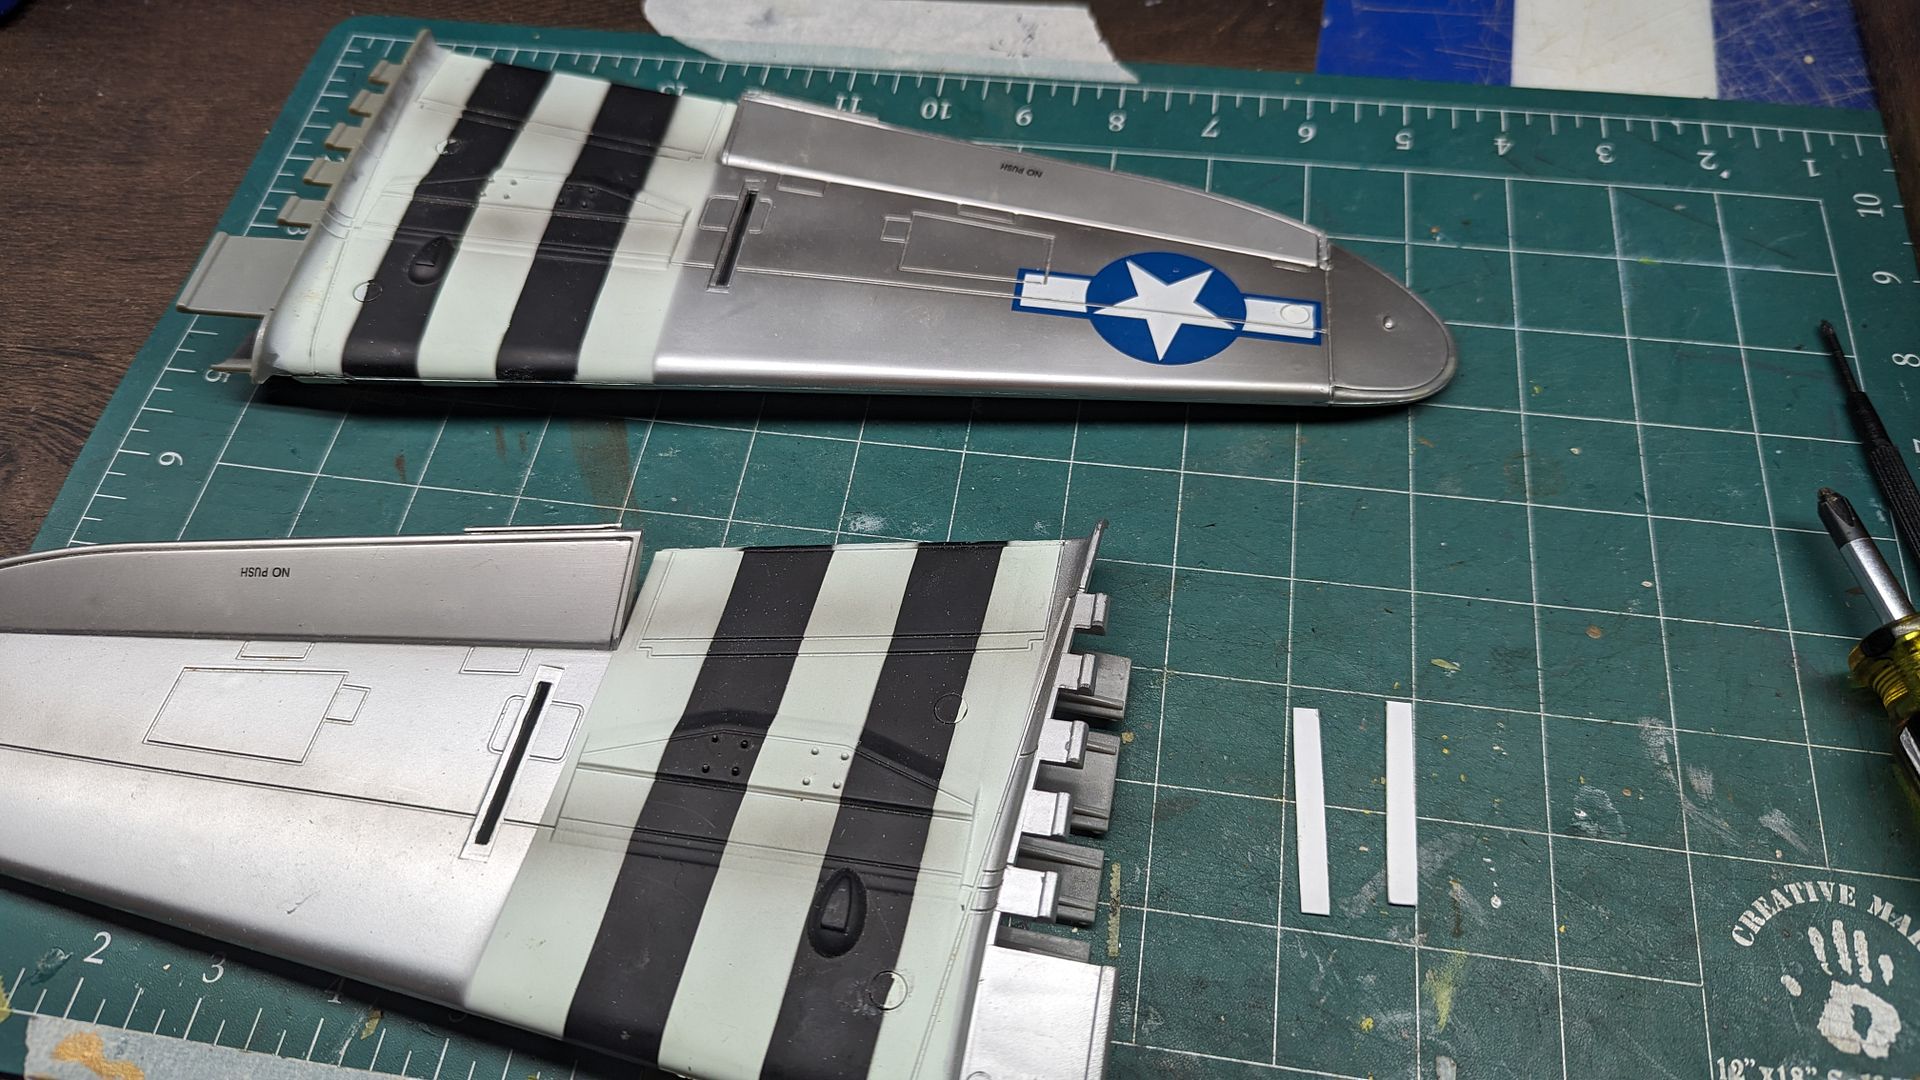
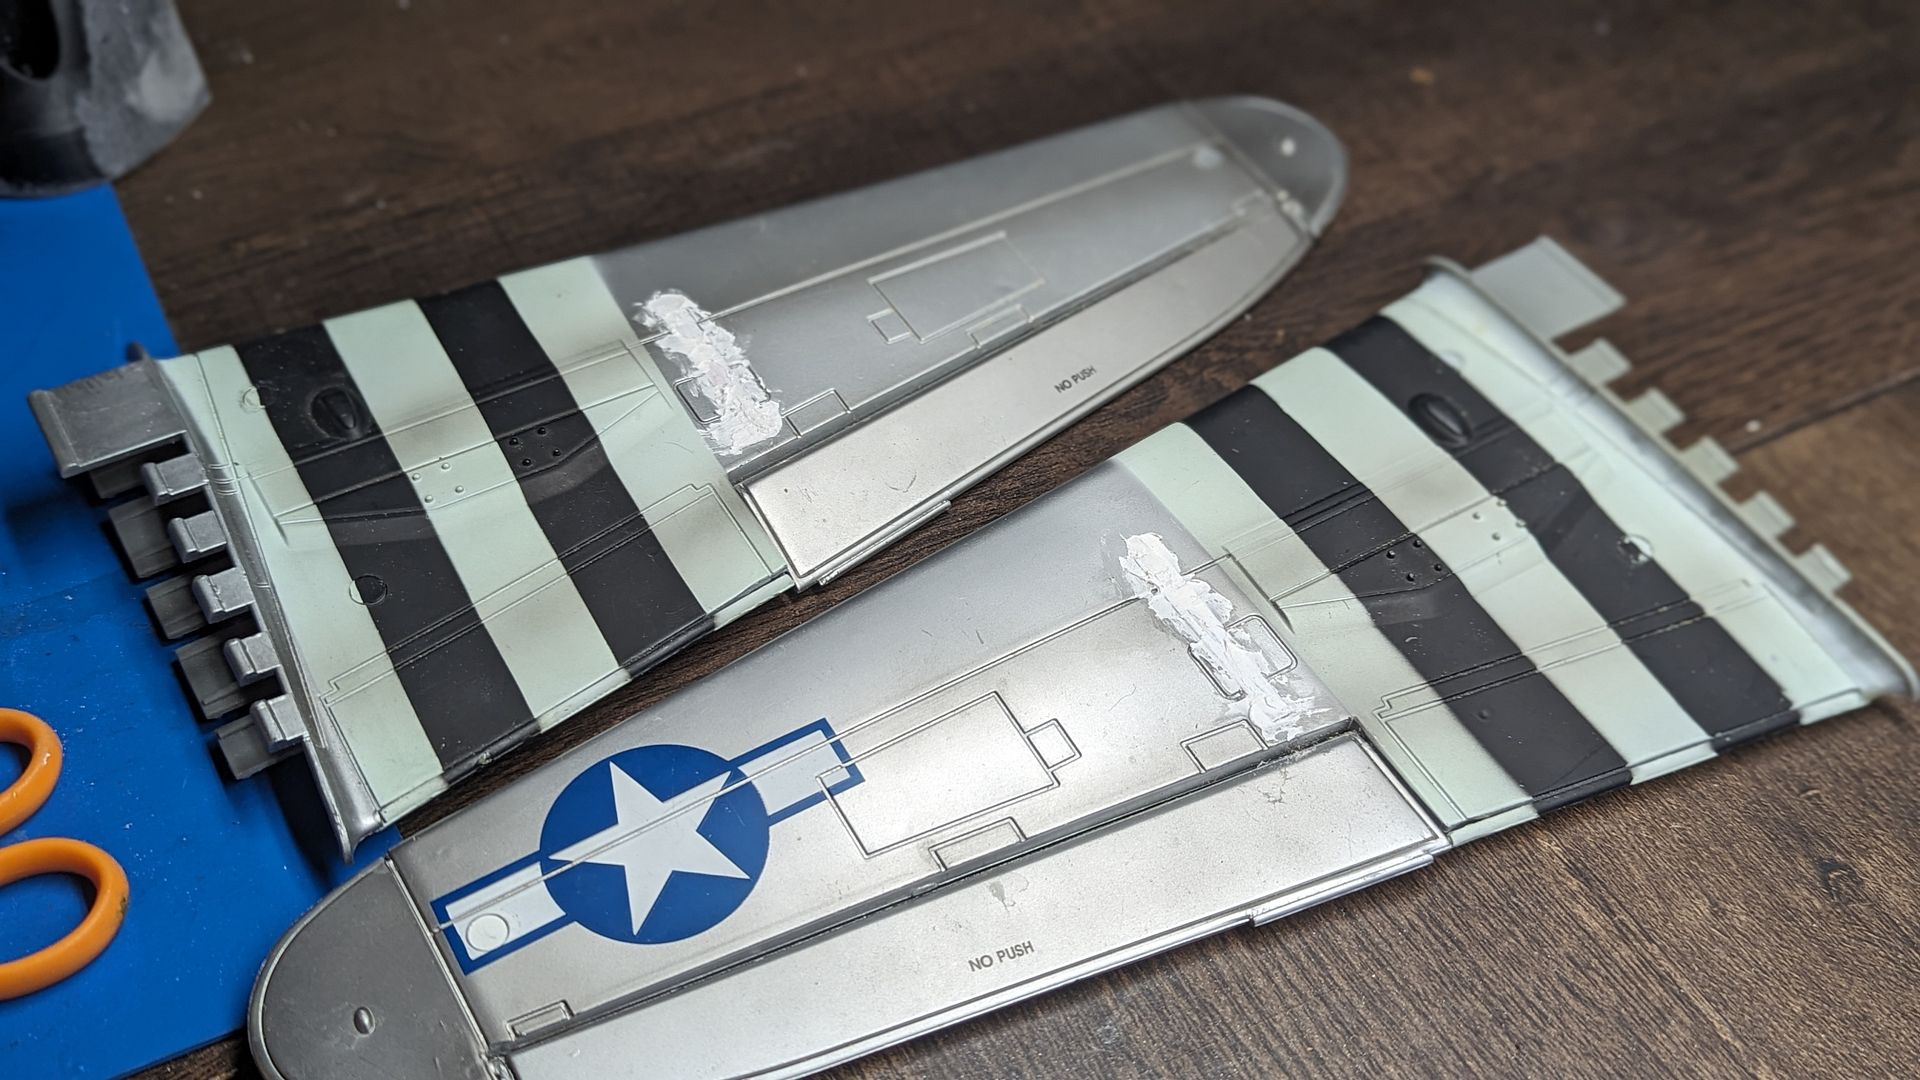
A simple piece of styrene cut and fitted to both rocket tree holes was glued in, with scoring later to match the panel lines.
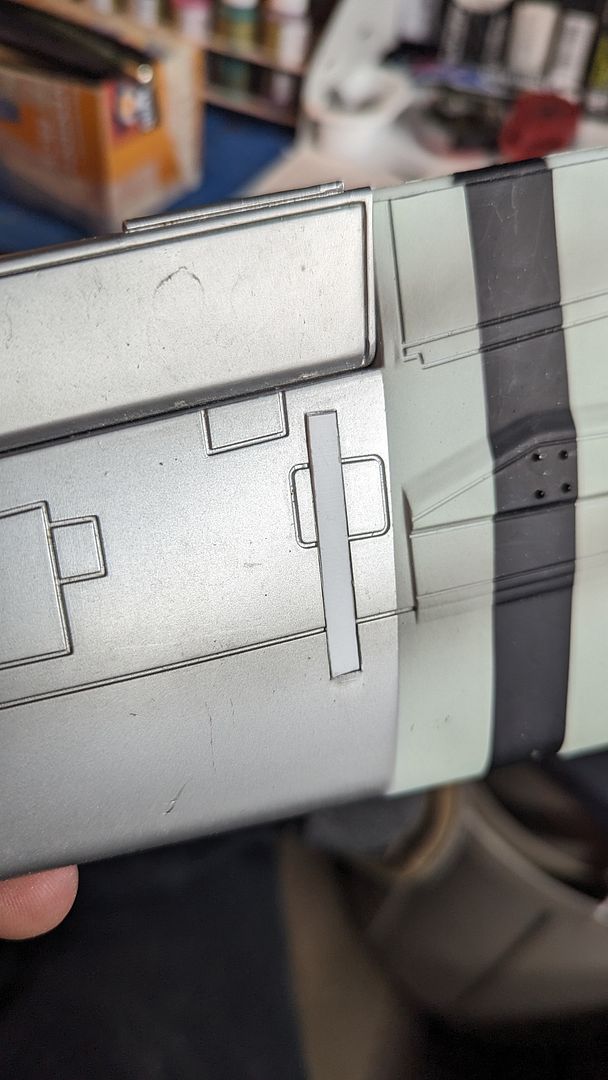
To try and blend them in further, a heavy set of putty and sanding commenced... along with further scribing of the panel lines.
Before long, Brian had managed to print and send me a set of what I had requested. I now had no excuses. I had to start cutting into the plane...
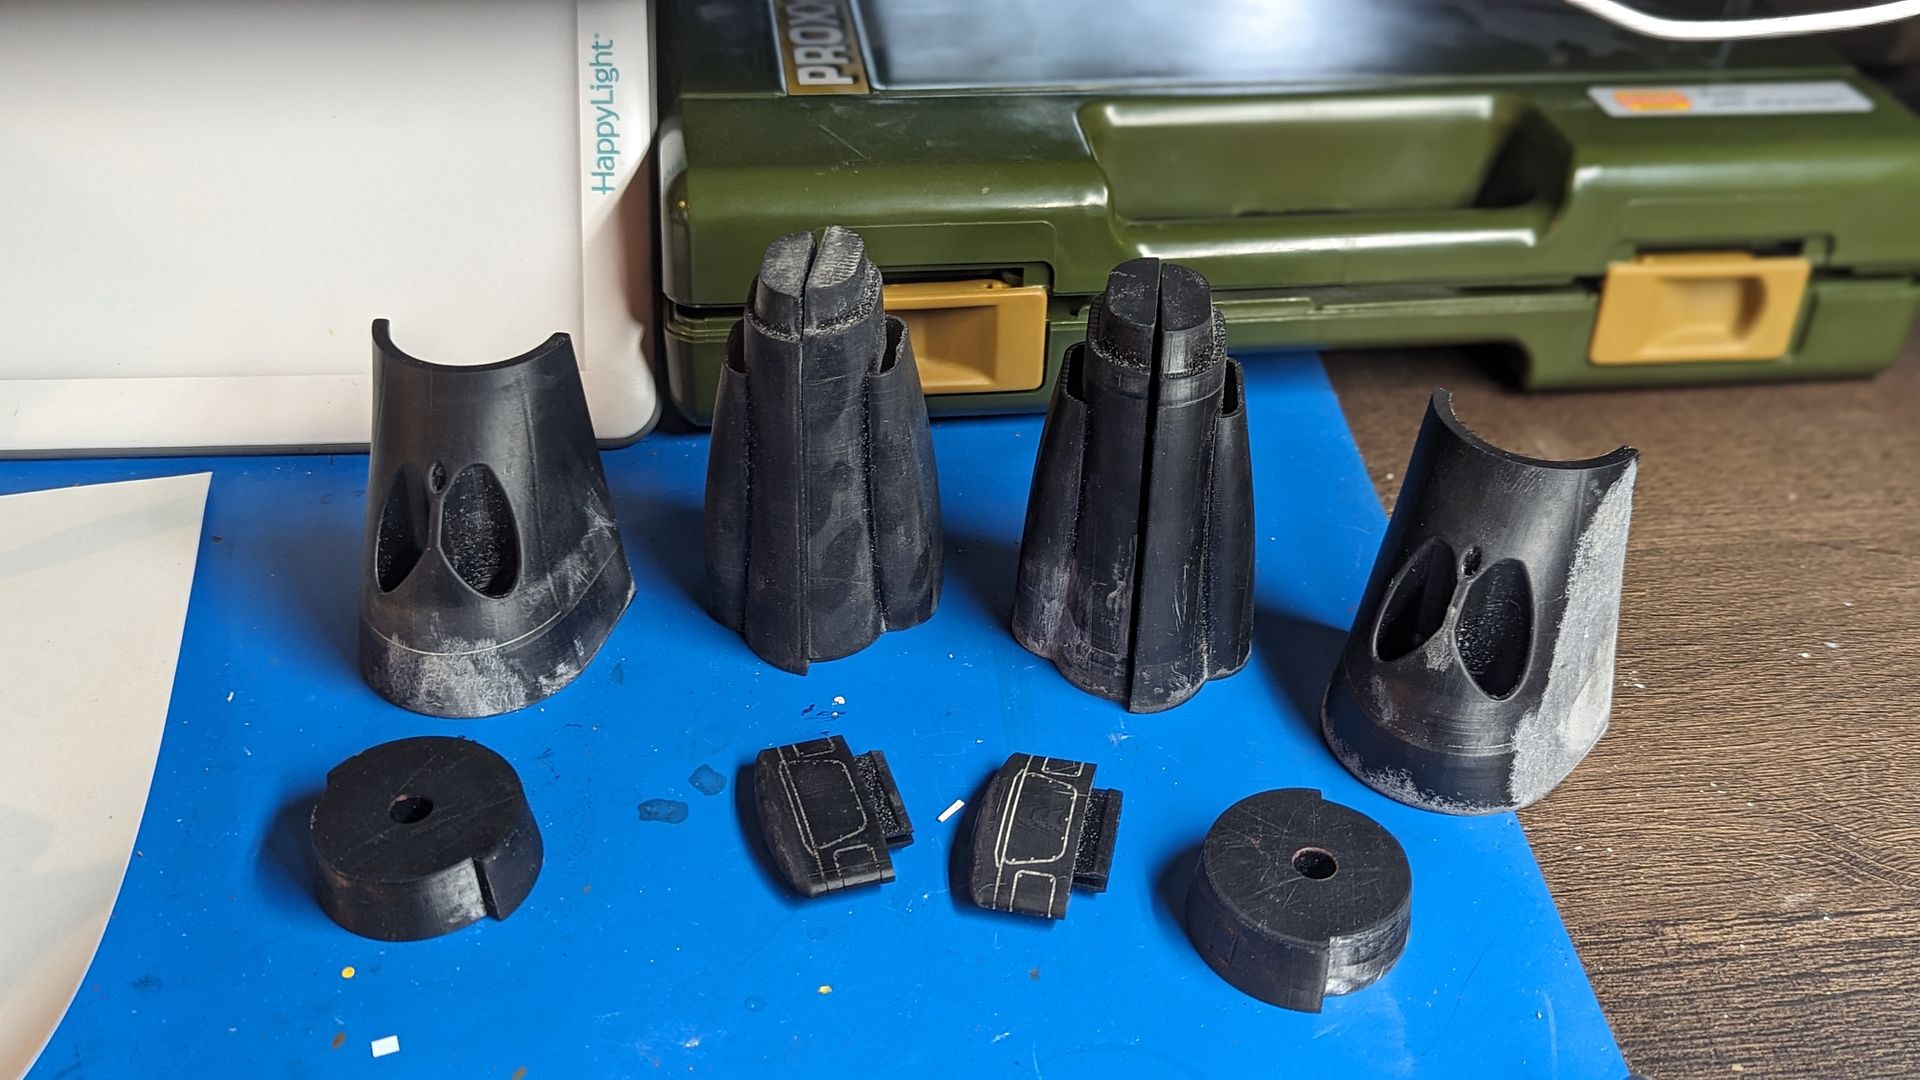
Obviously the two main sections that would require cutting was the center section, and the two twin aft booms. I started with the center section as that was the more complicated section. I decided early on that a complete disassembly of the center section wouldn't be necessary. I was able to carefully remove the front J model intake from the original model. I also added a small "bridge" over the turbo super charger out of styrene that was present on the F model.
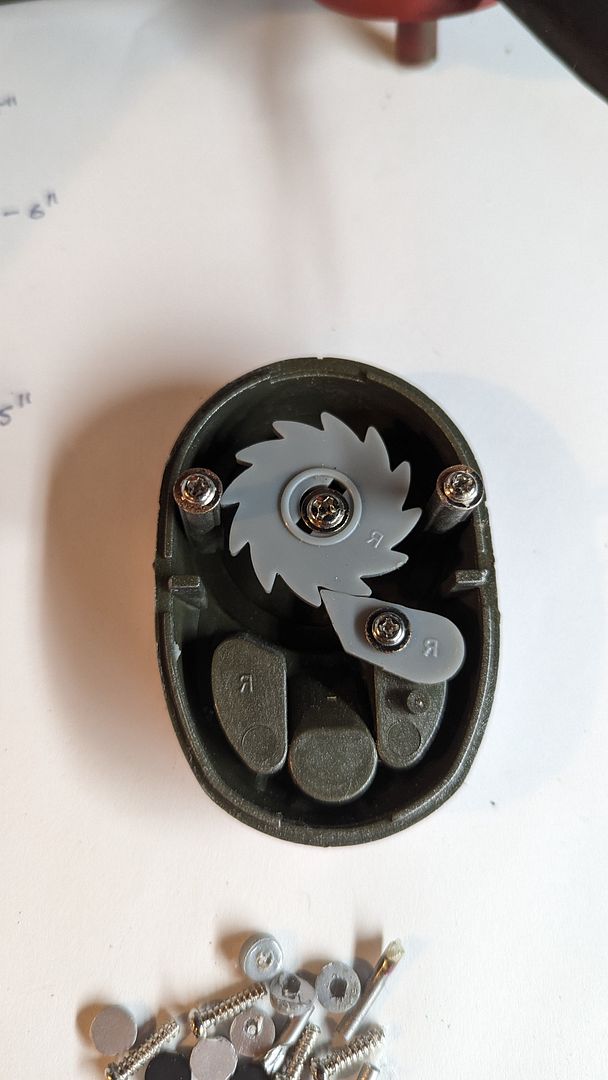
The props came off easily and were sent to my father who used his heat gun to bend them into a more straight orientation, as well as drill and tap a bolt and slightly loose cylinders to allow the props to still spin. From this point, I was able to use a cutting wheel and take off the lower section of the J model intake.
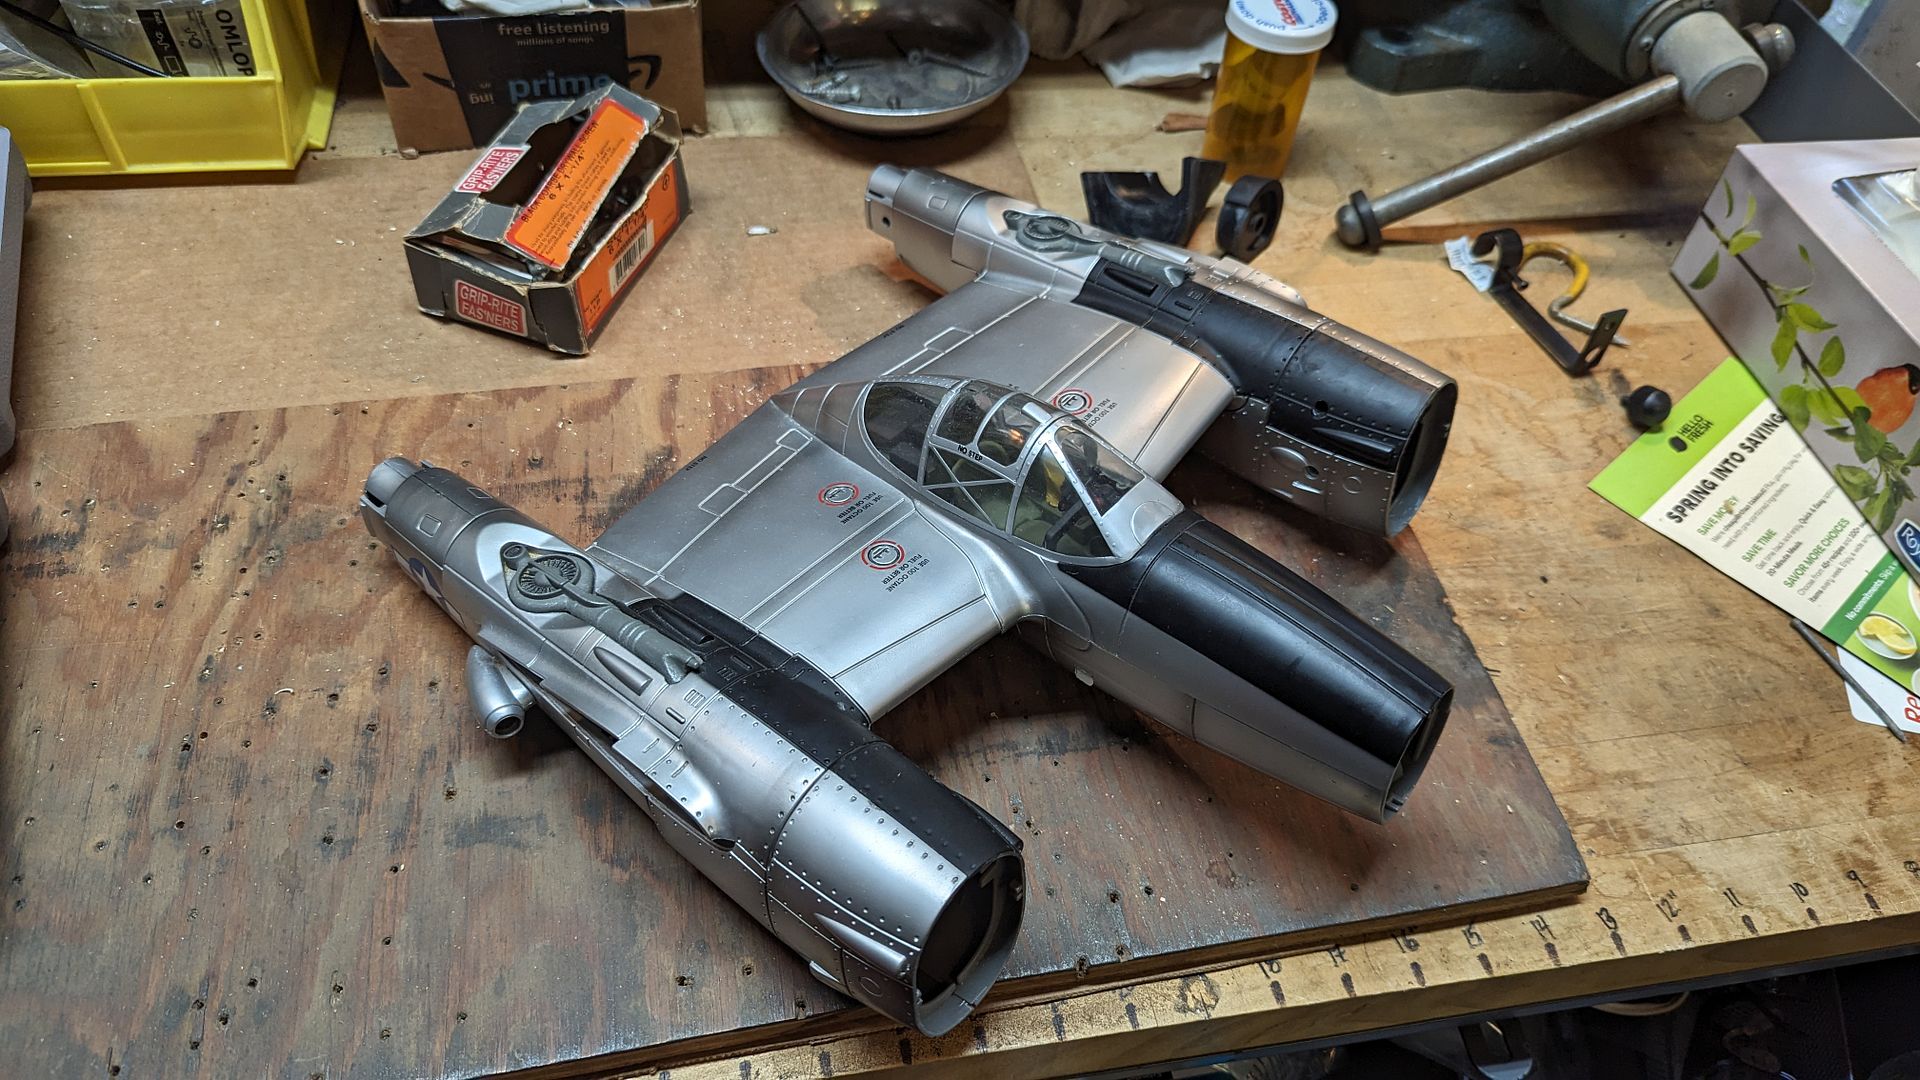
Each nacelle section came in two pieces. The lower intake extremity, and the section just after the prop hub spinner. I then grafted those sections onto the original model with alot of superglue.
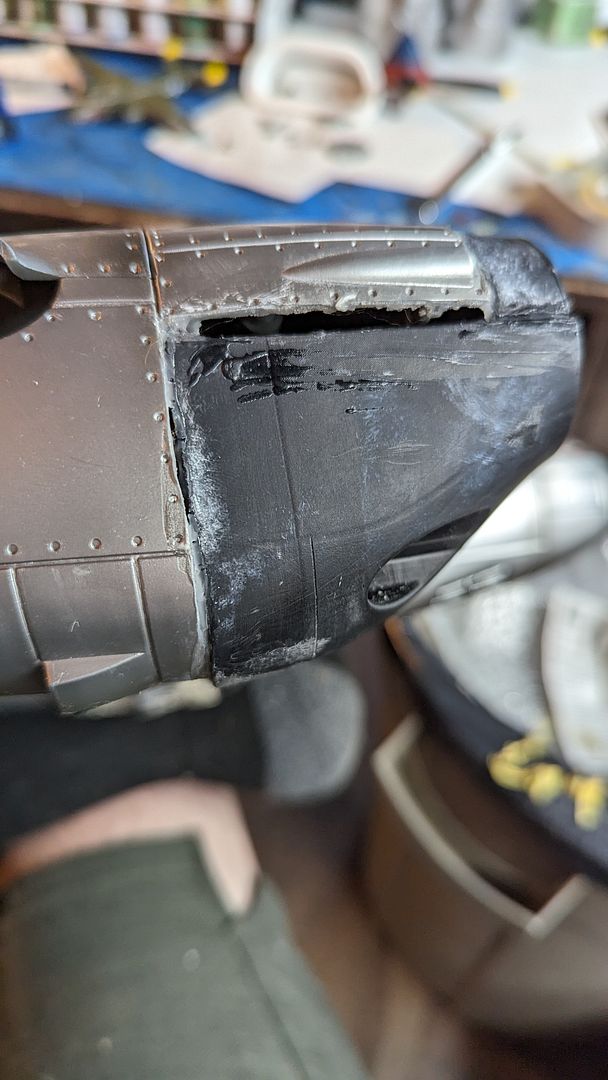
Yep... it wasn't pretty for sure. But I trusted the process and knew that I would be able to hide most of this hurt., I bought a can of P38 filler (the irony was not lost on me) and started applying it to where it was needed. (NOTE: make sure to use a mask and be well ventilated when using that stuff...) This first edition 3D printed conversion set from Brian was not perfect as far as match up certain sections on the original model, and I did send back some data to him so in case he prints another set, it can be updated to be more accurate and fit better.
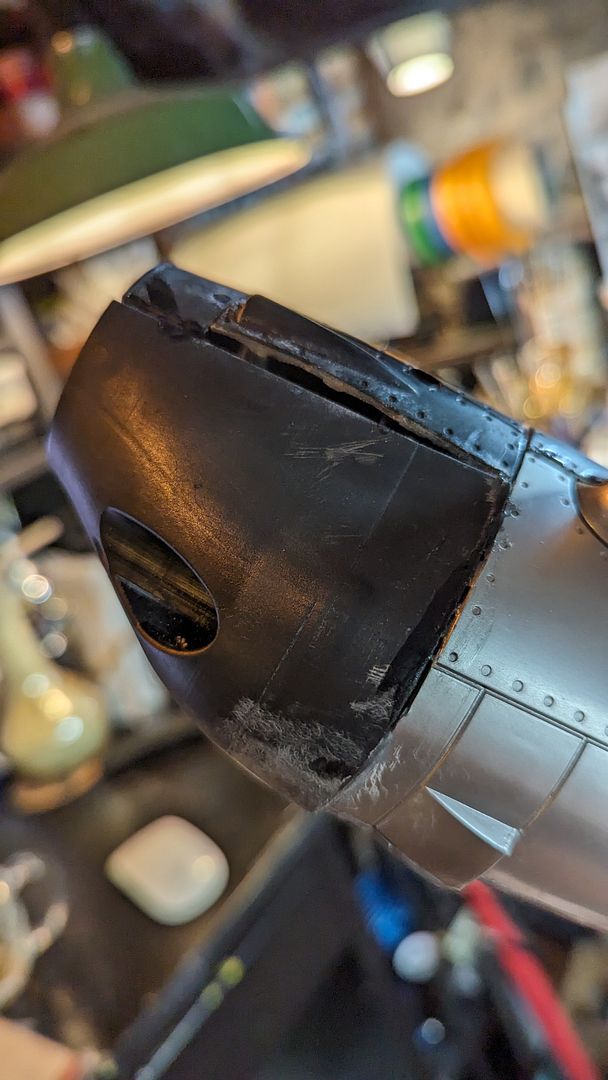
What followed was a long process of putty, sanding, primer, inspection, repeat. I had also used my trusty Proxon drill to hog out the five gun barrel ports.
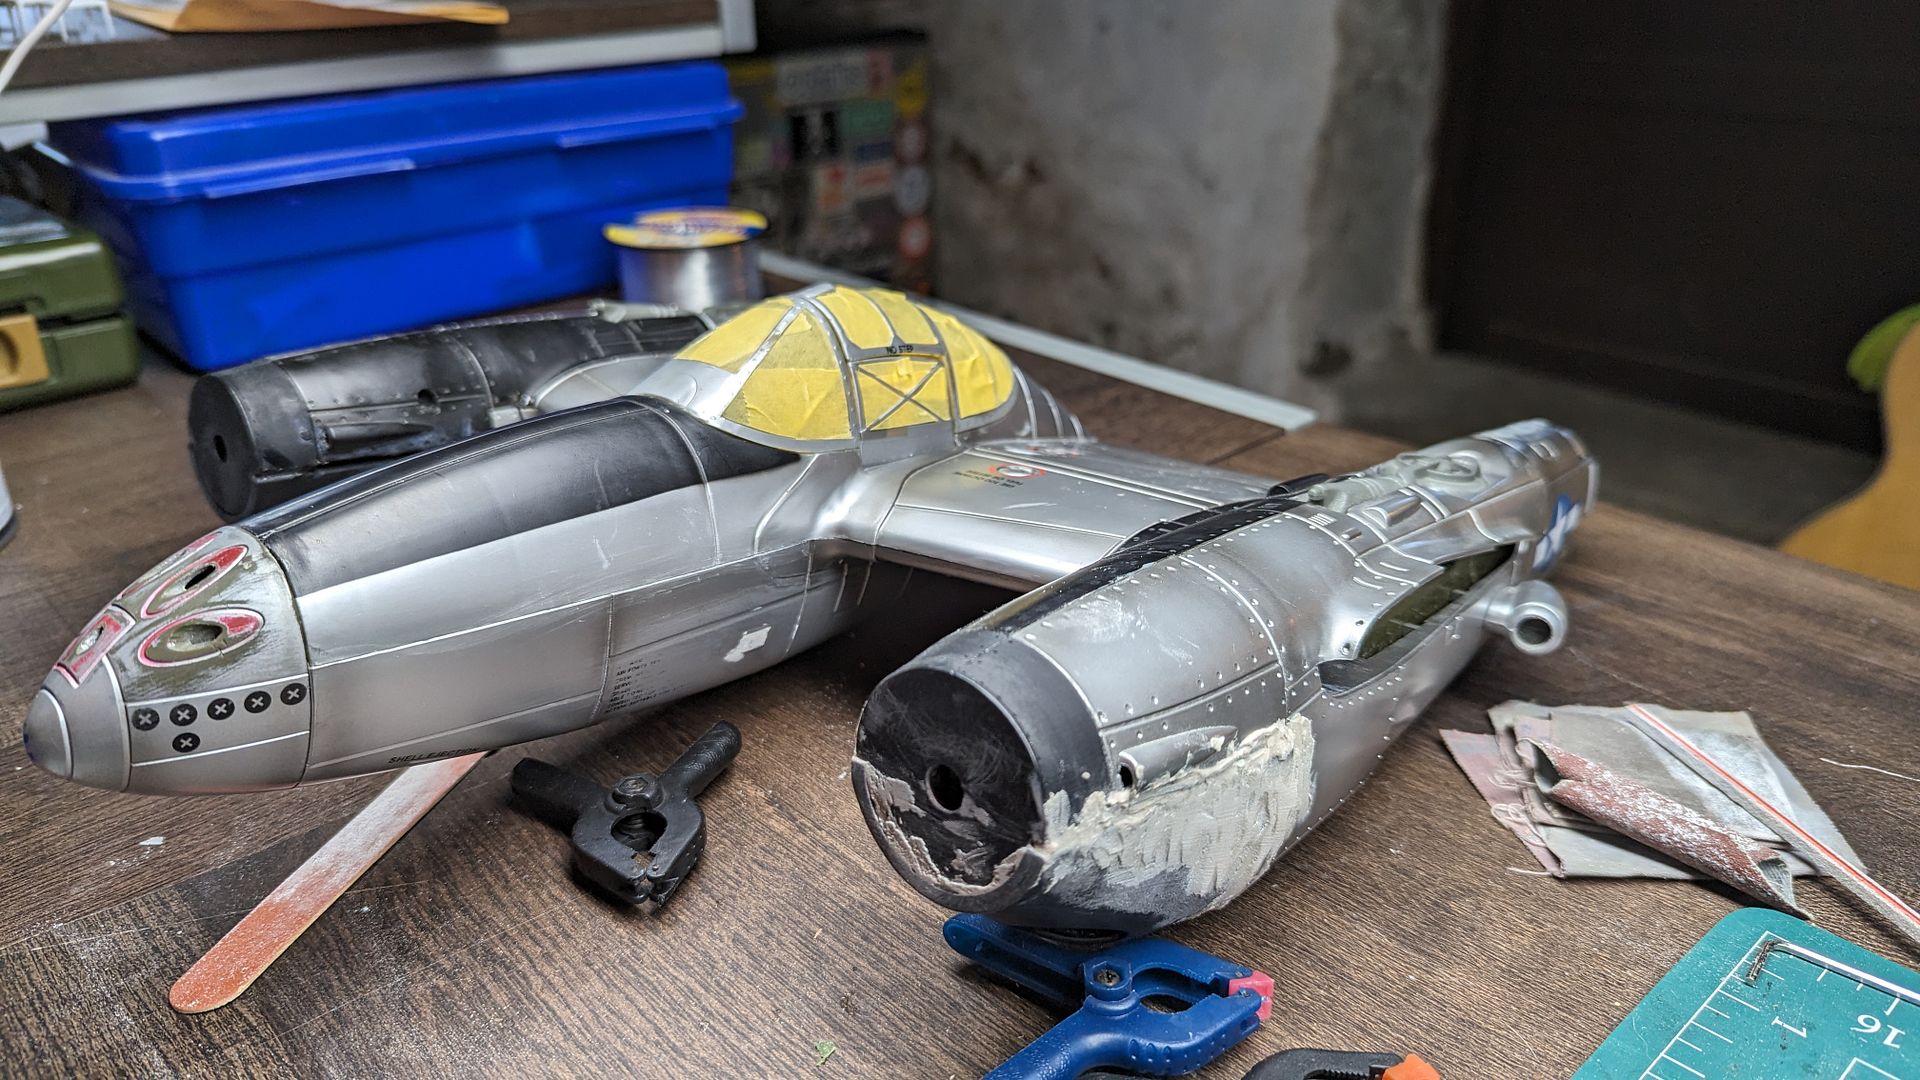
My father was willing to drill and tap a large threaded rod into the nose gear and connection fitting to ensure a strong nose gear now. I added a missing additional stabilization bar on the front of the gear. Aside from the engine nacelles, the rest of the aircraft received a dose of putty over the original port holes for the screws. I also sealed up any large spaces where different halves met and sanded them.
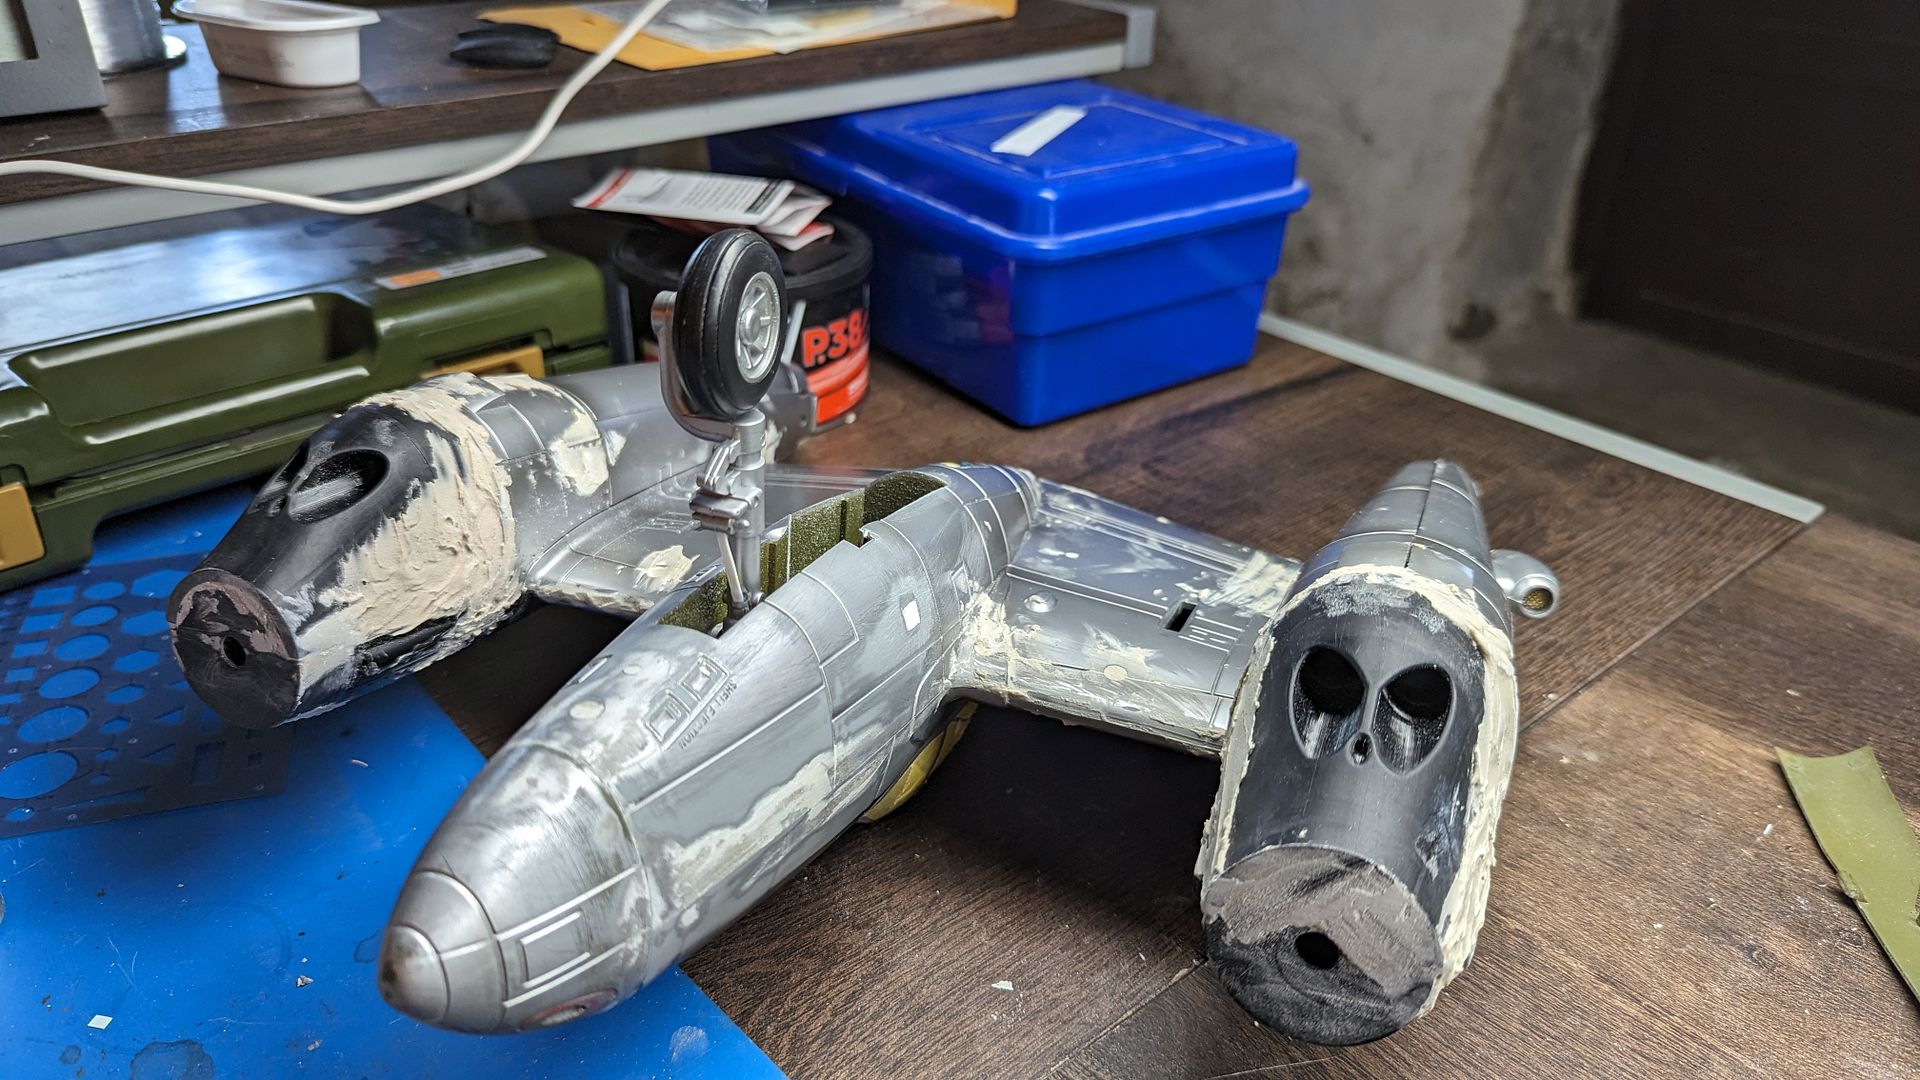
I decided to switch gears and tackle the other major portion of this build, the tail booms. The goal was to dissect along the panel line (groove) just behind the radiator housing.
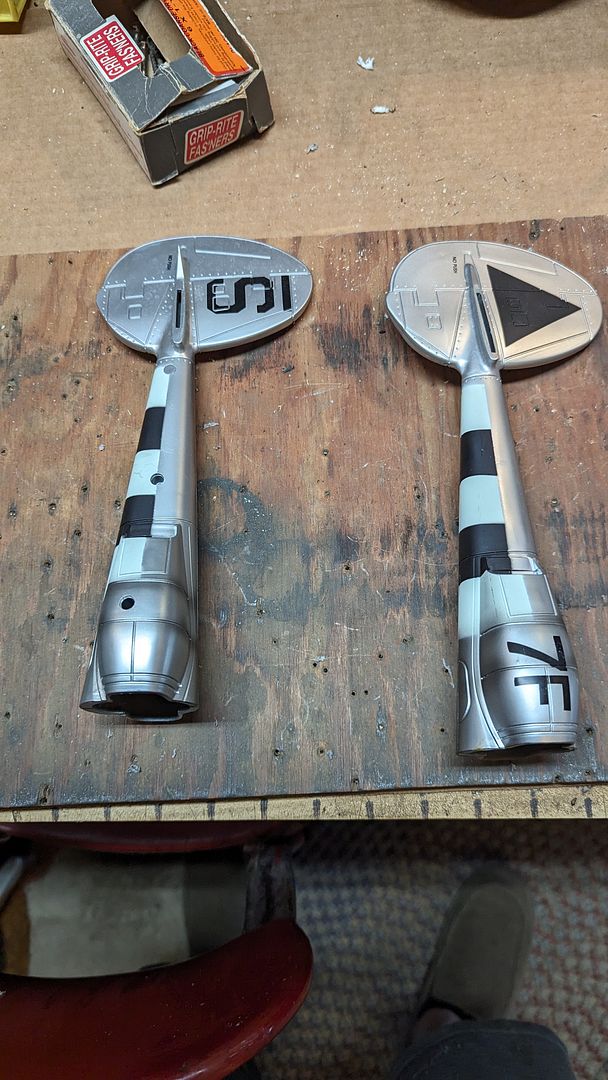
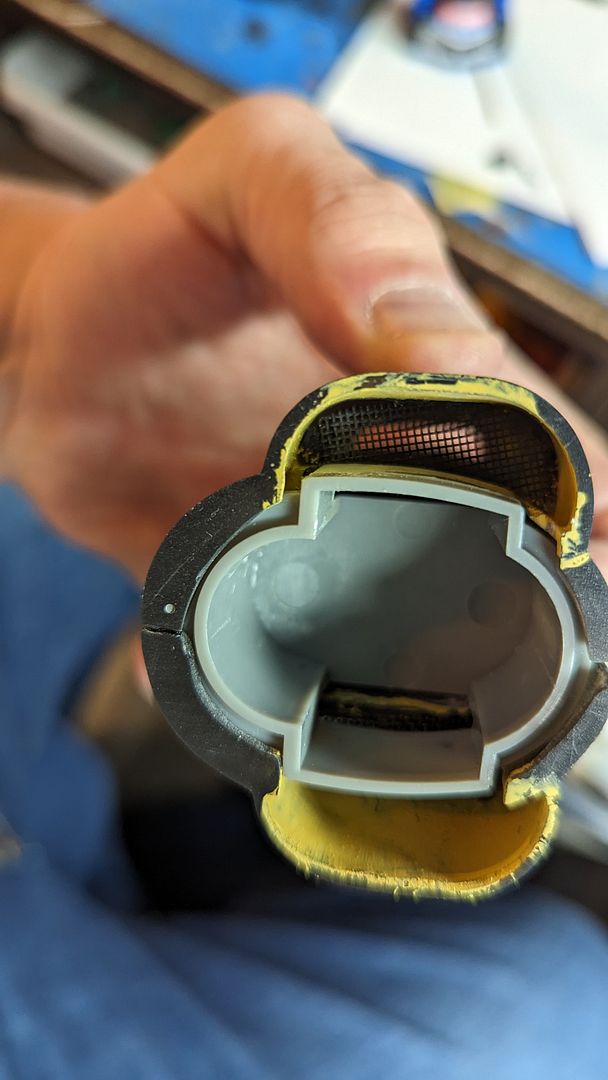
Each new radiator housing came in to parts. I took advantage of the accessibility and added the bright yellow zinc chromate yellow along with some mesh netting for the radiator.
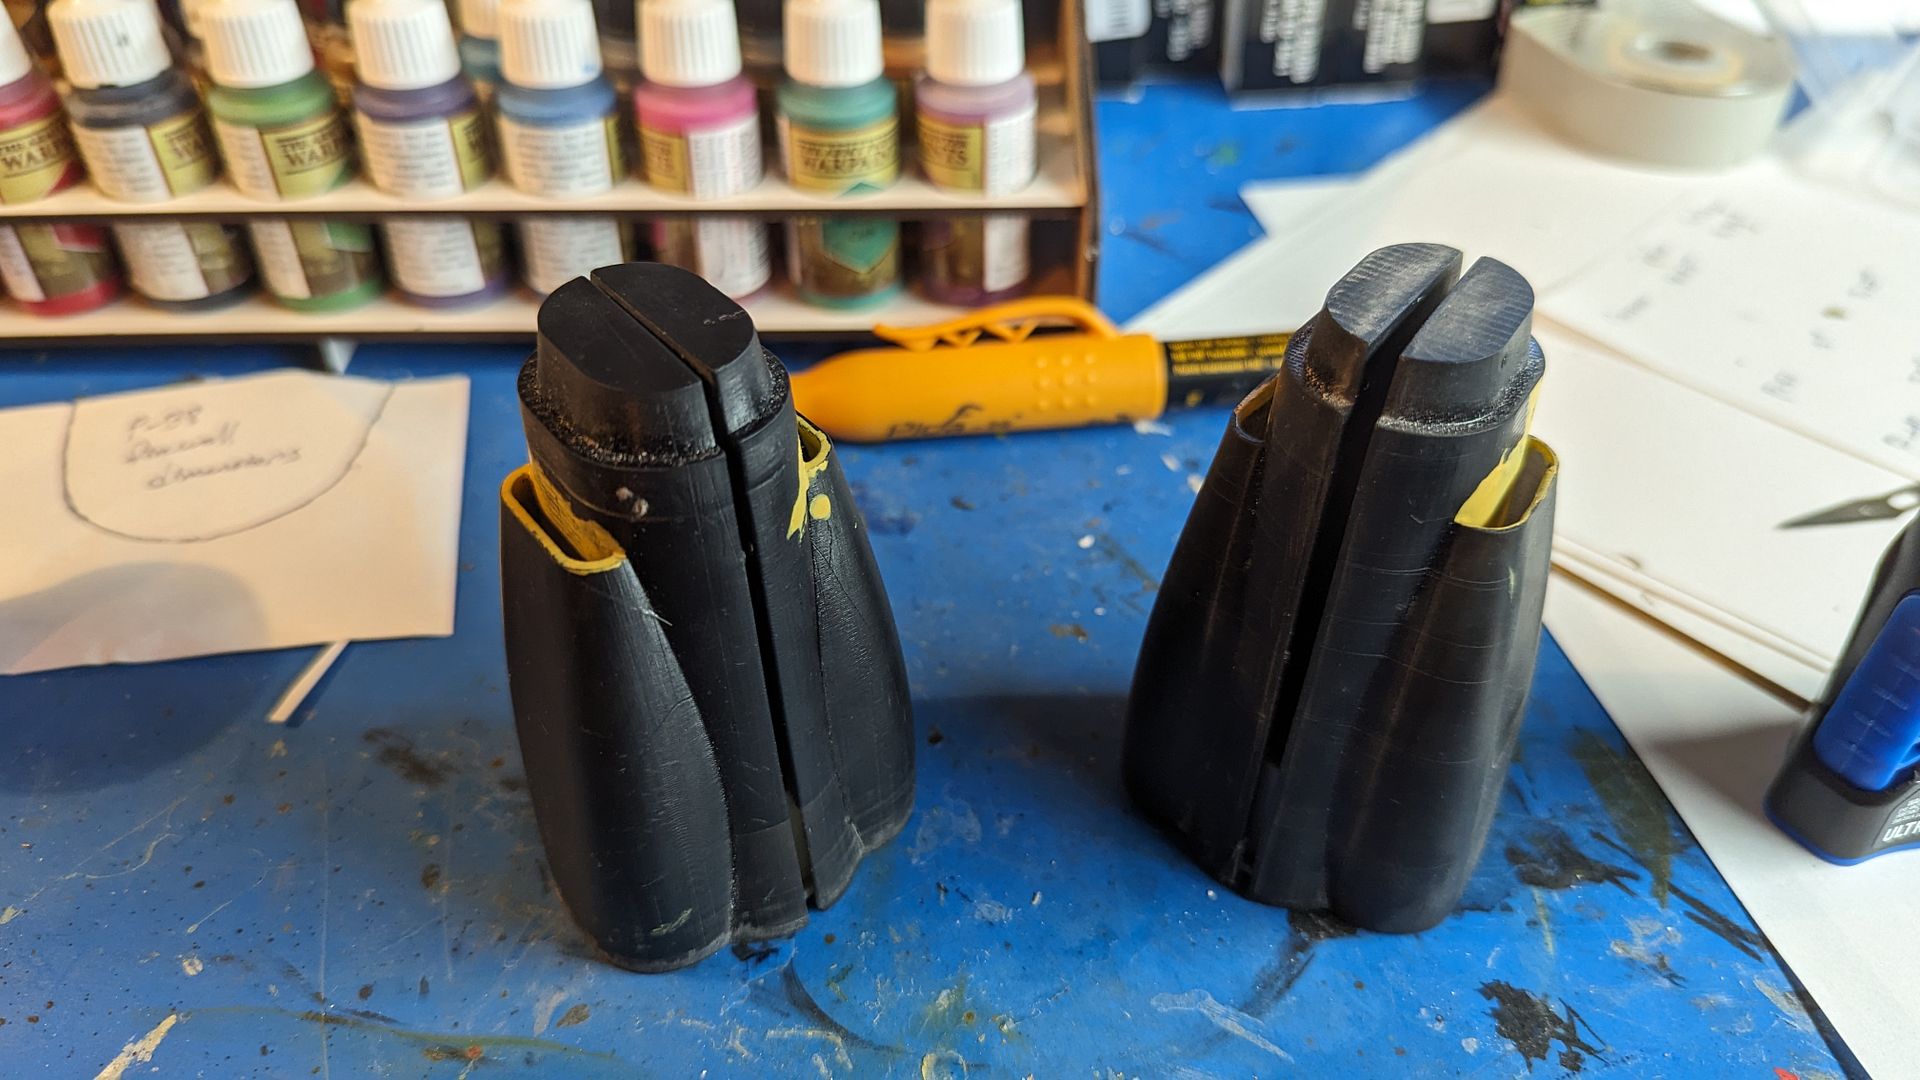
The main goal was to extract and reuse these special collet pieces that fit into the rear of the center section to allow the plane to continue to be modular.
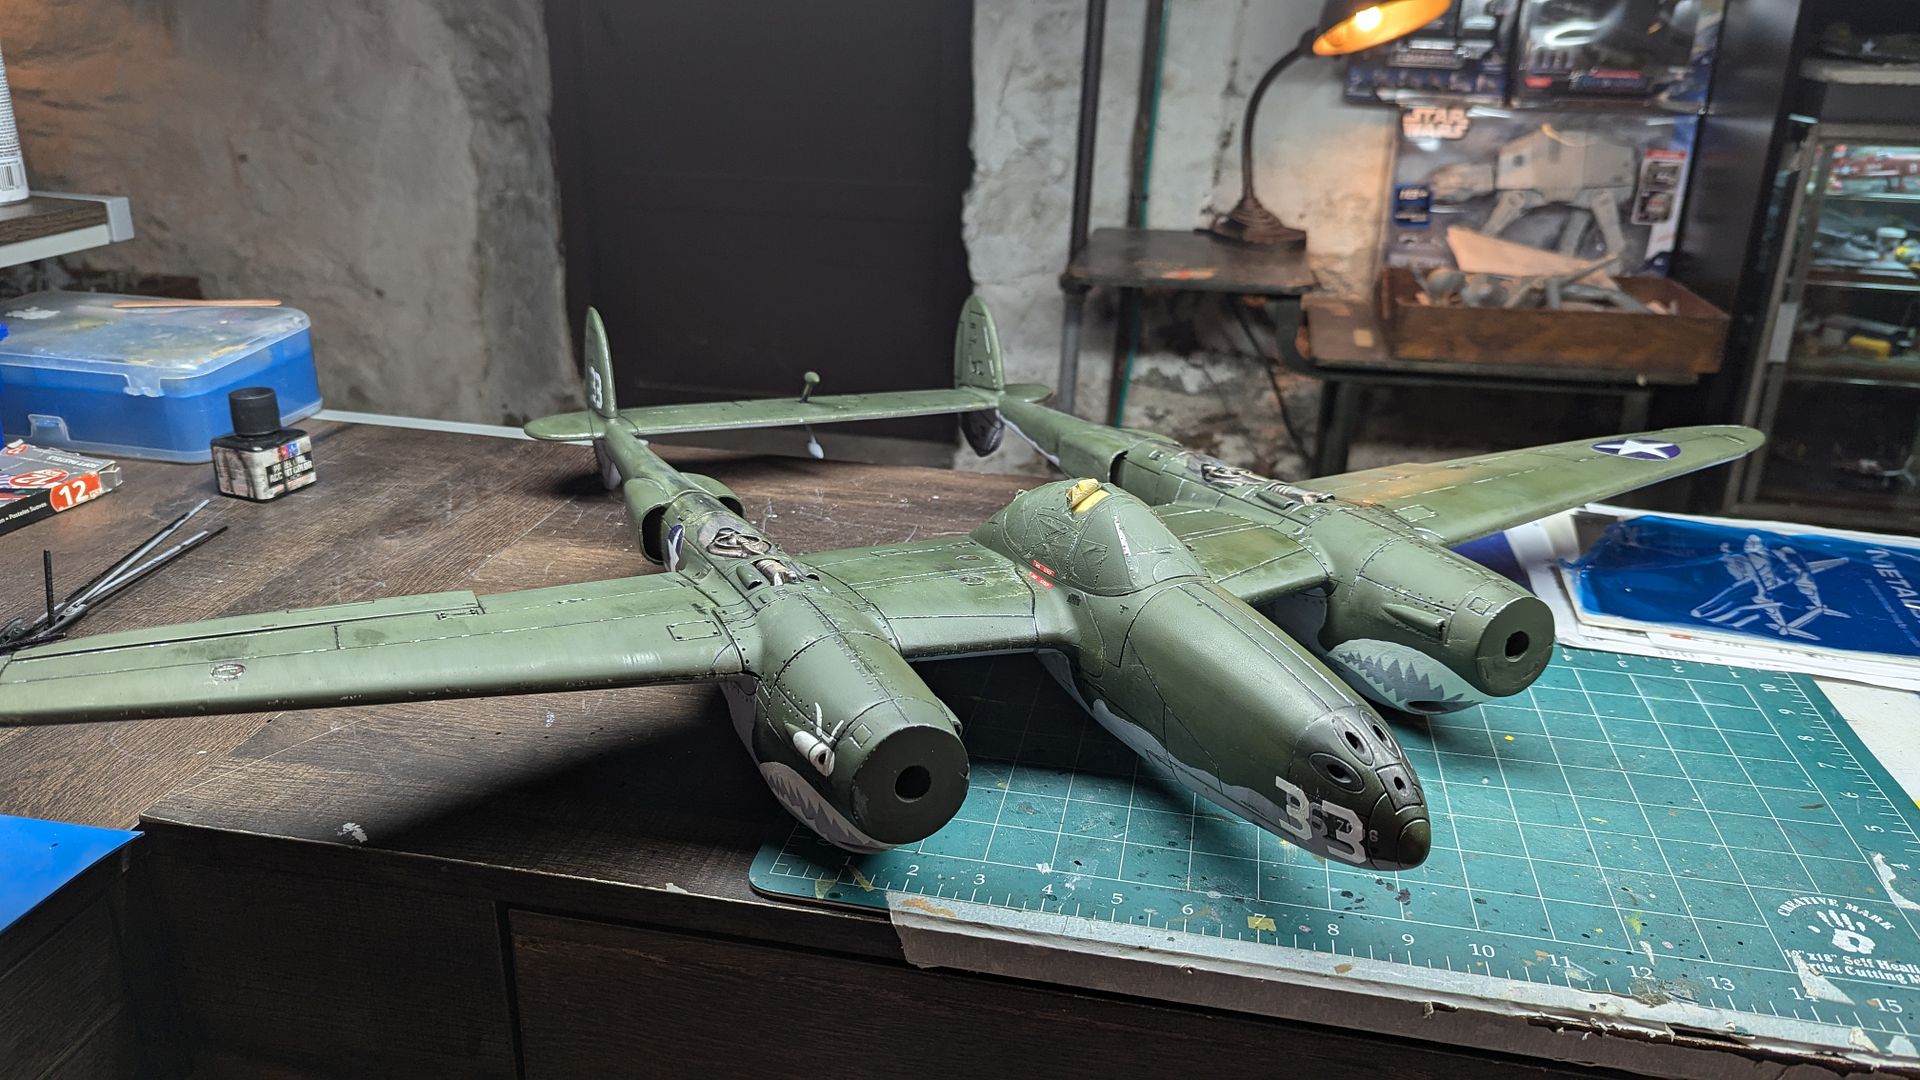
At this point I completed the major procedures required for this build, with putty, sanding, and paint next. But first, to keep motivation up, I just to assemble my Frankenstein monster to see the whole thing together.
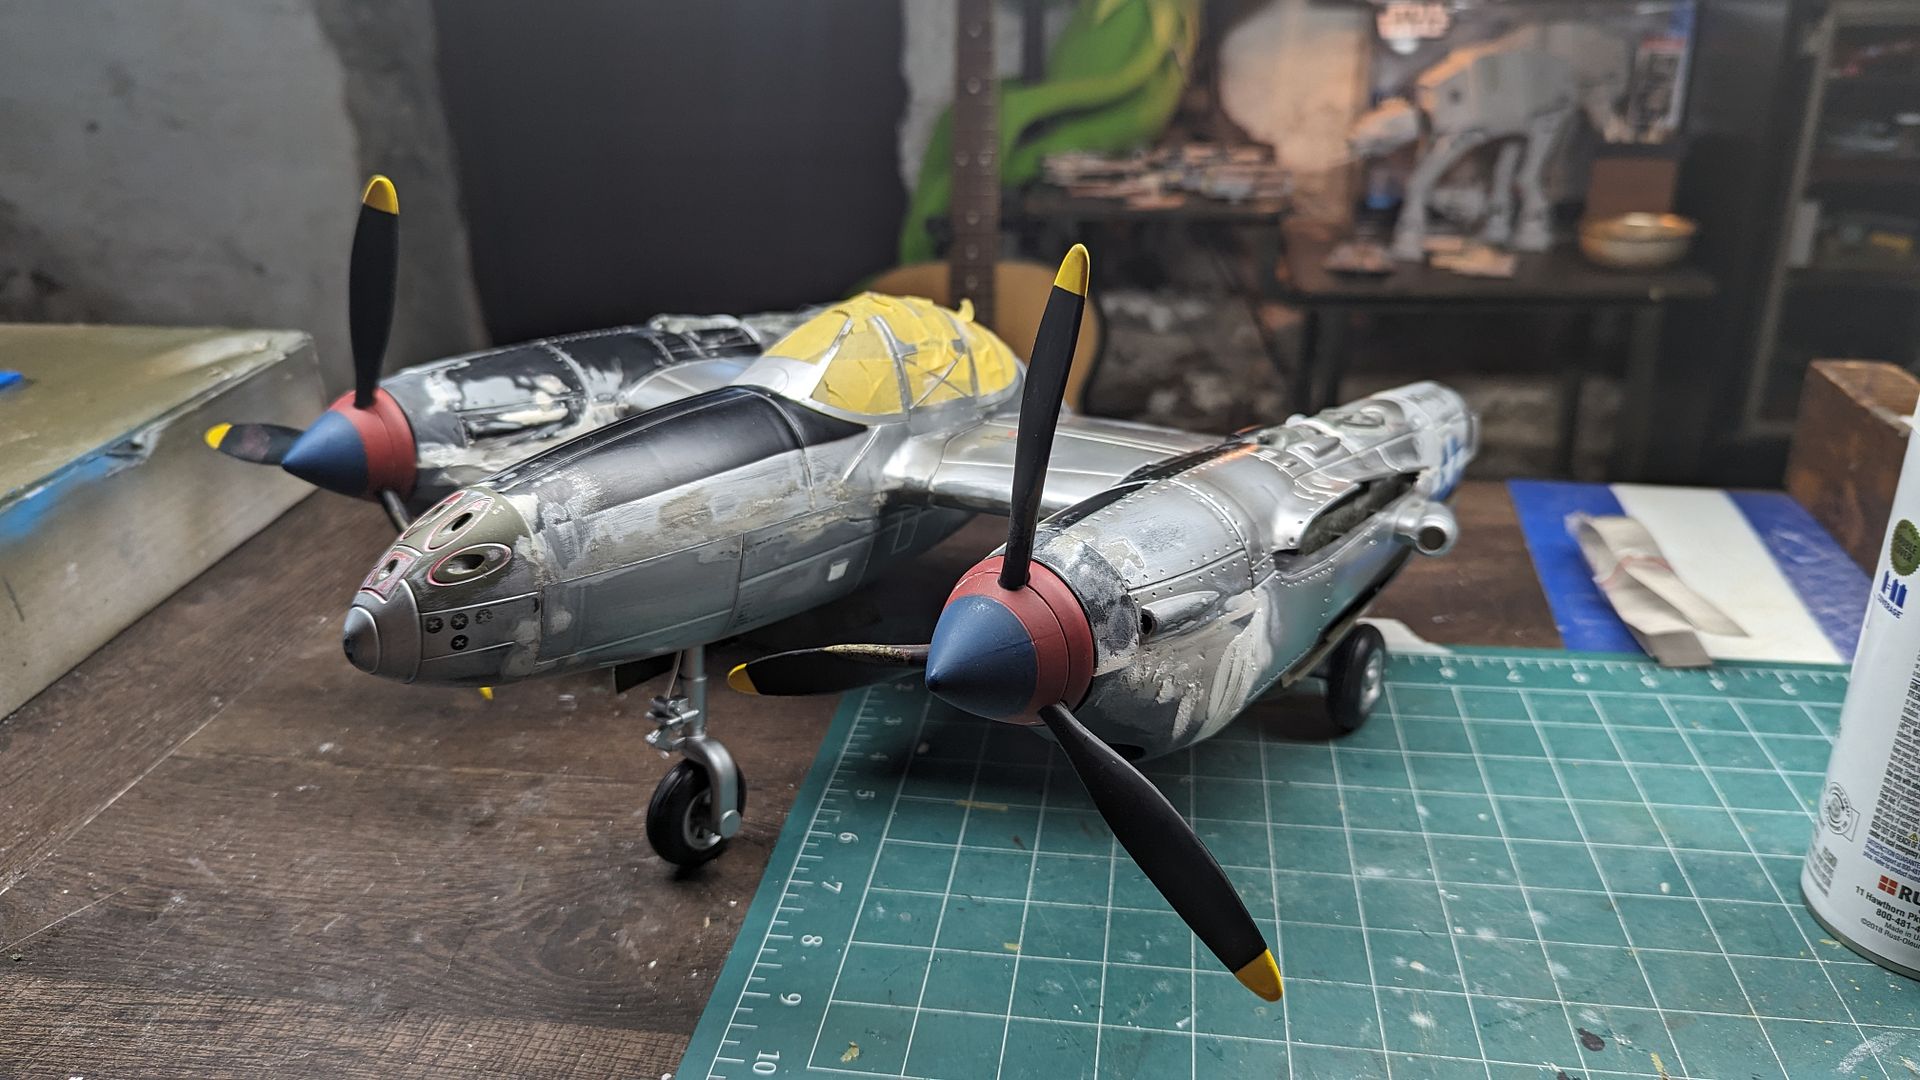
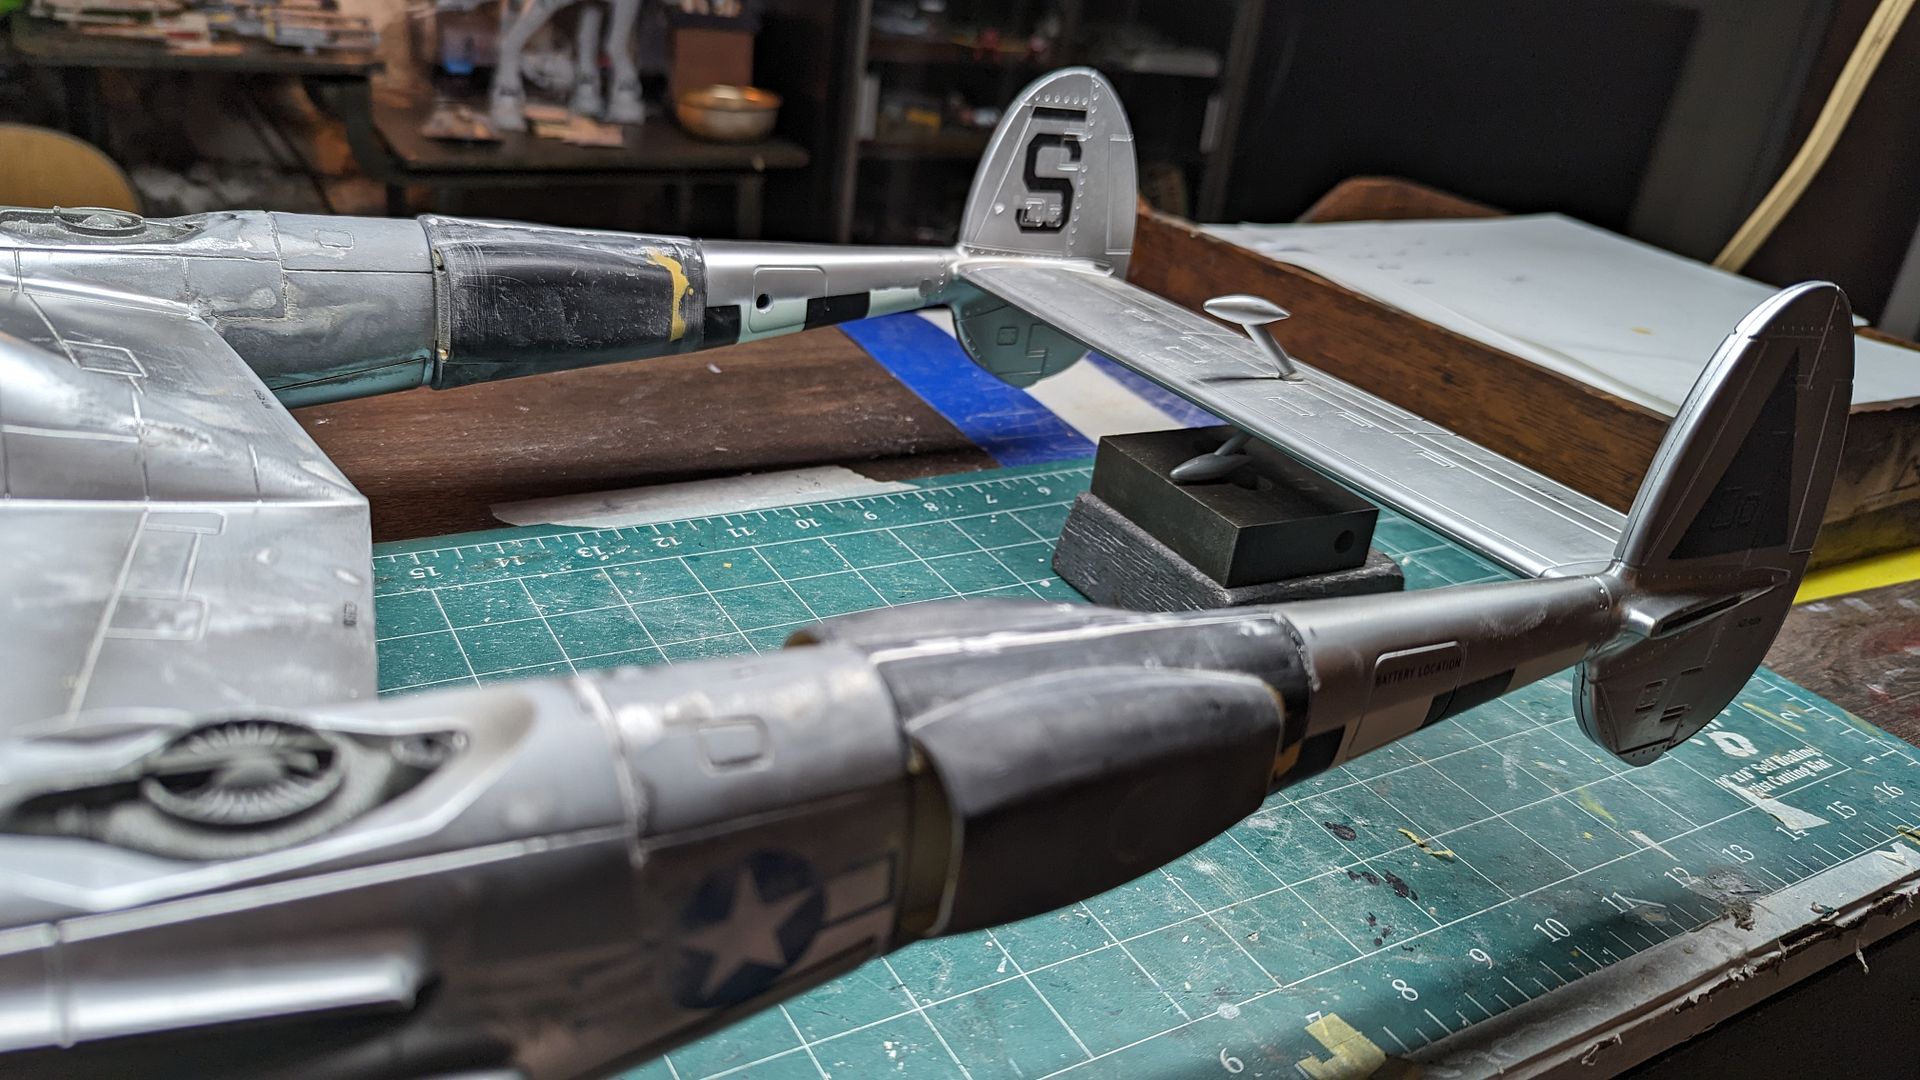
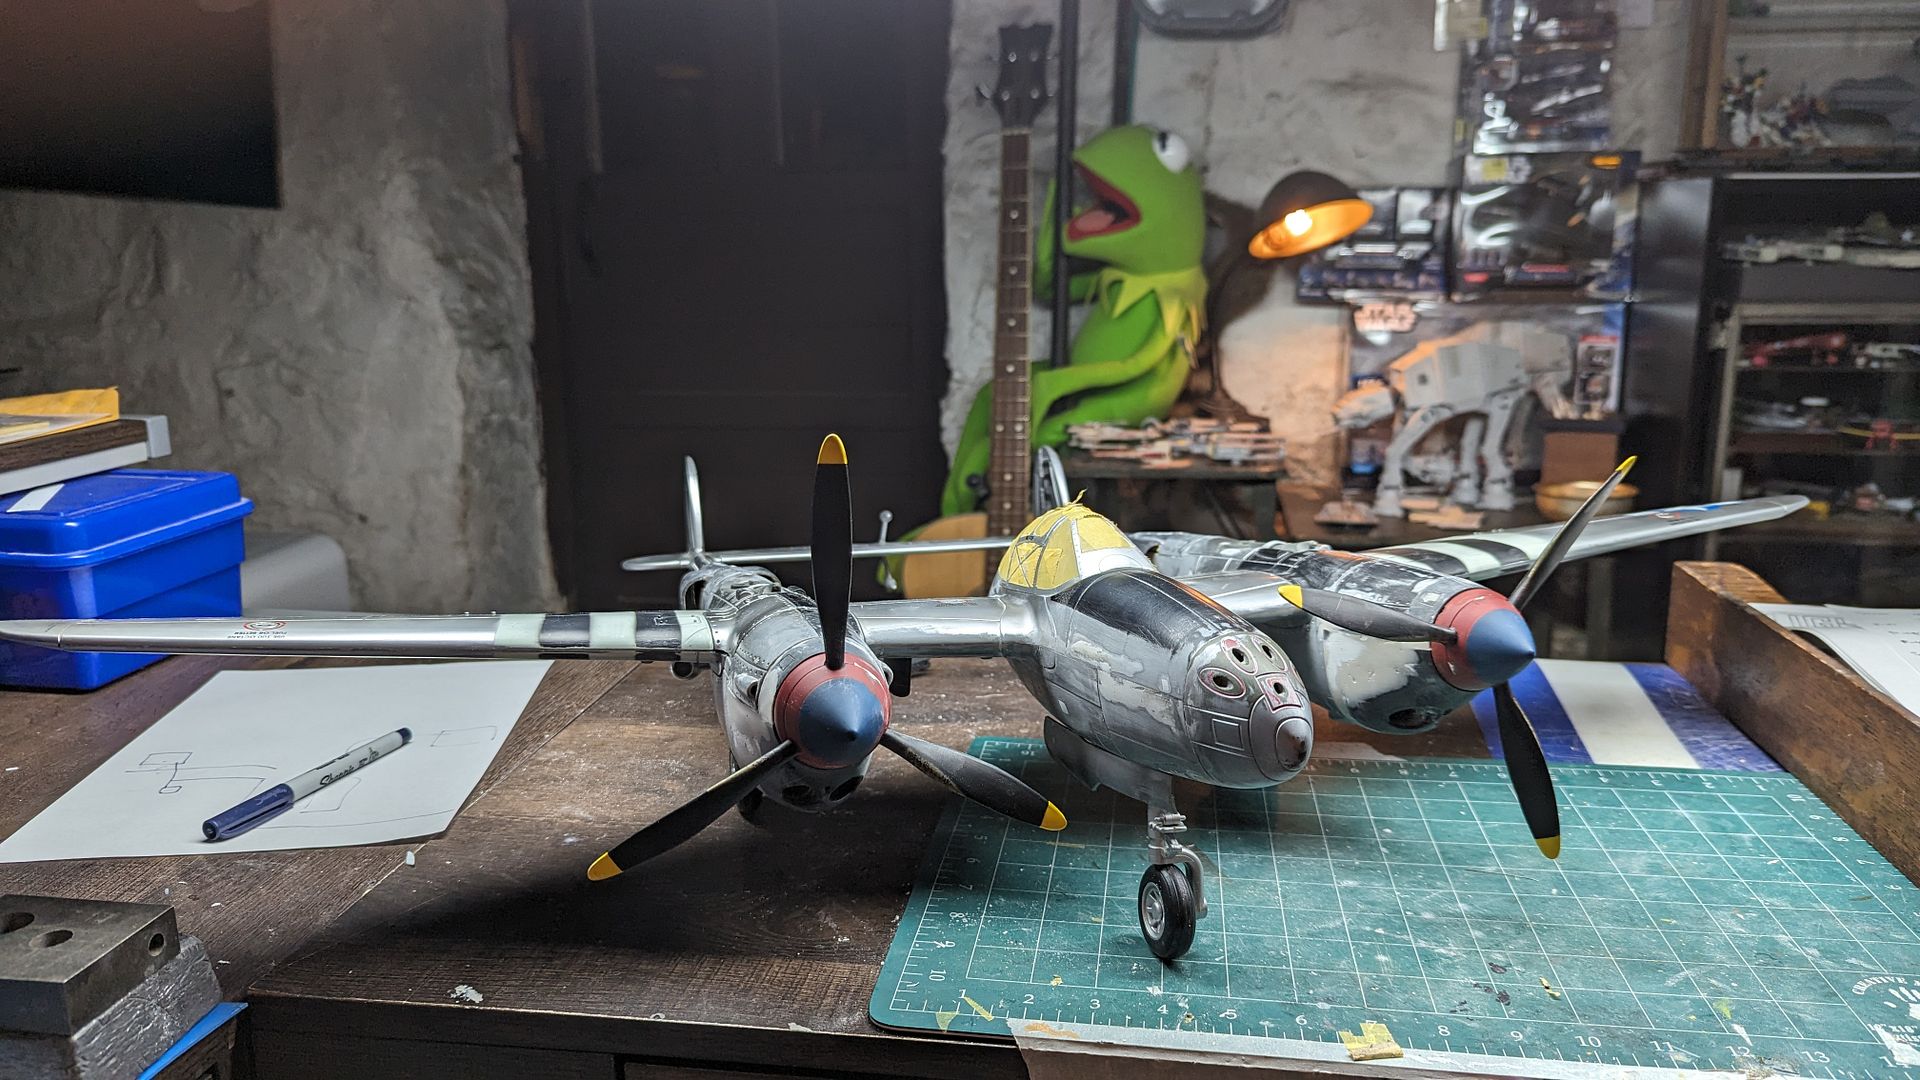
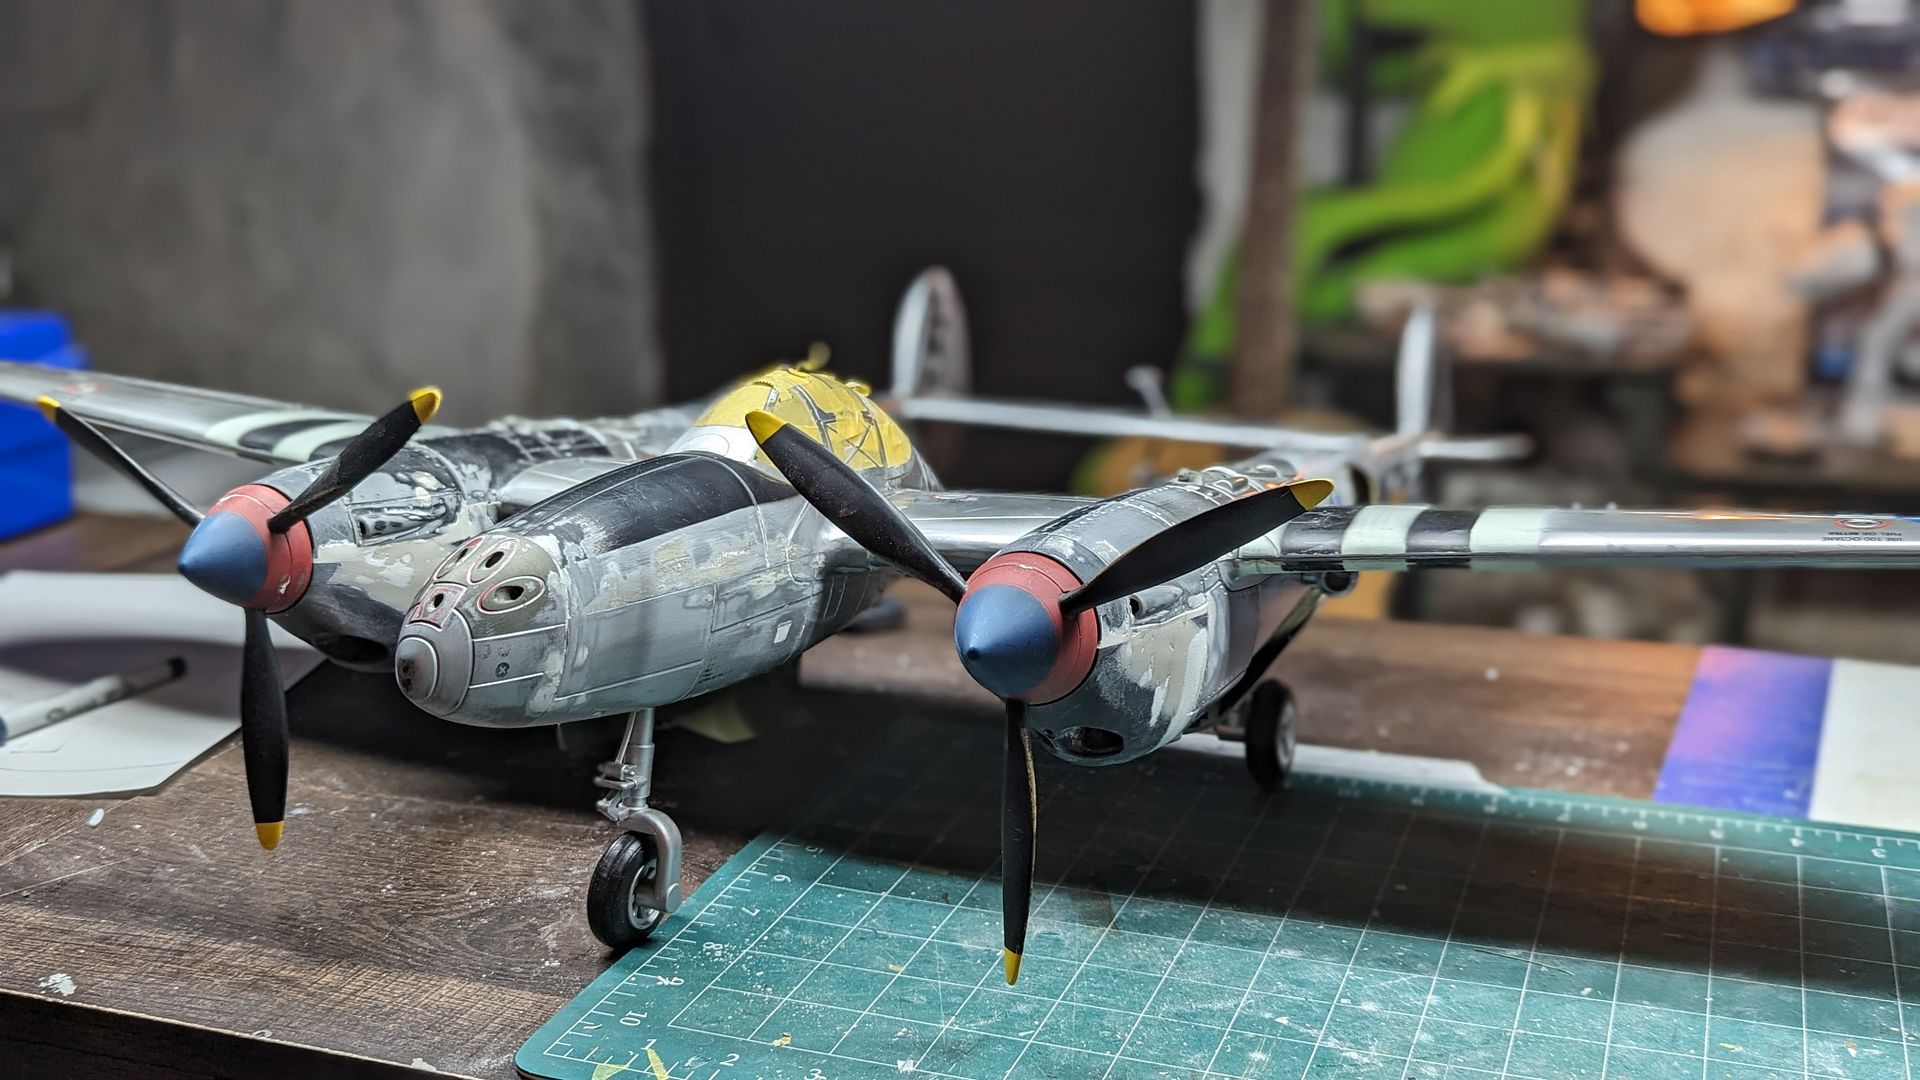
After I was satisfied with the alignment on the pieces, I began the process of putty, sanding, primer, inspection, repeat.
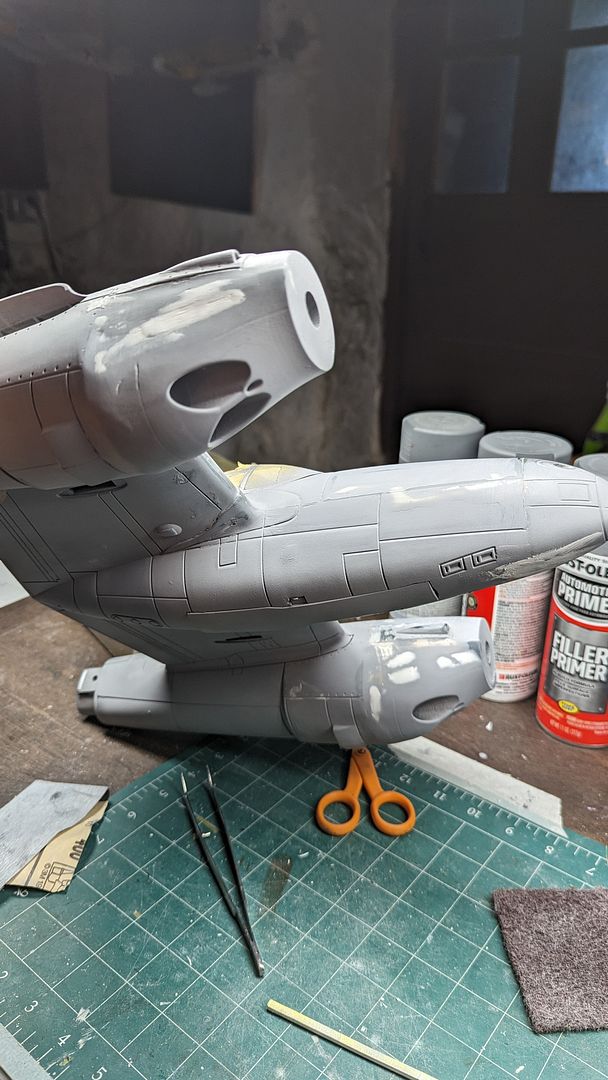
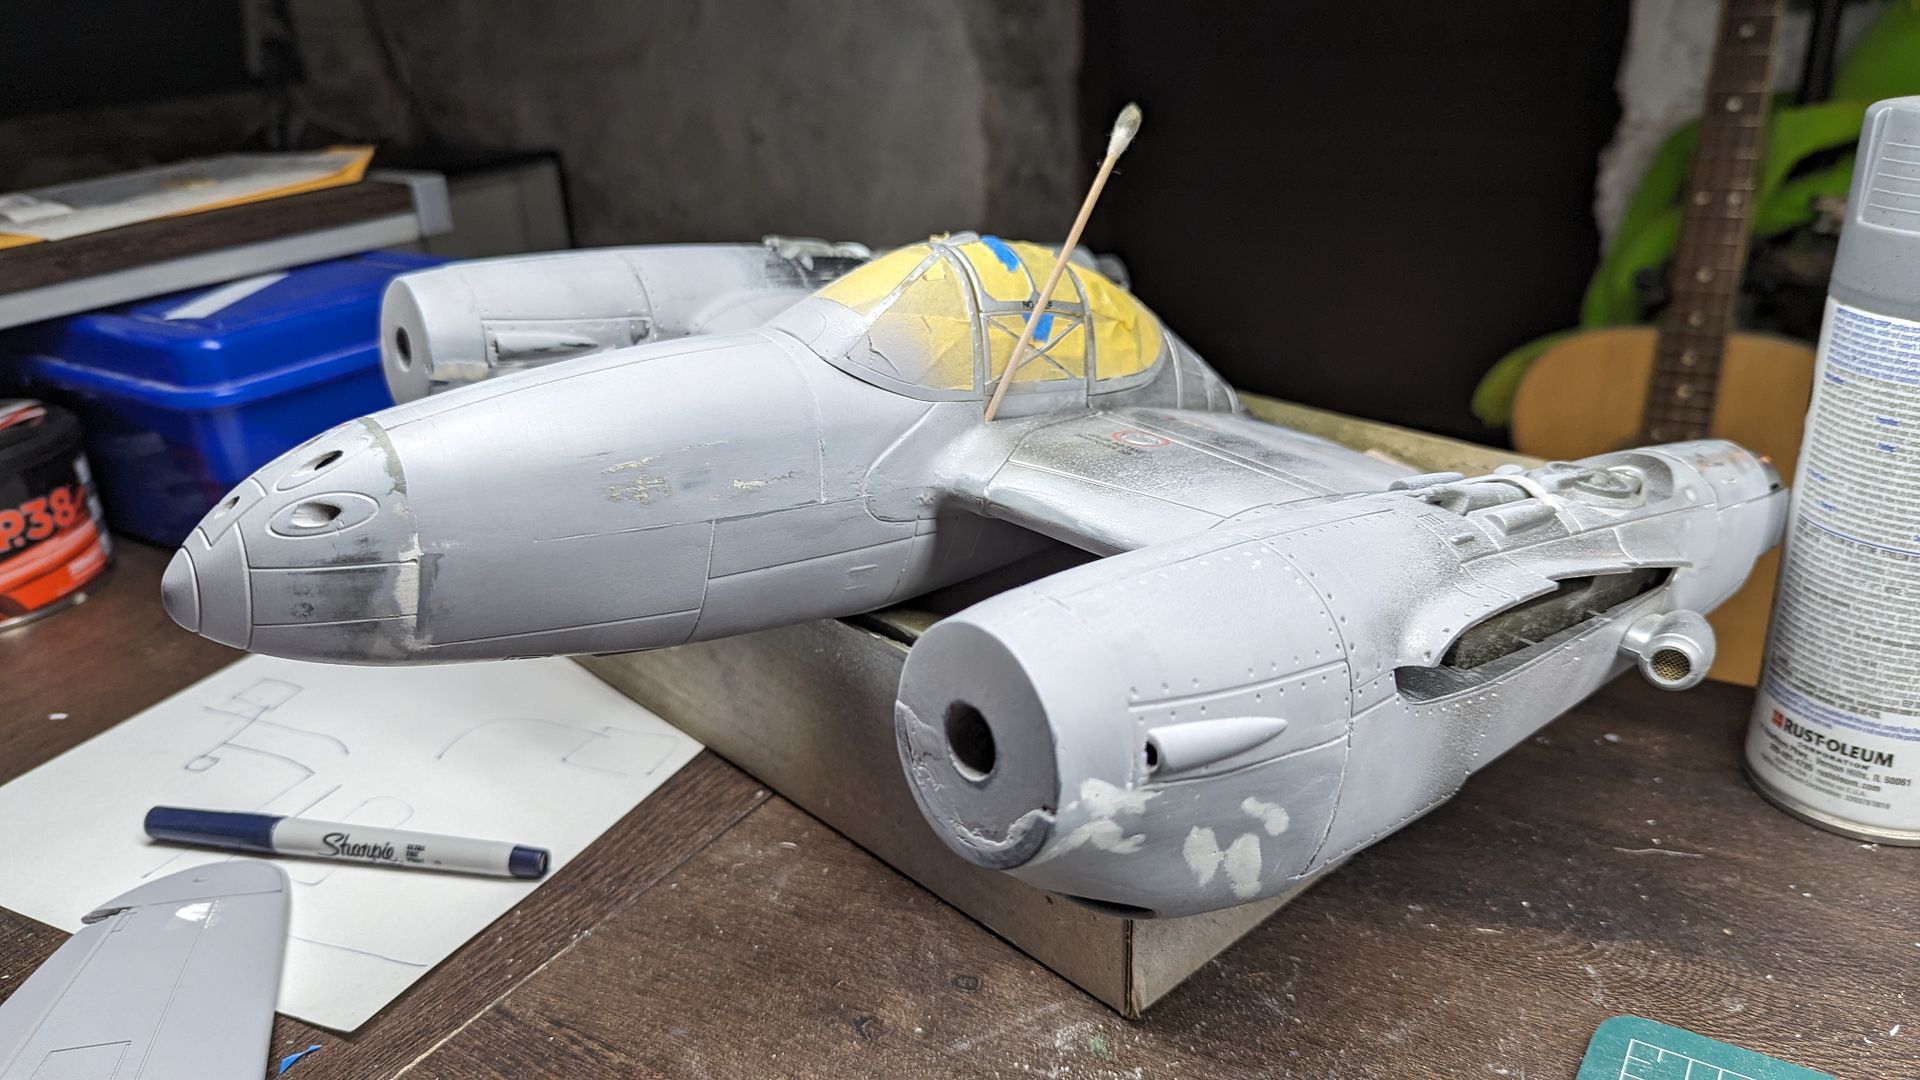
Putty, sanding, primer, inspection, repeat. I was having issues with the side entry window that rolls down of the model (hence why the cotton swab was stuck into the crevasse). So it eventually received some PVA glue to keep it up in position. If the client wishes to lower the window, all they'll need is to run an exacto knife down the crevasse to loosen it.
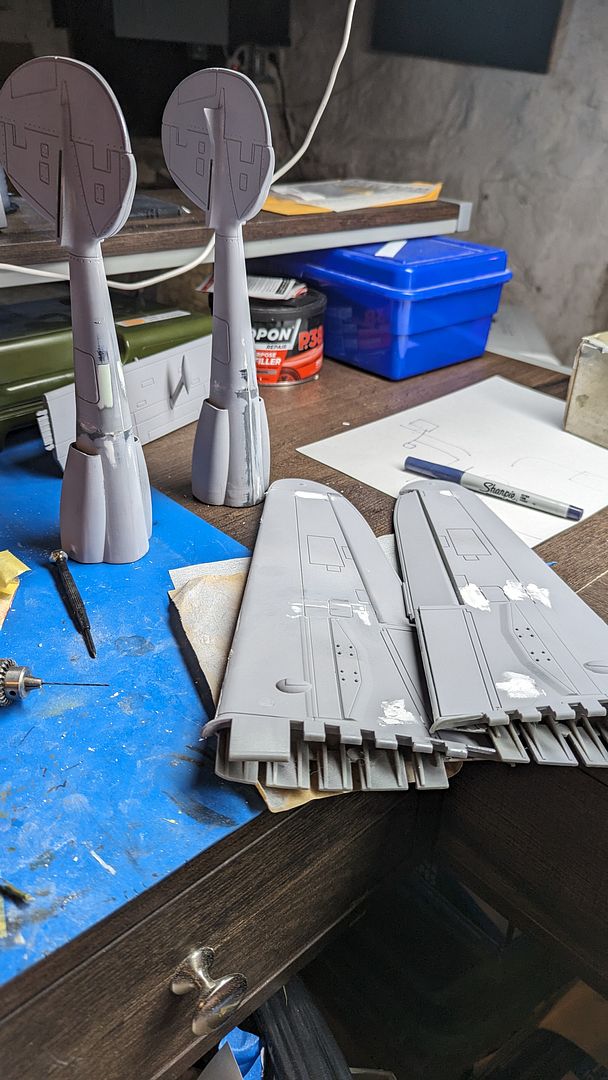
Additional puttying, sanding, and primer were necessary on the wings, tail booms, and horizontal stab
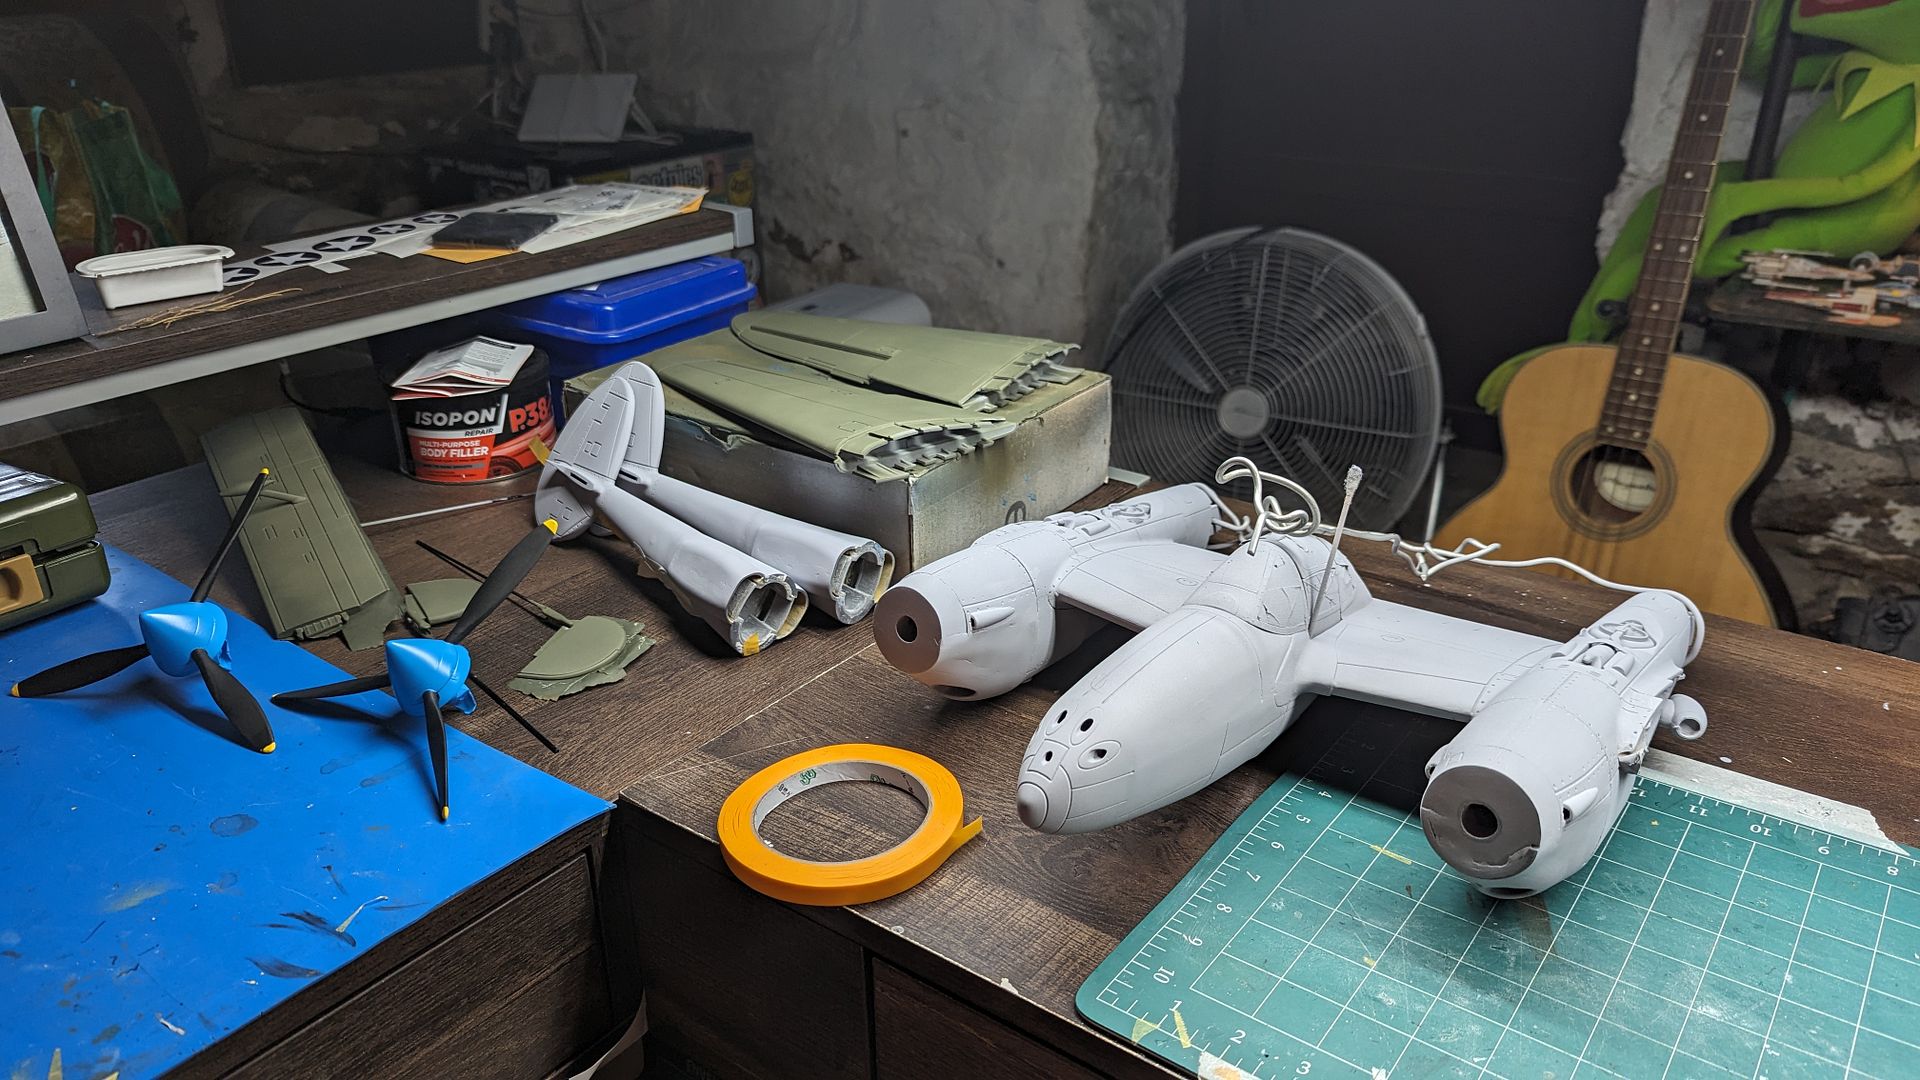
Eventually I got to a place where it started to look passible for my standards, and I moved to paint. I utilized the grey primer as the underside color, and found a good spray can of camo OD green for the plane. The props and spinners were one of the first pieces to be finished.
Eventually I was able to paint the wings green, as well as the horizontal stabs. For the markings I designed and printed up the US stars, and lettering for the nose and tail on the vinyl printer / plotter that I have access to at work. I bought a custom sized set of P-38 nomenclature decals on clear vinyl from
https://callie-graphics.com who have helped me out in the past with nomenclature sets for my 1/18th scale P-51D and P-47N projects. They normally produce these sets, as well as full decal sets for RC aircraft.
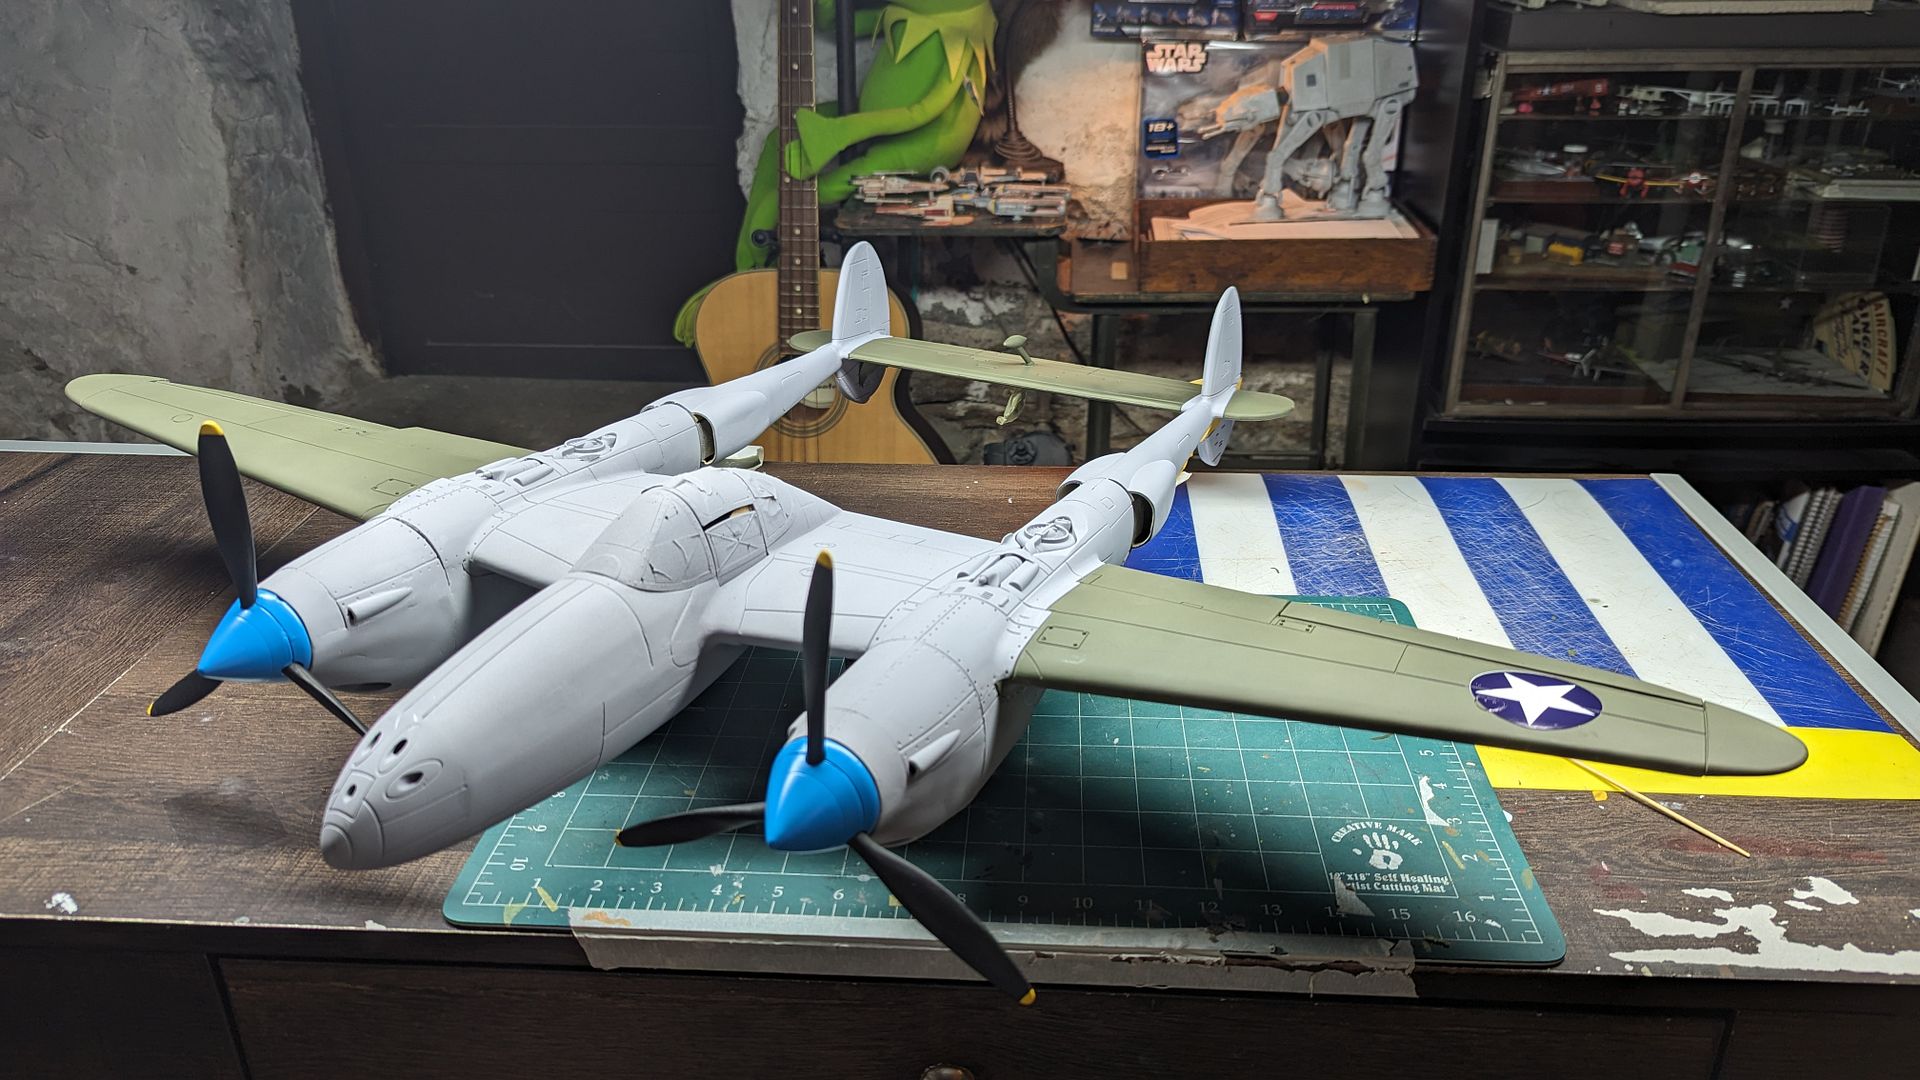
I used a masking gel for the break between the green and grey, with additional tape covering the rest of the grey. This would be my one big mistake during the build... The masking gel was supposed to be mostly supposed to be used on canopies only or glossy surfaces. The rough / coarse texture of the primer led the masking material to come off in small slivers. A... absolute... freakin... nightmare! It took me some time to slowly remove all the sections, then I began using a fresh exacto knife and "shaved" off the rest of the masking layer. The model would require alot of touchups to get it to be passible. Once the green and grey were to a respectable point, then came the endless process of trying to figure out where the 100+ tiny nomenclature decals went, along with the weathering passes. Easily the most fun part of the build. I had originally redrawn and printed out the shark mouths on white vinyl, but quickly found that it was nearly impossible to line the pieces up correctly. I resorted to drawing the shark mouths and slowly painting them in by hand.
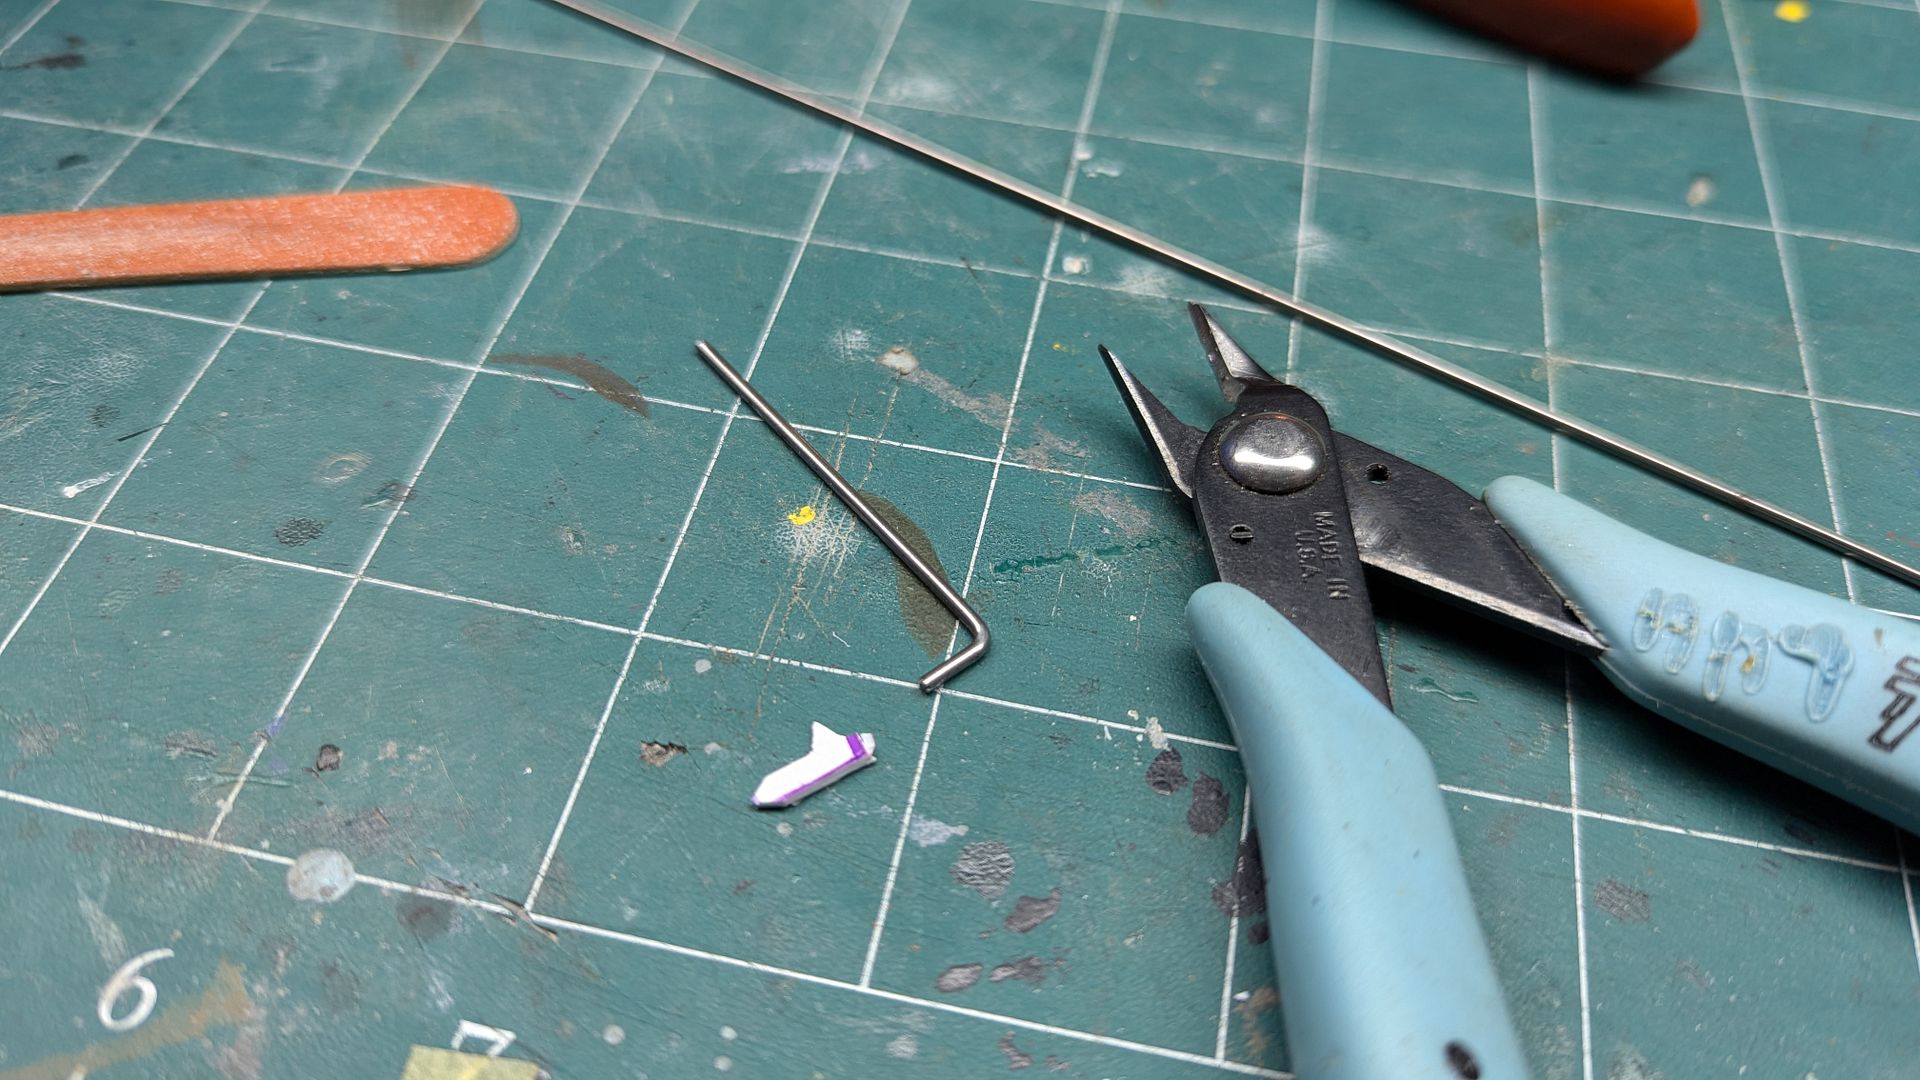
The new gun barrels were painted black and silver, weathered heavily, clear coated, and cut to fit the gun ports. I cut out two ovals of bare metal foil for the inside of the engine nacelles for the "mirrors" so the pilot could see both main landing gear. I also used some on the pistons on all three gear legs for added detail. I made a basic pitot tube out of some styrene and a metal rod.
I also used some masking tape and bare metal foil to make some crude seatbelts in the cockpit for some added detail. Again, the project was specifically a model that looked mostly the part form the outside. No extra detail in the cockpit was planned, so this was just for extra credit.
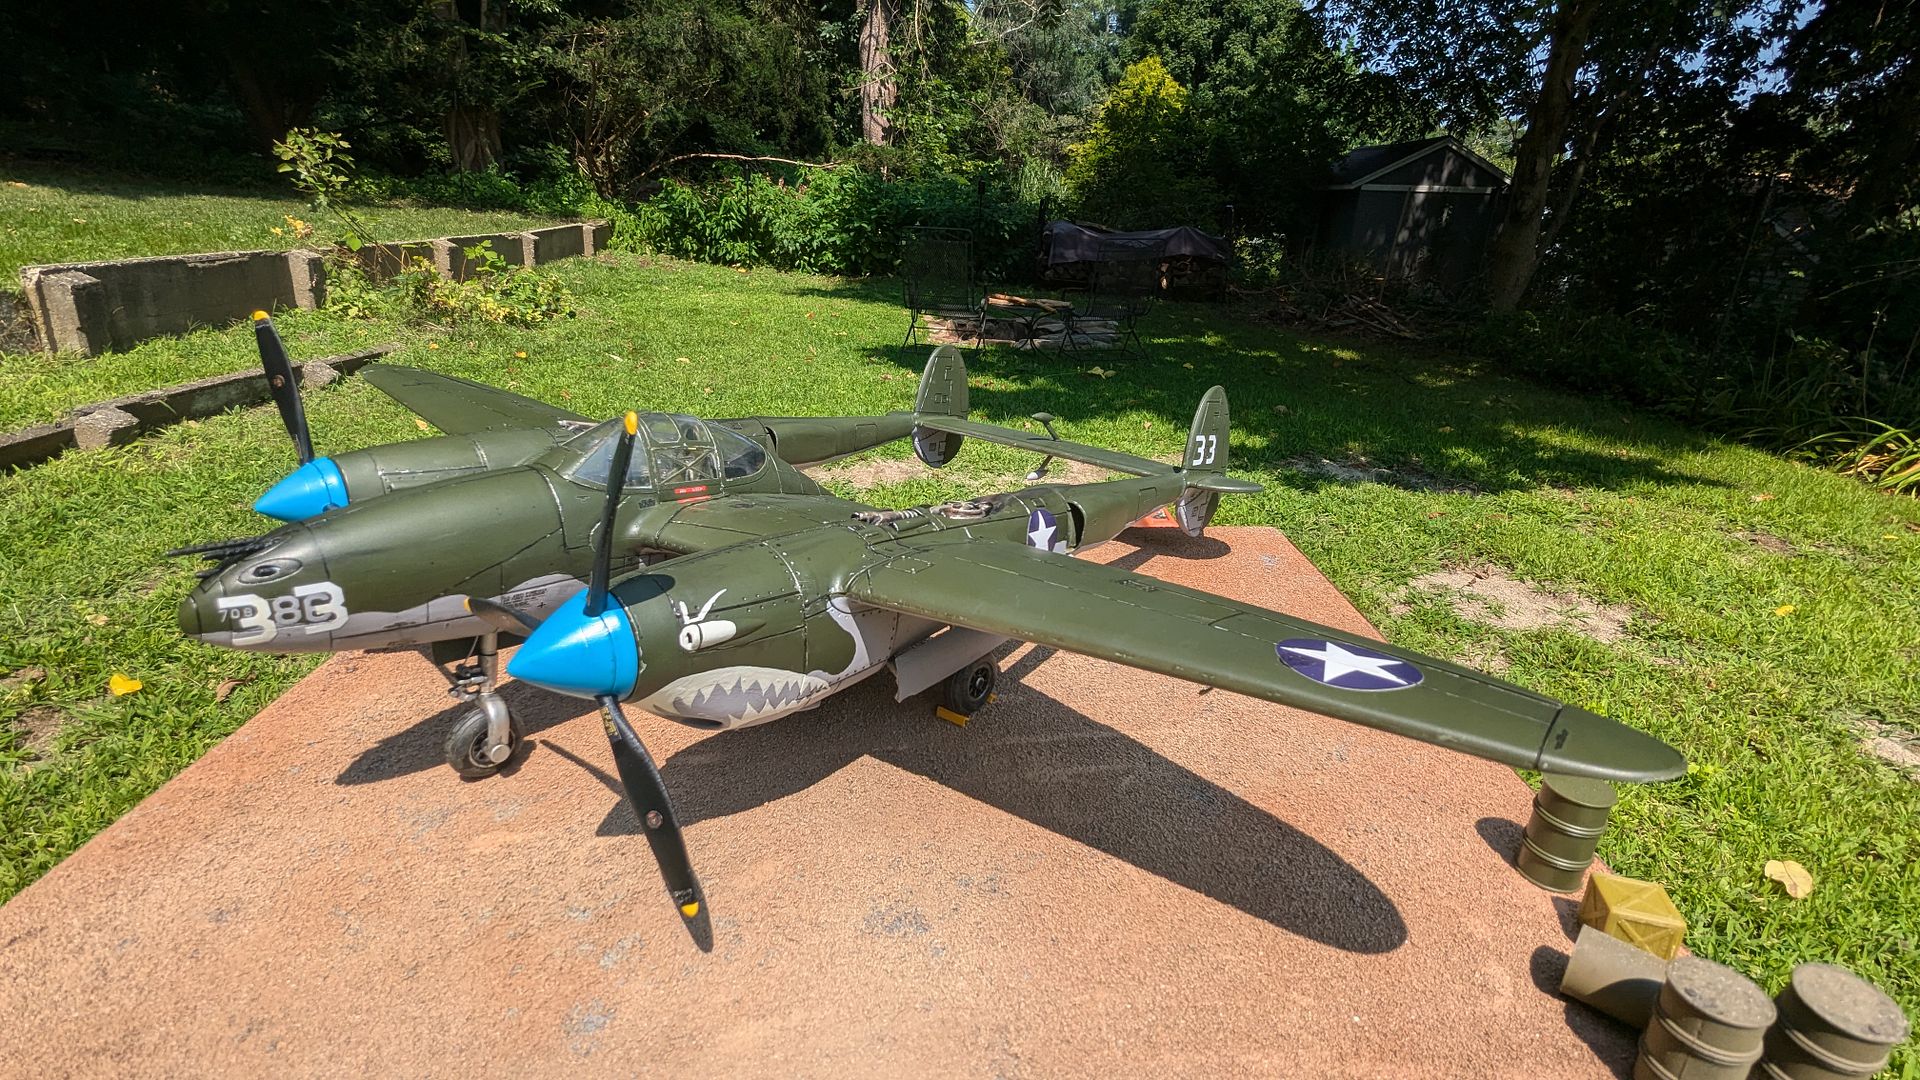
After additional touchups, detailing passes, weathering passes, etc. I was ready for final clear coat and final assembly.
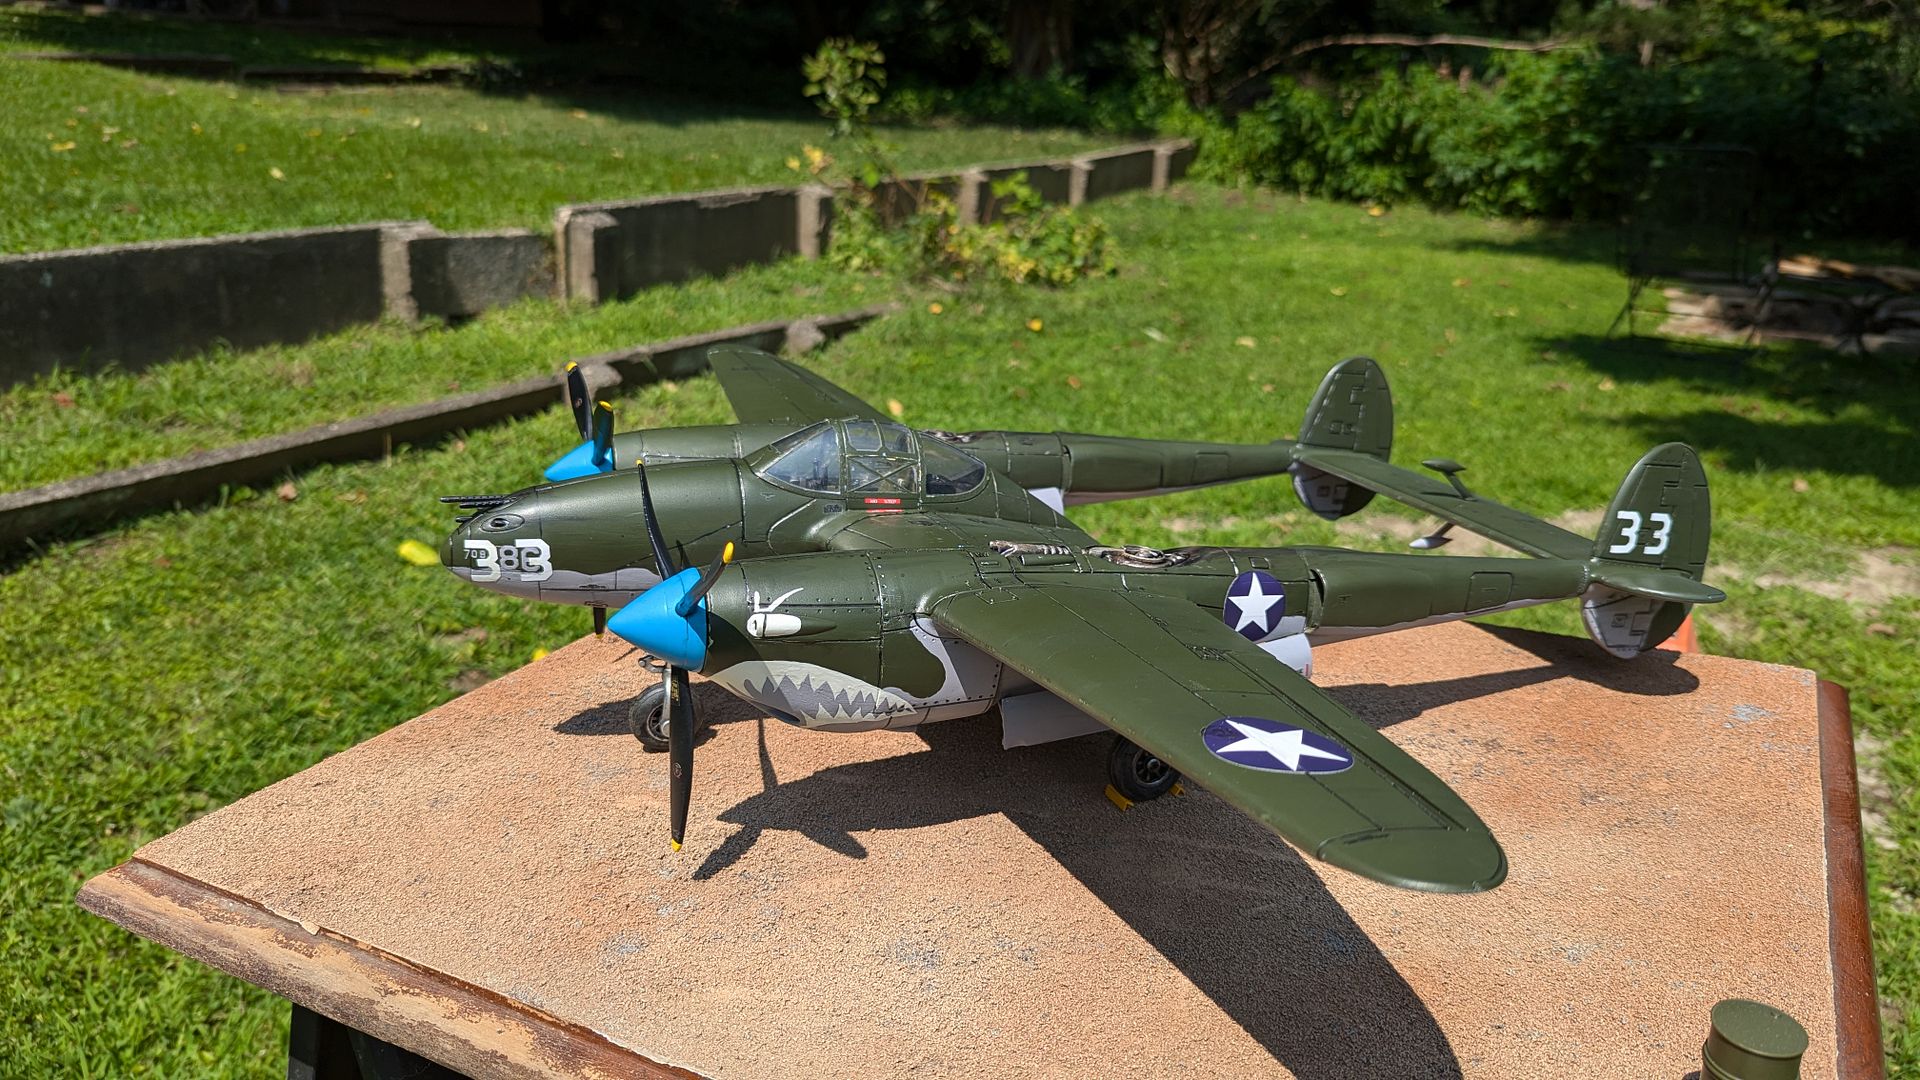

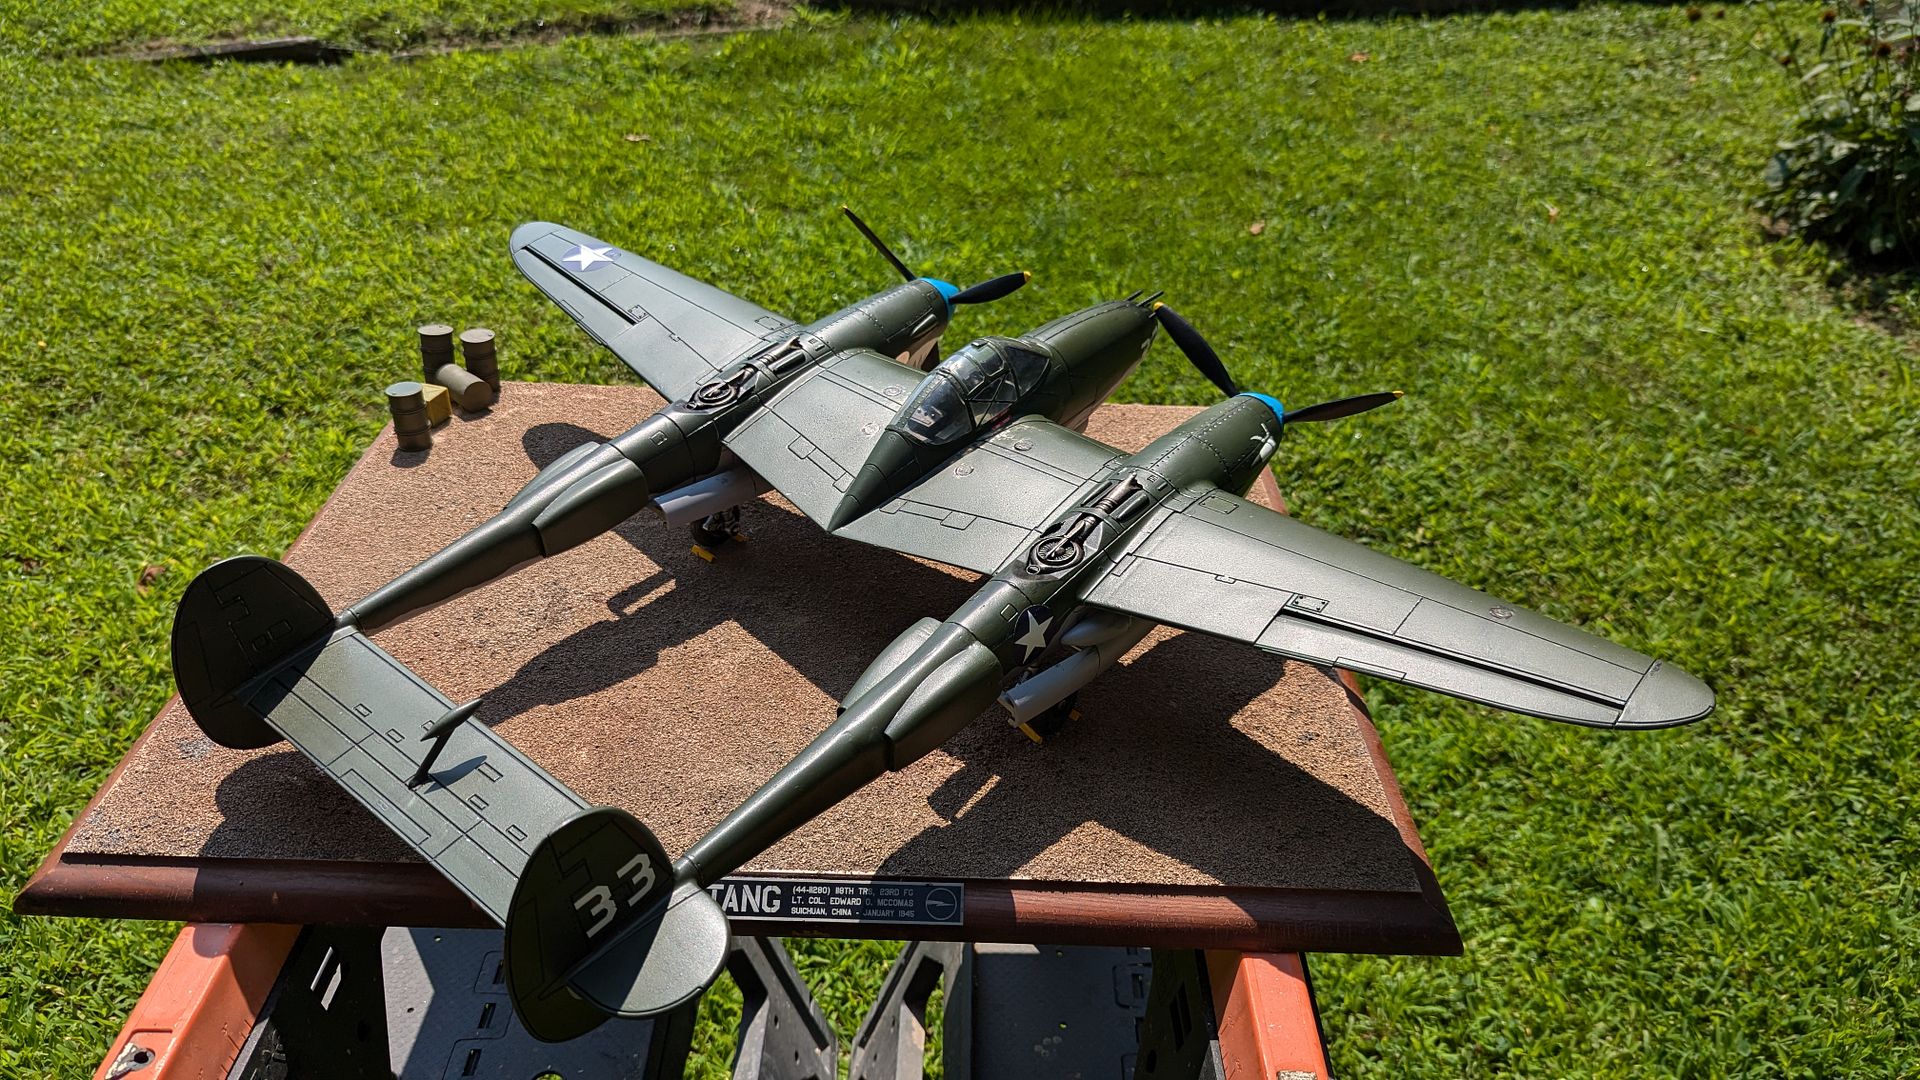
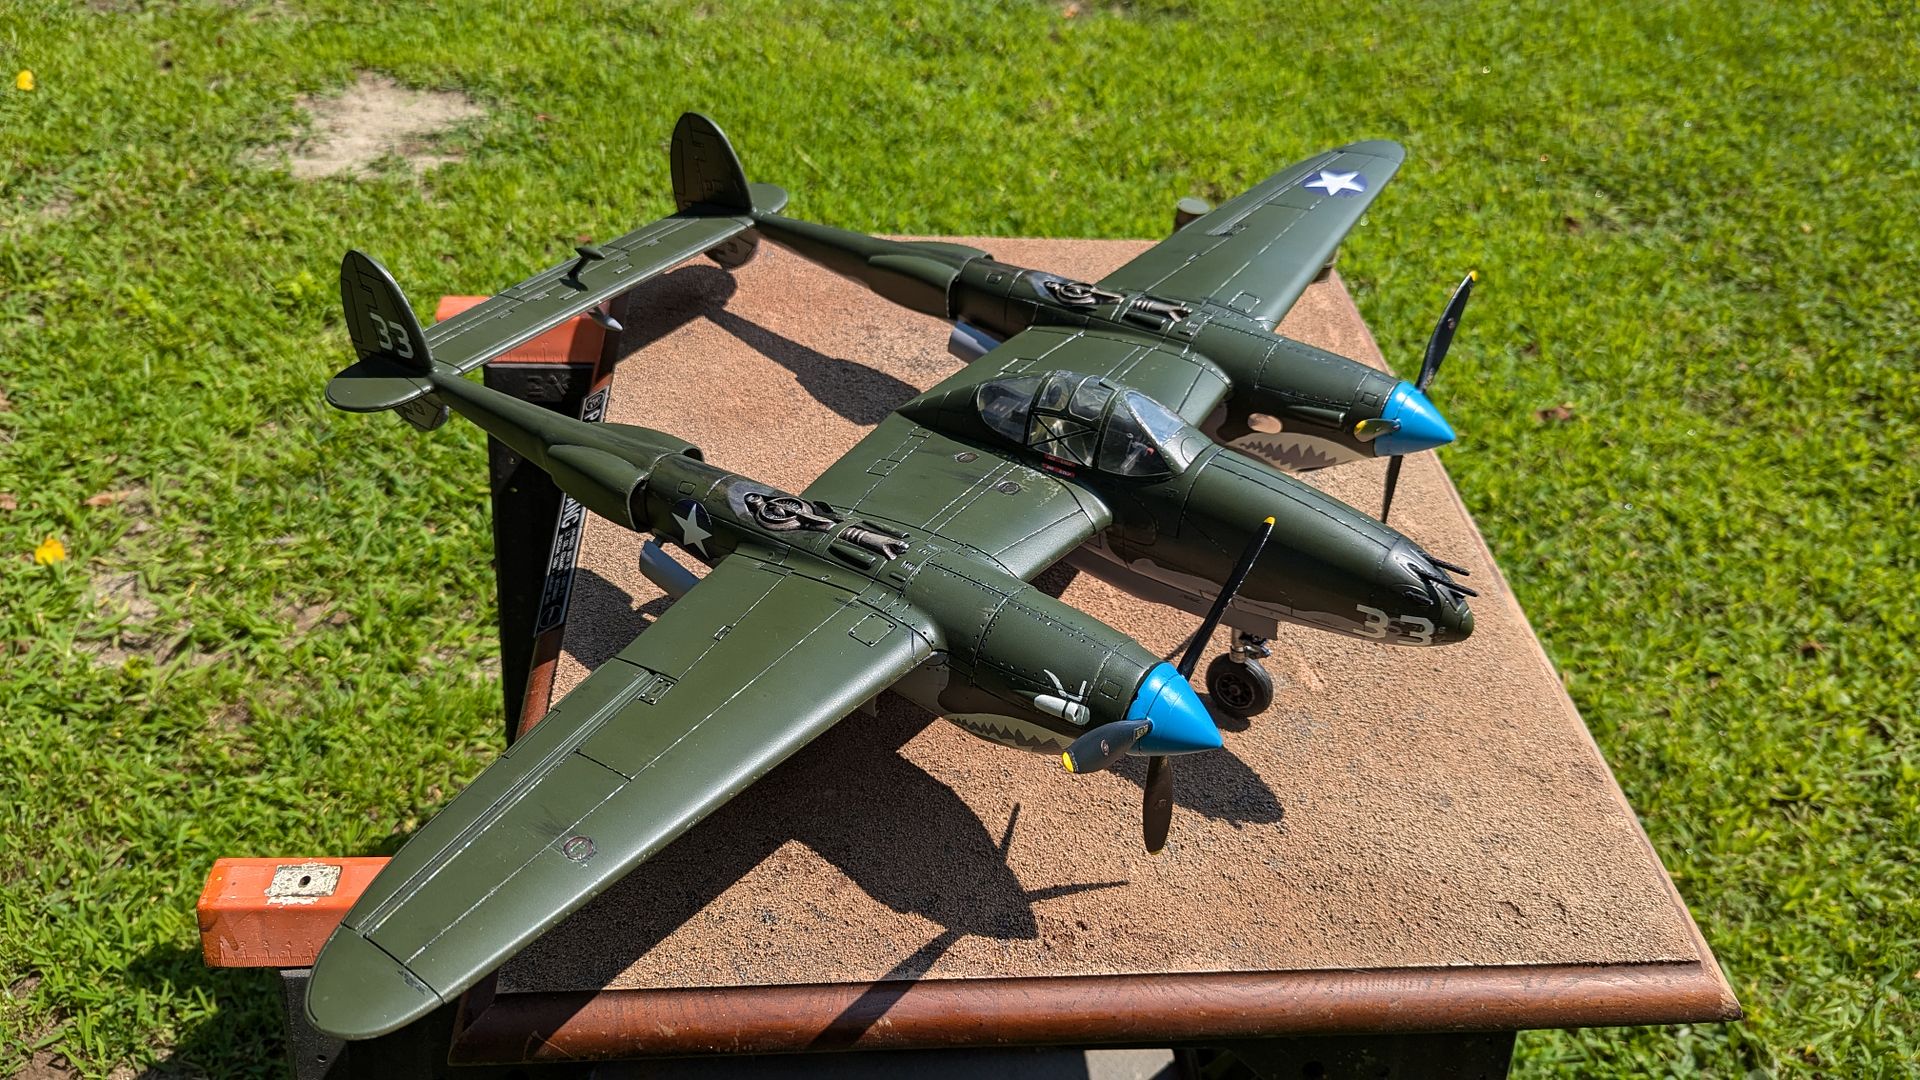
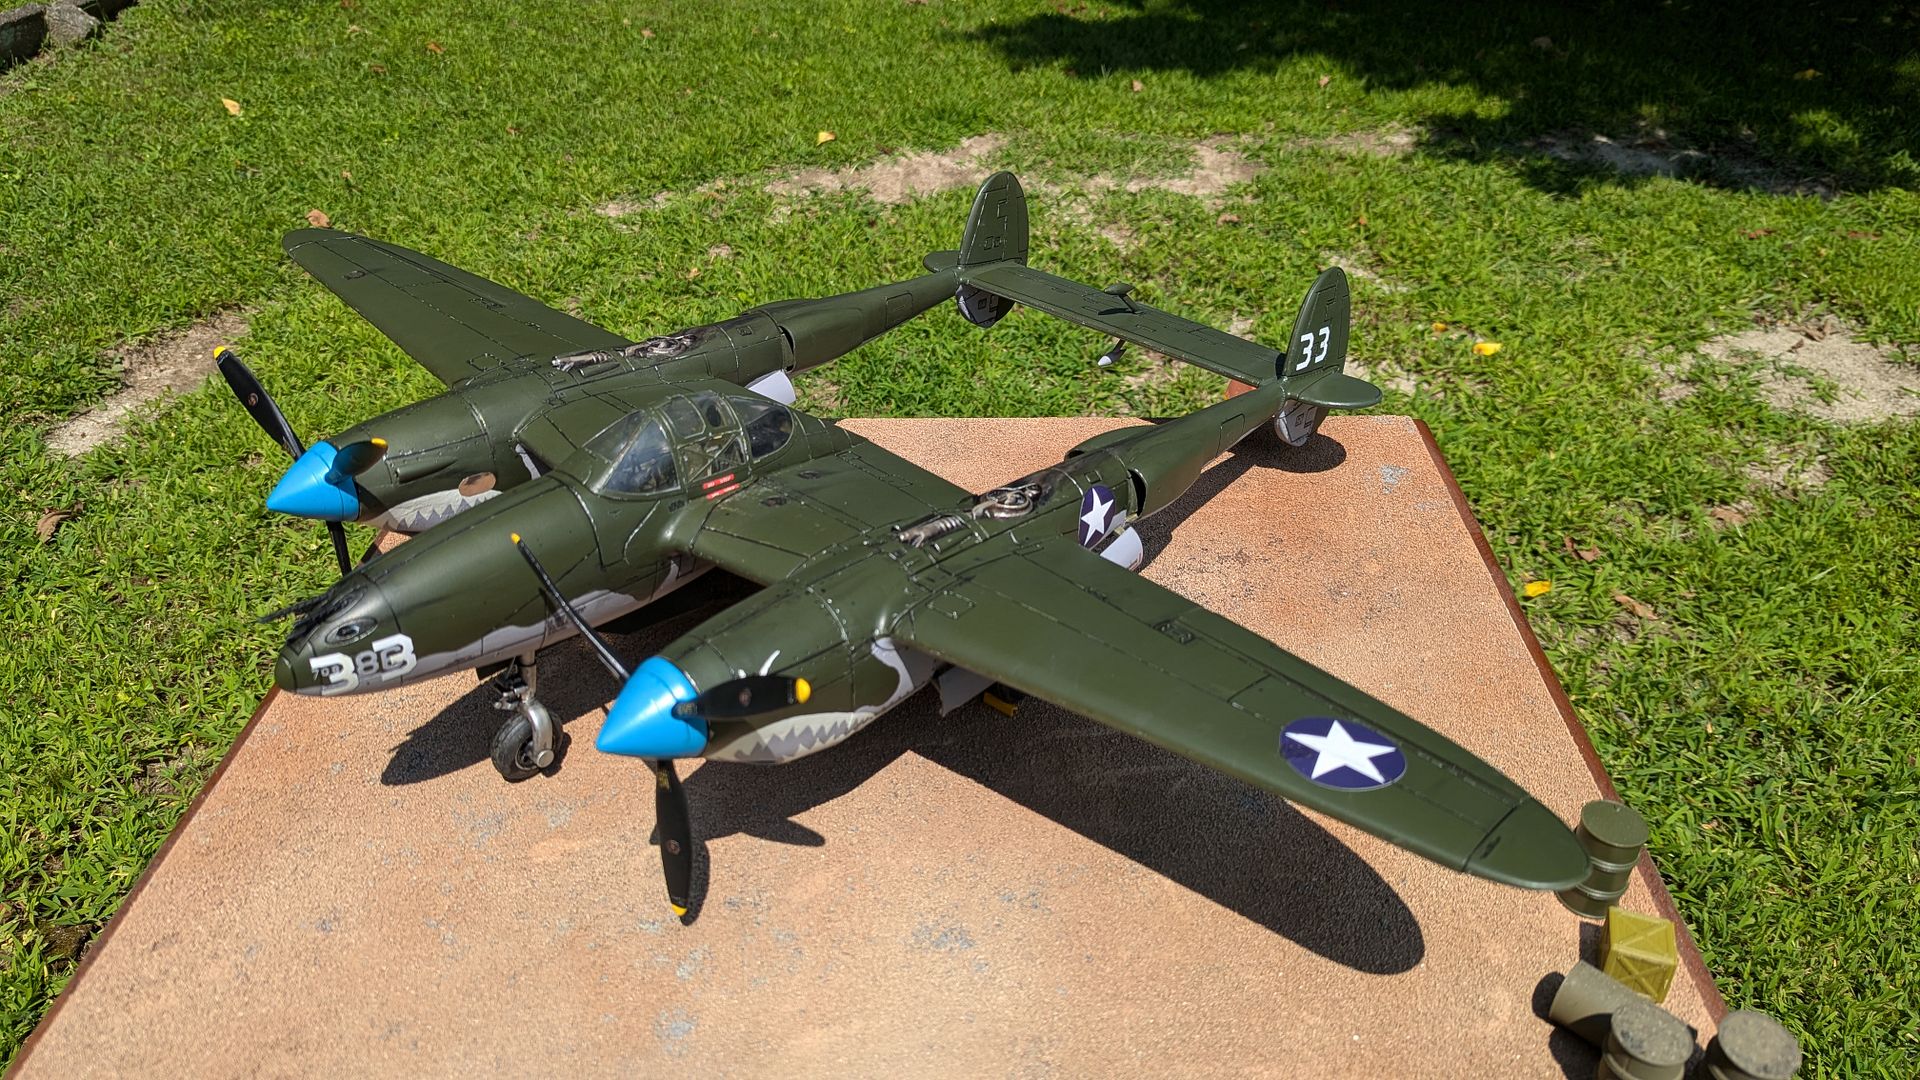
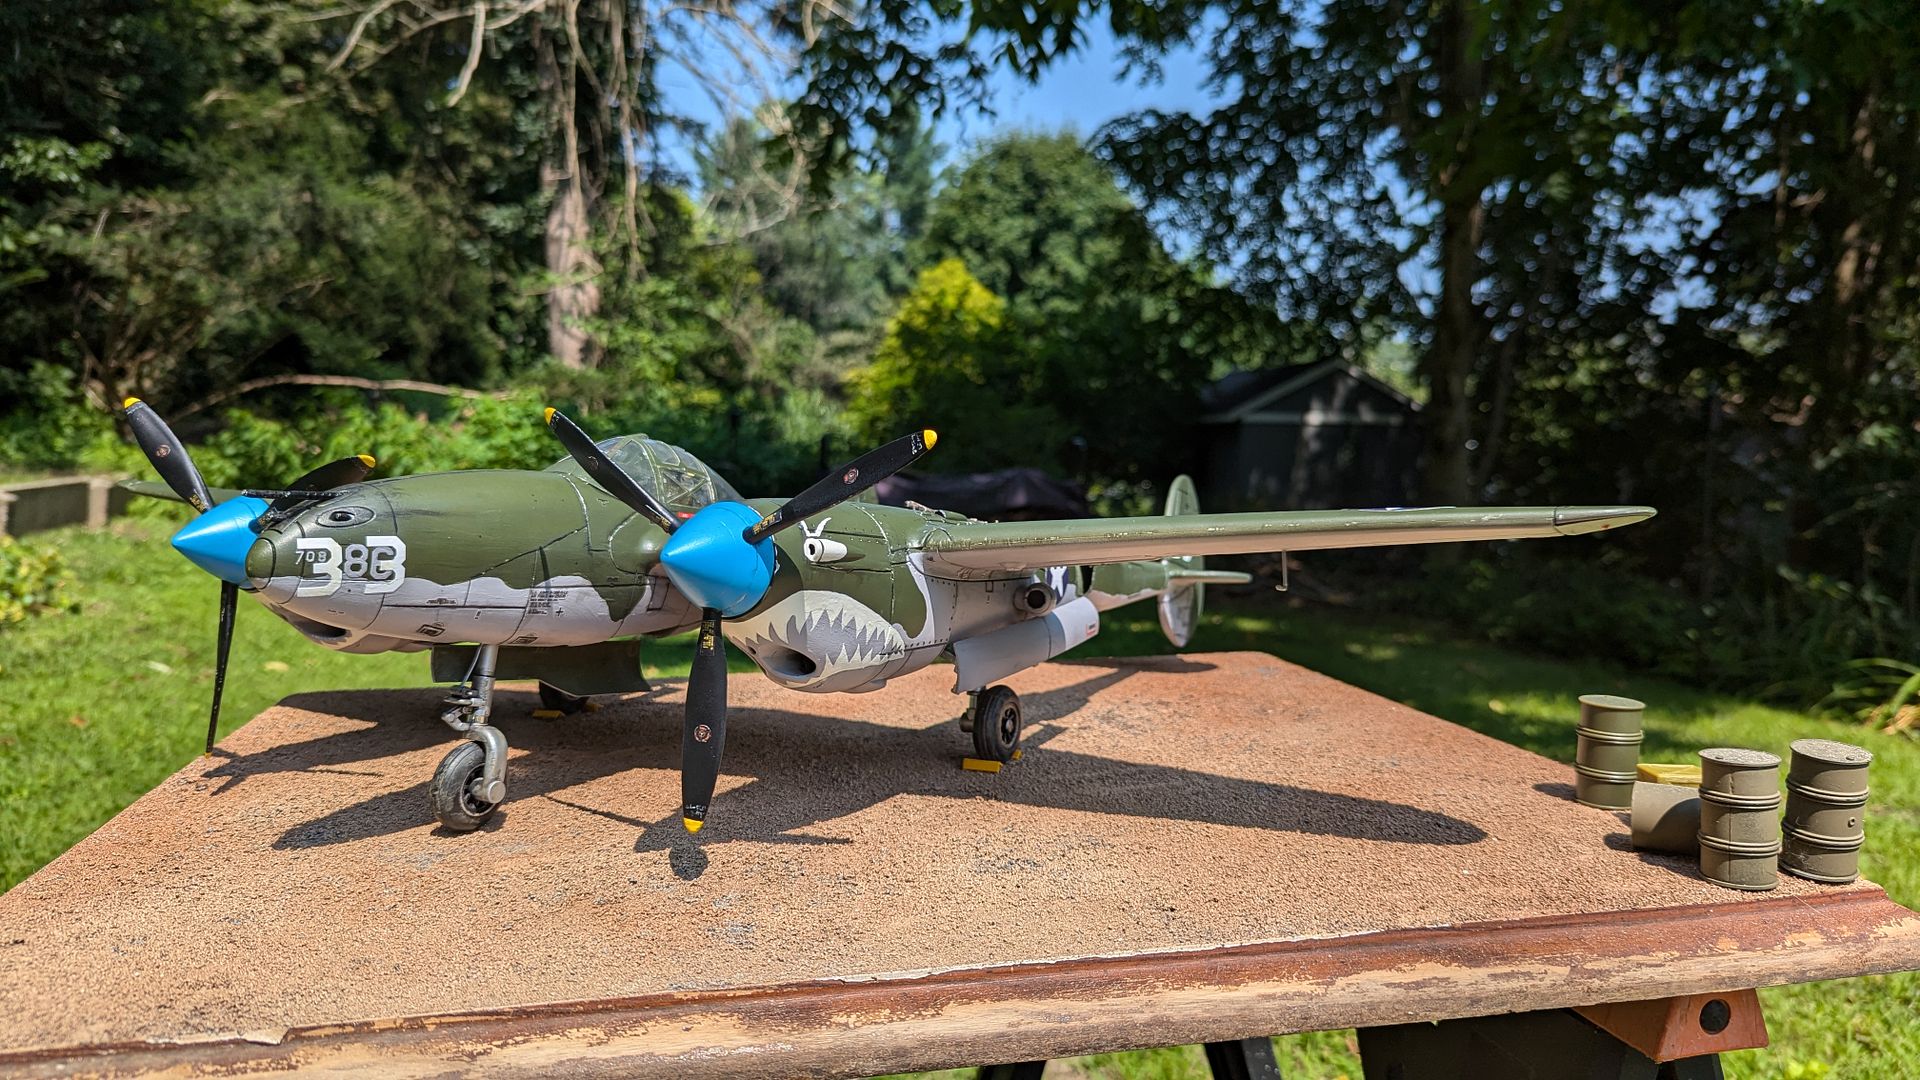
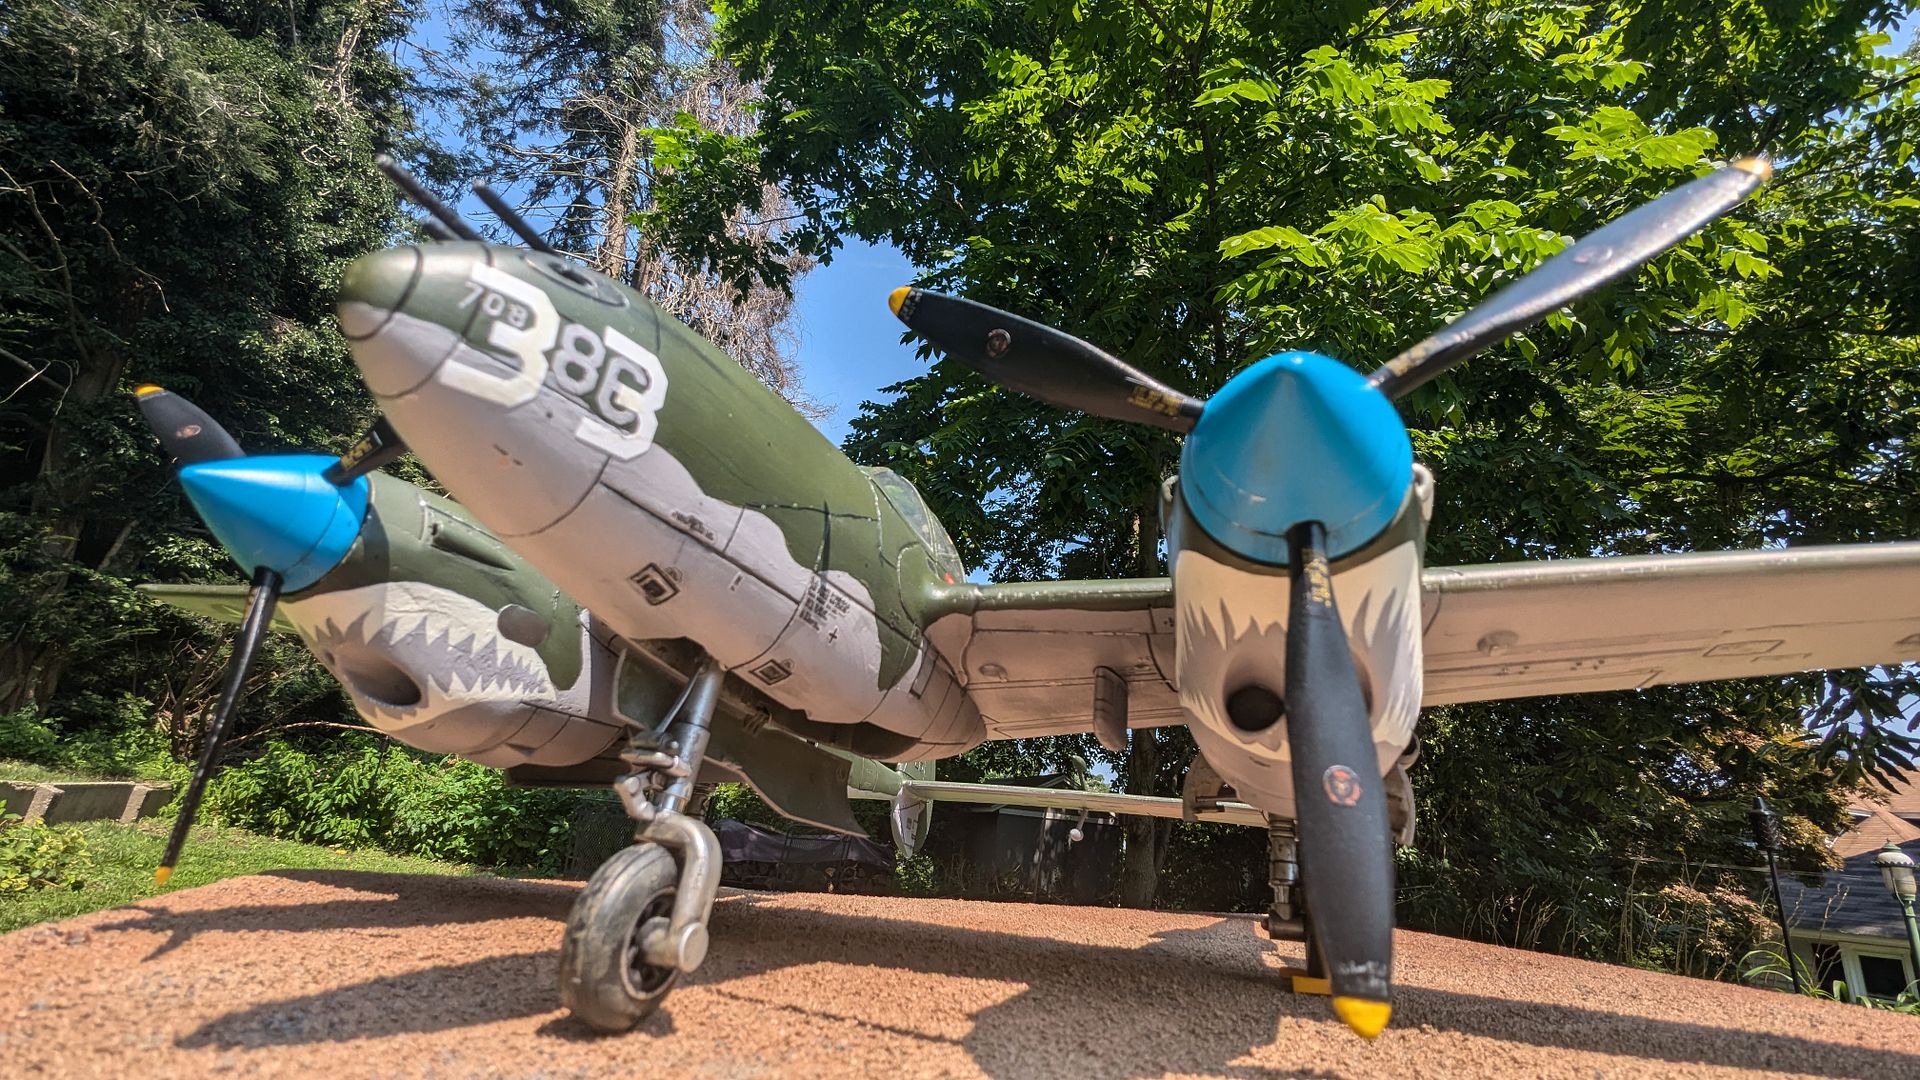
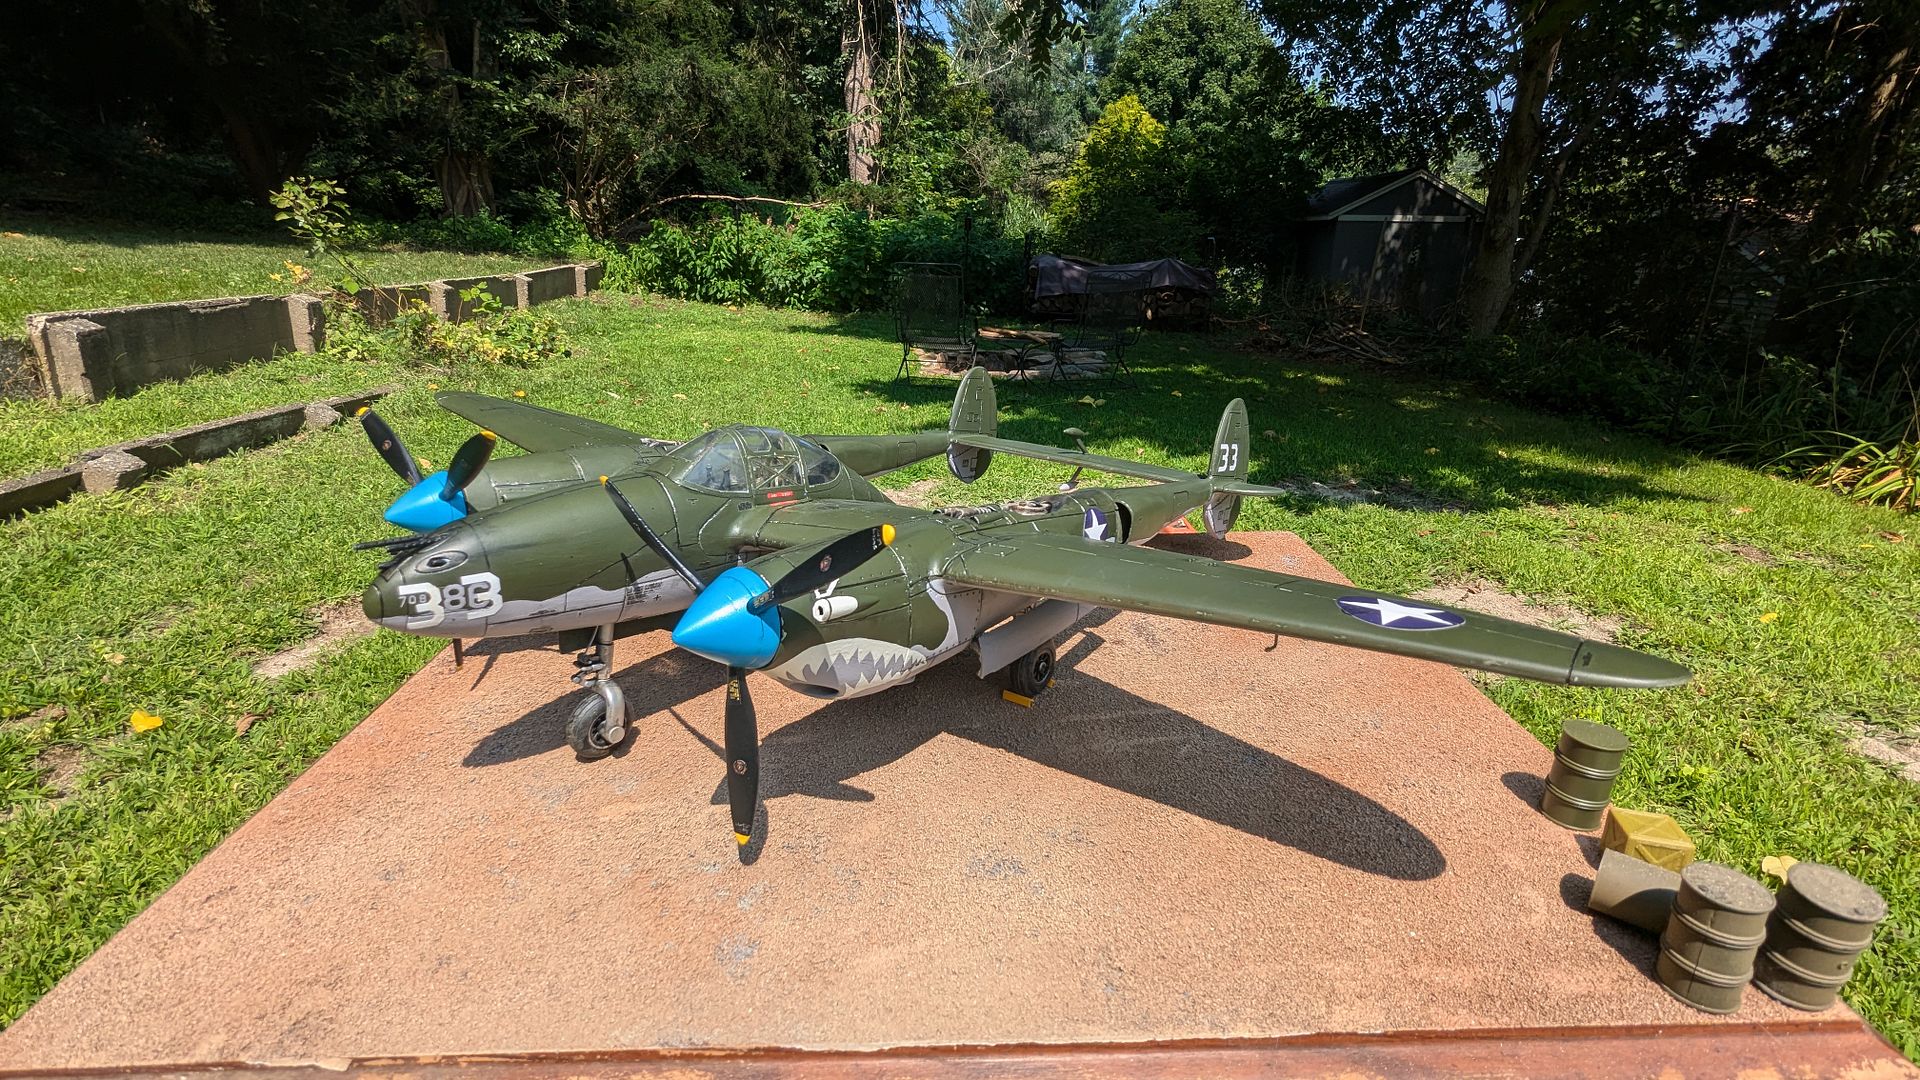
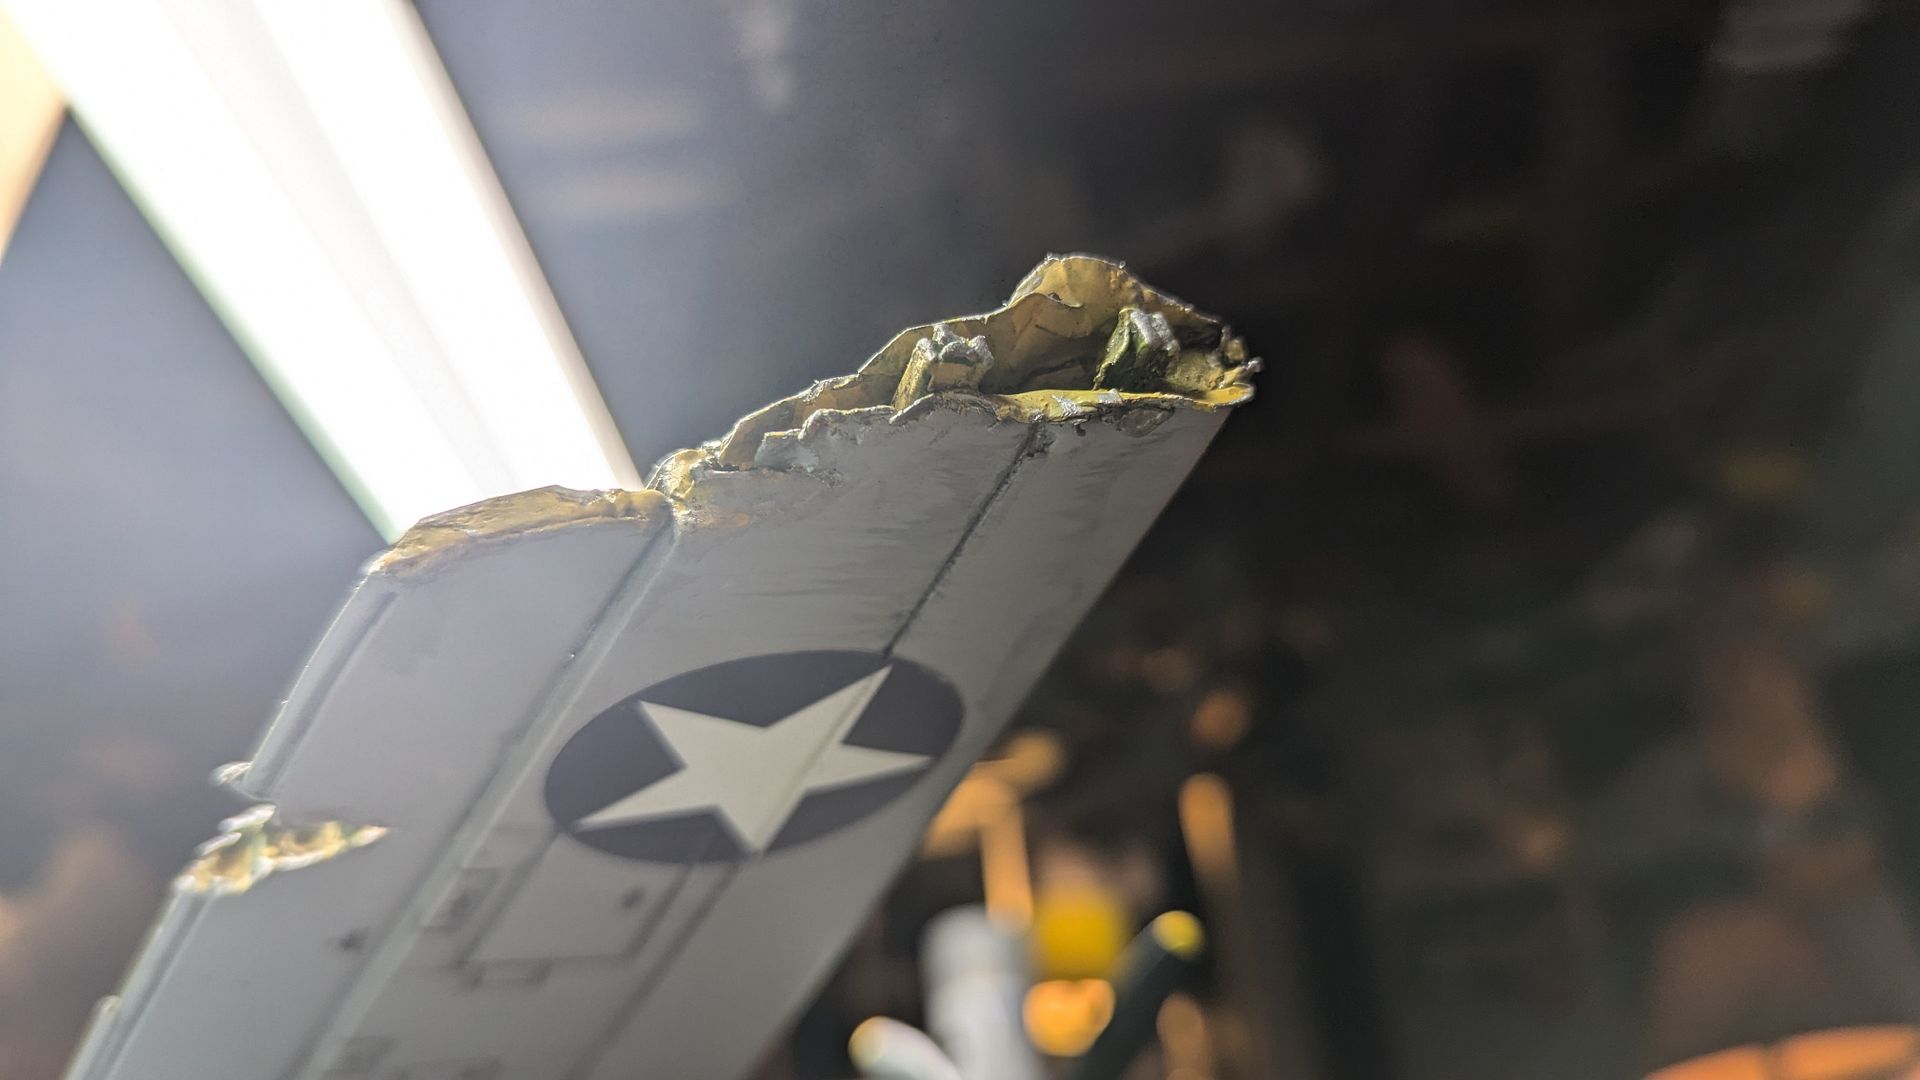
BUT WAIT! What about the damaged starboard wing?! Well that is technically the LAST thing I need to do to this bird before she is ready for shipment. Thankfully the wings pop right off, so I can work solely on the one wing, without damaging the rest of the model.
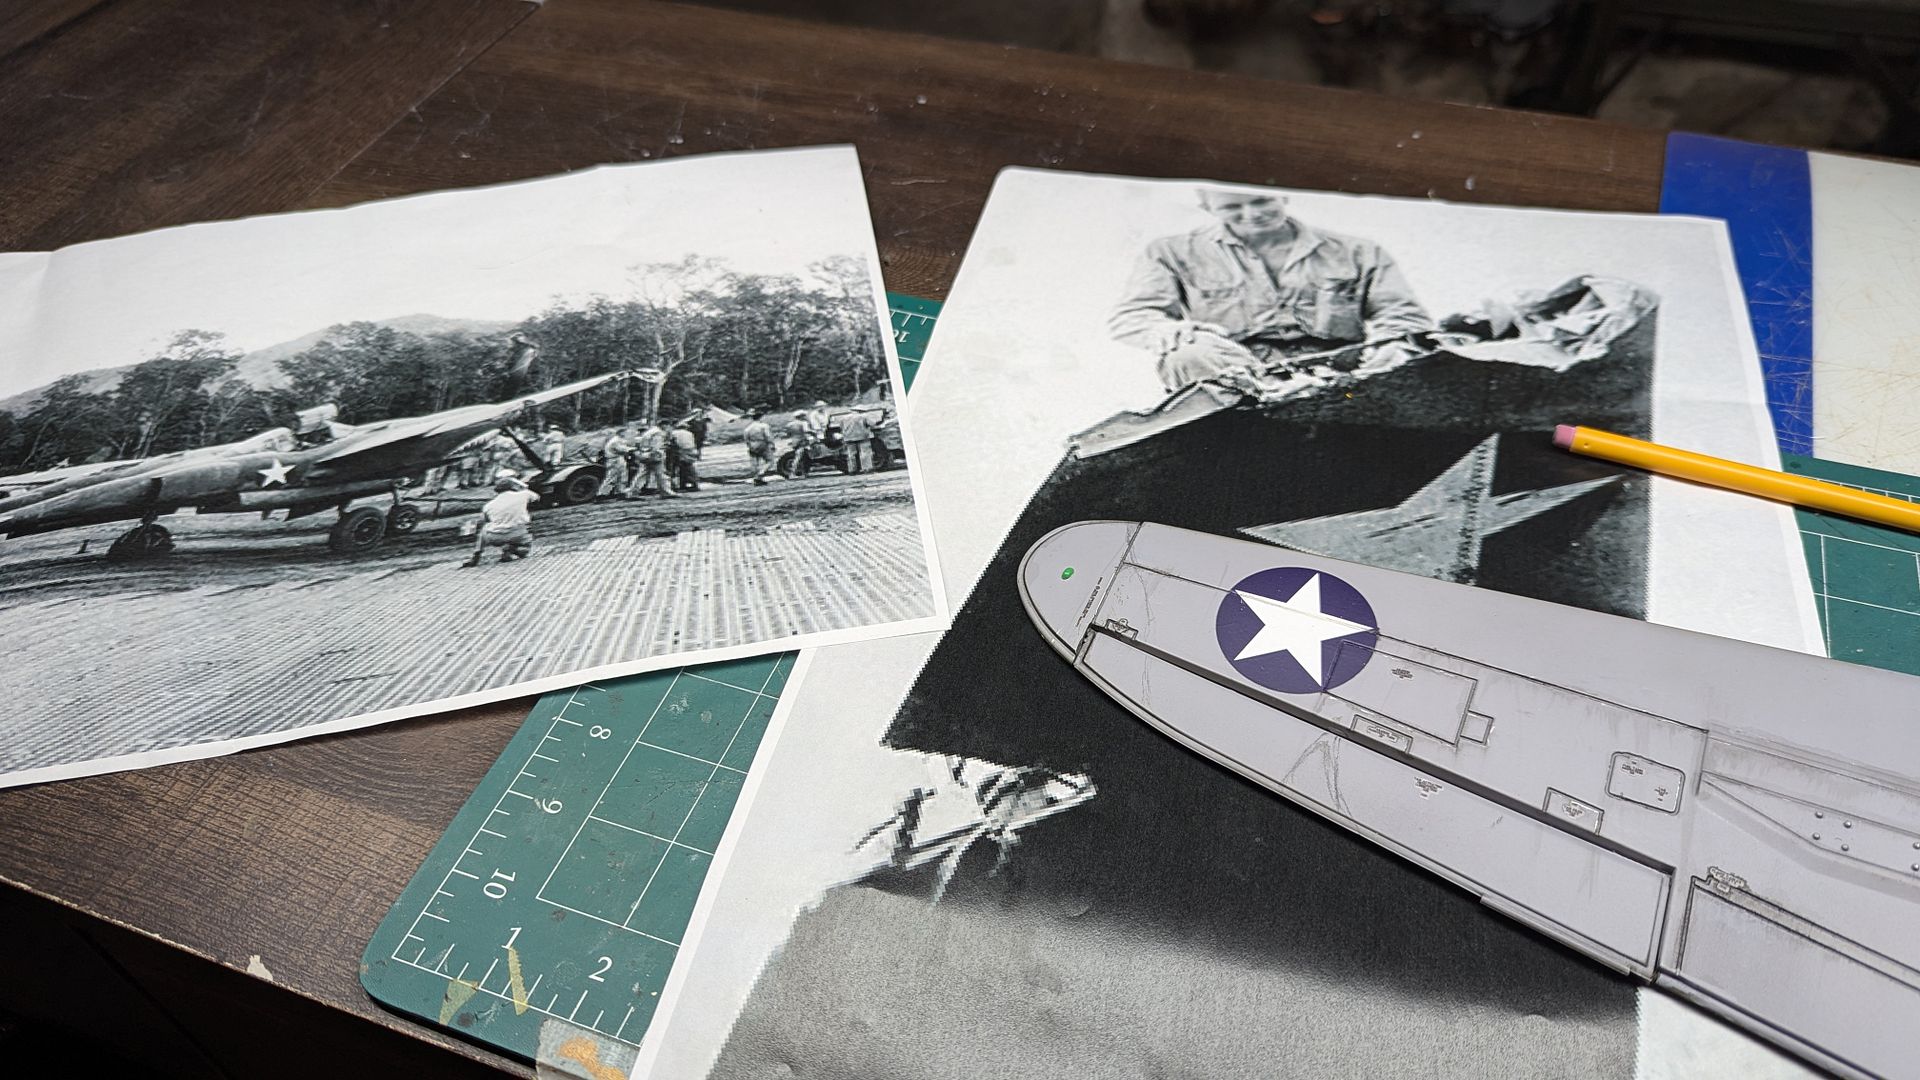
Well I finally did it... Just for the record I was not in favor of cutting up the wing, but that's what the customer wanted!
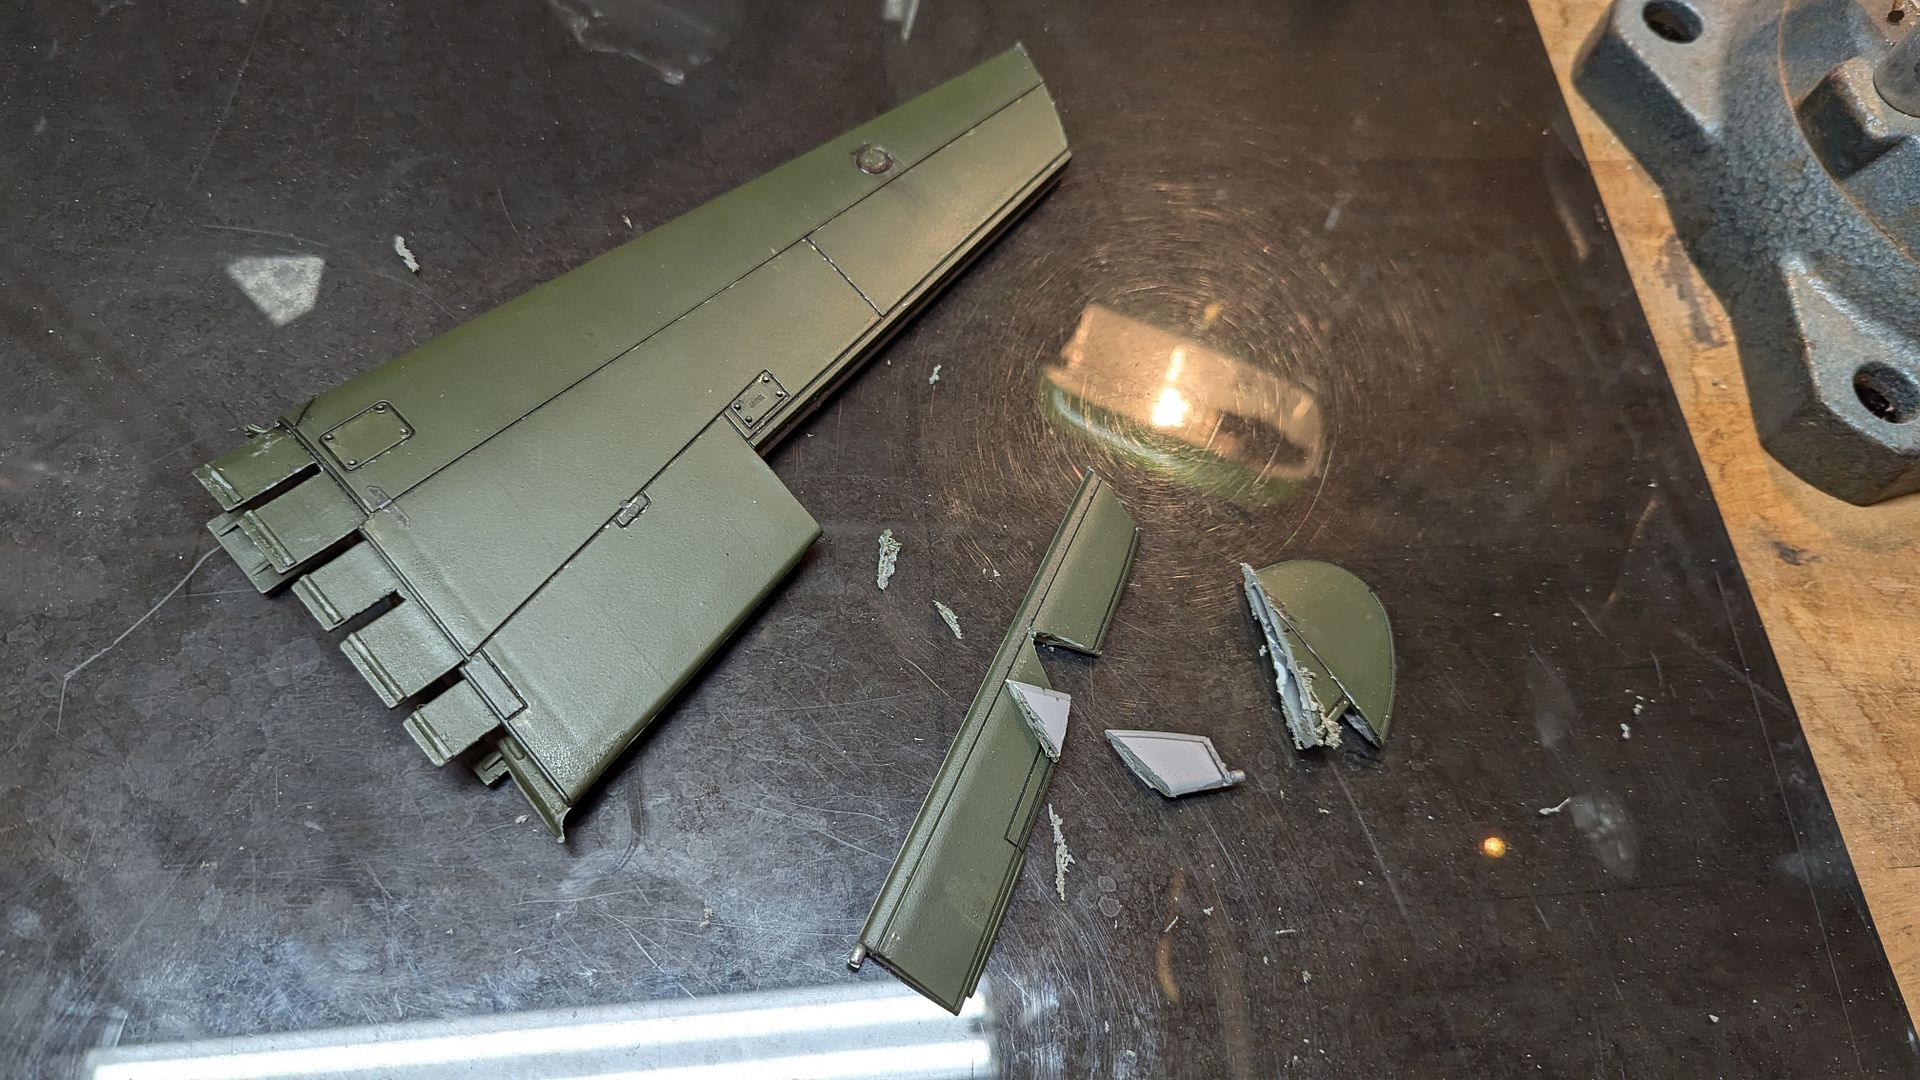
I used some styrene I glued into lace, and then with clippers and tweezers I bent and shredded the "metal" so it would look more accurate. I also used putty to smoothen out the transition between the original wing and these damaged sections.
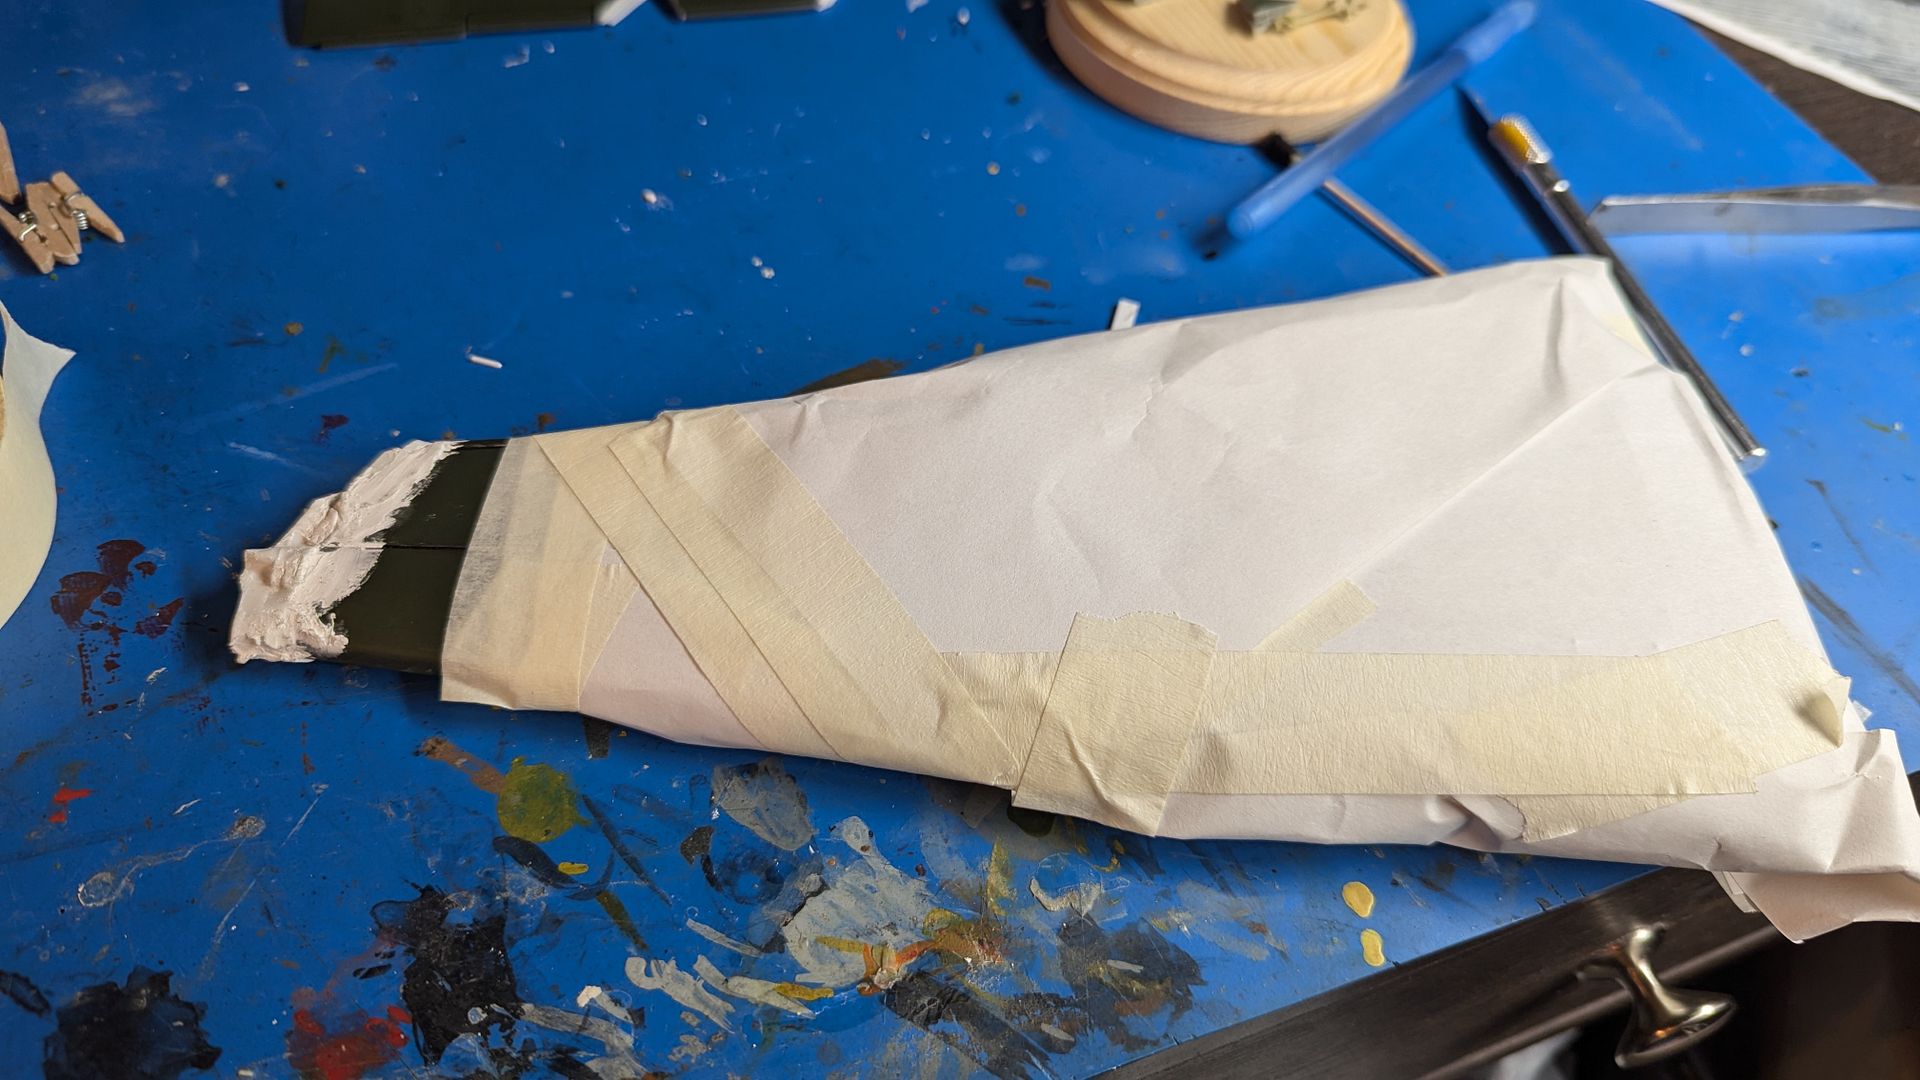
After this process I used a light yellow interior zinc chromate along with some darker greens. I also made sure to use aluminum on the edges to show bare metal.
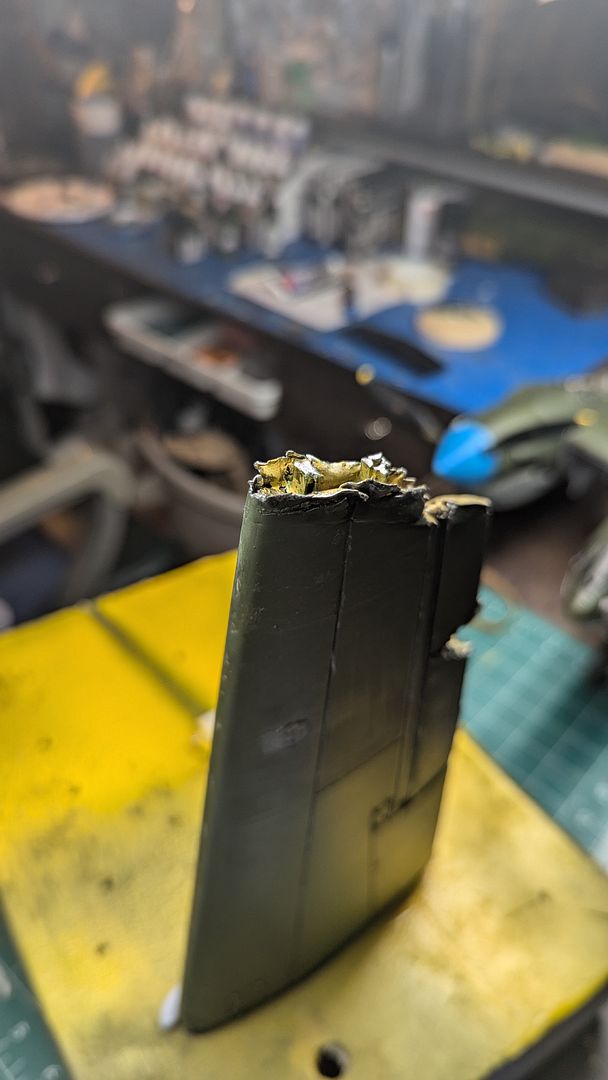
After a few passes I deemed it to be good enough for me, and clear coated the entire wing.
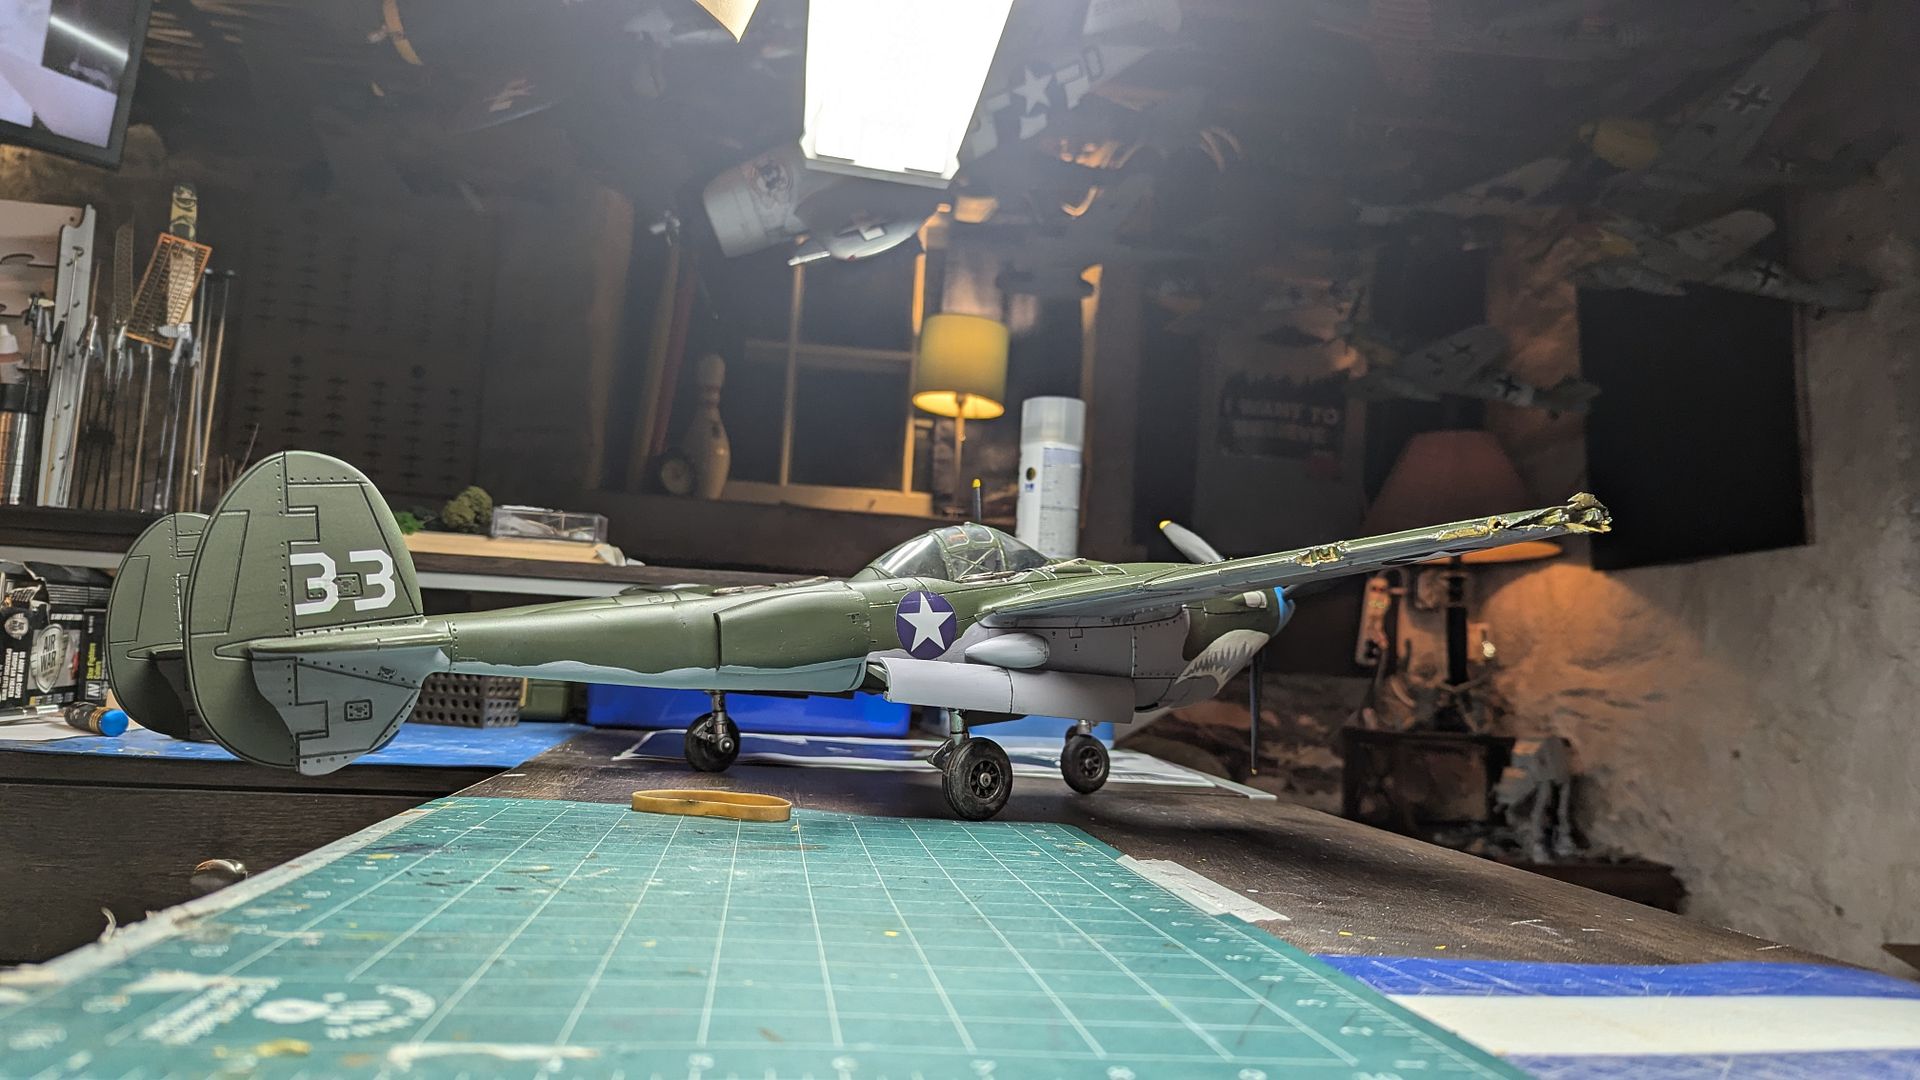
A couple of comparison shots

Mine...
...and the original

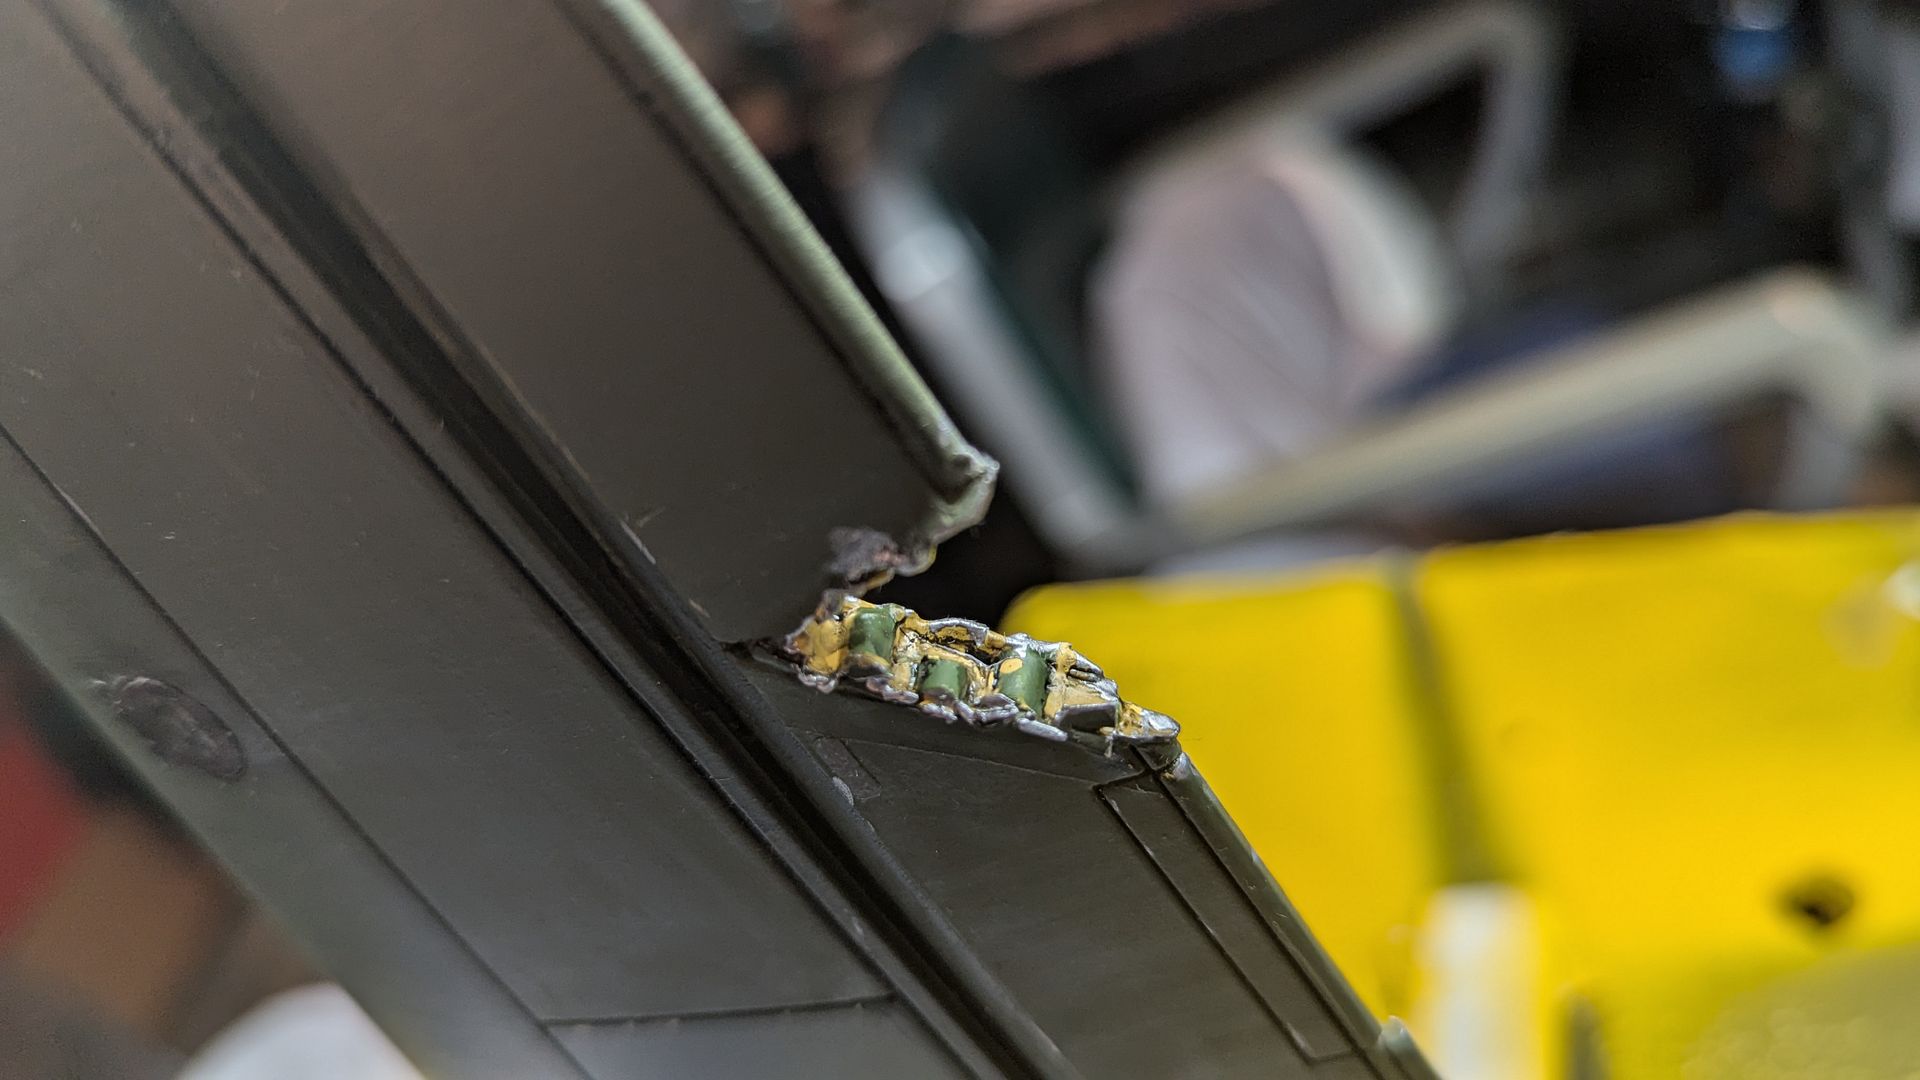
Overall I'd say I'm pretty pleased with the final result. Its pretty close and for my second freelance / hired project, i think it's pretty close to what they were asking for.
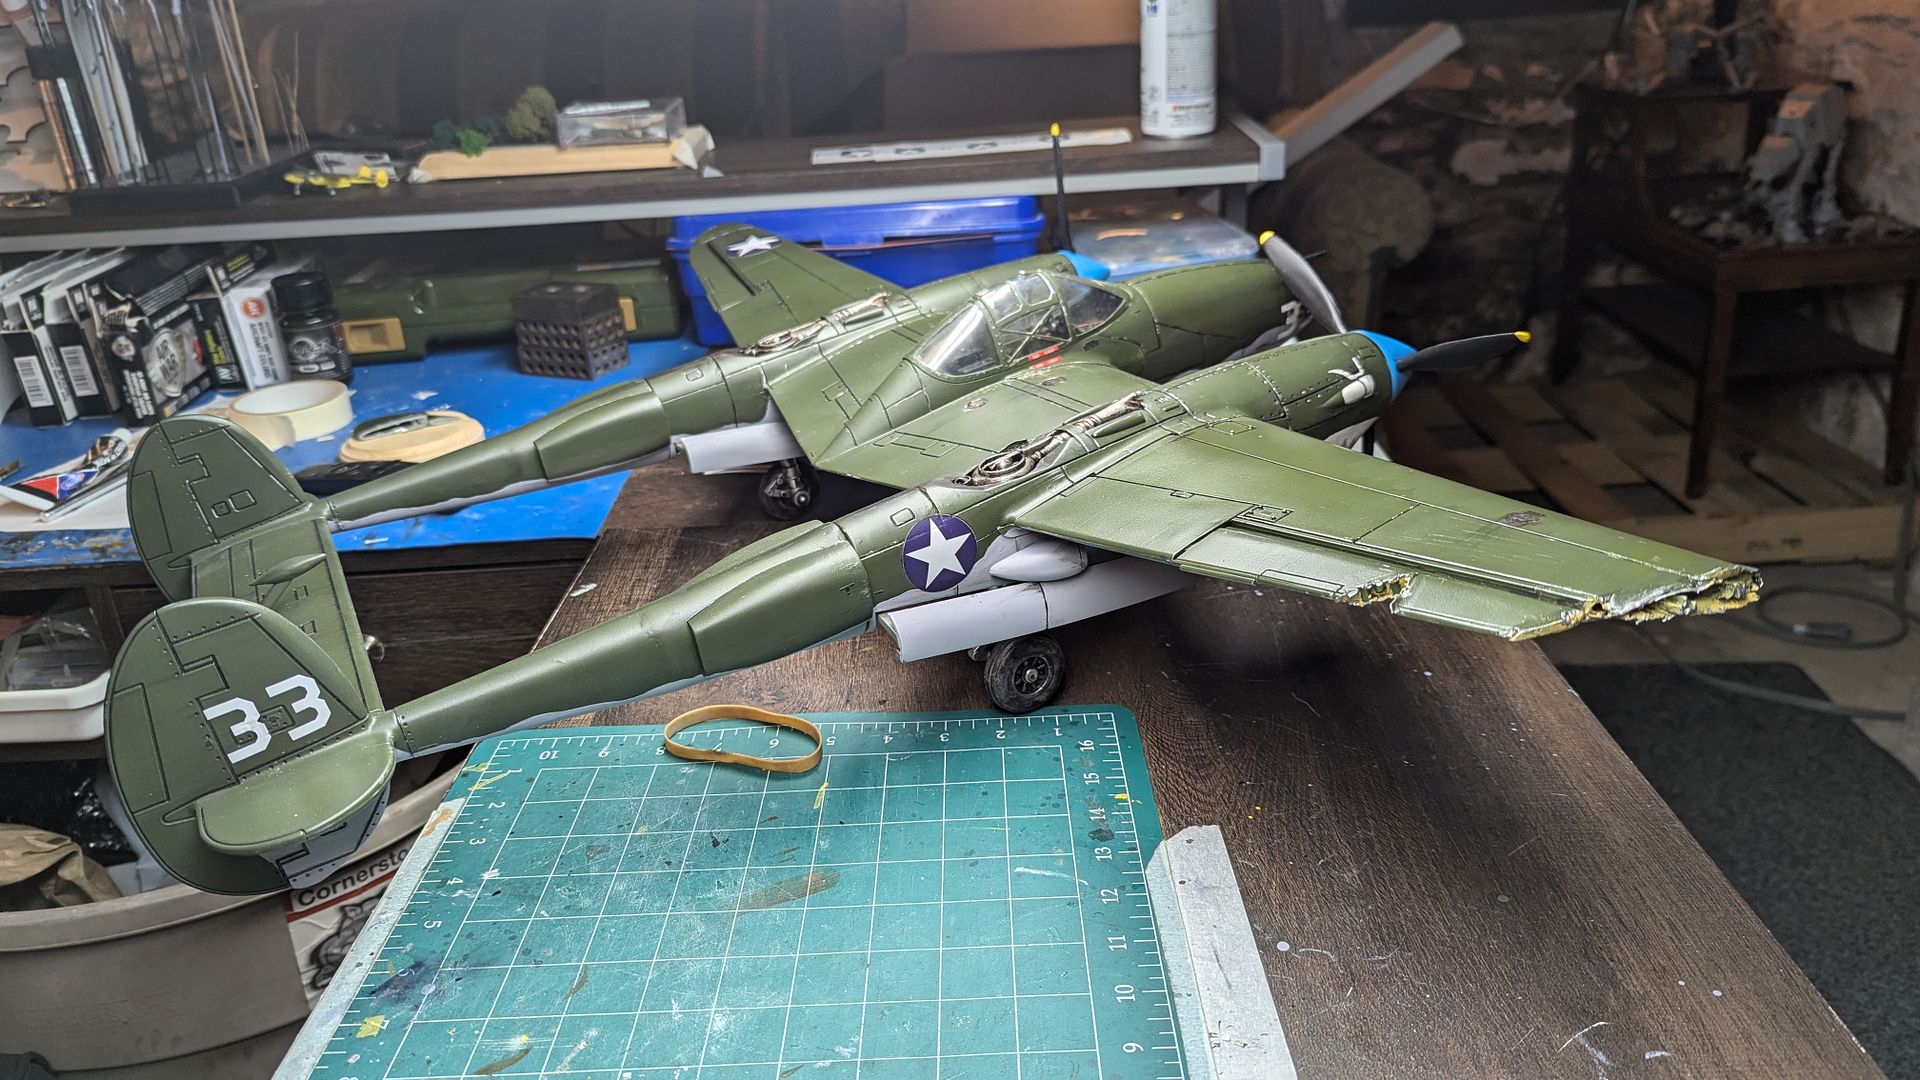
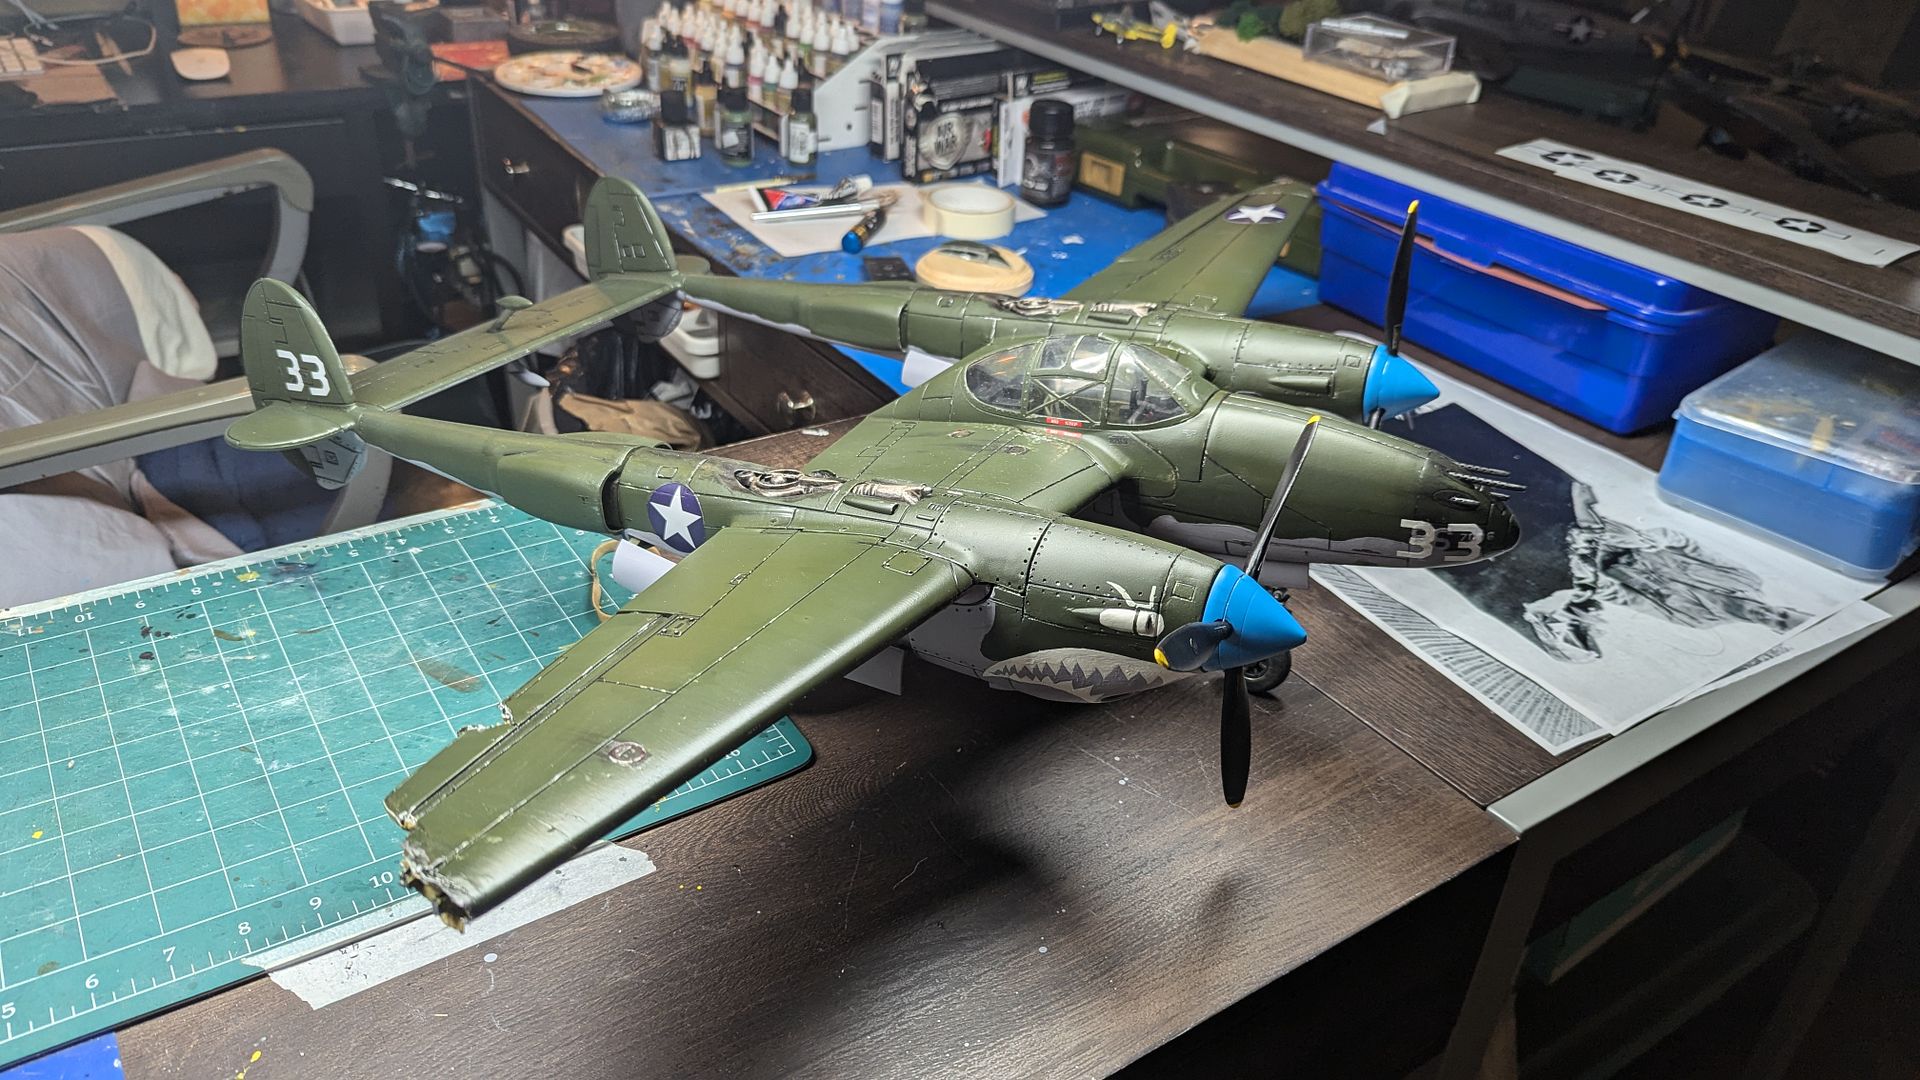
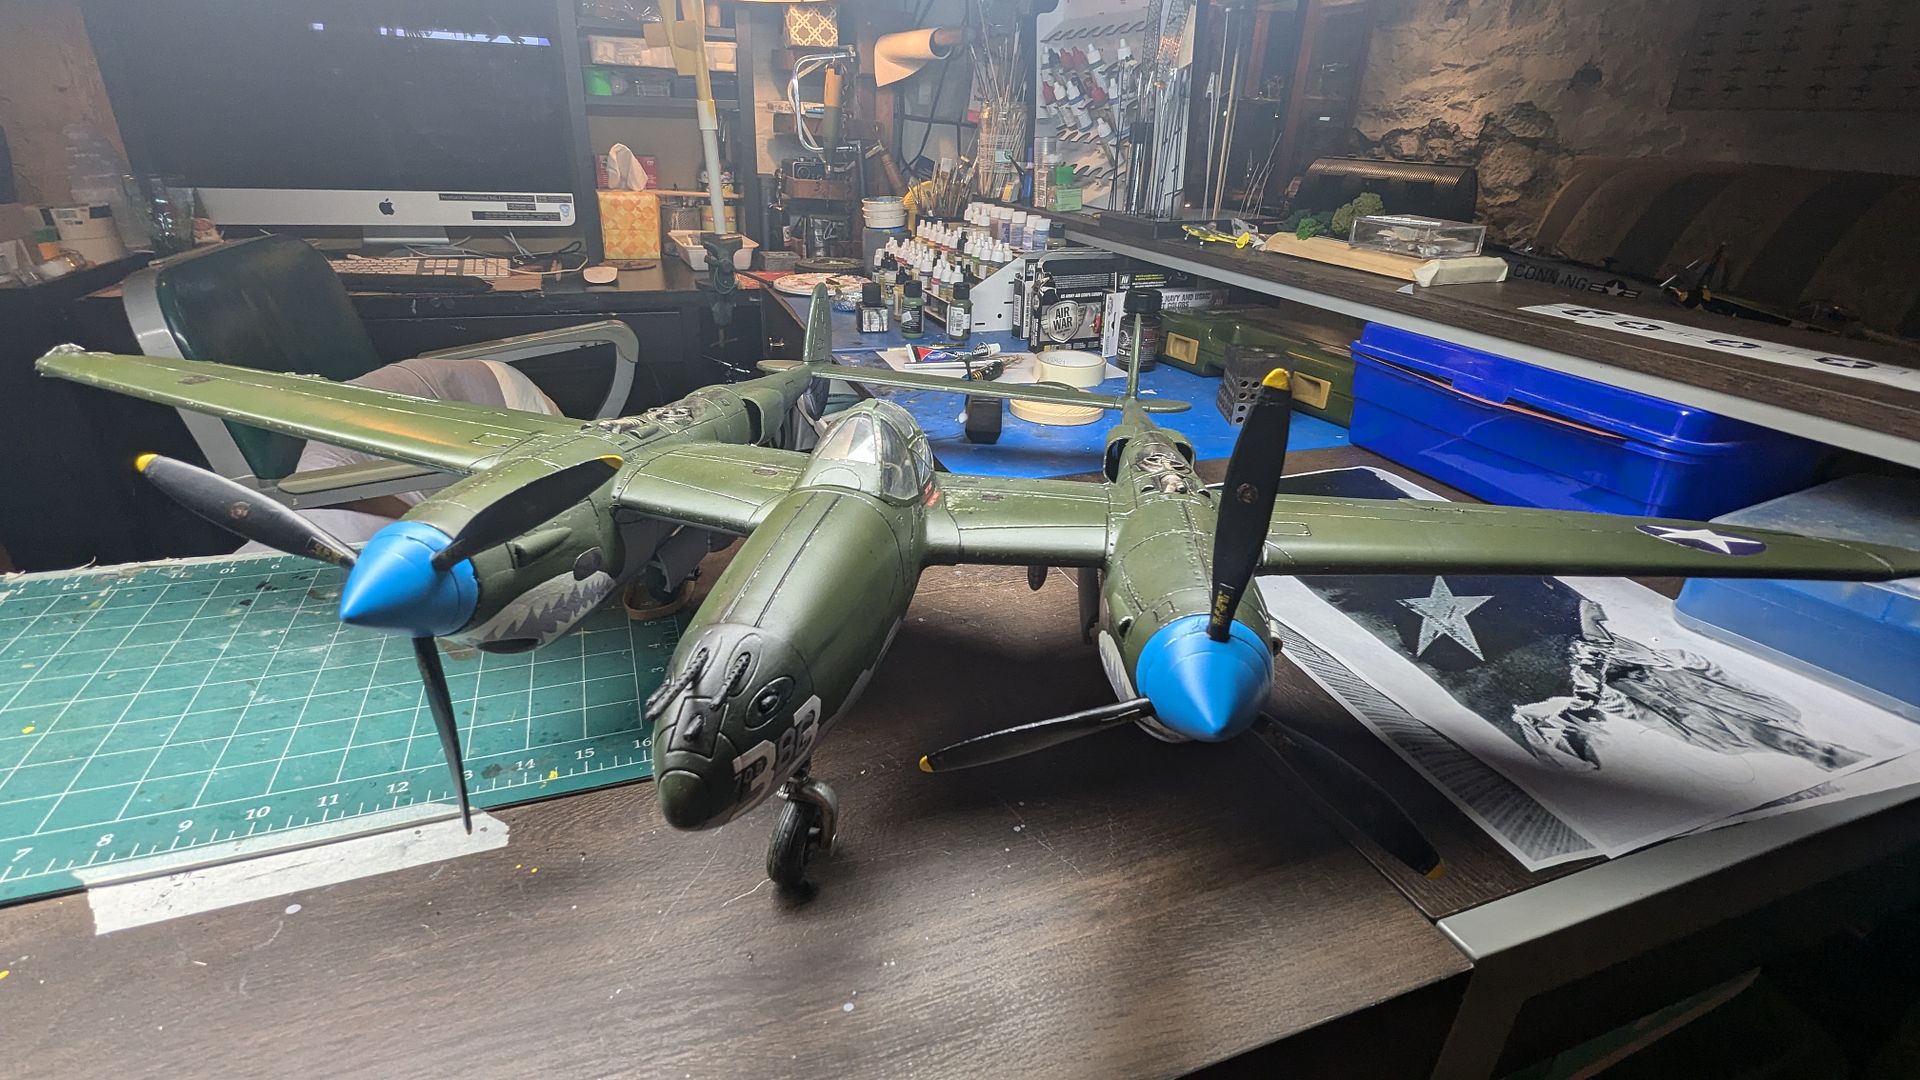
Now that she is completed it is being shipped to the National Museum of World War II Aviation in Colorado Springs, where it will go on display next to the real "White 33" at the which would be a huge honor. Thanks for watching!


