Warbird Information Exchange

DISCLAIMER: The views expressed on this site are the responsibility of the poster and do not reflect the views of the management.
It is currently Tue Apr 16, 2024 9:06 am

All times are UTC - 5 hours


Classic Wings Magazine WWII Naval Aviation Research Pacific Luftwaffe Resource Center
When Hollywood Ruled The Skies - Volumes 1 through 4 by Bruce Oriss


Post new topic Reply to topic  [ 13 posts ] 
Author Message
PostPosted: Sat Jul 23, 2011 11:18 am 
Offline
User avatar

Joined: Thu Aug 16, 2007 4:04 pm
Posts: 641
Location: Central Texas
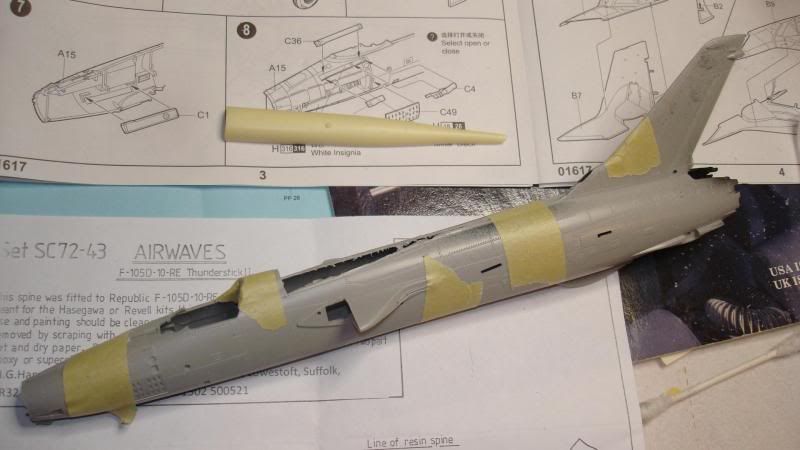
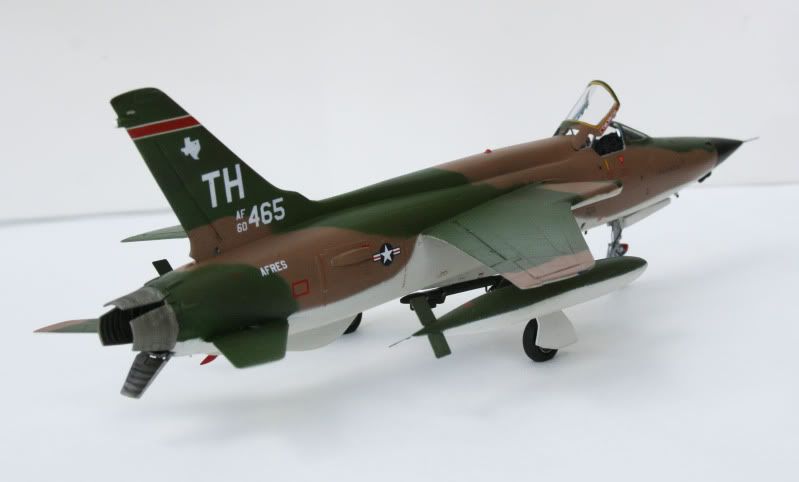
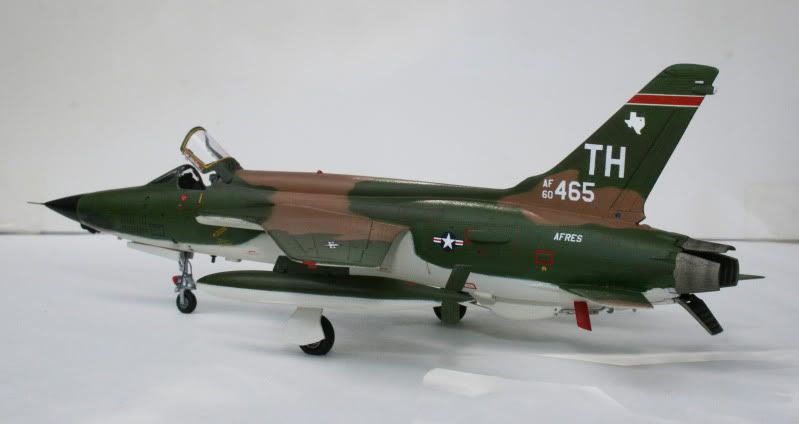
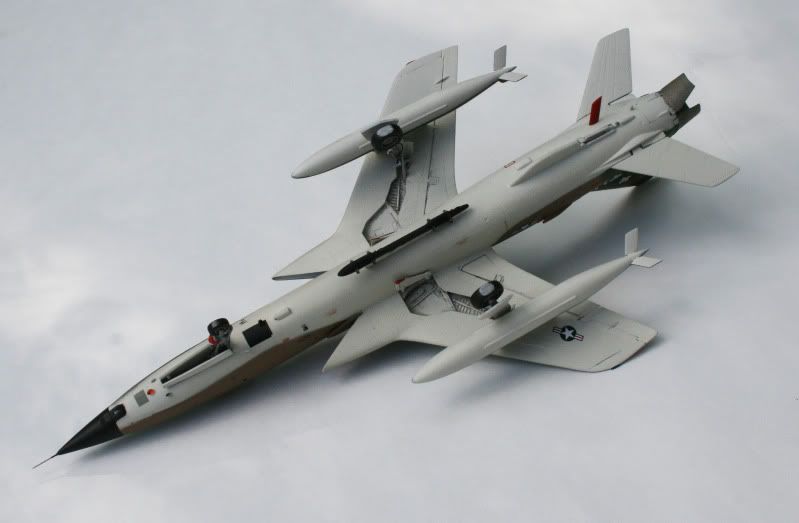
Here is my latest completed build, the 1/72 Trumpeter F-105D Thunderchief. I combined this kit with the Airwaves Resin T-Stick II spine to create a Thud from the 457th Texas Air Force Reserve from Carswell AFB cira 1980.

The conversion was pretty straight forward. I used a razor saw to remove the kit spine and once the fuselage was glues together, I super glued the new resin spine in place and filled and sanded it to fit.

Image

Image


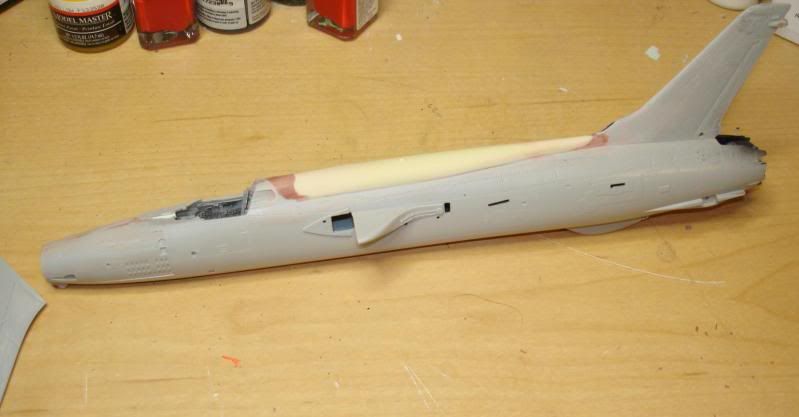
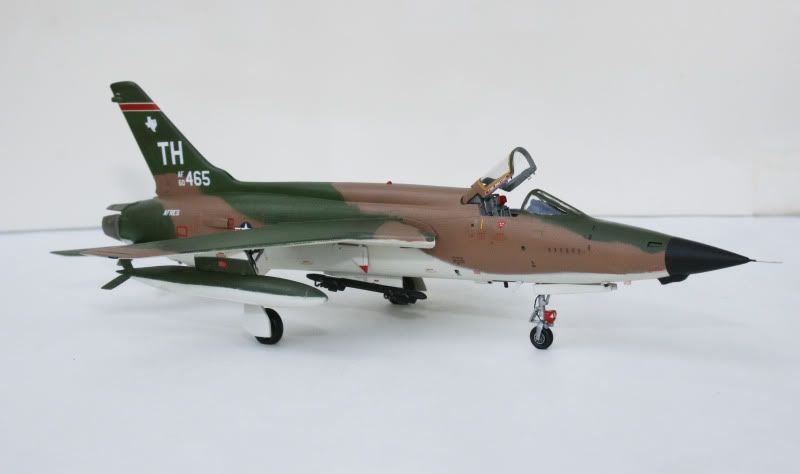
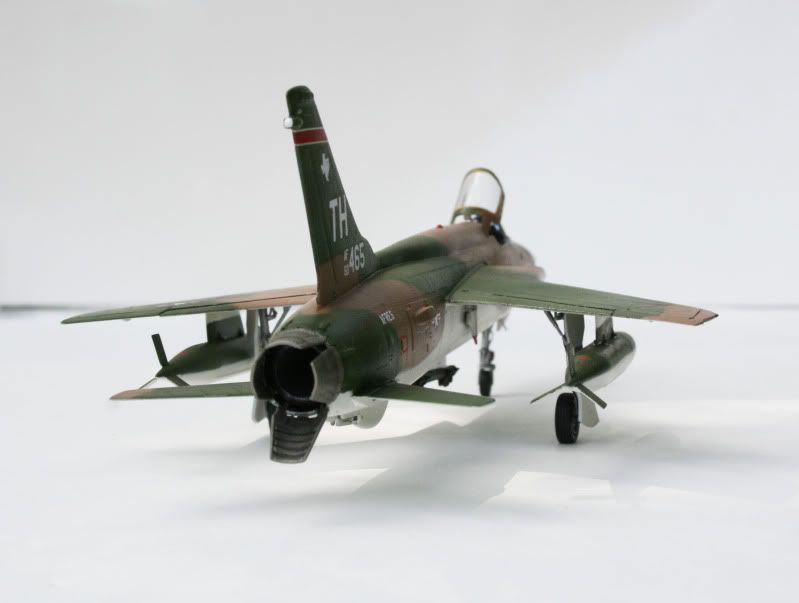
The Trumpeter Thud is a nice kit, much better than the ancient Hasegawa offering. One thing to watch out for is the exhaust pipe – the kit would have you place it too far into the fuselage. It should be just about even with the end of the fuselage. The main gear is also a bit tricky to get right. I did replace the cockpit and wheels with Aires Resin sets. I also replace the engine cooling scoops on the fuselage sides with Quickboost parts. I used a centerline MER and pylon from the spares box – it might be from a Monogram Thud kit come to think of it. I also added brake lines to the gear with fine copper wire.

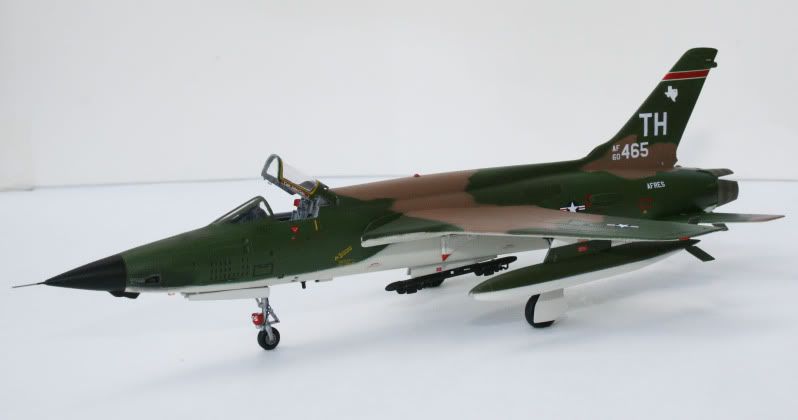
The model was painted with Model Master enamels sprayed with my trusty Paasche H airbrush.

The decals were the tough part. I’ve wanted to do a Texas AFRES bird for a while but the decals were always the problem. When I saw one of the latest boxing of the afore mentioned Hasegawa kit had them, I had to pick this one up just for the decals (sad I know). When I started using them on the model however, I was disappointed to see that the Hasegawa white isn’t really white. It was more of an off-white color, drat. This didn’t fly with me and being the perfectionist that I am (which is why I only seem to finish something every 3 or months), this wasn’t going to work. Luckily I had the presence of mind to scan the Hasegawa sheet before I used it. I had a replacement set made in pure white and I was all set. The stencils and other various markings are from the Trumpeter kit and various Microscale decals from my spare decal collection.


Image

Image

Image

Image

Image

Image


I've got several other kits in the works, hopefully I can get another one finished up soon :)

-Derek


Top
 Profile  
 
PostPosted: Sun Jul 24, 2011 12:17 pm 
Offline
User avatar

Joined: Sun Jun 07, 2009 1:13 pm
Posts: 671
Location: Indiana
Great job!

_________________
Image


Top
 Profile  
 
PostPosted: Sun Jul 24, 2011 4:55 pm 
Offline
3000+ Post Club
3000+ Post Club
User avatar

Joined: Fri Mar 02, 2007 6:52 pm
Posts: 3399
Location: Wichita Falls, Texas, USA
Very good work. I especially like the drooped exhaust petal. :)


Top
 Profile  
 
PostPosted: Sun Jul 24, 2011 8:00 pm 
Offline
Long Time Member
Long Time Member

Joined: Sat Dec 22, 2007 12:36 am
Posts: 7961
Location: Mt. Vernon, WA.
which was also the speed brake-looks very nice and you did a great job on every aspect of the build! :supz:

_________________
Don't make me go get my flying monkeys-


Top
 Profile  
 
PostPosted: Sun Jul 24, 2011 9:31 pm 
Offline
3000+ Post Club
3000+ Post Club

Joined: Thu Dec 21, 2006 8:32 am
Posts: 4310
Location: Battle Creek, MI
Very sharp! I always wondered why that lover exhaust panel drooped like that.

SN


Top
 Profile  
 
PostPosted: Tue Aug 09, 2011 2:57 pm 
Offline
2000+ Post Club
2000+ Post Club
User avatar

Joined: Thu Sep 23, 2004 3:00 pm
Posts: 2128
Location: Utah
I am jealous! great job and I to have wondered about the exhaust petal drooping - thanks!

Tom P.


Top
 Profile  
 
PostPosted: Tue Aug 09, 2011 3:18 pm 
Offline
1000+ Posts!
1000+ Posts!
User avatar

Joined: Wed Oct 03, 2007 3:22 pm
Posts: 1776
Location: Seattle
Fantastic!

_________________
-Al Sauer
http://www.flickr.com/photos/spookythecat


Top
 Profile  
 
PostPosted: Tue Aug 09, 2011 3:19 pm 
Offline
3000+ Post Club
3000+ Post Club
User avatar

Joined: Fri Mar 02, 2007 6:52 pm
Posts: 3399
Location: Wichita Falls, Texas, USA
Yep, all 4 petals were used as speedbrakes. Thus, when the hydraulics bled out, the lower petal would droop. :)

http://www.burrusspta.org/themachined.html

Found that a few months ago while looking up some other history on the F-105 and it has a great picture of the pedals fully deployed on an early F-105D. I believe they didn't deploy as far on the later F-105D's and later models.


Top
 Profile  
 
PostPosted: Tue Aug 09, 2011 3:33 pm 
Offline
User avatar

Joined: Thu Aug 16, 2007 4:04 pm
Posts: 641
Location: Central Texas
Thanks for the kind words guys. Overall, I'm pretty happy with the way it turned out.

A big thanks to Jospeh Osborn of Fireball Modelworks for saving me with a replacement set of decals. If it wasn't for him it wouldn't have turned out as nicely as it did...

-Derek


Top
 Profile  
 
PostPosted: Tue Aug 09, 2011 3:36 pm 
Offline
Account Suspended
User avatar

Joined: Wed Nov 14, 2007 3:06 pm
Posts: 2713
Awesome Job! :drink3:

Much sweeter than my old Revel 1:72 Build

_________________
S.


Top
 Profile  
 
PostPosted: Tue Aug 09, 2011 4:34 pm 
Offline
User avatar

Joined: Tue Jul 31, 2007 12:12 am
Posts: 901
Location: Just outside of Grosse Ile N.A.S.
Wow, you seem to be pretty handy with an airbrush :shock:
Good job, great subject. Thanks for sharing.


Top
 Profile  
 
PostPosted: Thu Aug 11, 2011 7:26 am 
Offline
User avatar

Joined: Thu Aug 16, 2007 4:04 pm
Posts: 641
Location: Central Texas
mazdaP5 wrote:
Wow, you seem to be pretty handy with an airbrush :shock:
Good job, great subject. Thanks for sharing.


Thanks but I'm not really that handy with my airbrush. It still give me fits occasionally...

To paint my F-105, I blew up a drawing of the SEA Camo to 1/72 on my copier at work. Then I cut out the pattern and used blue tack to hold to the model as I sprayed the different colors. The blue tack lifts the mask off of the surface a bit to give the edge a slightly feathered look. Then when it was all done I had the usual retouching here and there to fix some overspray. Flat areas like the wings and vertical stab are no sweat, it's just the curved areas where I have trouble with the overspray.

-Derek


Top
 Profile  
 
PostPosted: Mon Sep 03, 2012 12:17 pm 
Offline
User avatar

Joined: Wed Aug 29, 2012 11:00 am
Posts: 45
Location: DTW
That is a great looking Thud

_________________
Lead Aircraft Mechanic
Expressjet Airlines, DTW
Image


Top
 Profile  
 
Display posts from previous:  Sort by  
Post new topic Reply to topic  [ 13 posts ] 

All times are UTC - 5 hours


Who is online

Users browsing this forum: No registered users and 5 guests


You cannot post new topics in this forum
You cannot reply to topics in this forum
You cannot edit your posts in this forum
You cannot delete your posts in this forum
You cannot post attachments in this forum

Search for:
Jump to:  
Powered by phpBB® Forum Software © phpBB Group