1/160 Bachmann Miniplane P-40E
Tue Jan 03, 2023 1:00 pm
Happy New Year! For my first completed build of the year, something even I didn't expect myself to do. And surprisingly it was a pretty fast turn around. Started in December and finished in January!
Background:
Growing up, my father would tell me about these little scale plastic model planes (some very close to 1/144th scale) that he had when he was a kid called: Miniplanes. I was instantly fascinated by them. Eventually he found someone selling a mint Wildcat and DC3 and promptly purchased them. I thought they were the coolest and he began collecting them for the second time in his life. Especially the WWI aircraft as they were close to HO scale trains (which I had setup quite alot on the plane/train table in the basement). Today we probably have around 40 or so examples. Mostly mint or near mint examples. Some pretty beat up WWI birds that my father had plans for rebuilding. He's already redone three Fokker DR.1s and a D.VII. And I hope he eventually finds the "spark" to jump back in them. But that's where my interest in attempting to redo one of these ancient little models came from.
Why the P-40?:
One of the models I always liked was the P-40. Despite it's short comings, it was a welcome addition to my mismatched and motley crew of other 1/144th (and near 1/144th) scale models. Generally being interested in these Miniplanes recently, I was looking at some pictures of them online and was reminded of how much fun that P-40 gave me. I then thought: what would one of these crude Miniplanes look like if I gave it the standard treatment? If I tried to really rebuild this model into something more decent. Would it hold up or even compare to anything else in 1/144th scale?
Ebay Purchase:
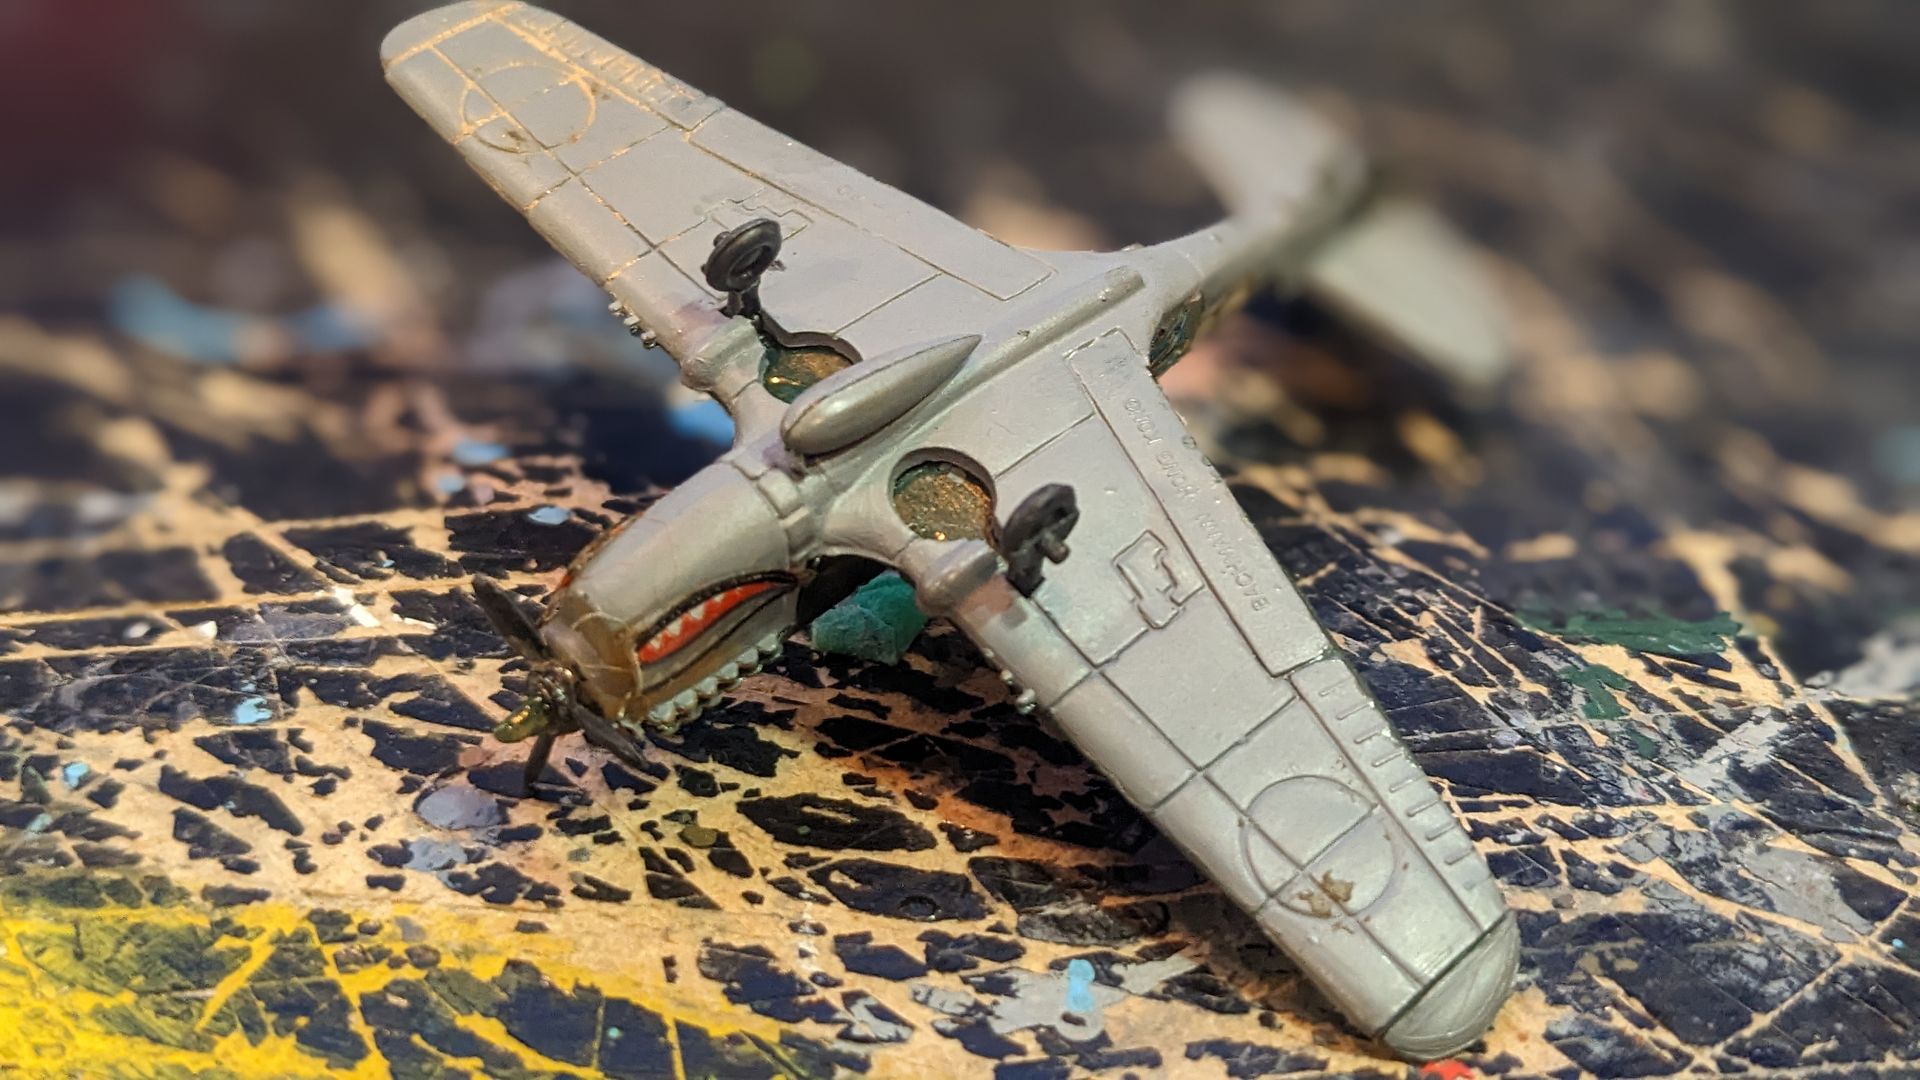
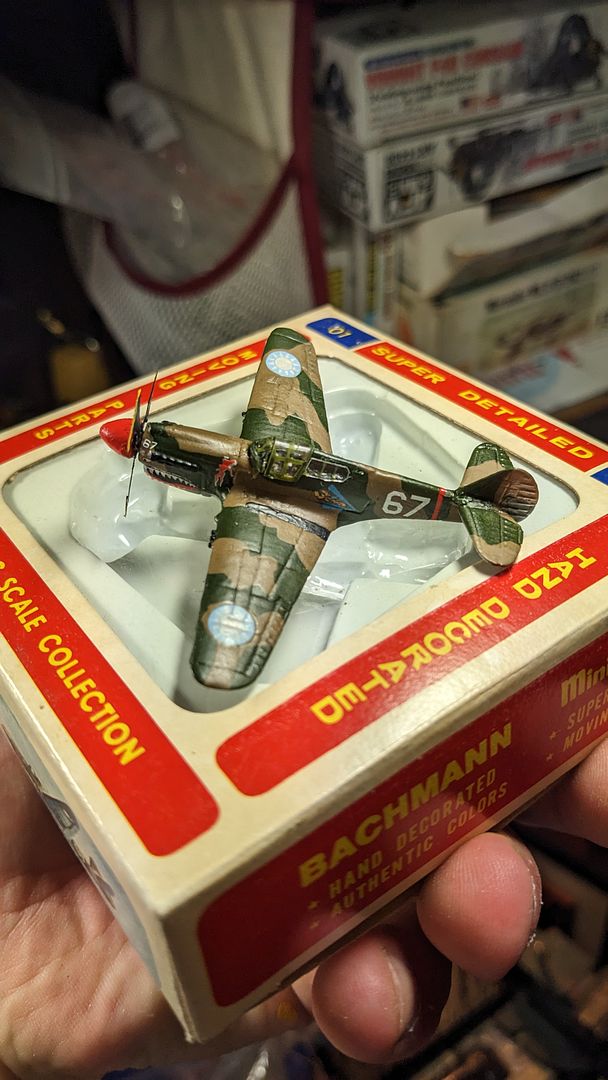
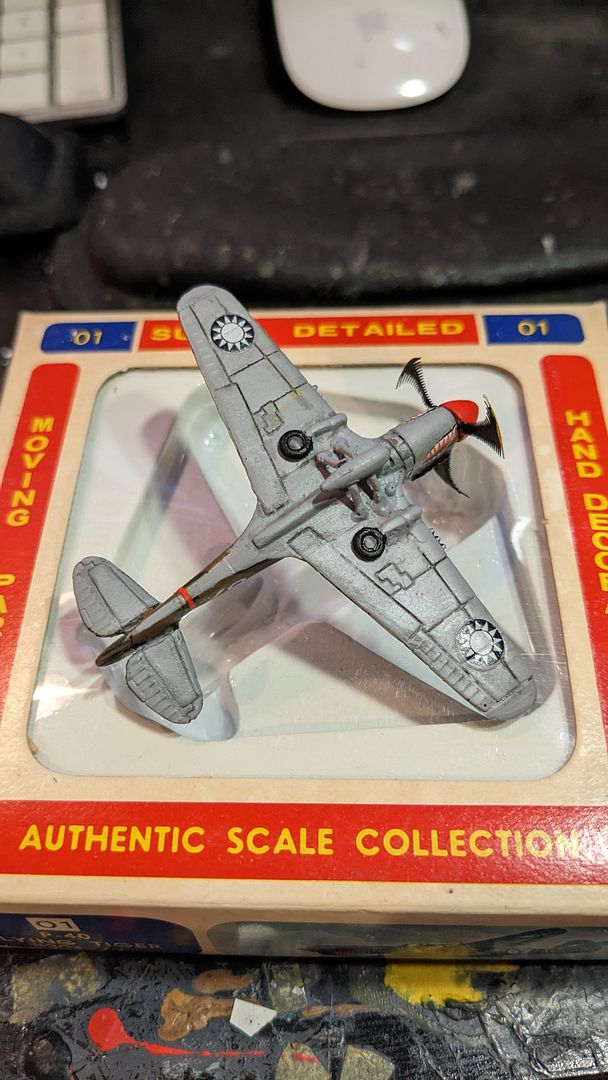
We still have the one I played with when I was a kid and (thankfully) it was still in good condition with all of its decals intact. But I wasn't prepared to butcher a complete model for my amusement. But I did find this incomplete one on ebay, costing only a total of $12.00 (including shipping). As you can see it was missing some decals along with its original prop and hub. So for me this was the perfect starting point!
Build:
My end goal was simple: to try and rebuild the Miniplane P-40 (paint scheme and all) in its best possible form. After scaling down some three view drawings to 1:160th scale, I found the overall shape of the model to be fairly accurate. The landing gear was another story. Don't remember a P-40 ever having landing gear like a P-51!? I started by filling in and sanding the incorrect wheel bays, I decided early on that a gear down model would be alot more work and opted to finish her in a flying position. I then realized just where I could utilize this model, in a larger diorama eventually. (More to come in future builds). I also cut the external tank off as it was incorrectly positioned and eventually reattached it.
Here's an early picture with the proposed donor wheels, landing gear, and prop. The prop turned out to be too small. Since I had some spare AFV Club P-40C decals lying around, I knew one would be great for at least the rondels, red fuselage band, and "Hell's Angels" emblem.
The horizontal stabs eventually "fell off" and I continued to sand and fill and holes. This including filling the entire rear decking behind the pilot. I originally used just a putty filler which I ended up regretting. Every time I tried to use a drill bit to hog out the rear windows, more material would be pulled out then I wanted, causing larger cavities. I ended up filling the space with superglue, shooting it with primer, and going back in with the drill. I had to repeat that process a few times to finally get the rear windows to a decent place.
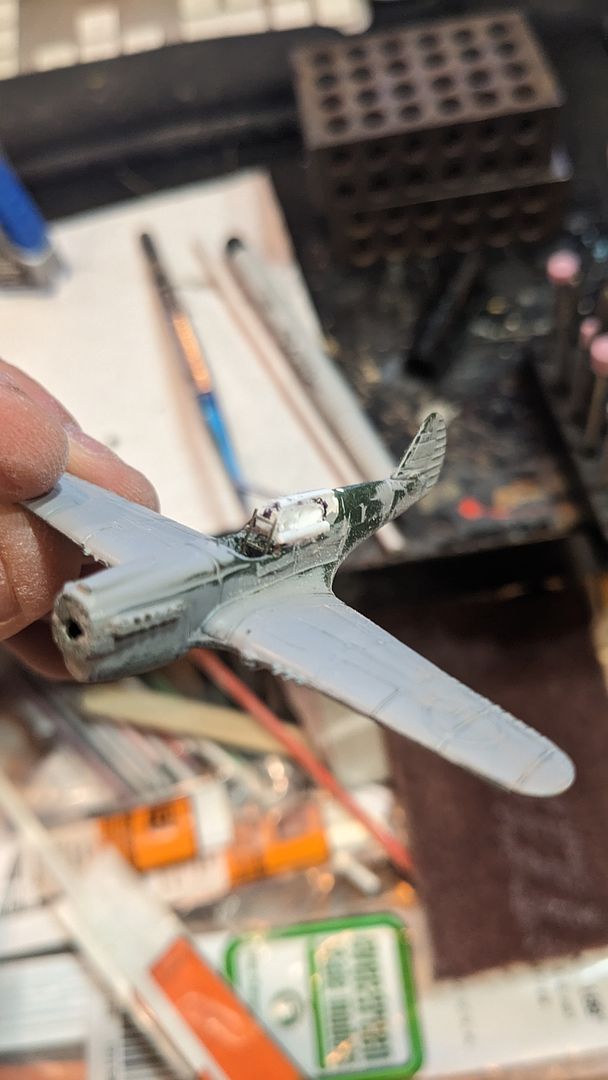
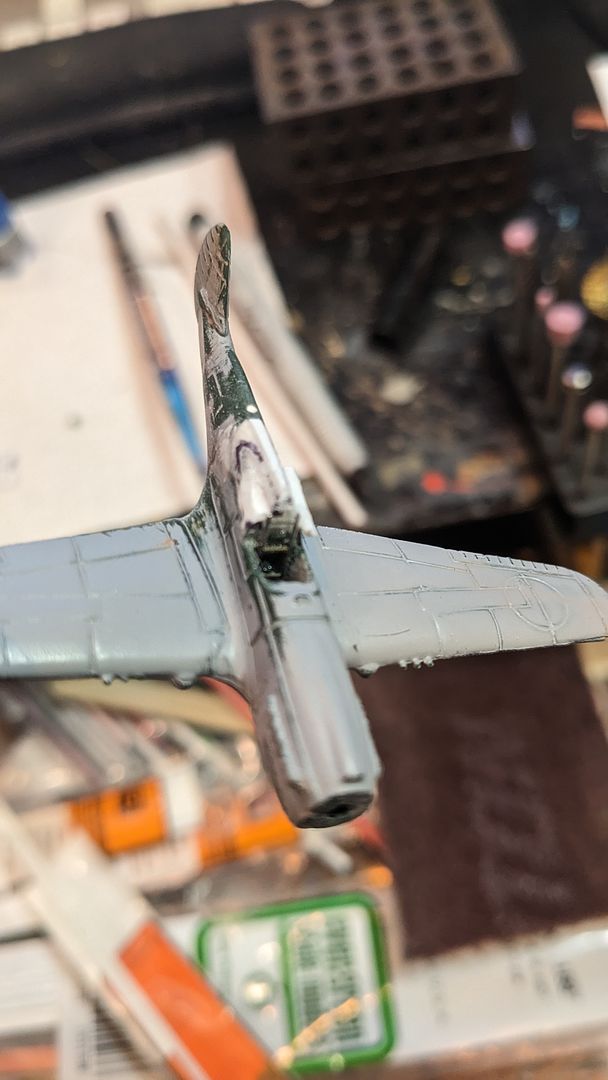
I also decided to drill out the cockpit and give it a bit of detail. I found some photoetched ladder / railings that I thought could work as the seat frame as a little extra added detail. I cut a crude instrumental panel out and painted it black, along with a head rest. I started making a seat for the pilot, but decided that it wouldn't fit with the pilot so I omitted it.
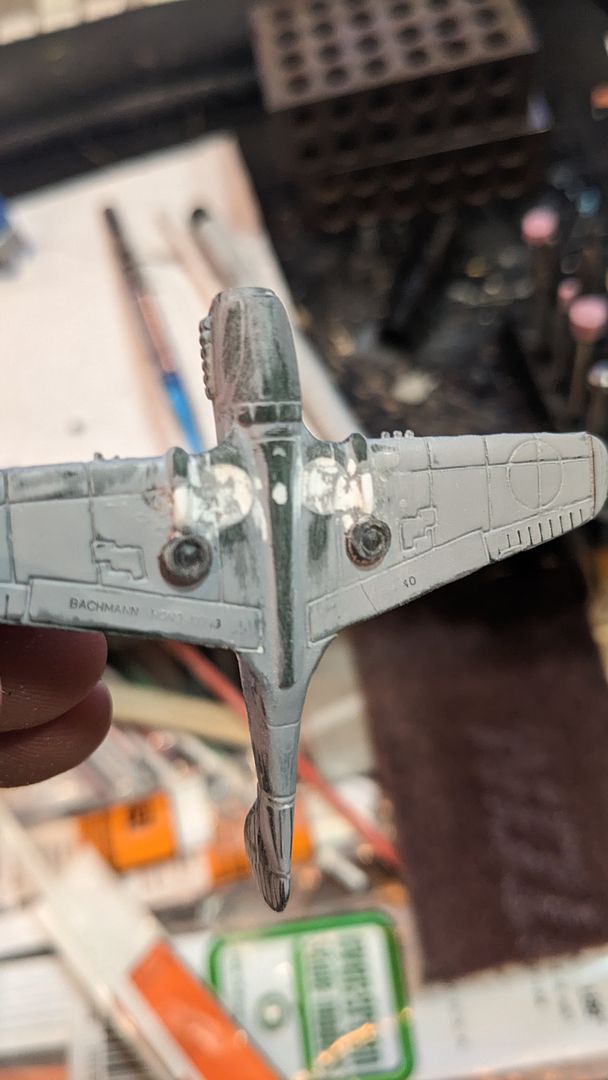
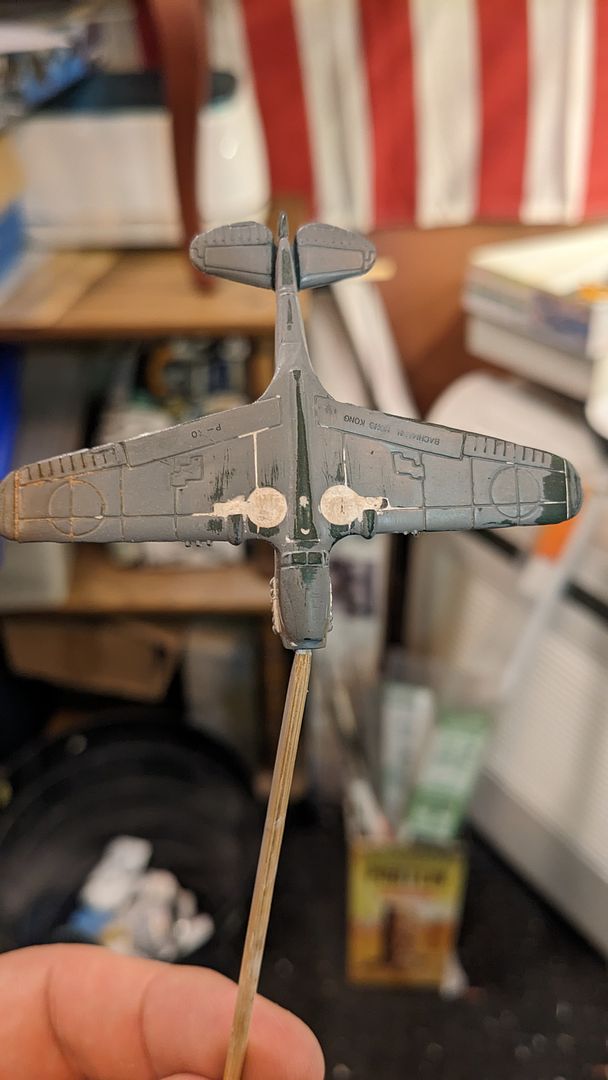
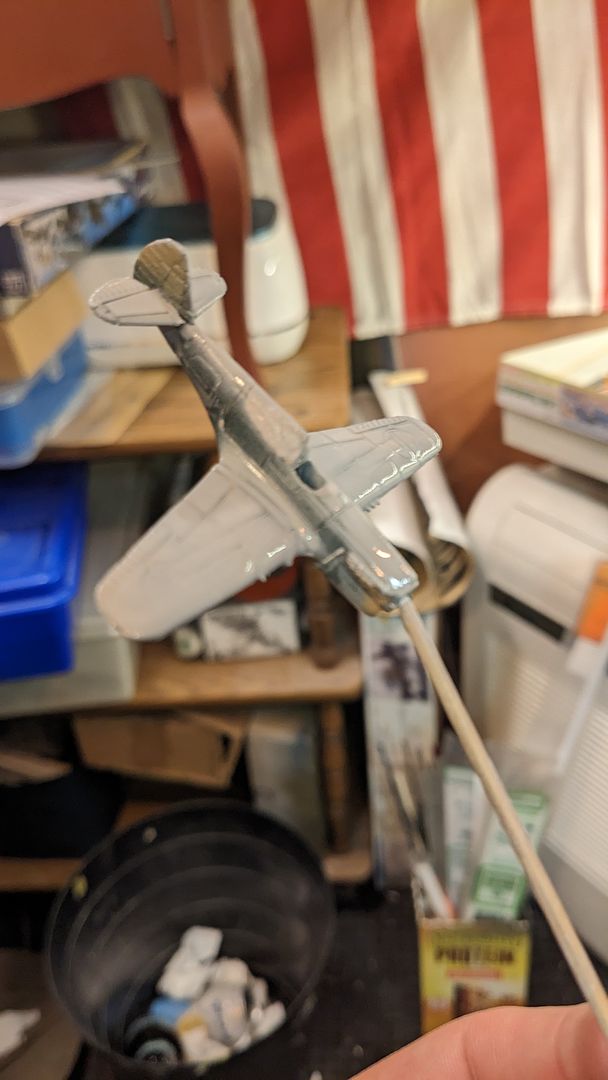
I reused the original wheels and after trying to sand them down, I glued them into position. I used some thin plastic rods as the landing gear, and sanded it together. I then added the external tank, the horizontal stabs, and primed it one last time.
I then started in on paint. I ended up using Vallejo RAF Colors and a light grey for the underside and just brushed them on.
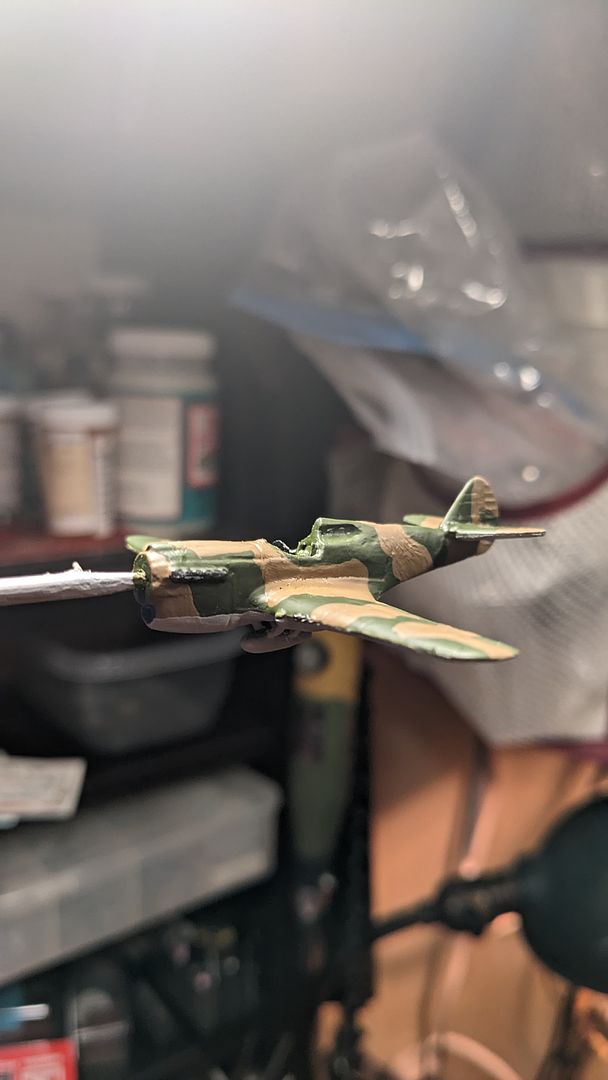
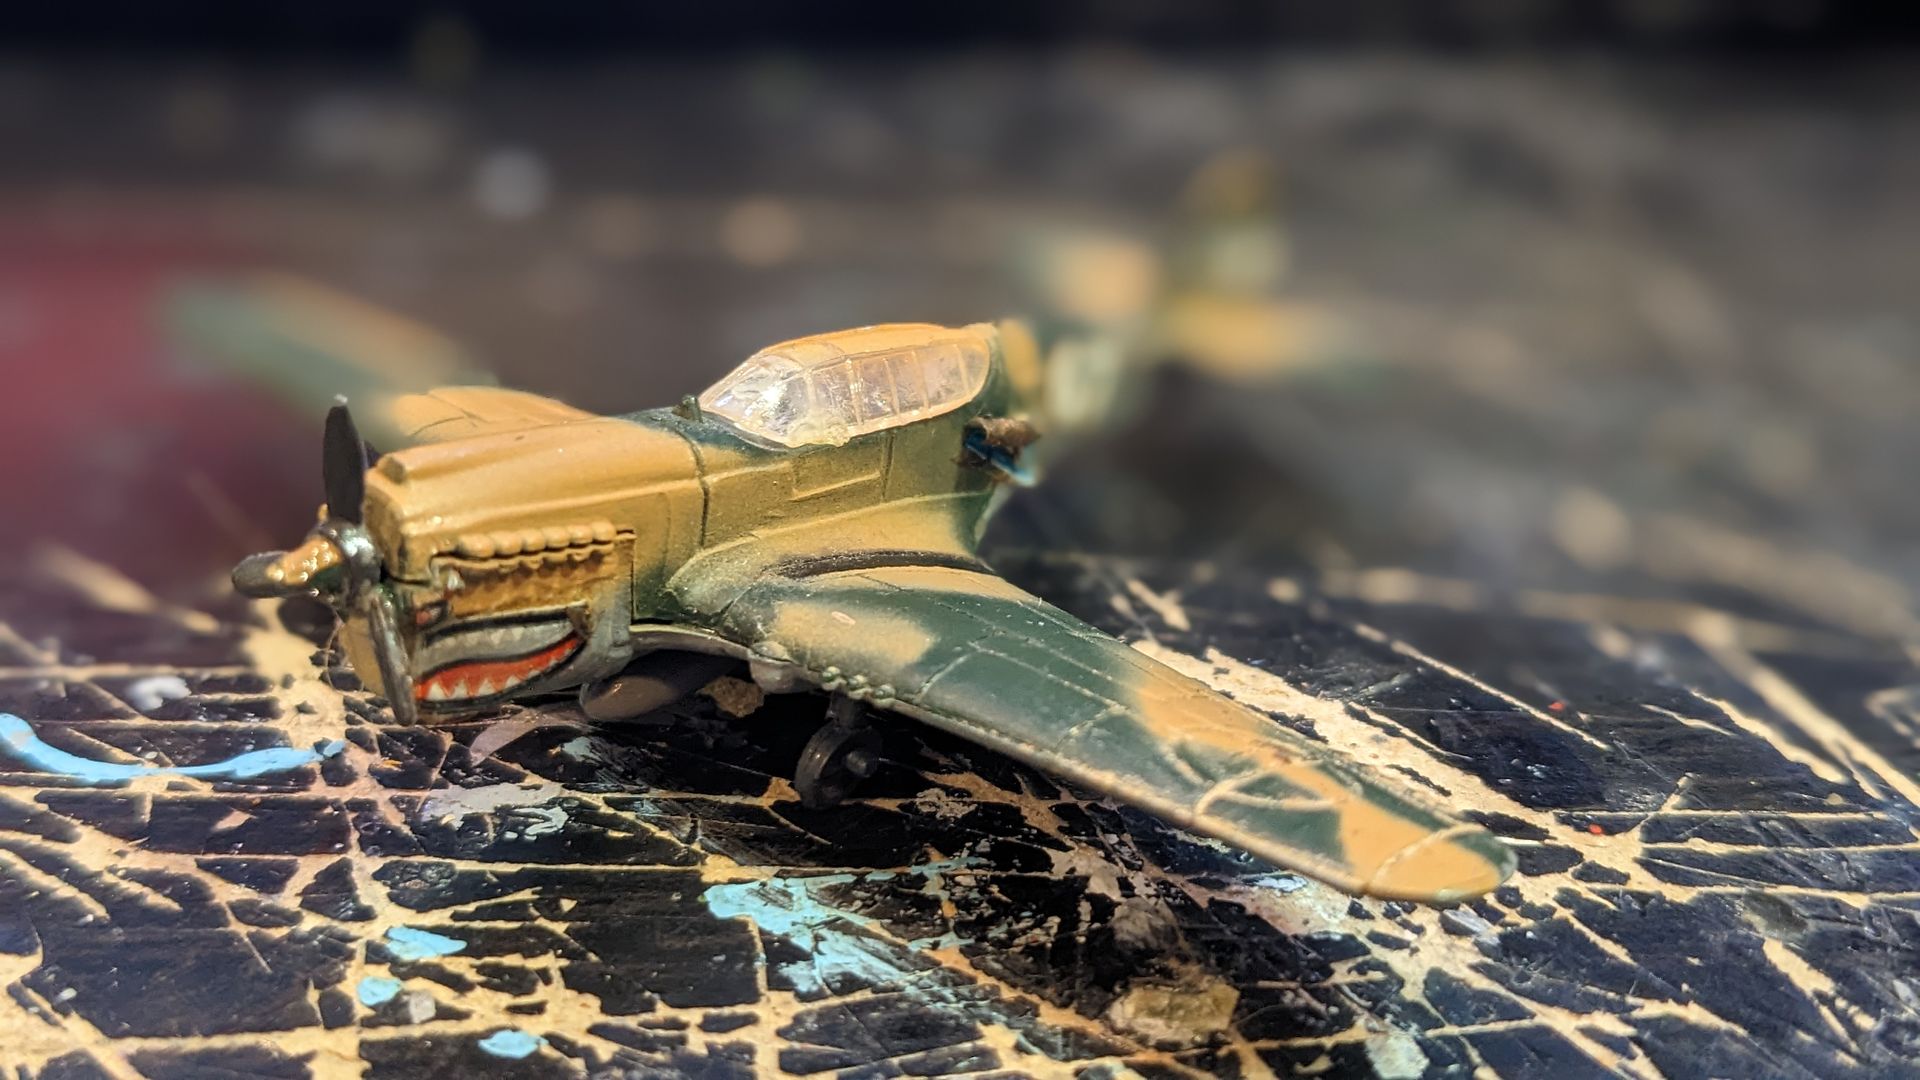
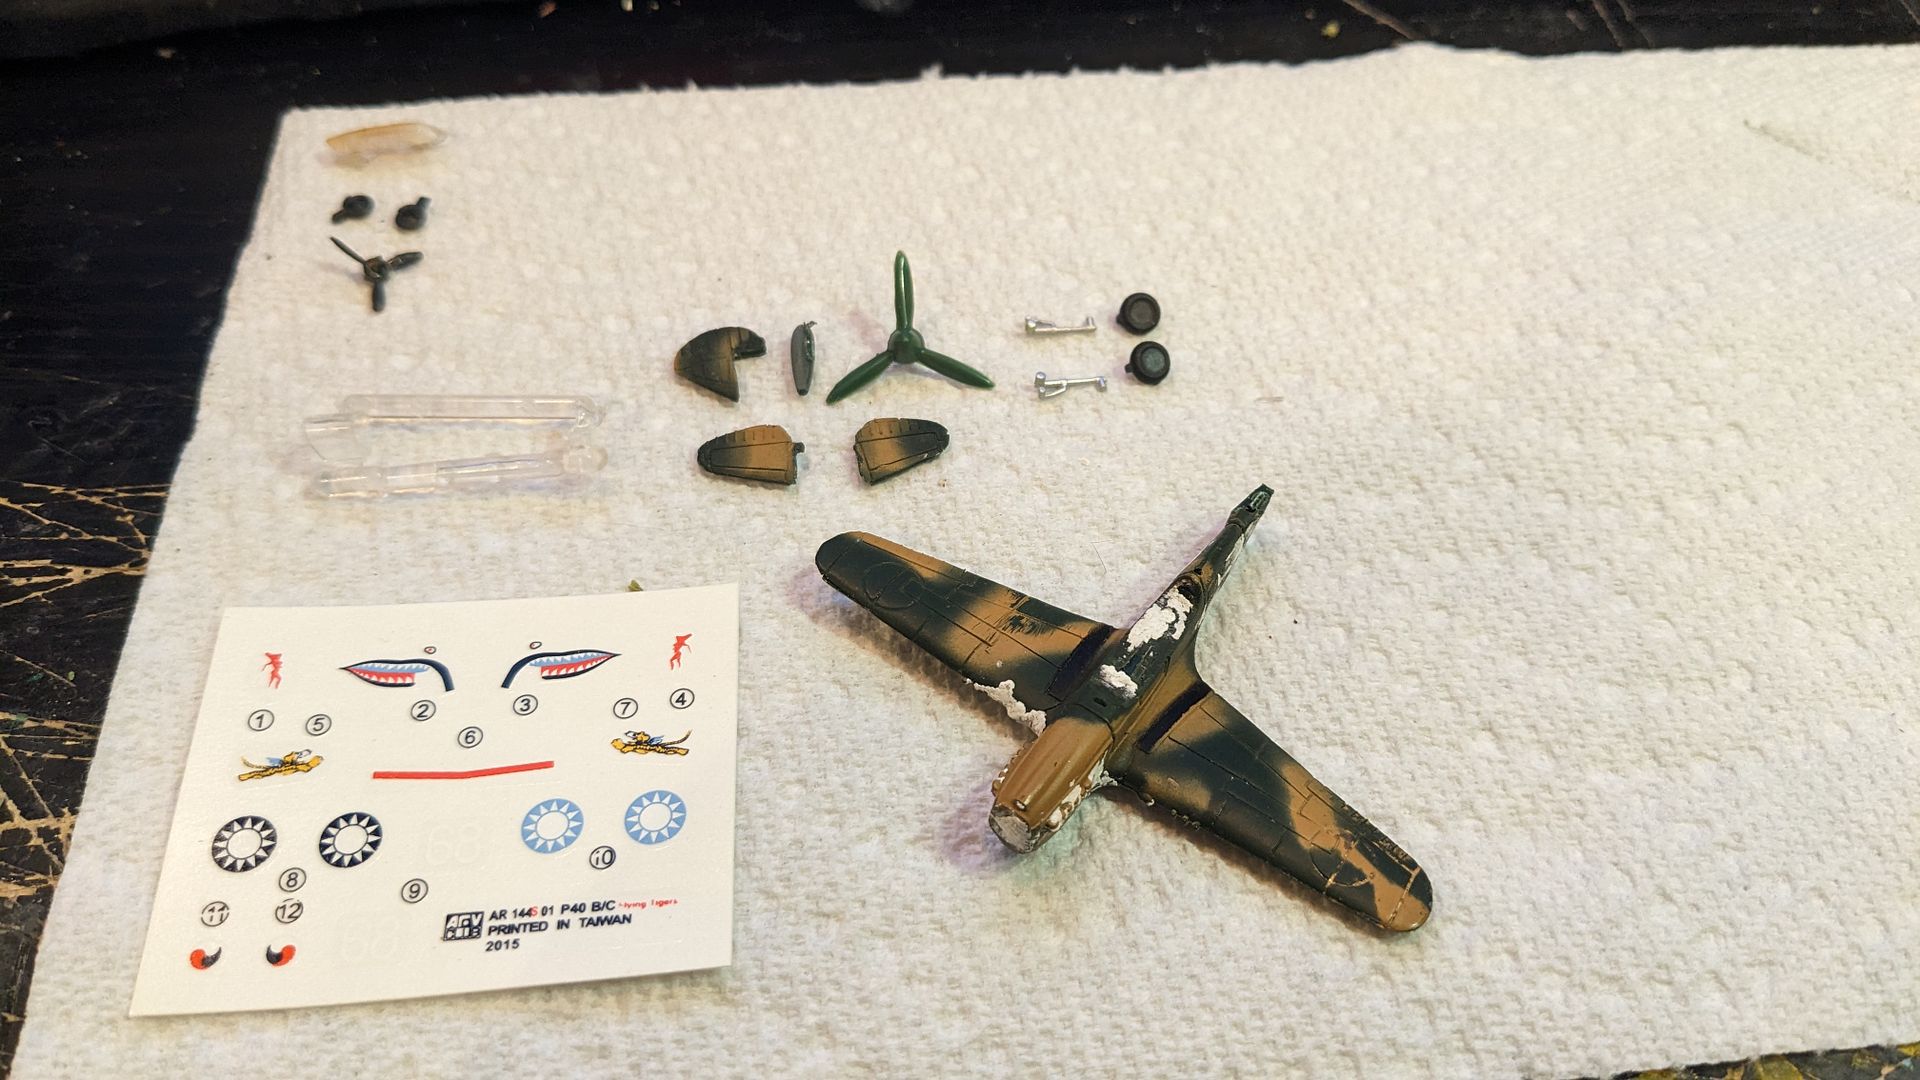
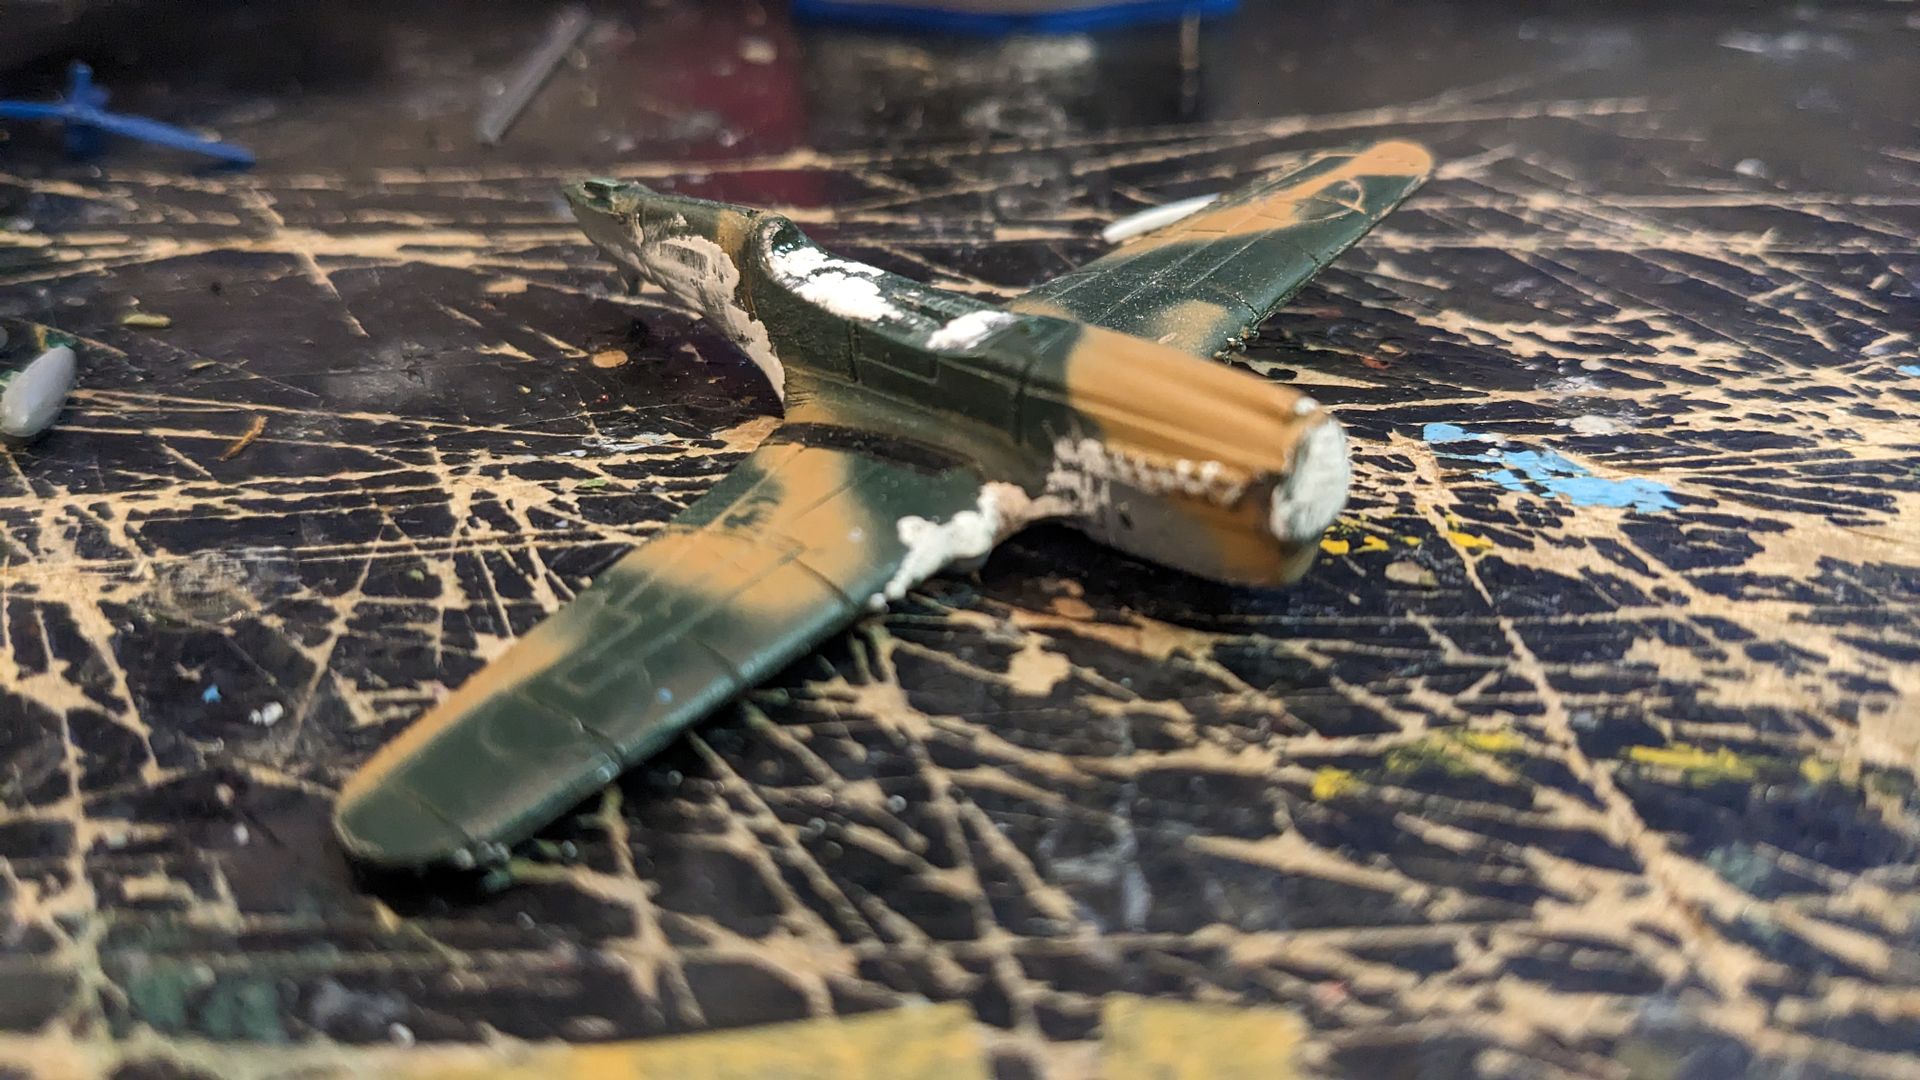
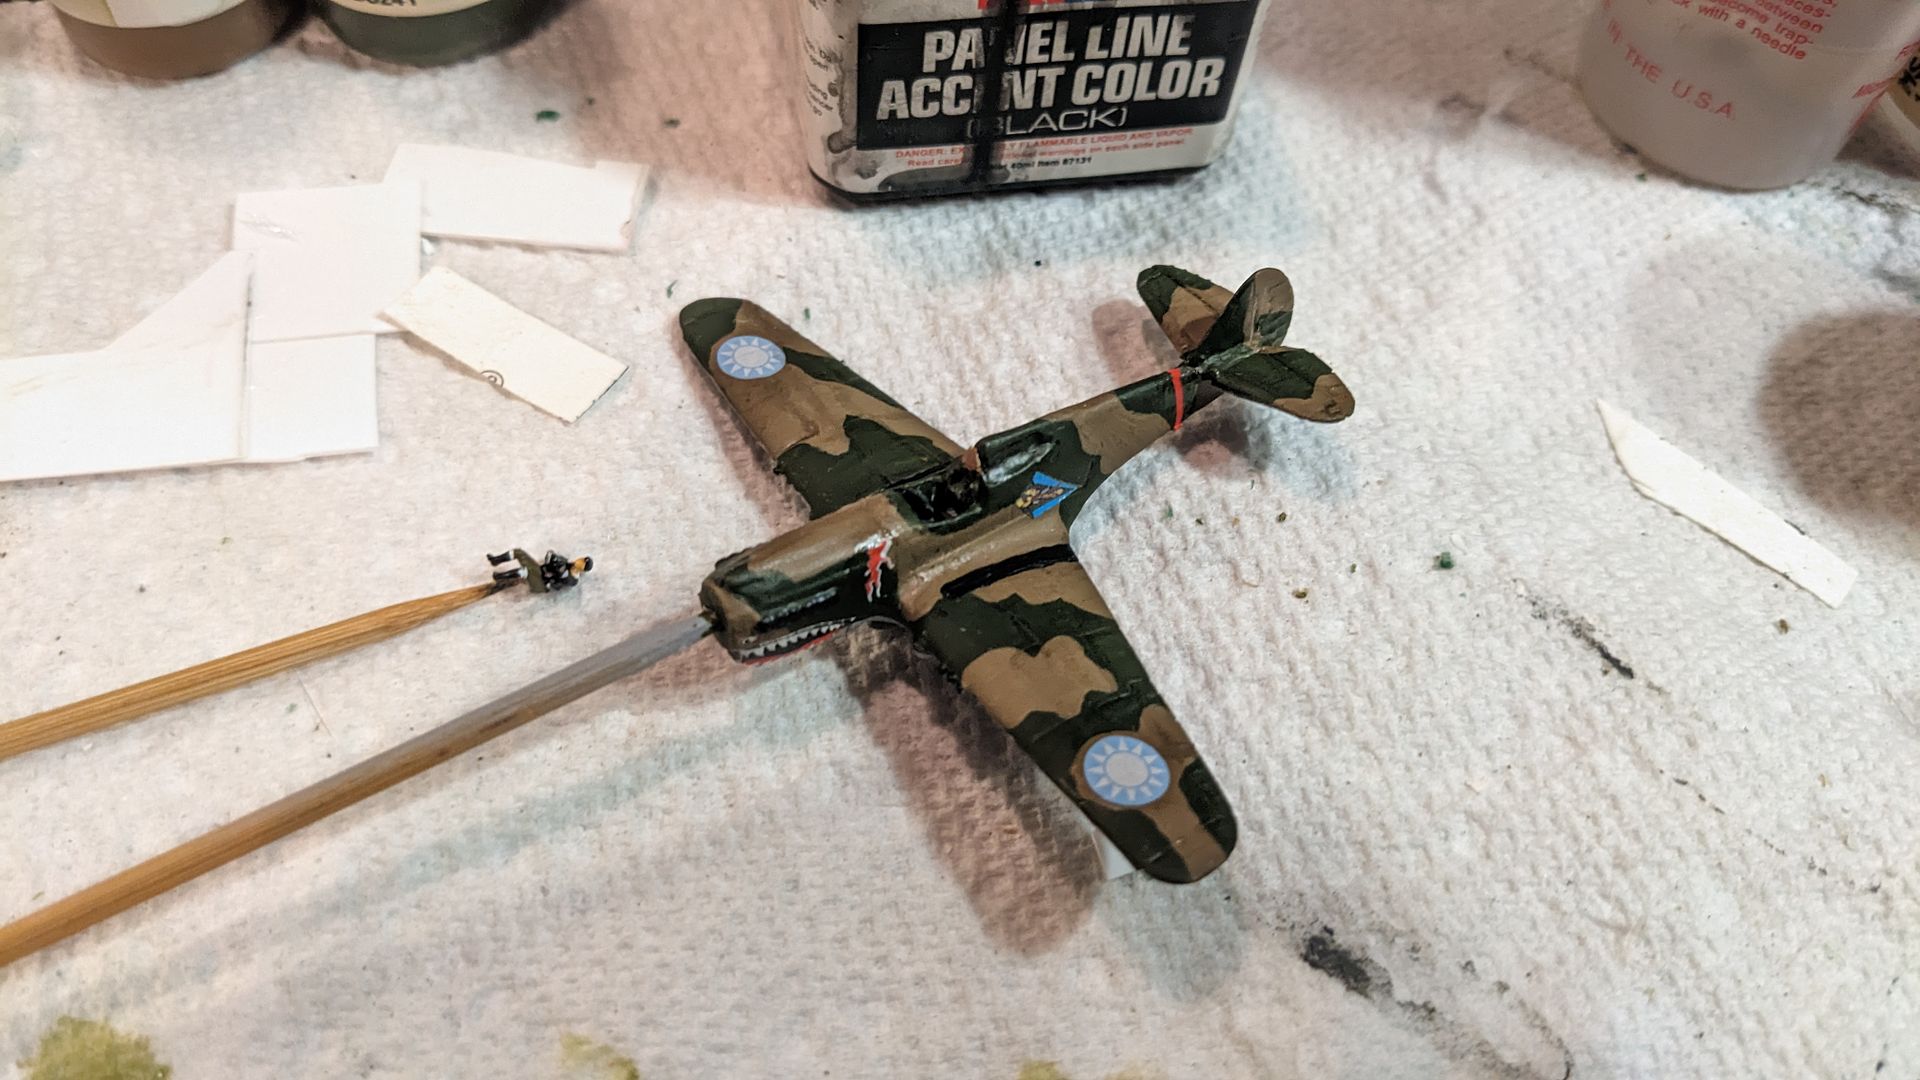
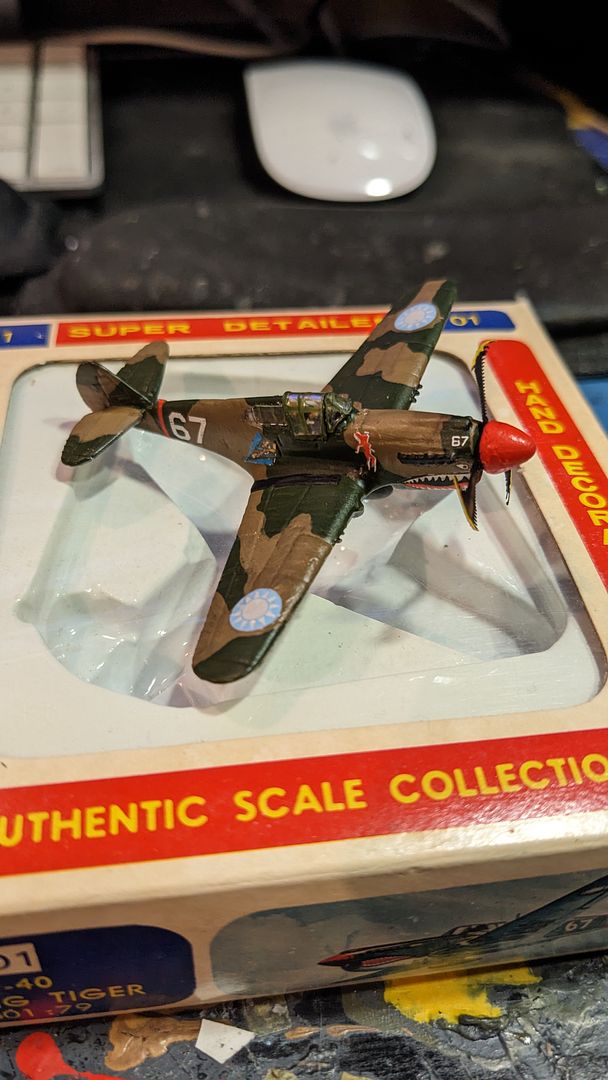
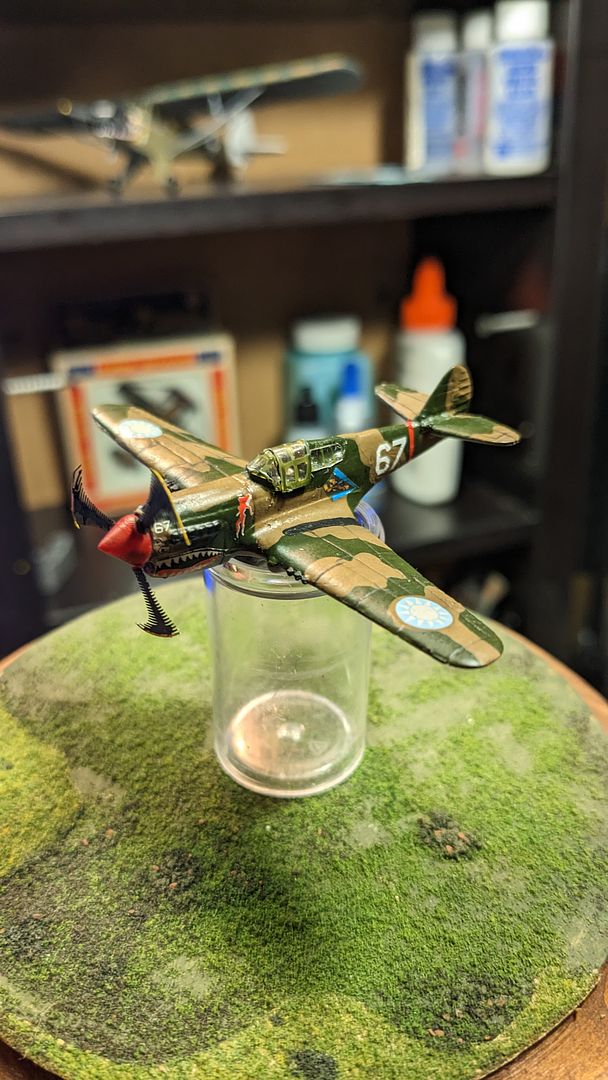
Once the paint was to where I needed it, it was off to the races, as I threw those decals on at lightening speed! As previously stated, I reused the four rondels, "Hell's Angels" girl, and red fuselage band, from the AFV decal sheet. I "borrowed" some shark mouths from other P-40 Flying Tigers decal sheets I found online, and reprinted them out on my own deal paper. I also remade the Flying Tiger and blue chevron (per the original Miniplane scheme).
A shot with an early prop hub spinner not used.
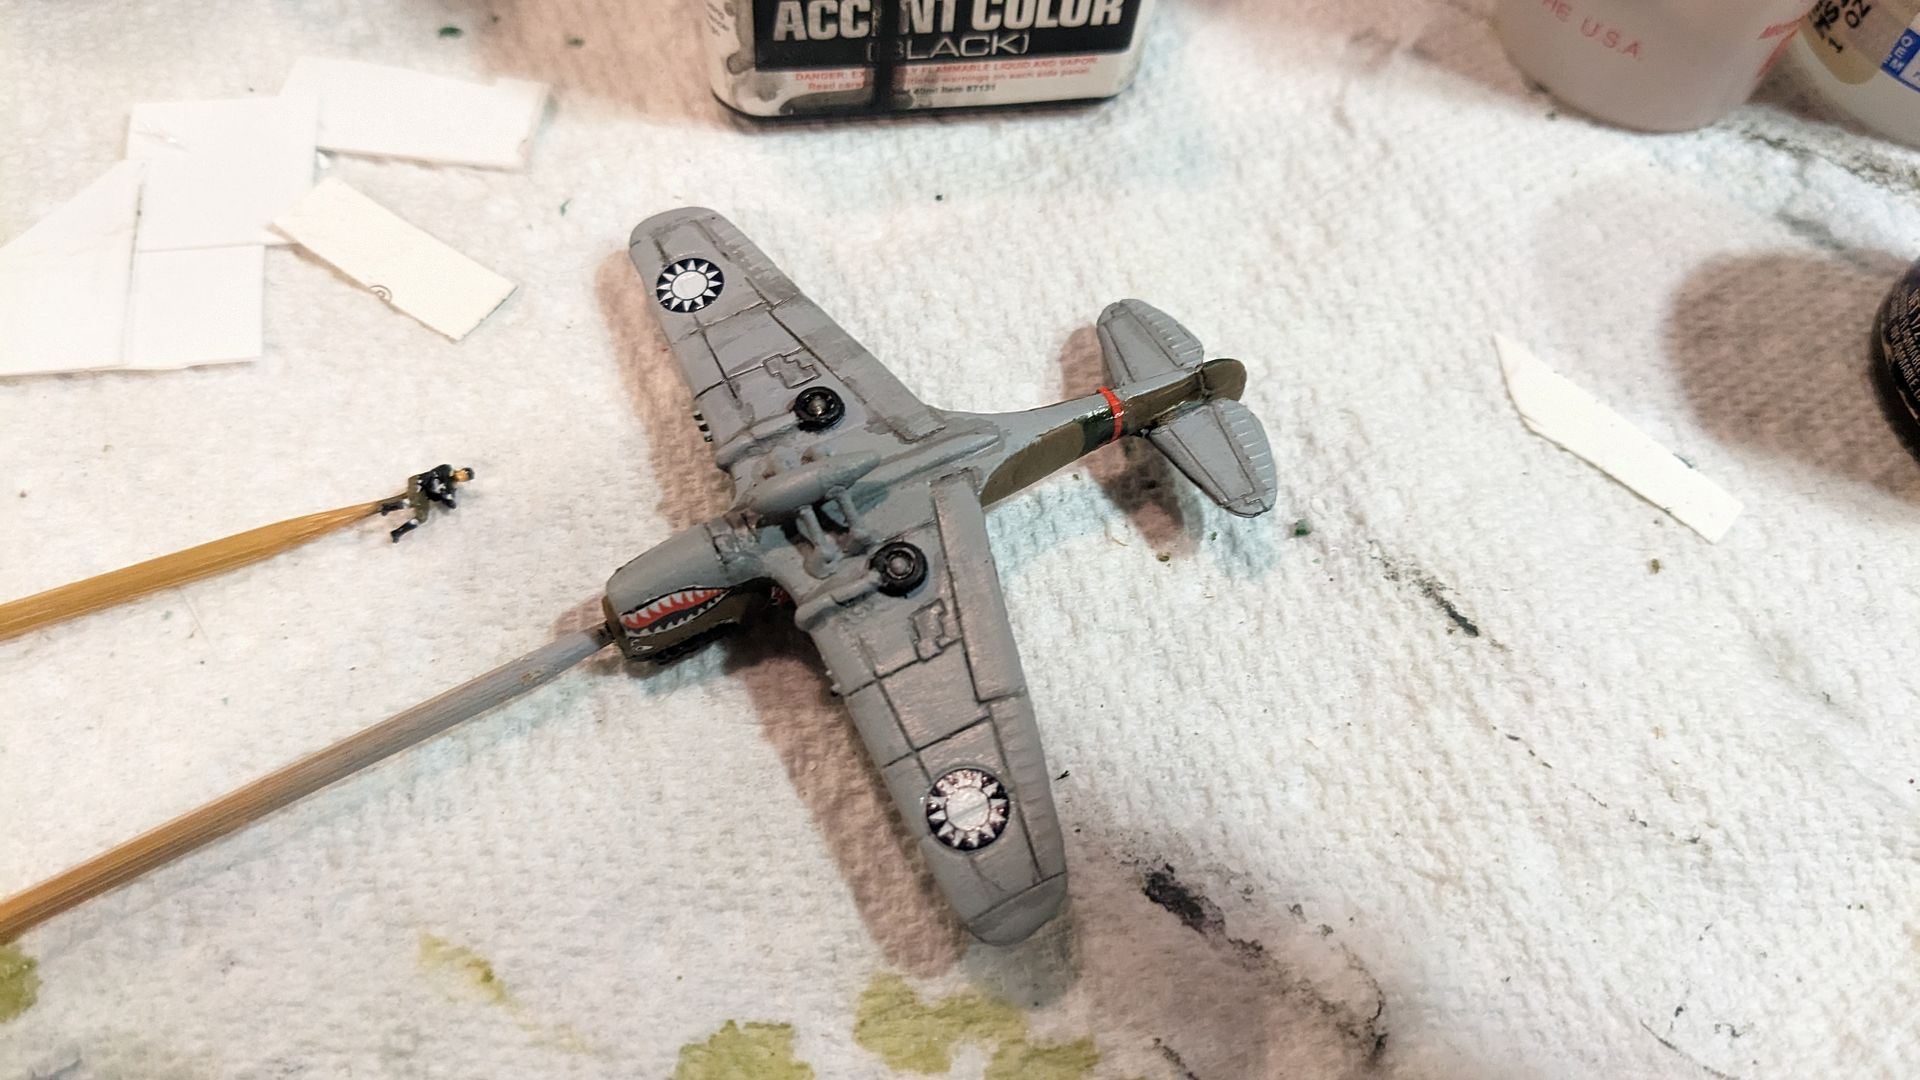
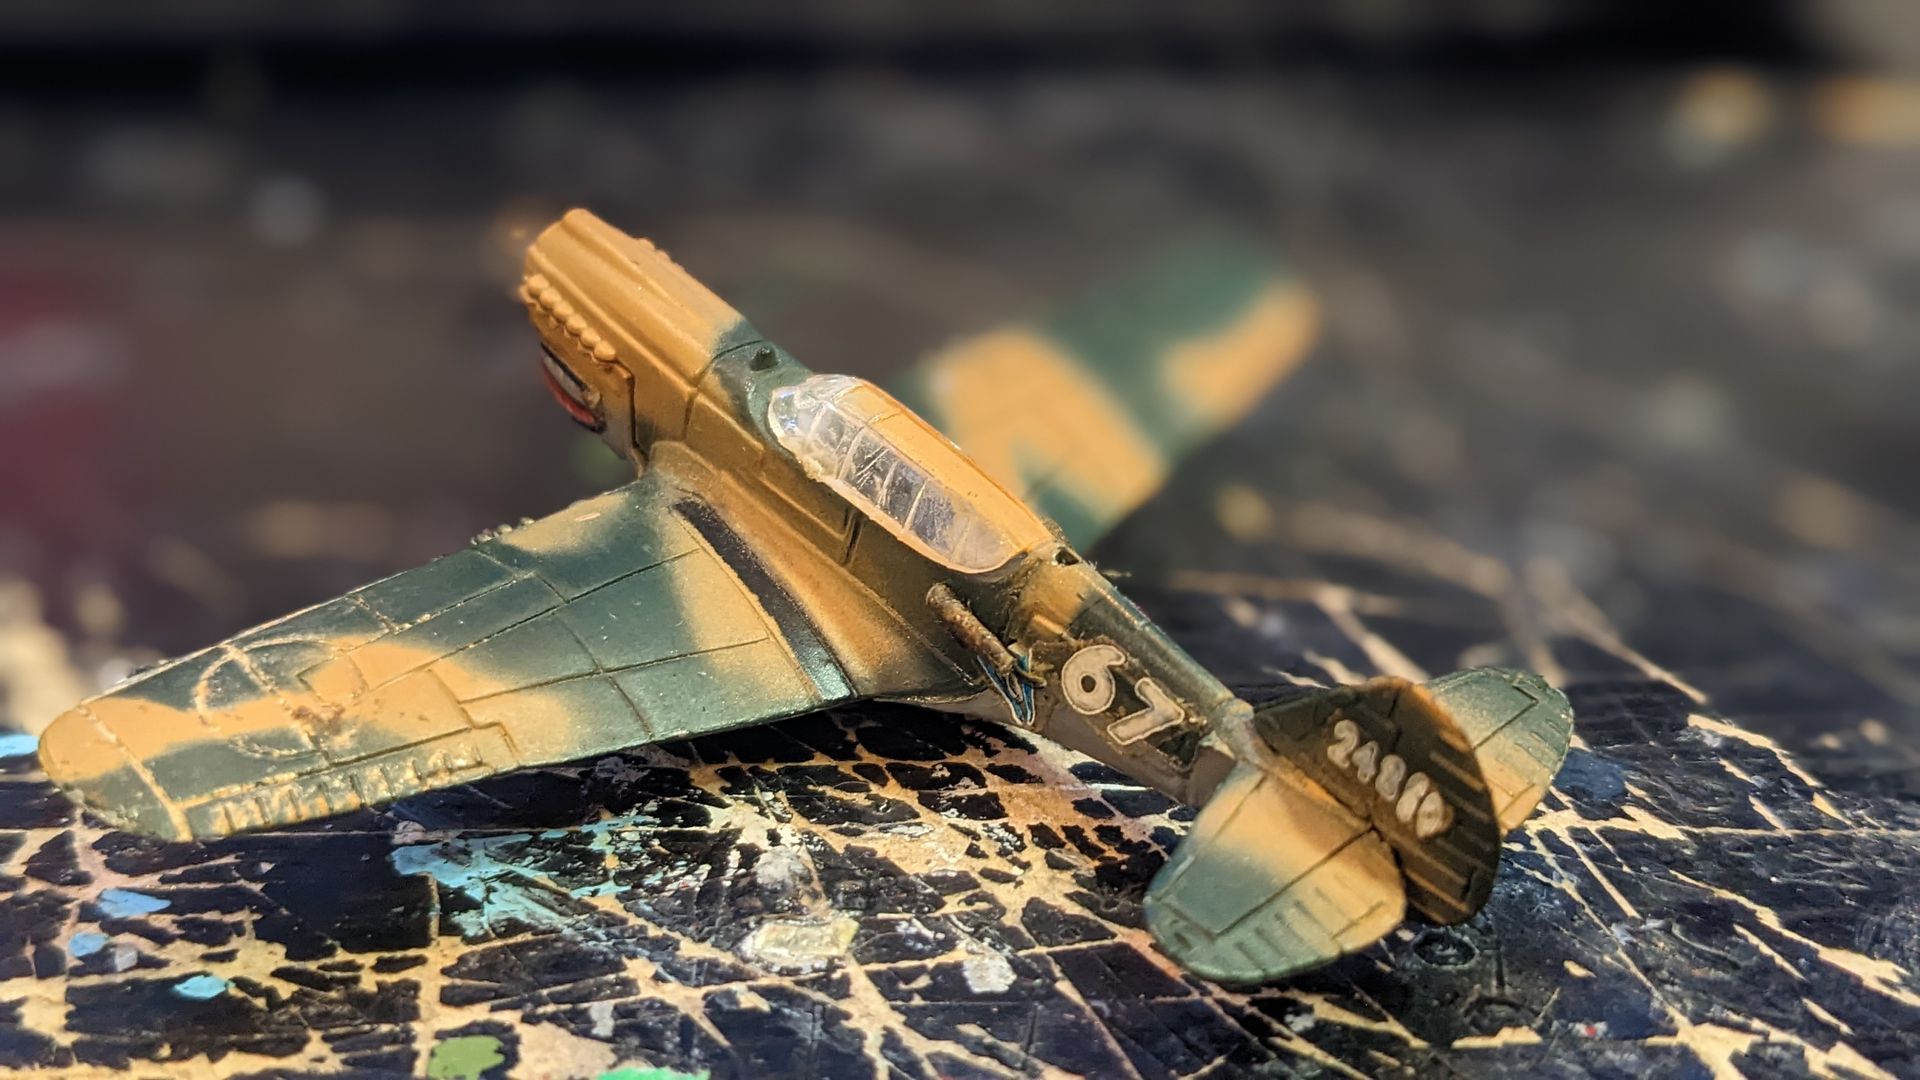
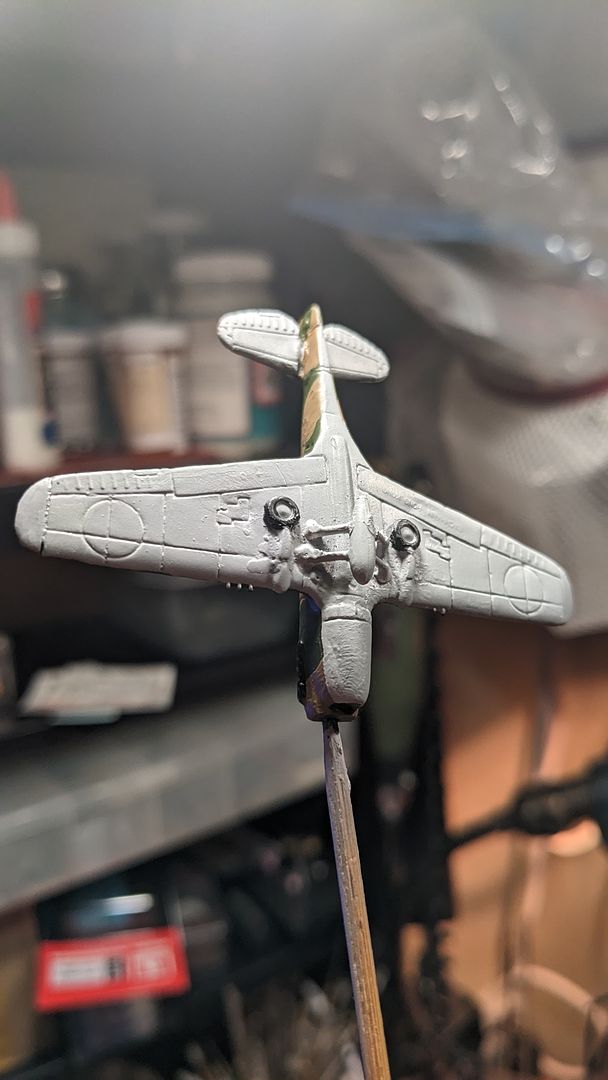
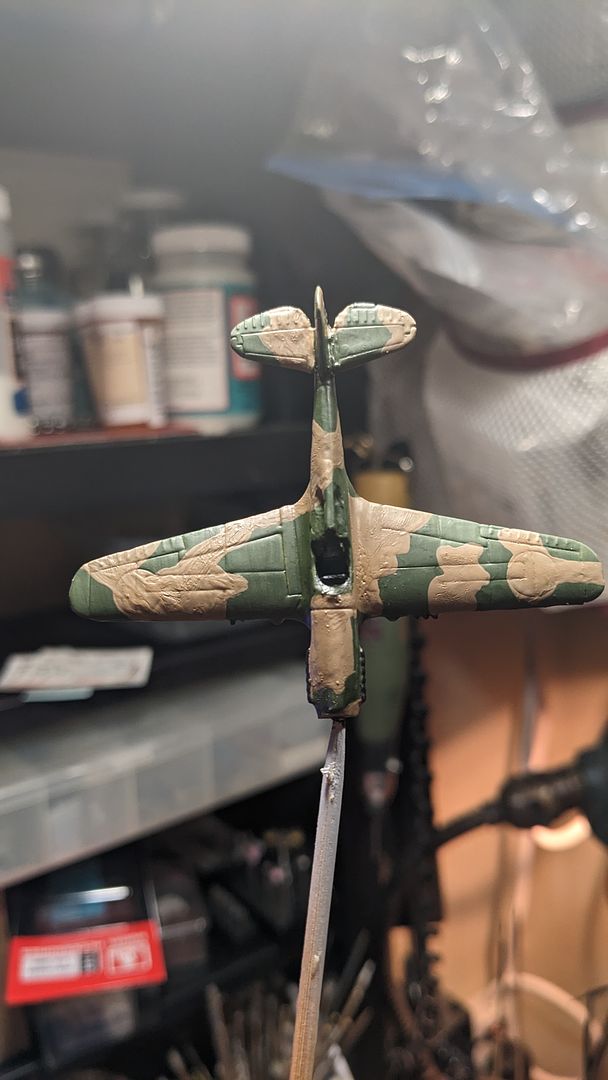
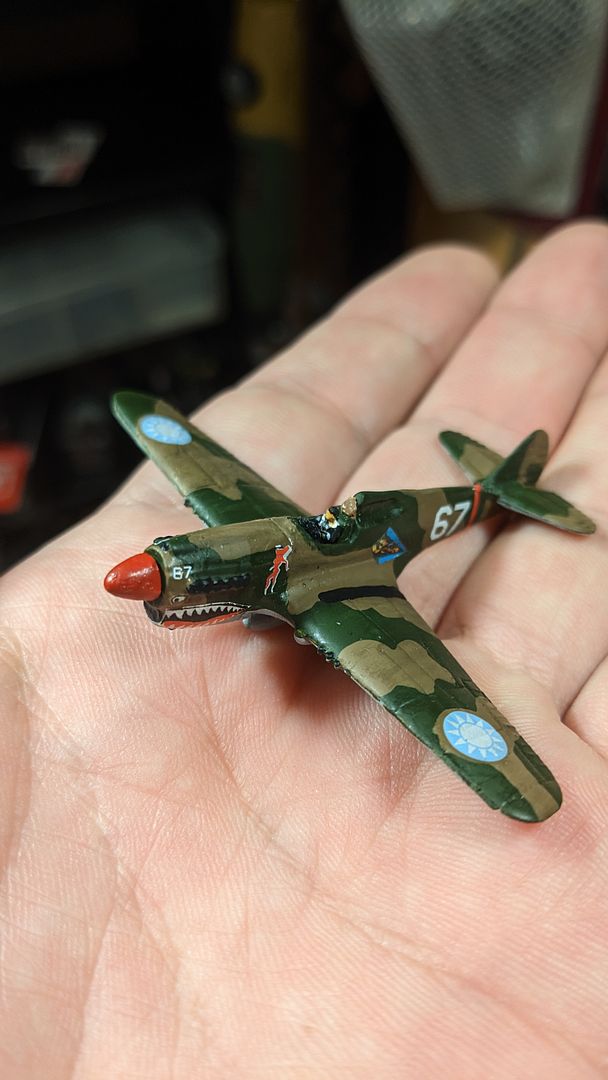
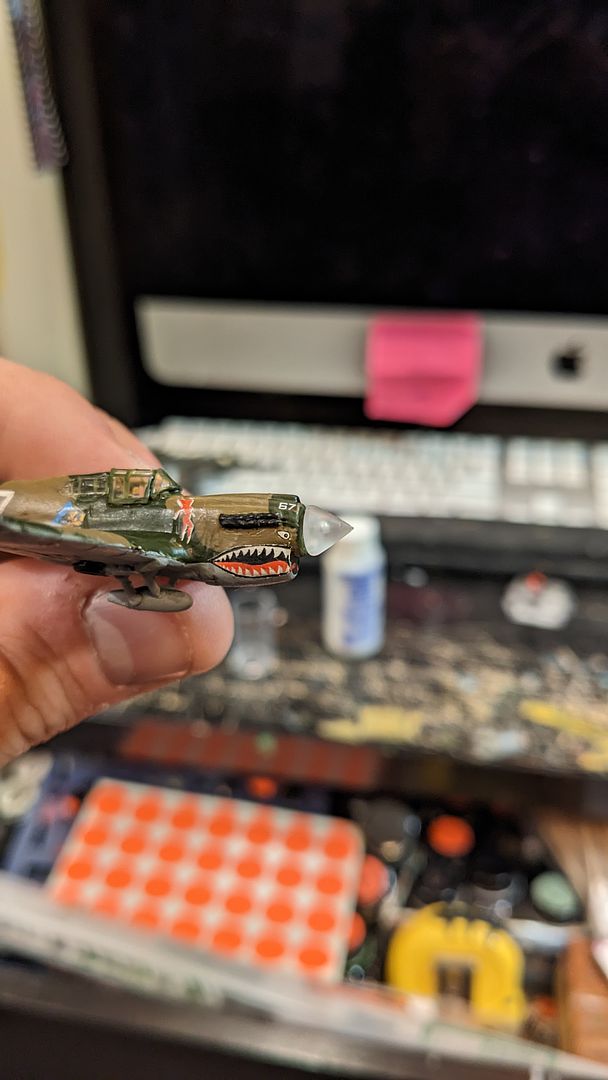
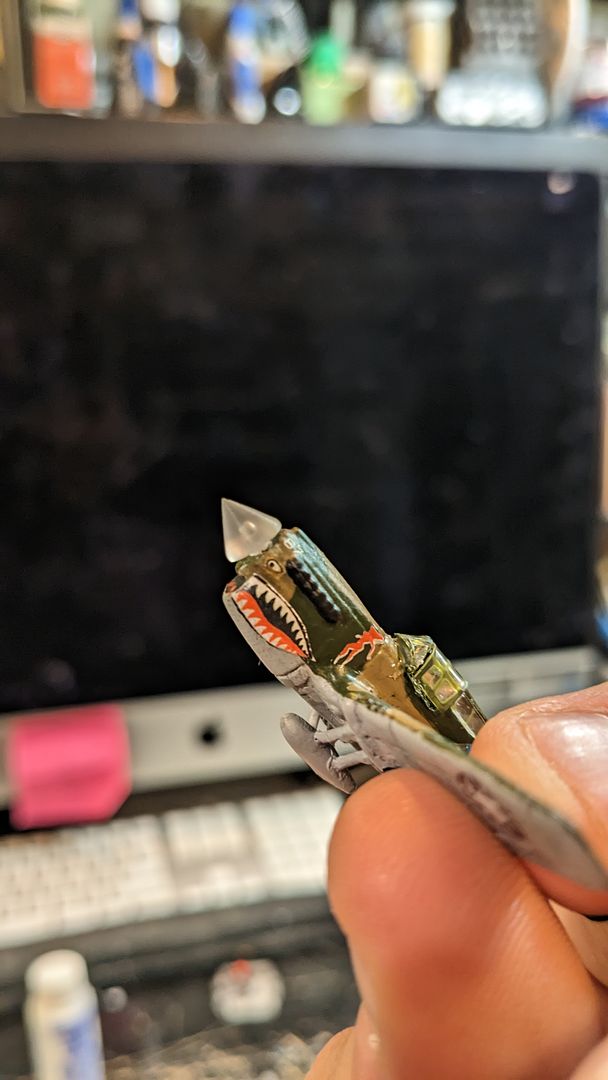
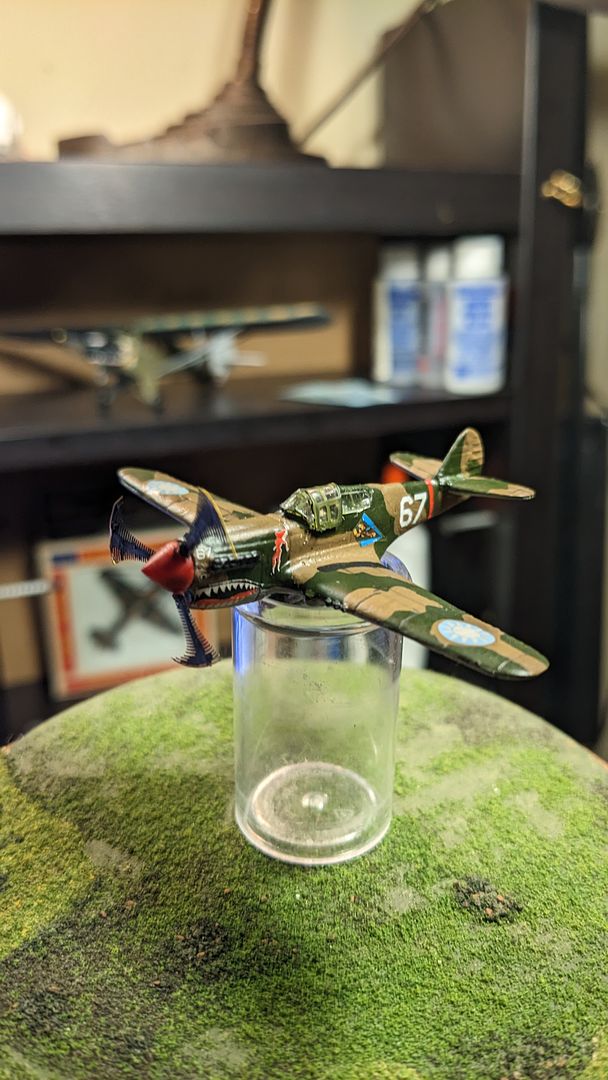
Underside showing some weathering and the pilot. I ended up using some extra white numbers from decal sheets to finish it off. I still might go back and put some sort of white serial number on the tail. The next task was the canopy. I cut some clear acetate for the rear windows and glued them in with krystal klear. For the main canopy I used a spare Bandai P-40B/C canopy. While I see alot of differences between the B/C front windscreen, and the revised E model, this was what I had. Until I find a suitable replacement I'm willing to use, this will work for me. After adding the pilot into the cockpit, I clear coated the entire plane in flat matte. I then glued the canopy into place and painted it. The last major hurdle was the prop. This model was missing its original prop hub (which I probably wouldn't have even used anyway) and needed a replacement. This proved to be fairly difficult as nothing I had was shaping up to be the right size. I eventually settled on a three bladed prop that I think came from a diecast Bachmann Miniplane ME-410. It was made out of some sort of vinyl plastic that, when sanded, bunched up and became more granular and difficult to get a clear surface on. I already had decided to use prop blurs (since it was supposed to be flying). I'm not 100% on the prop hub and may go back and replace it if I find a better replacement. I just haven't had the heart to go and steal one from one of my unbuilt Revell P-40 kits. If anyone has an extra P-40 hub, I'd be glad to take it!
After all that, I called it good! Not too bad as far as putting lipstick on a pig! But I think she may be the prettiest Miniplane P-40, I have ever seen!

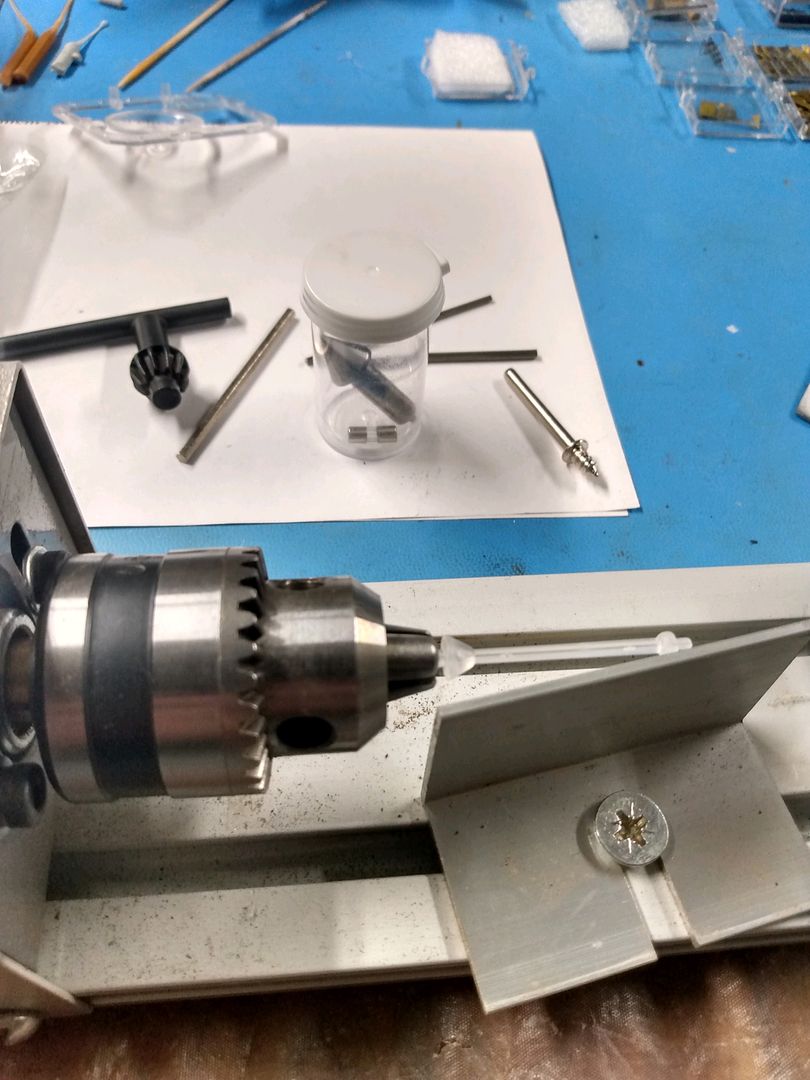
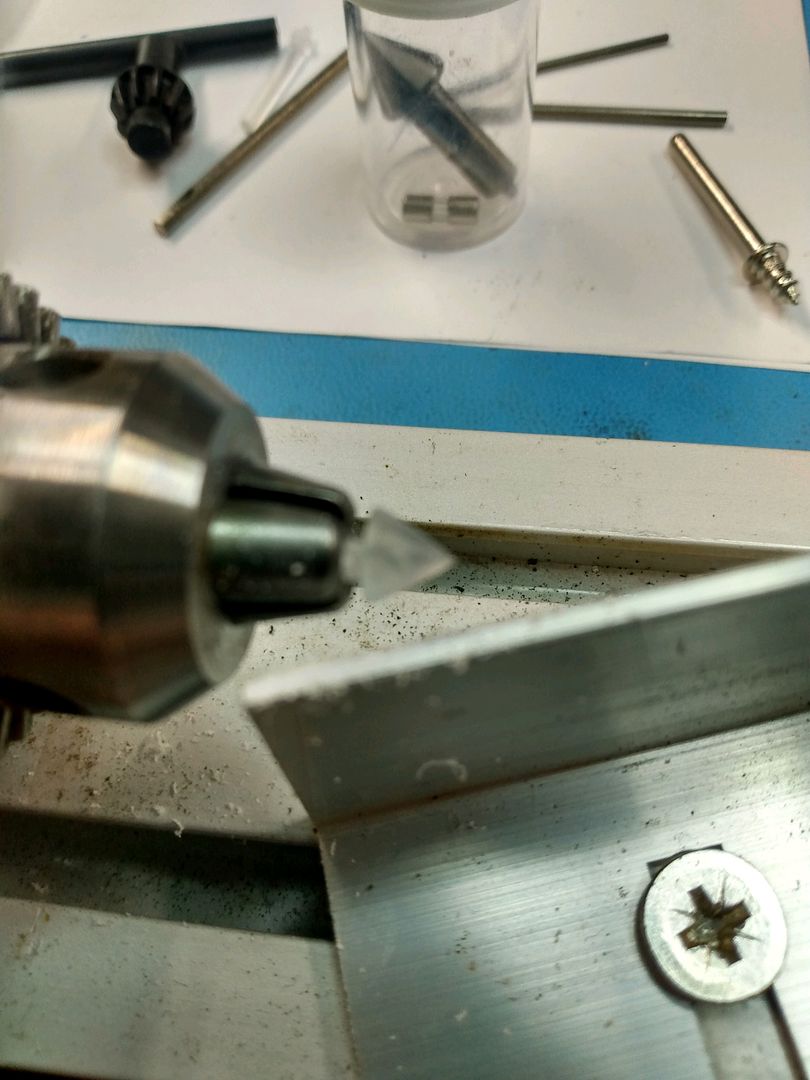
My father decided to put some of his honed grinding / lathe skills to good use and turned down what appears to a more suitable hub then the one I currently have. I will keep you updated with how the new nose looks!
Hope you liked the build!
Background:
Growing up, my father would tell me about these little scale plastic model planes (some very close to 1/144th scale) that he had when he was a kid called: Miniplanes. I was instantly fascinated by them. Eventually he found someone selling a mint Wildcat and DC3 and promptly purchased them. I thought they were the coolest and he began collecting them for the second time in his life. Especially the WWI aircraft as they were close to HO scale trains (which I had setup quite alot on the plane/train table in the basement). Today we probably have around 40 or so examples. Mostly mint or near mint examples. Some pretty beat up WWI birds that my father had plans for rebuilding. He's already redone three Fokker DR.1s and a D.VII. And I hope he eventually finds the "spark" to jump back in them. But that's where my interest in attempting to redo one of these ancient little models came from.
Why the P-40?:
One of the models I always liked was the P-40. Despite it's short comings, it was a welcome addition to my mismatched and motley crew of other 1/144th (and near 1/144th) scale models. Generally being interested in these Miniplanes recently, I was looking at some pictures of them online and was reminded of how much fun that P-40 gave me. I then thought: what would one of these crude Miniplanes look like if I gave it the standard treatment? If I tried to really rebuild this model into something more decent. Would it hold up or even compare to anything else in 1/144th scale?
Ebay Purchase:
We still have the one I played with when I was a kid and (thankfully) it was still in good condition with all of its decals intact. But I wasn't prepared to butcher a complete model for my amusement. But I did find this incomplete one on ebay, costing only a total of $12.00 (including shipping). As you can see it was missing some decals along with its original prop and hub. So for me this was the perfect starting point!
Build:
My end goal was simple: to try and rebuild the Miniplane P-40 (paint scheme and all) in its best possible form. After scaling down some three view drawings to 1:160th scale, I found the overall shape of the model to be fairly accurate. The landing gear was another story. Don't remember a P-40 ever having landing gear like a P-51!? I started by filling in and sanding the incorrect wheel bays, I decided early on that a gear down model would be alot more work and opted to finish her in a flying position. I then realized just where I could utilize this model, in a larger diorama eventually. (More to come in future builds). I also cut the external tank off as it was incorrectly positioned and eventually reattached it.
Here's an early picture with the proposed donor wheels, landing gear, and prop. The prop turned out to be too small. Since I had some spare AFV Club P-40C decals lying around, I knew one would be great for at least the rondels, red fuselage band, and "Hell's Angels" emblem.
The horizontal stabs eventually "fell off" and I continued to sand and fill and holes. This including filling the entire rear decking behind the pilot. I originally used just a putty filler which I ended up regretting. Every time I tried to use a drill bit to hog out the rear windows, more material would be pulled out then I wanted, causing larger cavities. I ended up filling the space with superglue, shooting it with primer, and going back in with the drill. I had to repeat that process a few times to finally get the rear windows to a decent place.
I also decided to drill out the cockpit and give it a bit of detail. I found some photoetched ladder / railings that I thought could work as the seat frame as a little extra added detail. I cut a crude instrumental panel out and painted it black, along with a head rest. I started making a seat for the pilot, but decided that it wouldn't fit with the pilot so I omitted it.
I reused the original wheels and after trying to sand them down, I glued them into position. I used some thin plastic rods as the landing gear, and sanded it together. I then added the external tank, the horizontal stabs, and primed it one last time.
I then started in on paint. I ended up using Vallejo RAF Colors and a light grey for the underside and just brushed them on.
Once the paint was to where I needed it, it was off to the races, as I threw those decals on at lightening speed! As previously stated, I reused the four rondels, "Hell's Angels" girl, and red fuselage band, from the AFV decal sheet. I "borrowed" some shark mouths from other P-40 Flying Tigers decal sheets I found online, and reprinted them out on my own deal paper. I also remade the Flying Tiger and blue chevron (per the original Miniplane scheme).
A shot with an early prop hub spinner not used.
Underside showing some weathering and the pilot. I ended up using some extra white numbers from decal sheets to finish it off. I still might go back and put some sort of white serial number on the tail. The next task was the canopy. I cut some clear acetate for the rear windows and glued them in with krystal klear. For the main canopy I used a spare Bandai P-40B/C canopy. While I see alot of differences between the B/C front windscreen, and the revised E model, this was what I had. Until I find a suitable replacement I'm willing to use, this will work for me. After adding the pilot into the cockpit, I clear coated the entire plane in flat matte. I then glued the canopy into place and painted it. The last major hurdle was the prop. This model was missing its original prop hub (which I probably wouldn't have even used anyway) and needed a replacement. This proved to be fairly difficult as nothing I had was shaping up to be the right size. I eventually settled on a three bladed prop that I think came from a diecast Bachmann Miniplane ME-410. It was made out of some sort of vinyl plastic that, when sanded, bunched up and became more granular and difficult to get a clear surface on. I already had decided to use prop blurs (since it was supposed to be flying). I'm not 100% on the prop hub and may go back and replace it if I find a better replacement. I just haven't had the heart to go and steal one from one of my unbuilt Revell P-40 kits. If anyone has an extra P-40 hub, I'd be glad to take it!
After all that, I called it good! Not too bad as far as putting lipstick on a pig! But I think she may be the prettiest Miniplane P-40, I have ever seen!
My father decided to put some of his honed grinding / lathe skills to good use and turned down what appears to a more suitable hub then the one I currently have. I will keep you updated with how the new nose looks!
Hope you liked the build!
Last edited by Warbird Kid on Wed Jan 04, 2023 10:00 am, edited 1 time in total.
Re: 1/160 Bachmann Miniplane P-40E
Tue Jan 03, 2023 6:08 pm
My favorite bit on that is where you corrected the landing gear, quality work.
Re: 1/160 Bachmann Miniplane P-40E
Tue Jan 03, 2023 7:07 pm
Cool! I have quite a few of those Bachmann planes that came from an estate. I really ought to post some more of them on eBay.
Re: 1/160 Bachmann Miniplane P-40E
Mon Jan 09, 2023 11:42 am
Thanks for the complements guys! Got an update. I received the hub my father cut down out of a clear Revell stand and it is a definite improvement!
After a little paint I think it will do nicely! Here are some shots matched up with a stock Miniplanes P-40 for comparison.
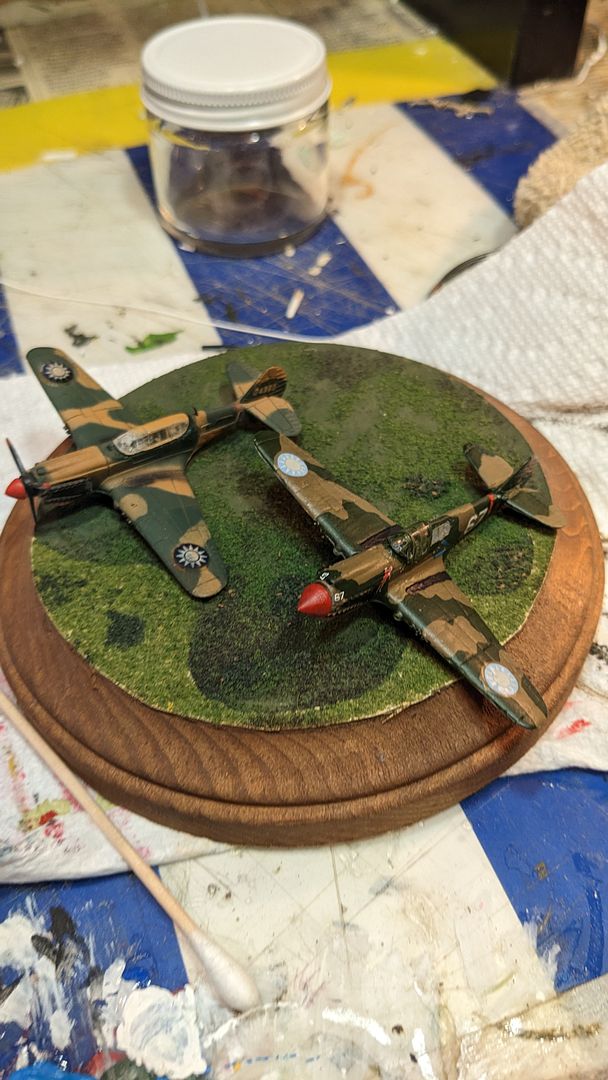
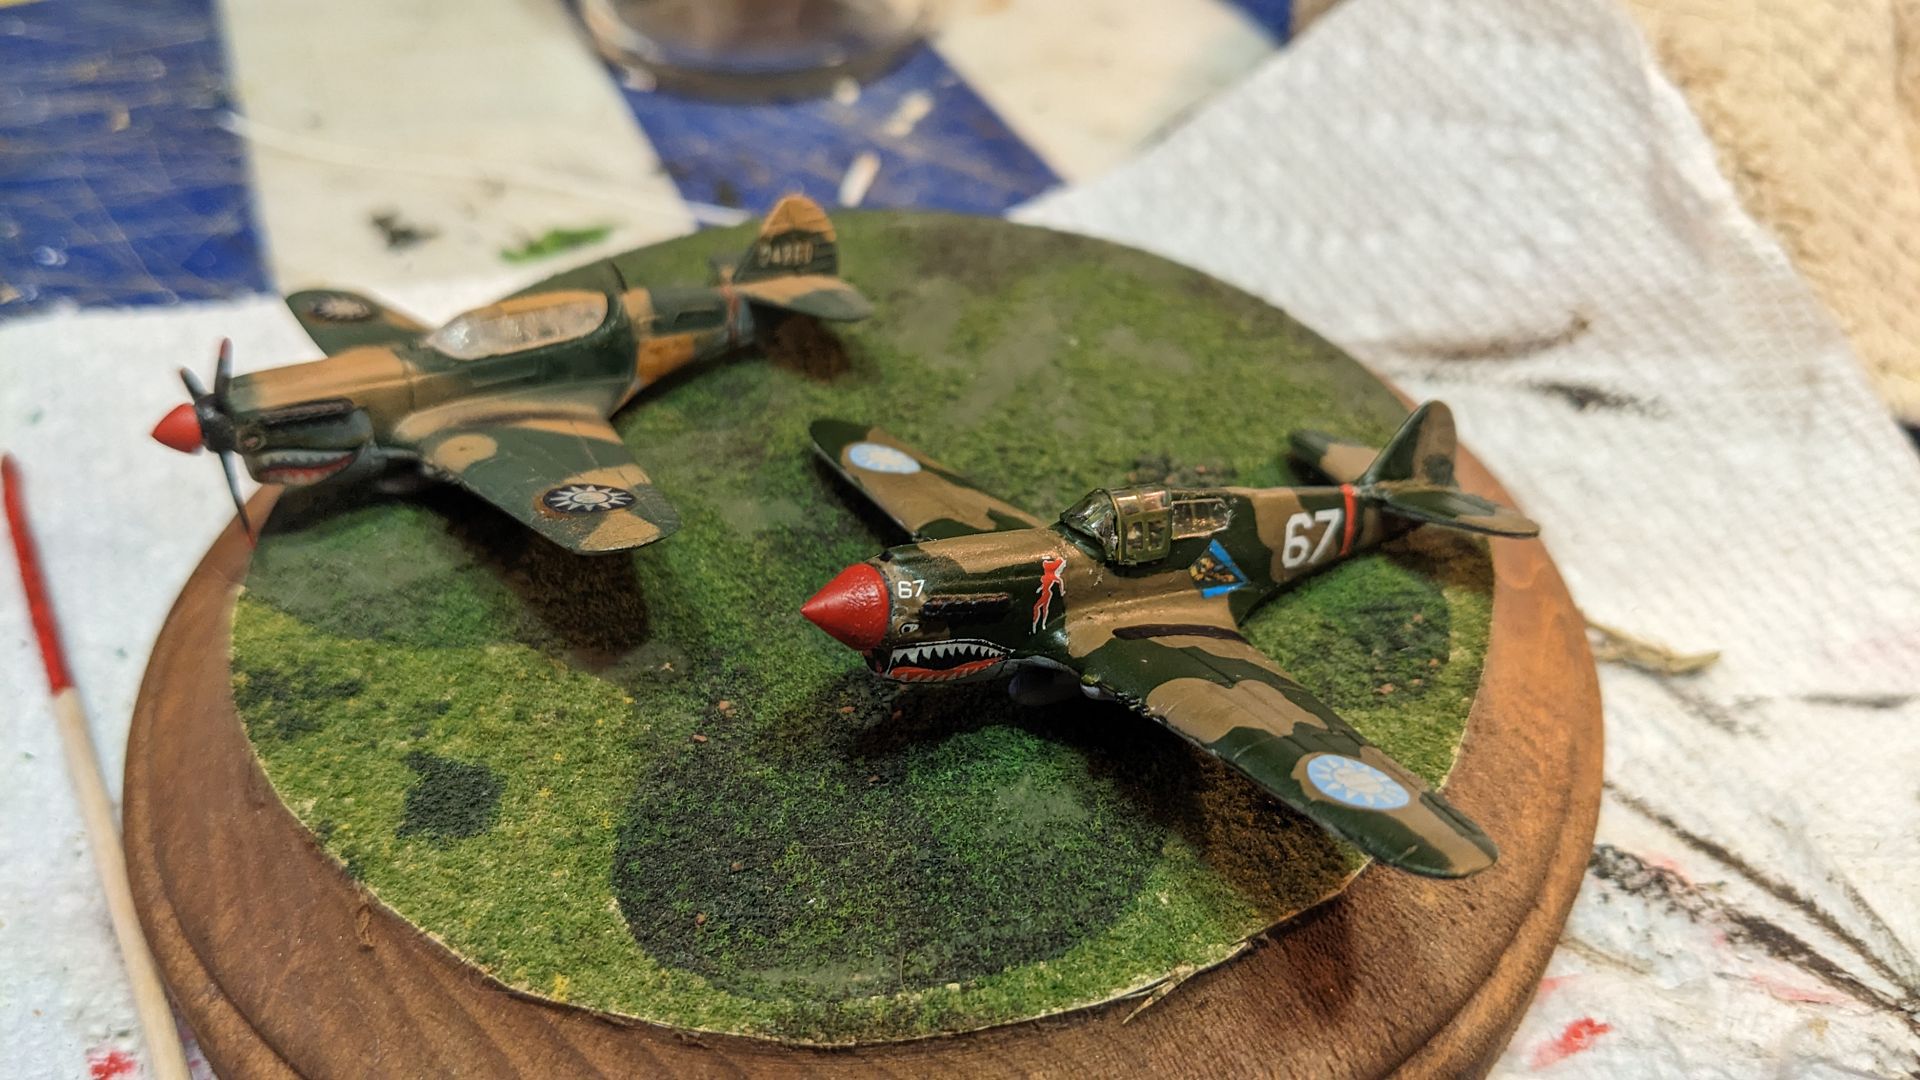
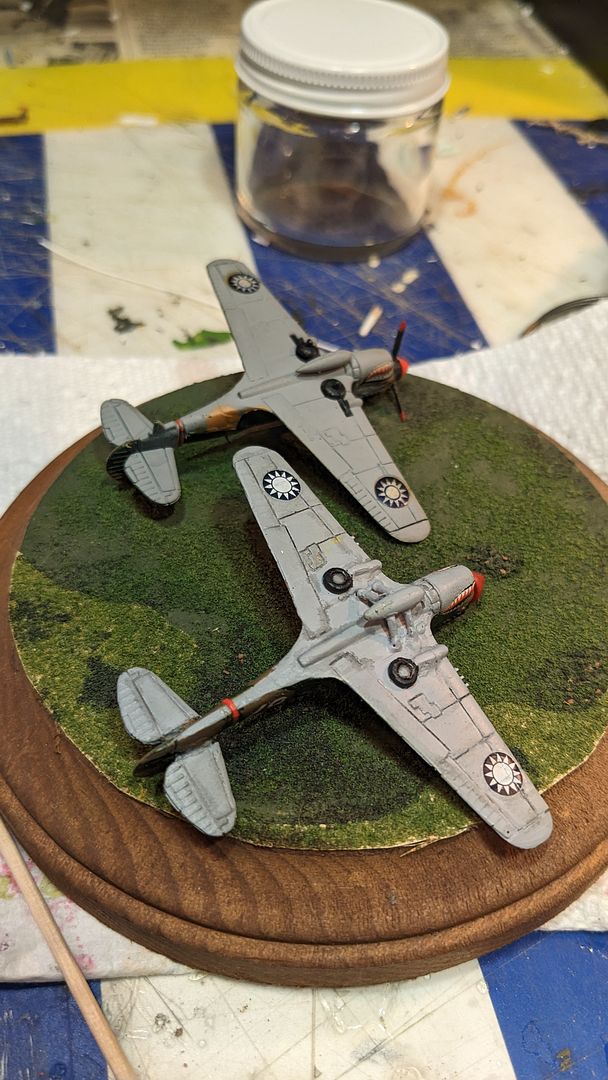
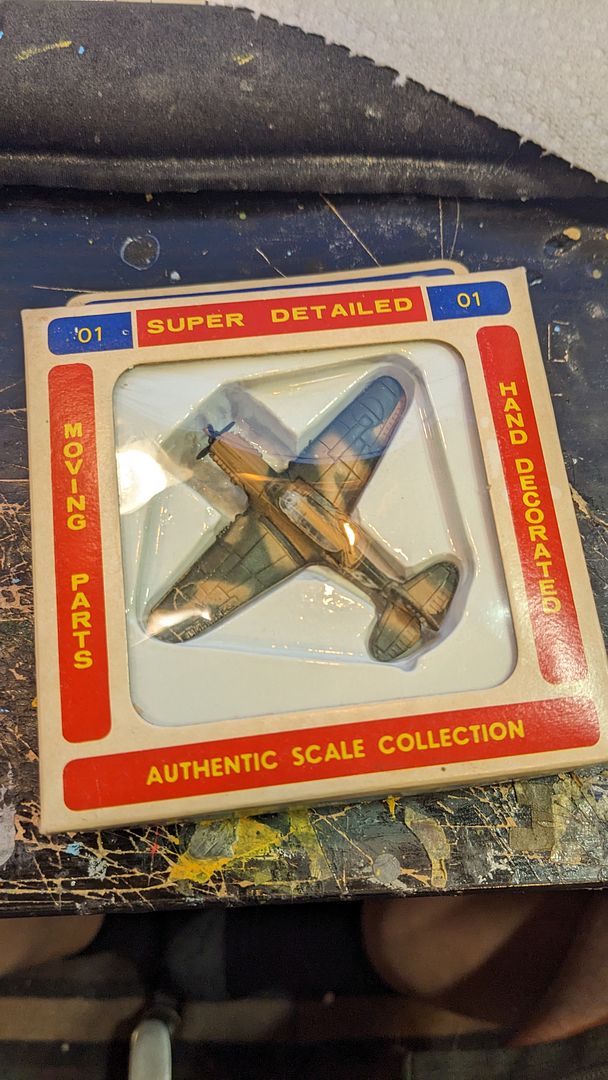
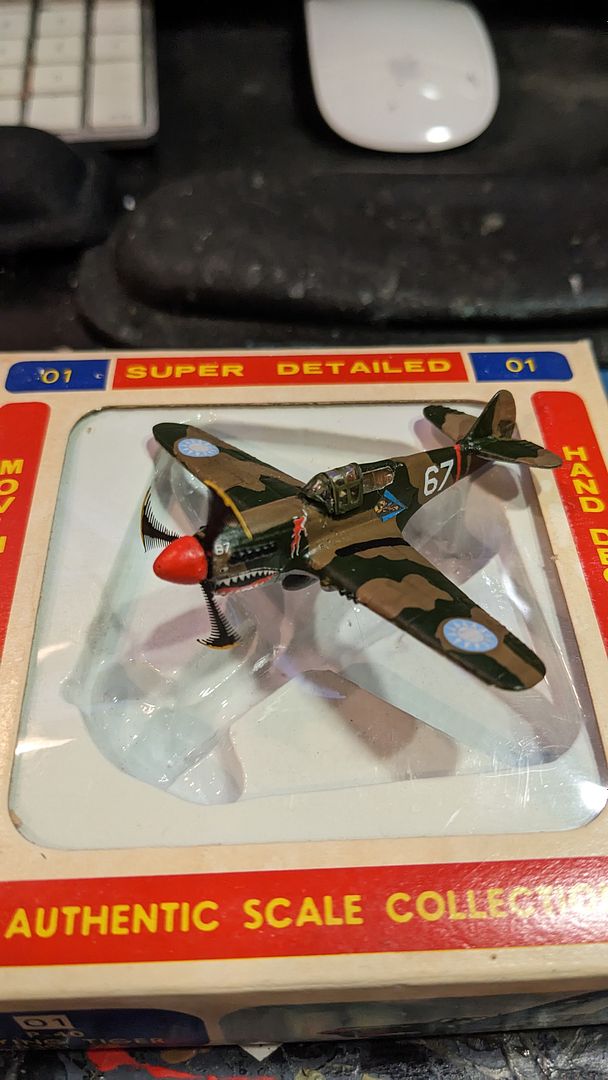
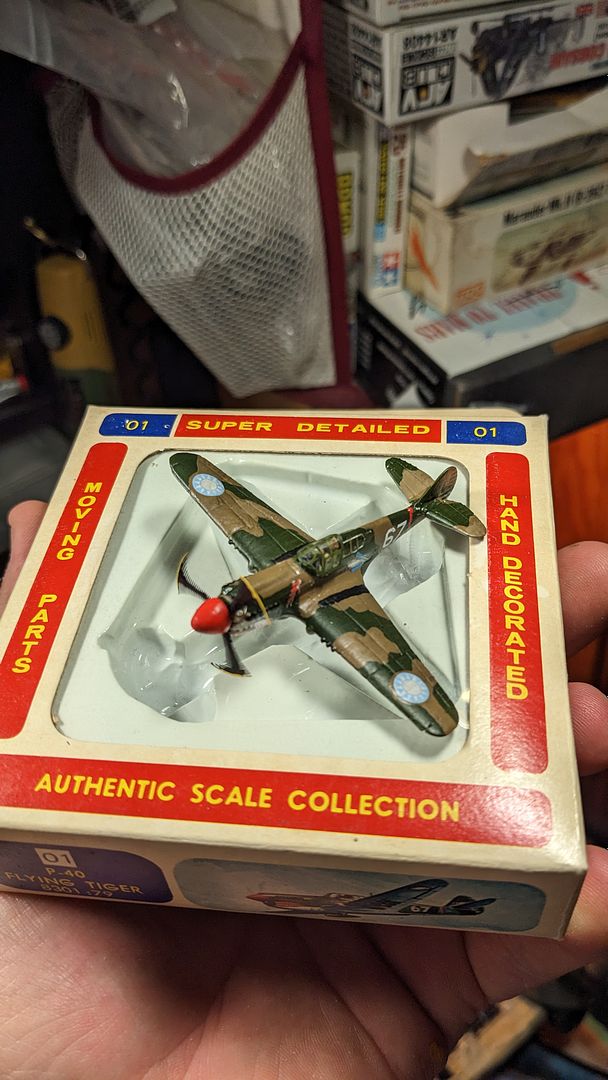
I ended up purchasing another Miniplanes P-40 on Ebay since it was missing a canopy, box, but had most of its decals. Since I just so happened to have a spare box and canopy, it was the perfect match! Now we have another (mostly) complete original P-40 in the box!
And for some final shots with the prop blurs transplanted over tot the new hub. Definitely looks alot better!
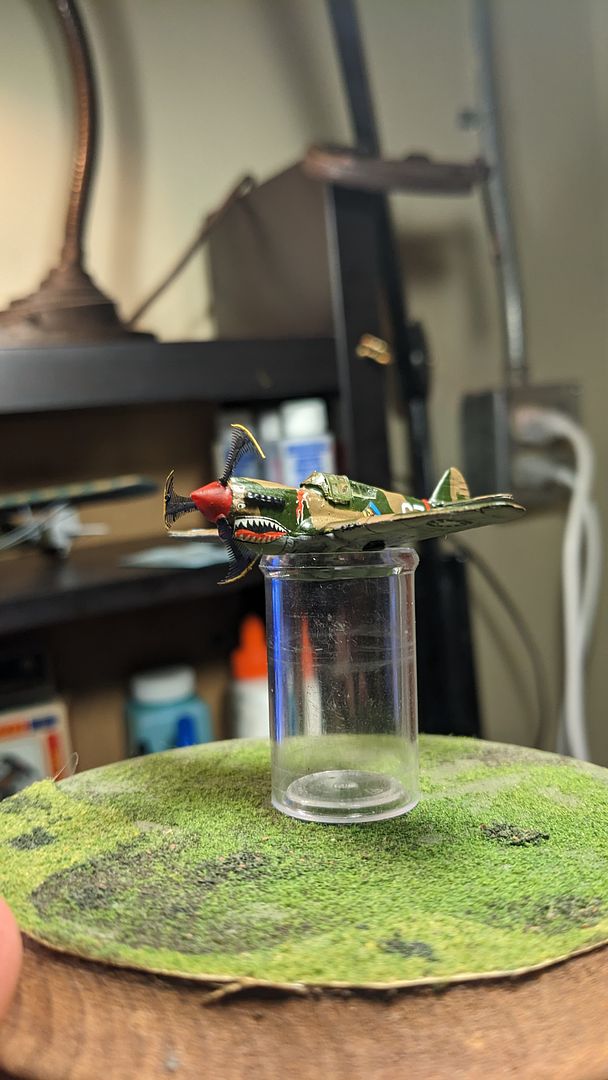
I still might go back and add wing lights, wires, etc. But not until I complete the second plane for the diorama. But more on that later. Hoped you liked the build!
After a little paint I think it will do nicely! Here are some shots matched up with a stock Miniplanes P-40 for comparison.
I ended up purchasing another Miniplanes P-40 on Ebay since it was missing a canopy, box, but had most of its decals. Since I just so happened to have a spare box and canopy, it was the perfect match! Now we have another (mostly) complete original P-40 in the box!
And for some final shots with the prop blurs transplanted over tot the new hub. Definitely looks alot better!
I still might go back and add wing lights, wires, etc. But not until I complete the second plane for the diorama. But more on that later. Hoped you liked the build!