Warbird Information Exchange
http://warbirdinformationexchange.org/phpBB3/

Bought a Fairchild 24
http://warbirdinformationexchange.org/phpBB3/viewtopic.php?f=16&t=24344
Page 55 of 58

Author:  Dave Hadfield [ Fri Jan 25, 2019 7:25 pm ]
Post subject:  Re: Bought a Fairchild 24

I'm so far behind on this thread...

You know, when you retire, you don't get more time off. You just fill the days with THE THINGS YOU REALLY WANT TO DO. For years, when working, you put things off because of a busy money-making schedule. Thus when you are no longer constrained by a paycheck, you charge in full-blast and commit yourself to doing the things you've been putting-off for years. It's not re-tirement. It's re-engagement.

Anyway, 2018 was one of the most significant years of my life. The Spitfire Trip, Oshkosh, the release of "Climbin' Away", sailing, travelling in Europe, writing, composing, performing... it was wonderful.

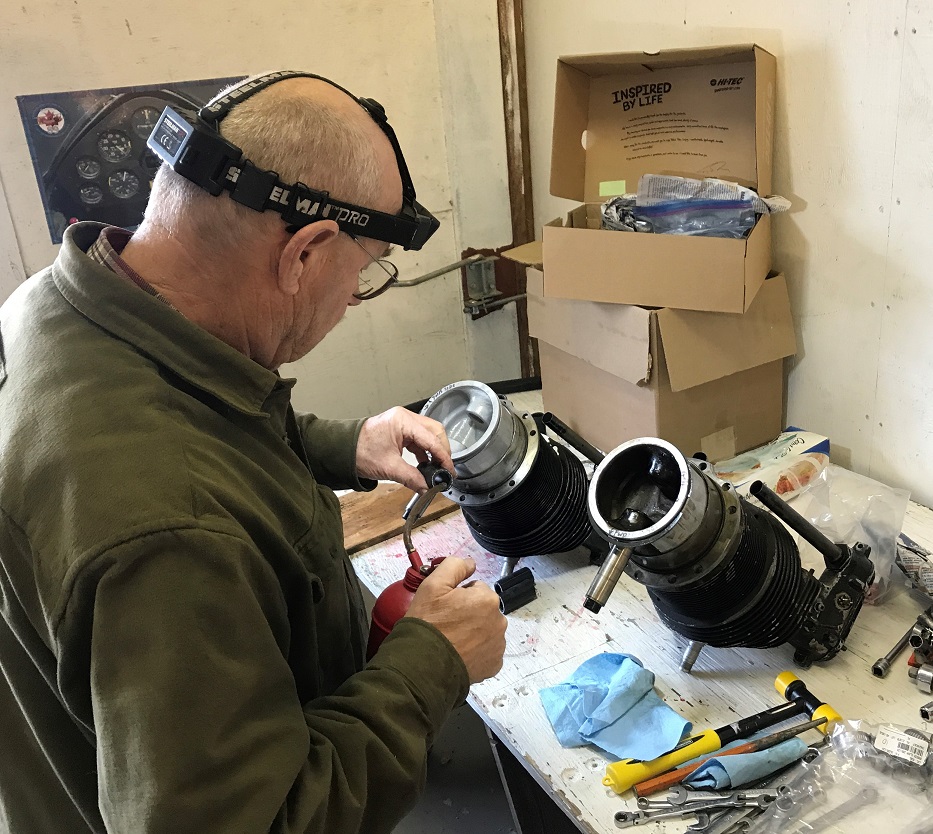
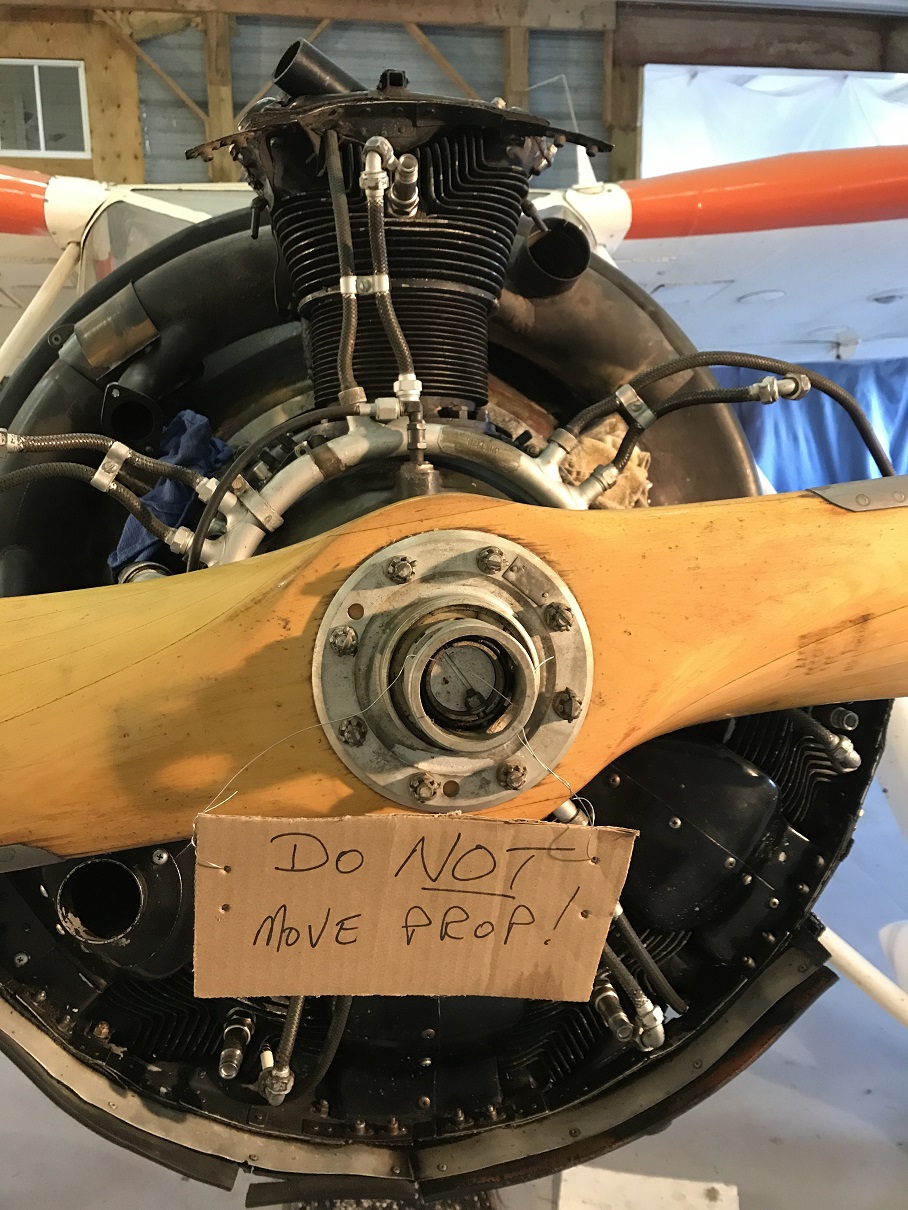
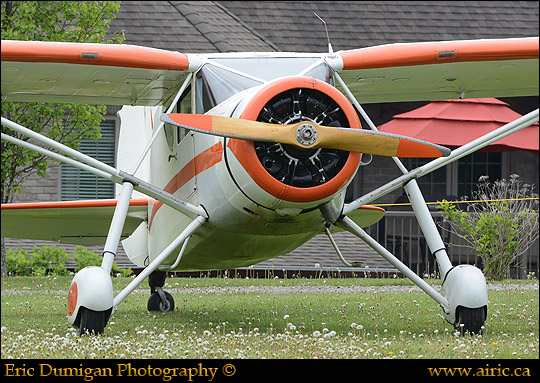
But this is supposed to be a thread about our Fairchild 24W! So I should get that fine old machine back into focus. RECAP: during the winter of 2017-18 I had sent both the mags and the carb away for overhaul. Good thing I did -- the pros found problems with both. Then in May I flew to Woodstock, to Dave Hewitt's fly-in.

Image

Image

Image

Image

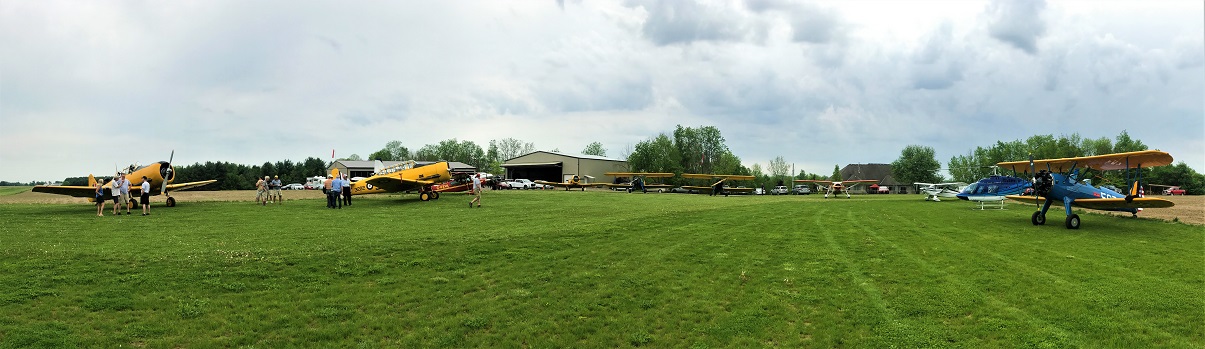
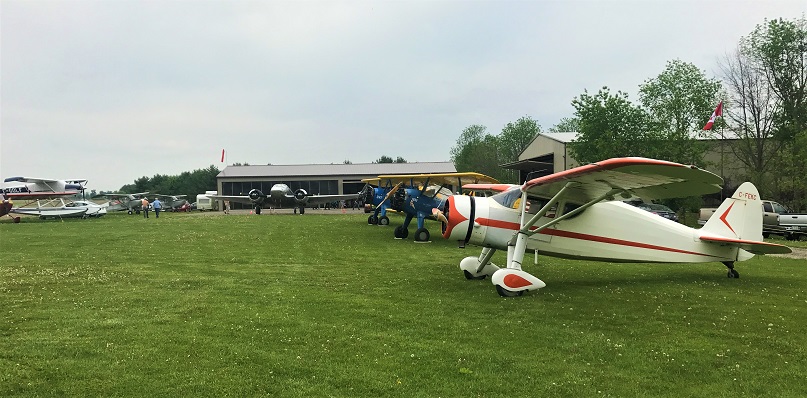
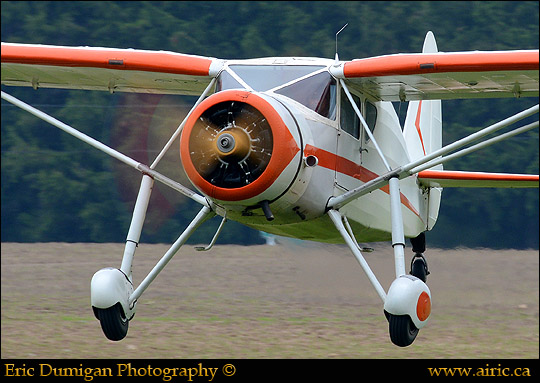
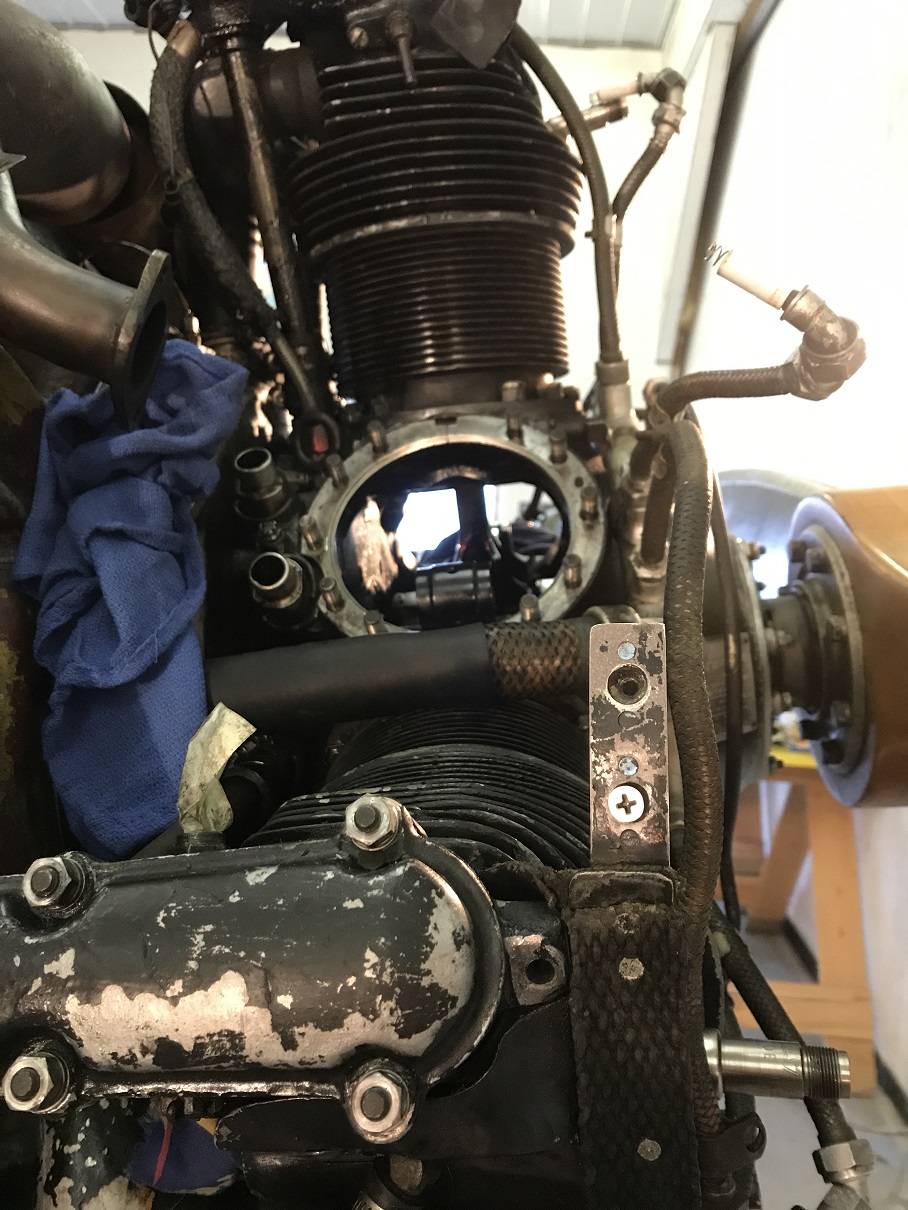
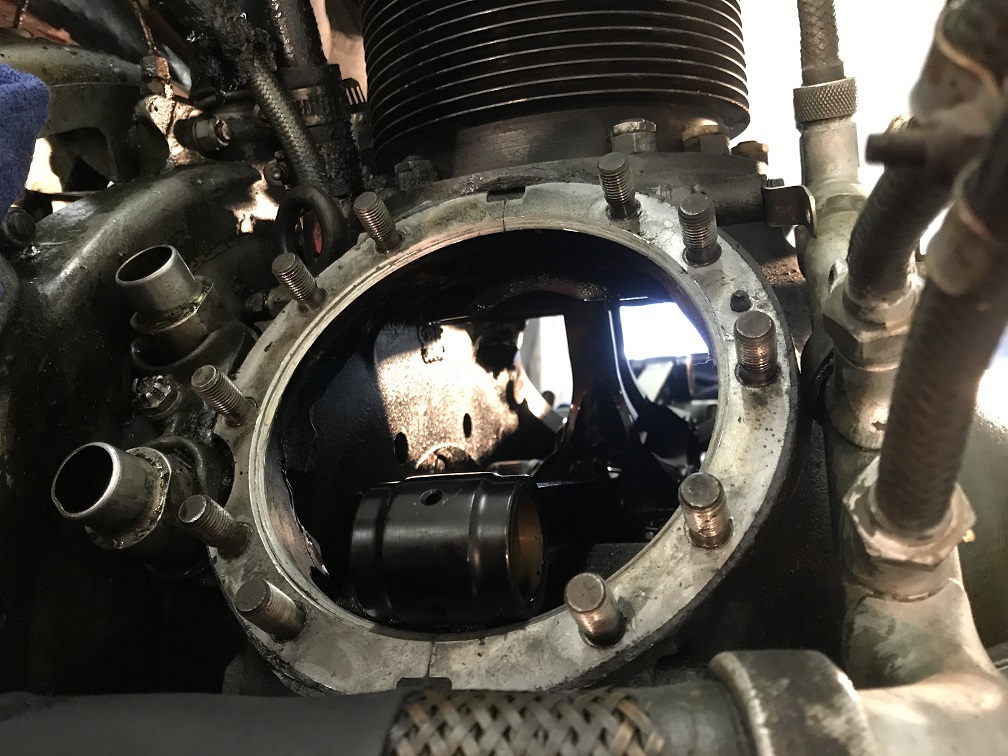
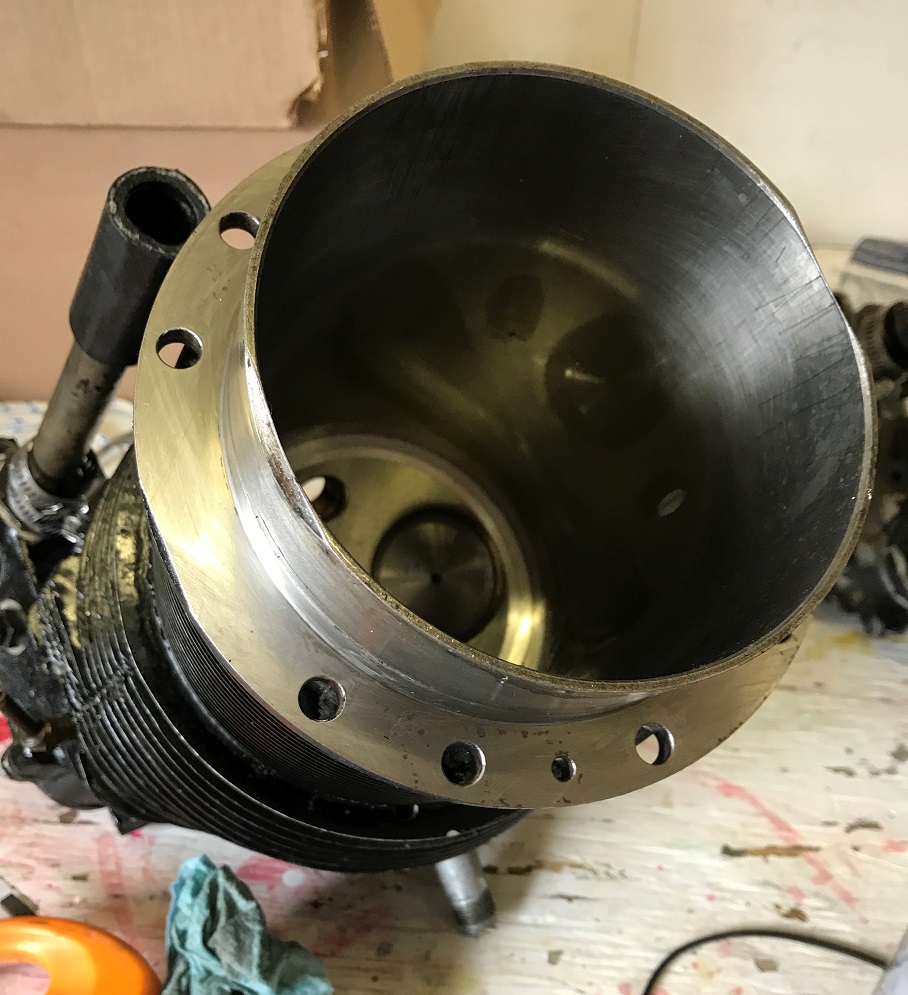
This was fun, and I was tremendously pleased with the way the Fairchild was performing -- silky-smooth and more power than ever before. But as I took off for the return flight, the engine was low on RPM and was not smooth at all. Most disconcerting! I did a 180 and went back and landed at Dave's. I checked: were all 7 cylinders hot? Was anything obvious wrong? Was there still oil -- or was it all on the belly? No... all seemed okay... so I flew back home. But when I got the hangar doors closed I did a quick compression check. Results: not good. I did it again. Darn. #2 cylinder was blowing 40/80, and #7 had almost no compression at all. In fact the exhaust valve kept sticking while I did the compression check.

Rats.

Author:  Dave Hadfield [ Fri Jan 25, 2019 7:42 pm ]
Post subject:  Re: Bought a Fairchild 24

So I conferred with Stan. He came out, investigated, scratched his head, and delivered his verdict: both cylinders would have to come off. And once this was done, yes, the problem were quite clear: #2 had very worn rings, and #7 had an exhaust valve seat that had come loose, and was causing the valve to stick.

This caused me much knashing of teeth! I wanted a simple and reliable airplane to use because my schedule was already full with flying the fighters. I didn't want complications! Who would! But it-was-what-it-was... so for the rest of the summer the Fairchild went to the back-burner and I concentrated on getting the Spitfire out to BC and back, in one piece.

The solution turned out to be much more complicated than I initially thought. All the Warners are wearing out. Everyone wants the same parts to keep them going. The #2 cylinder was .020 over-sized. My stock of rings for pistons of that size was used-up. Harman D and John D didn't have any more. It took all Summer and Fall to scrounge, search, and finally find a solution.

And as for #7, we decided to install a new cylinder I had bought on-spec a couple of years earlier, off Barnstormers. This wasn't just new, it was Brand-New. Never used! Still in the maker's cosmoline! Totally stock! But trying to find a piston for it turned out to be a nightmare. No one has installed a new cylinder in a Warner for a very long time! Again, I had to scrounge, search, haunt the internet, and make a lot of phone calls. Eventually success.

Author:  Dave Hadfield [ Fri Jan 25, 2019 8:14 pm ]
Post subject:  Re: Bought a Fairchild 24

So Stan came over to install the 2 prepped-and-ready cylinders. (Lots of oil!) I sure like the look of that brand-new piston!


Image

The engine was looking a little gaunt -- more like a Kinner!

Image

You could see through it!

Image


Image

Author:  Dave Hadfield [ Fri Jan 25, 2019 8:23 pm ]
Post subject:  Re: Bought a Fairchild 24

And we got #2 on with no trouble at all. But when we went to install #7, we could not wiggle the studs through the holes. They didn't seem to fit! What the heck!?!

And sure enough, measurement soon established that the holes were for 5/16" studs, and the studs themselves were 3/8"

Image

I dug into my files. Yes, there it was, a 1951 AWD. The smaller studs had been breaking, so there was a procedure to replace them with larger ones. This aircraft, CF-EKC, had long-since complied with the directive. But I'd forgotten about it "because it didn't apply to me".

The original never-used cylinder was totally stock, pre-1951. It didn't have the holes bored-out. Darn!

So I had to come up with a procedure to bore-out the holes -- while staying dead-on center, and dead-straight!

Stay tuned...

Author:  Dan K [ Sun Jan 27, 2019 4:07 pm ]
Post subject:  Re: Bought a Fairchild 24

Image

Author:  Dave Hadfield [ Sun Jan 27, 2019 5:36 pm ]
Post subject:  Re: Bought a Fairchild 24

SAME BAT-WARNER!

Author:  Dan K [ Sun Jan 27, 2019 10:04 pm ]
Post subject:  Re: Bought a Fairchild 24

Broke out the Fender Strat knock-off...beach music improv for the past 20 minutes...

:rock:

NA-NA-NA-NA-NA-NA-NA-NA-NA-NA-NA-NA-NA-NA... :lol:


Image

Author:  Dave Hadfield [ Fri Feb 08, 2019 6:01 pm ]
Post subject:  Re: Bought a Fairchild 24

A friend suggested that I grind a 45 angle onto a drill bit, have a whirl, and it would self center. Hmmmm… probably that would work... but all 10 holes had to be perfect. 9/10 = scrap. And there are NO new cylinders around.

I took it to a machine shop for advice. They wanted to put it on a lathe or milling machine, but the cylinder has no flat or perpendicular surfaces. No place to grip the thing. You'd have to make a very expensive jig. We looked at the unit, hefted it around, wrinkled our eyebrows, and pondered. Someone, I'm not sure who, came up with the idea of a drilling-guide instead. We'd make a collar, and I'd drill guide-holes in that, at home.

The machinist pulled out a caliper -- a very large old caliper out of an old wooden case -- measured carefully, and 2 days later I picked up the collar-guide made from 3/8" mild steel. He nailed it. It slid onto the cylinder skirt and when it was all the way to the base, I could rotate it -- JUST. Perhaps a 1/1000" clearance. Absolutely no play at room temperatures. Perfect.

I didn't take a picture at that point. Not until later when I'd drilled the first holes.

Image

Author:  Dave Hadfield [ Fri Feb 08, 2019 6:13 pm ]
Post subject:  Re: Bought a Fairchild 24

What a great solution! Simple, and cheap!

OK, the next thing was to transfer the center of the existing 5/16" holes to the collar/drill-guide. I had to think about that for a bit... But a "bit" was precisely the answer! A drill bit! You see, the holes weren't exactly 5/16". They were oversized 1/32" to allow for a bit of mis-match amongst the 10 studs. So I bought a 5/16 + 1/32 = 11/32" bit and cut off the shank. I figured that if I put a point of a section of that bit-shank, and pressed it through the hole into the collar, it would transfer the mark into the mild steel.

So that's what I did. I took the 1" of shank (more wouldn't fit below the cooling fins of the cylinder) and chucked it in the drill press. Then I spun it up, while I held an angle-grinder to it with the disc rotating the opposite way to the drill-press. The result was this:

Image

The steel did not lose it's temper because of the speed of rotation of both parts -- lots of air-cooling.

Author:  Dave Hadfield [ Fri Feb 08, 2019 6:26 pm ]
Post subject:  Re: Bought a Fairchild 24

So, I slipped the bit-marker into the hole...

Image

… slid the collar down and clamped it tight and pressed it hard into the collar using a set of vise-grips. This did indeed transfer a center-mark! I enlarged this with a center-punch, then drilled it with a small bit (1/8"), then the full-sized 11/32 bit (cobalt -- bought for the purpose).

Image

The cobalt bit ate into the mild steel like it was wood.

Image

Author:  Dave Hadfield [ Fri Feb 08, 2019 6:38 pm ]
Post subject:  Re: Bought a Fairchild 24

To shorten the story, this worked. I drilled a few different holes in the guide, allowing for 2 or 3 thousandths of error, and then could pick one that would line one up exactly on the small hole in the skirt.


Image


Then clamp it firmly in place...


Image


… and drill in a carefree, devil-may-care, get-it-done-now fashion, secure in the knowledge of being righteous and true! (Not really. I fussed. And bought a new 1/2 drill for the process, and a new cobalt bit that was 1/32" larger than the 3/8" stud = 13/32".) I drilled through the skirt ten times, and widened all the holes -- for better or worse.

Author:  Dave Hadfield [ Fri Feb 08, 2019 6:51 pm ]
Post subject:  Re: Bought a Fairchild 24

Result -- success! The cylinder slipped over the studs perfectly!

Image

When 1952 rolls around, and all the many Warner cylinders have to be modified this way, I'm going to get rich!

BUT... there's always another wrinkle...

Sigh...

One of my exhaust sections was too corroded. I did have a replacement. But it didn't fit...

Image

… stay tuned...

Author:  DH82EH [ Wed Apr 17, 2019 7:40 pm ]
Post subject:  Re: Bought a Fairchild 24

Well.....?
I know for a fact that it all turned out well.
Dave buzzed our strip today and did a few wing overs. She sounded smooth as silk by the way.
I thought to my self, this isn't the Spitfire Dave :wink:
Very good choice to not land, as our strip is still very wet and soft, with more rain in the forecast.
Looked like you were really enjoying your beauty today Dave.
Good on ya!

Andy

Author:  Dave Hadfield [ Sat Apr 20, 2019 9:52 am ]
Post subject:  Re: Bought a Fairchild 24

Wingovers? Buzz job? I'm sure I don't know what you mean! Must have been some other Fairchild. But I'm glad their engine sounded good.

And I'll bet someone down there was waving! ;)

Author:  Dave Hadfield [ Sat Apr 20, 2019 10:12 am ]
Post subject:  Re: Bought a Fairchild 24

Carrying on, yes, I found a superb SS welder (PM me if you want the contact, in Bradford ON), and he added material onto each end. Lovely job. Invisible beads. And then I ground-ground-ground the big pipe to fit. Took ages, and I was knee-deep in filings.

Image

But, when it was all trimmed and in the right place, with the right curve, the neck and end-piece no longer fit the cylinder head. Drat! Not even close! Even though it was a proper exhaust piece for the same model engine. There needed to be more length, a rotation, and a tilt.

So I cut it off! Then fastened the 2 pieces into place.

Image

Next I had to preserve the gap and alignment so I could take it back to the welder and get him to fill it in. So I had the idea of cutting 3 strips of sheet-metal, then bridging the gap with them spaced around the tube, then holding it all in place with hose clamps.

Image

This worked perfectly, cheap and simple and foolproof. It came back perfectly welded, again, and fit to perfection.

Page 55 of 58 All times are UTC - 5 hours
Powered by phpBB® Forum Software © phpBB Group
https://www.phpbb.com/