Warbird Information Exchange

DISCLAIMER: The views expressed on this site are the responsibility of the poster and do not reflect the views of the management.
It is currently Fri Apr 19, 2024 3:48 pm

All times are UTC - 5 hours


Classic Wings Magazine WWII Naval Aviation Research Pacific Luftwaffe Resource Center
When Hollywood Ruled The Skies - Volumes 1 through 4 by Bruce Oriss


Post new topic Reply to topic  [ 323 posts ]  Go to page Previous  1 ... 12, 13, 14, 15, 16, 17, 18 ... 22  Next
Author Message
PostPosted: Thu Jun 06, 2013 3:21 pm 
Offline
User avatar

Joined: Thu Aug 21, 2008 3:29 pm
Posts: 351
Location: Windsor, ON
Time for pictures.

Overall picture of the shop today. 3 of the landing gear doors and the port wingtip behind the work bench.
Image

One of the landing gear doors we spent the day riveting. This was earlier in the day, we've almost completed all of the rivets on the outter skins. Once that's done we can do the inspection/document process and then begin riveting the interior skins on.
Image

Same door later in the day.
Image

Another one of the doors. This one has almost all skins riveted on the exterior, but there is still a bit more work to do before buttoning this one up for good.
Image

The third door we have on the go. Today was spent fitting and prepping the exterior skins for final installation which will begin tomorrow.
Image

Rear of the port wingtip.
Image

Finally the starboard wingtip which is pretty much on hold at the moment.
Image

_________________
Ryan Orshinsky
Windsor, ON
CH2A - Engineering
rorshinsky@ch2a.ca
http://www.ch2a.ca


Top
 Profile  
 
PostPosted: Tue Jun 11, 2013 2:34 am 
Offline
KiwiZac
User avatar

Joined: Fri Jun 13, 2008 12:33 am
Posts: 1444
Location: Blenheim, NZ
This is an amazing restoration to follow - and in such detail! - so thank you for sharing your updates with us.

_________________
Zac in NZ
#avgeek, modelbuilder, photographer, writer. Callsign: "HANDBAG".
https://linktr.ee/zacyates

"It's his plane, he spent the money to restore it, he can do with it what he wants. I will never understand what's hard to comprehend about this." - kalamazookid, 20/08/2013
"The more time you spend around warbirds the sooner you learn nothing, is simple." - JohnB, 24/02/22


Top
 Profile  
 
PostPosted: Fri Jun 28, 2013 2:19 pm 
Offline
User avatar

Joined: Thu Aug 21, 2008 3:29 pm
Posts: 351
Location: Windsor, ON
Another update for you guys!

We've made a lot of progress over the past few weeks and we now have a regular crew of 6 to 8 people almost everyday! It's great to see people getting involved with the project once again and new crew members joining on!

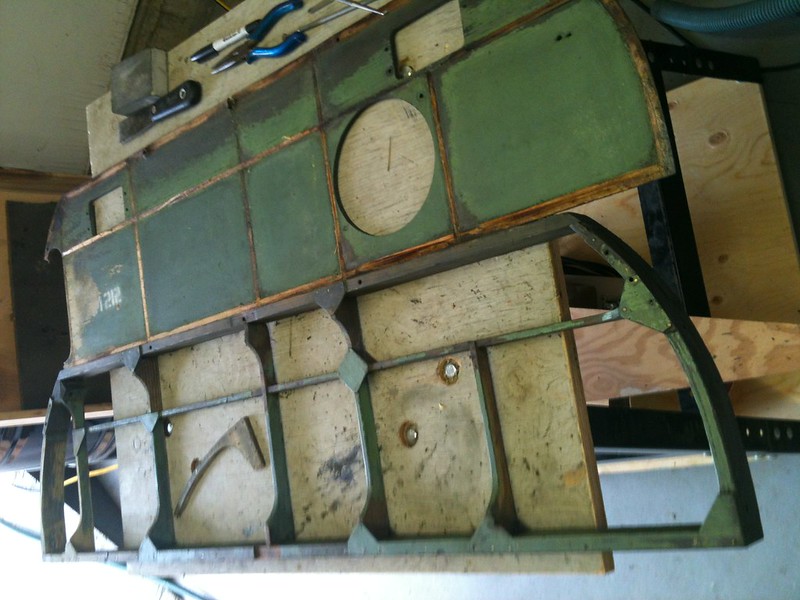
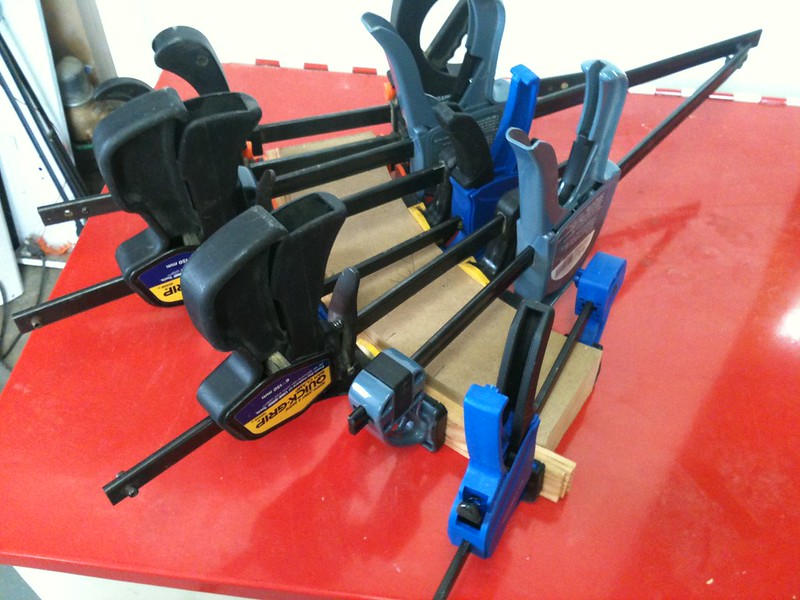
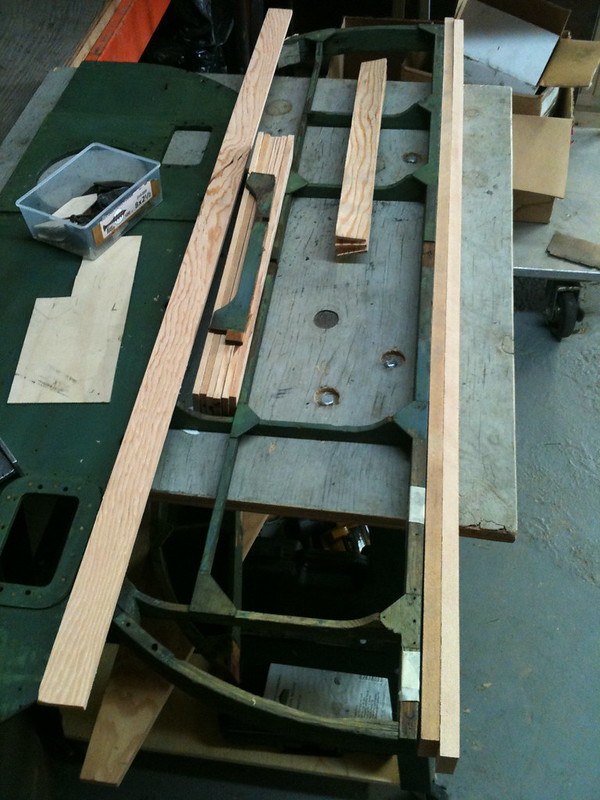
Let's start with the Port Wingtip: This past week a couple of us began working on this piece once again. Our structures AME found a few cracks in one of the ribs, this resulted in the installation of a doubler to take care of that issue. We also began fitting the leading edge, we found one of the leading edge ribs had to be modified slighting so it was removed and reworked, we then had to make new brackets that attached it to the 4 stingers, once that was done it was reinstalled. We also finished off the last two top side skins which we are going to start riveting next week! The last two skins for the bottom side are in the process of being made and we're reading to start riveting into the place the two large skins on the bottom side that are on the trailing edge of the wingtip. We hope to have it nearly completed in another week or two.

The two new top skins clecoed into place. We'll also be riveting the smaller skin at the top.
Image

Image

The two skins which we will begin riveting on the bottom trailing edge next week.
Image

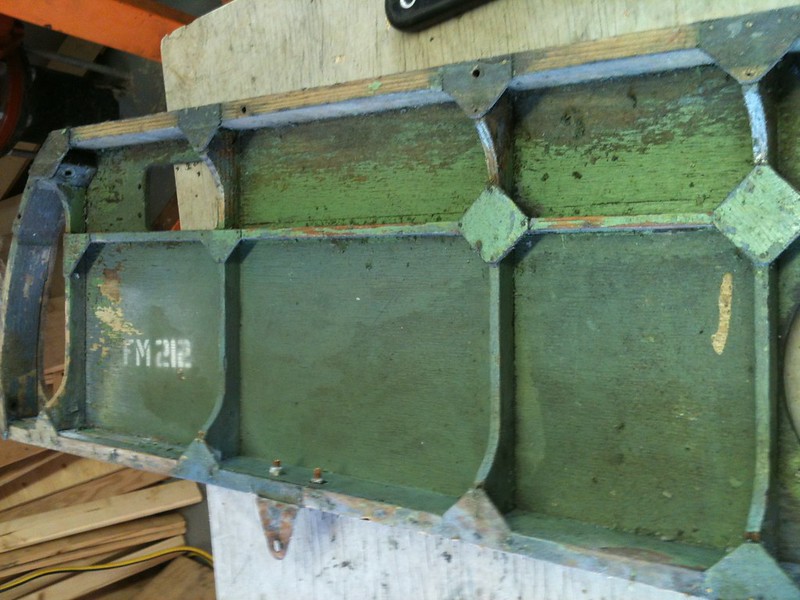
Rib that had to be reworked.
Image

Next up the gear doors: Two of the doors are nearly completed, a few more minor things to complete. Claire (Don, "Big Daddy's" daughter) has been doing an amazing job riveting on the bottom skins which we've decided to try to attach with mostly bucked rivets rather than blind rivets to save on cost. Once they're off of our shelf I'll get some photos of those two.

The other two are coming along nicely as well. Claire has started riveting the bottom skins on this one.
Image

Finally the 4th door, we're in the process of making the last of the bottom skins. The top ones have been primed and are ready for installation once the bottom ones are all back drilled.
Image

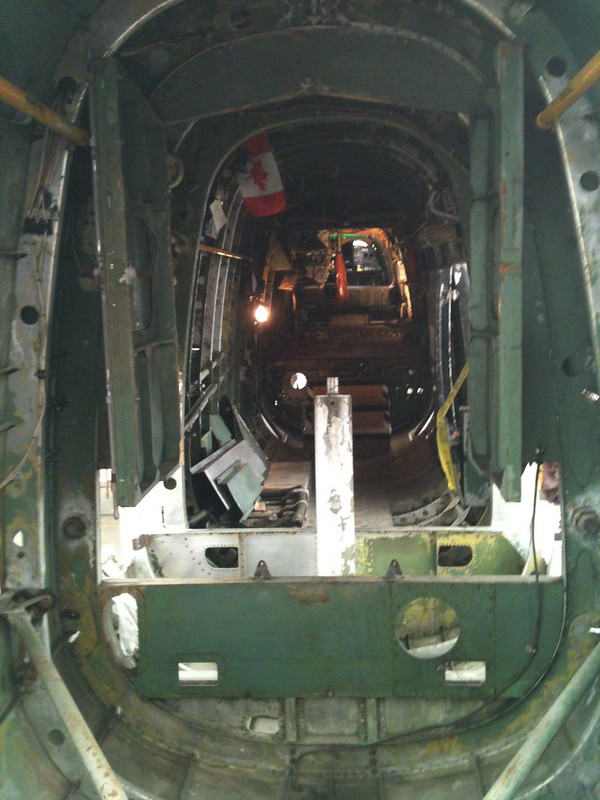
Vertical stabilzer: A week or so ago we brought in one of the vertical stabilizers, we've begun to open that one up to see how much work is required for it. We'll be building a proper jig soon to mount it in and then will be removing the skins and starting the task of restoring that chunk of the plane!

Image

I think that's about it for now. I'll hopfully have some more news soon to post! :drink3:

_________________
Ryan Orshinsky
Windsor, ON
CH2A - Engineering
rorshinsky@ch2a.ca
http://www.ch2a.ca


Top
 Profile  
 
PostPosted: Fri Jun 28, 2013 4:33 pm 
Offline
Long Time Member
Long Time Member
User avatar

Joined: Wed Jan 24, 2007 1:54 am
Posts: 5120
Location: Stratford, CT.
Keep Em' Coming!

_________________
Keep Em' Flying,
Christopher Soltis

Dedicated to the preservation and education of The Sikorsky Memorial Airport

CASC Blog Page: http://ctair-space.blogspot.com/
Warbird Wear: https://www.redbubble.com/people/warbirdwear/shop

Chicks Dig Warbirds.......right?


Top
 Profile  
 
PostPosted: Sat Jun 29, 2013 8:52 pm 
Offline
User avatar

Joined: Thu Feb 23, 2012 8:13 am
Posts: 91
Location: Windsor, ON, Canada
One of the surprising things to me about the Lancaster project is the discovery of the amount of woodworking that went into these birds. There are wooden forms and stringers in all of the canoes (aka the rear engine nacelles), the double doors over the main spar, the draft-doors to the rear turret, the navigator's table, and the main hatch in the nose, not to mention some bits in the wingtips and other areas. One of my main tasks since joining this project has been using my woodworking experience to build work tables, jigs, stands, etc. Now I get to do some of the really fun stuff.

Last week, we pulled out the wooden doors and frames to the rear turret (I believe they were called the "draft-proof doors") to see what shape they were in. Here is a shot looking forward from the rear turret before they were removed..

Image

The first piece we looked at was the lower frame, which is usually obscured by the horizontal stabilizers when they are in place.

Image

Here it is after removal.

Image

And, after careful removal of the plywood skin...

Image

The 3 mil plywood skin was attached with 1/4" brass nails (and possibly some glue). You can see where it had been repaired and a large hole added, possibly for ventilation. The rectangular holes were for the ammunition belts which ran underneath and through the rear spar assembly. What parts of this frame weren't soaked in oil, were so dried up that it was as light as balsa wood. It is going to need to be completely re-built. I will be updating this mini-project over the next 2 weeks. Stay tuned and thanks for watching!

Don


Top
 Profile  
 
PostPosted: Wed Jul 03, 2013 8:05 am 
Offline
1000+ Posts!
1000+ Posts!
User avatar

Joined: Sun May 02, 2004 10:14 am
Posts: 1692
Location: canada
Looks to be in pretty good shape Don, Are you going to build a completely new one using this as a template or repair whats there? Also you will need to manufacture the complete rear gunners walkway and the wood steps over the ammunition tracking. If you dont have the end piece for the walkway at all, it has a socket attached to it that the door locking pin goes in to secure the two doors to the walkway. From memory I believe you should still have the mounting arms for those oon the floor aft of where the tailplane runs through the fuselage?

_________________
Cheers,
Peter

________


Top
 Profile  
 
PostPosted: Wed Jul 03, 2013 11:50 am 
Offline
User avatar

Joined: Thu Feb 23, 2012 8:13 am
Posts: 91
Location: Windsor, ON, Canada
peter wrote:
Looks to be in pretty good shape Don, Are you going to build a completely new one using this as a template or repair whats there? Also you will need to manufacture the complete rear gunners walkway and the wood steps over the ammunition tracking. If you dont have the end piece for the walkway at all, it has a socket attached to it that the door locking pin goes in to secure the two doors to the walkway. From memory I believe you should still have the mounting arms for those oon the floor aft of where the tailplane runs through the fuselage?


Hi Peter,

The pics of the lower door frame are quite deceiving. It is in pretty bad shape actually. Most of it is so soaked in oil that it won't hold paint. The rest is so dried up and brittle that you can crumble it in your hands. So, yes, I will be re-building the whole piece from new material, using the old one as a template. The good news is that the doors and upper frame are likely re-usable, and once cleaned up and re-painted, can go back in the plane.

The gunner's walkway may be long gone (or was never there), tho we do have a pile of wooden parts that may hold some clues. I will have to look through photos to see what the walkway even looks like.

Are the mounting arms you are referring to in the lower right and left of this pic, IOW the tubing that runs out at and angle to either side of the fuselage?

Image

Thanks!

Don


Top
 Profile  
 
PostPosted: Wed Jul 03, 2013 4:31 pm 
Offline
User avatar

Joined: Thu Aug 21, 2008 3:29 pm
Posts: 351
Location: Windsor, ON
We do have the gunners walkway as well as all of the rest of the wooden/aluminum components that were in the tail section. We had to remove them to get the horizontal stabilizers out.

Can see some of it here during the removal process.
Image

They're either still in the hut or piled in with everything on the new shelves in the hangar. :)

_________________
Ryan Orshinsky
Windsor, ON
CH2A - Engineering
rorshinsky@ch2a.ca
http://www.ch2a.ca


Top
 Profile  
 
PostPosted: Thu Jul 04, 2013 11:53 am 
Offline
1000+ Posts!
1000+ Posts!
User avatar

Joined: Sun May 02, 2004 10:14 am
Posts: 1692
Location: canada
Great to see you have the gunners walkway. No those brackets you refer to are braces. The ones for the steps are attached to the lower fuselage formers. I Will try and find a picture or drawing

_________________
Cheers,
Peter

________


Top
 Profile  
 
PostPosted: Thu Jul 04, 2013 2:20 pm 
Offline
User avatar

Joined: Thu Feb 23, 2012 8:13 am
Posts: 91
Location: Windsor, ON, Canada
peter wrote:
Great to see you have the gunners walkway. No those brackets you refer to are braces. The ones for the steps are attached to the lower fuselage formers. I Will try and find a picture or drawing


Thanks to Ryan I did find the walkway today. It is in pretty terrible shape as well so I can add that to my list of woodworking projects.

I managed to get a pretty good start on the lower door frame today. We purchased a nice, dry 3"x 8"x8' piece of fir yesterday and today I started ripping the various pieces I will need. The two curved end pieces are where I am starting as they will be the most challenging part of the project.

I began by ripping six 16" long and +1/8" thick strips of fir. I am using 3 strips on each end piece, laminated together and bent around a jig that I built from stacked pieces of 3/4" MDF. I soaked the first three pieces in hot water and then clamped them together around the jig, just to pre-bend the wood before gluing them up.

Image

I will leave these in the jig overnight to dry out and then glue them up tomorrow.

The next step was to rip the rest of the stock needed for the two long top and bottom pieces as well as the cross braces.

Image

That's all for today. More to follow.

Don


Top
 Profile  
 
PostPosted: Thu Jul 04, 2013 7:49 pm 
Offline
1000+ Posts!
1000+ Posts!
User avatar

Joined: Sun May 02, 2004 10:14 am
Posts: 1692
Location: canada
Will the original one become a display artifact when the new ones built?

No luck on the drawing or picture so far..

_________________
Cheers,
Peter

________


Top
 Profile  
 
PostPosted: Thu Jul 04, 2013 8:54 pm 
Offline
User avatar

Joined: Thu Feb 23, 2012 8:13 am
Posts: 91
Location: Windsor, ON, Canada
peter wrote:
Will the original one become a display artifact when the new ones built?

No luck on the drawing or picture so far..


Yes, that's the plan. Thanks for looking, Peter.

Cheers,
Don


Top
 Profile  
 
PostPosted: Thu Jul 04, 2013 9:05 pm 
Offline
1000+ Posts!
1000+ Posts!
User avatar

Joined: Sun May 02, 2004 10:14 am
Posts: 1692
Location: canada
Perfect Don thanks! Also the walkway should install onto taller tubular brackets that come up from the stringers on the floor as well.. Kinda hard to explain online but if I was there I could show you exactly..

_________________
Cheers,
Peter

________


Top
 Profile  
 
PostPosted: Fri Jul 05, 2013 8:20 am 
Offline
1000+ Posts!
1000+ Posts!
User avatar

Joined: Sun May 02, 2004 10:14 am
Posts: 1692
Location: canada
Don,
if you give me an email address I will email you two scans from an AP that have info about the gunners walkway and mounting arms.

_________________
Cheers,
Peter

________


Last edited by peter on Fri Jul 05, 2013 10:31 am, edited 2 times in total.

Top
 Profile  
 
PostPosted: Fri Jul 05, 2013 10:29 am 
Offline
User avatar

Joined: Thu Aug 21, 2008 3:29 pm
Posts: 351
Location: Windsor, ON
peter wrote:
Perfect Don thanks! Also the walkway should install onto taller tubular brackets that come up from the stringers on the floor as well.. Kinda hard to explain online but if I was there I could show you exactly..


We have those brackets as well Peter, again it was all taken out when we removed the horizontal stabs.

_________________
Ryan Orshinsky
Windsor, ON
CH2A - Engineering
rorshinsky@ch2a.ca
http://www.ch2a.ca


Top
 Profile  
 
Display posts from previous:  Sort by  
Post new topic Reply to topic  [ 323 posts ]  Go to page Previous  1 ... 12, 13, 14, 15, 16, 17, 18 ... 22  Next

All times are UTC - 5 hours


Who is online

Users browsing this forum: No registered users and 23 guests


You cannot post new topics in this forum
You cannot reply to topics in this forum
You cannot edit your posts in this forum
You cannot delete your posts in this forum
You cannot post attachments in this forum

Search for:
Jump to:  
Powered by phpBB® Forum Software © phpBB Group