Re: Not sure, anybody interested?
Fri Feb 07, 2014 8:42 pm
Getting my hands dirty on our Spit again..We should have a dedicated thread for tinbashery artists 

Re: Not sure, anybody interested?
Fri Feb 07, 2014 8:52 pm
Rossco wrote:Getting my hands dirty on our Spit again..We should have a dedicated thread for tinbashery artists
How about dedicated forum:
http://www.allmetalshaping.com/index.php
Re: Not sure, anybody interested?
Fri Feb 07, 2014 11:10 pm
I think this thread needs a sticky...
Re: Not sure, anybody interested?
Fri Feb 07, 2014 11:15 pm
Not sure what that is but will continue posting here unless Mods decide a better location. Thanks for the support. Just trying to share years of knuckle bustin. 
Re: Not sure, anybody interested?
Mon Feb 10, 2014 8:56 pm
Scott, I hope you will update this as you do more parts. One thing you have hinted at that I found to be true, is that 90% of metalwork can only been learned by doing it. I think that is because it is 10% science and 90% art? The other thing I want to echo is that you can do a lot with a few hundred bucks of tools. For smaller parts, a couple of hammers, a dolly, a shot bag and a shrinker is all you need to make compound curves, such as replacing worn out fairings or sections of cowling. I bought a Harbor Freight planishing hammer and was very disappointed that it did not have enough power to form metal. Over time, though, I found it was a great planishing hammer! You can make the part with the hand tools described, but instead of having to be an absolute artist with those tools, you can smooth and finish it with the cheap planishing hammer.
I guess that is about 2 cents worth. Keep us up to date, please?!
I guess that is about 2 cents worth. Keep us up to date, please?!
Re: Not sure, anybody interested?
Mon Feb 10, 2014 10:42 pm
Rob, thanks for the reply. Yes, there will be much more to come. This is a huge project and will offer lots for review and comment.
Over the years, I learned to work with the bare minimum of tools and equipment which taught me to learn the material movement. Nicer tools now just make the job easier. The afore mentioned armor was done with hammers and tree stump forms.
Over the years, I learned to work with the bare minimum of tools and equipment which taught me to learn the material movement. Nicer tools now just make the job easier. The afore mentioned armor was done with hammers and tree stump forms.
Re: Not sure, anybody interested?
Mon Feb 10, 2014 11:01 pm
Cherrybomber13 wrote:I think this thread needs a sticky...
2nd that...
Re: Not sure, anybody interested?
Tue Feb 11, 2014 12:25 am
sdennison wrote:...Over the years, I learned to work with the bare minimum of tools and equipment which taught me to learn the material movement. Nicer tools now just make the job easier...
Is that a slam on the bigger shops that have the big yoder and Pullmax machines meaning they don't have the same skills?
And wondering why they all don't share techniques here?
Re: Not sure, anybody interested?
Tue Feb 11, 2014 9:32 am
No Sir. I would love to have and plan on adding as I can afford, the real tools of the trade. There is nothing I can teach the real shops as I said earlier in this thread. I am also making smaller and simpler parts that don't require a Pulmax. I work at the level I do based on what tools and the skill set I possess. I am merely trying to show what can be done with very little and a simple approach.
The major shops around the country are the Gold standard and have set the bar very high. I am still learning how to jump.
The major shops around the country are the Gold standard and have set the bar very high. I am still learning how to jump.
Re: Not sure, anybody interested?
Tue Feb 11, 2014 11:23 am
I think the point is that the skills are separate from the tools. No amount of fancy machines will produce good work if you don't know what you are doing. There are no Hail Mary's in sheet metalwork.
What the big machines provide is productivity. Case in point. The metal wizard at Westpac is just phenomenal at what he does. He has all the tools you describe. But I have seen the Tinman (Kent) produce the same quality work with hand tools. It might take him three times as long, but he can do it. And when he was doing production work instead of videos, he was using the wheel instead of the hammer and tree stump.
What I find great about what Scott is doing here is that he is giving us a window into the hands on restoration of a Corsair, that we just would not otherwise have. Also, there are guys here on WIX who want to learn to do it for real, and it is important to stress that you don't need to live in your car in order to get started.
Re: Not sure, anybody interested?
Tue Feb 11, 2014 4:16 pm
Really well put Rob.
The Red Baron was reportedly quoted saying something to the effect of "It's not the can, it's the guy in the can."
Structures work definitely has artistry as a huge component. Patience and understanding are very valuable as well.
Remember, it's really easy to make scrap!
Andy
The Red Baron was reportedly quoted saying something to the effect of "It's not the can, it's the guy in the can."
Structures work definitely has artistry as a huge component. Patience and understanding are very valuable as well.
Remember, it's really easy to make scrap!
Andy
Re: Not sure, anybody interested?
Tue Feb 11, 2014 9:08 pm
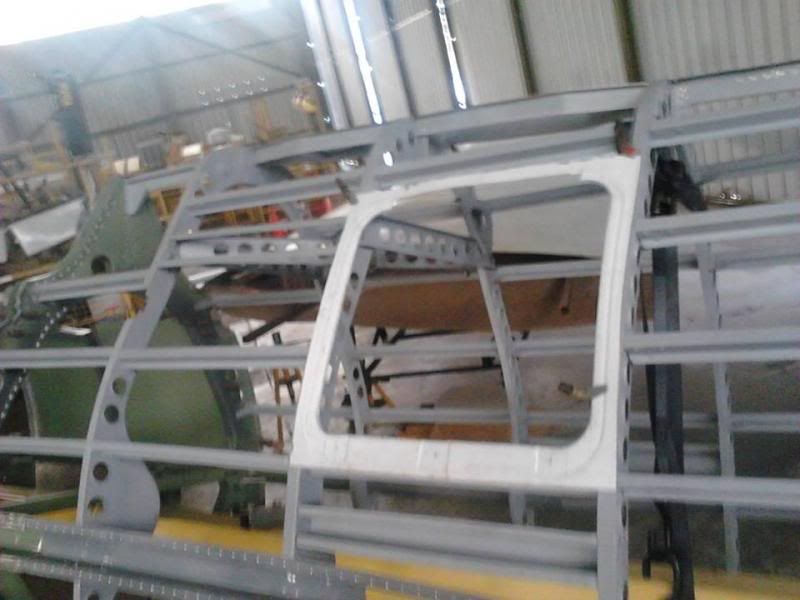
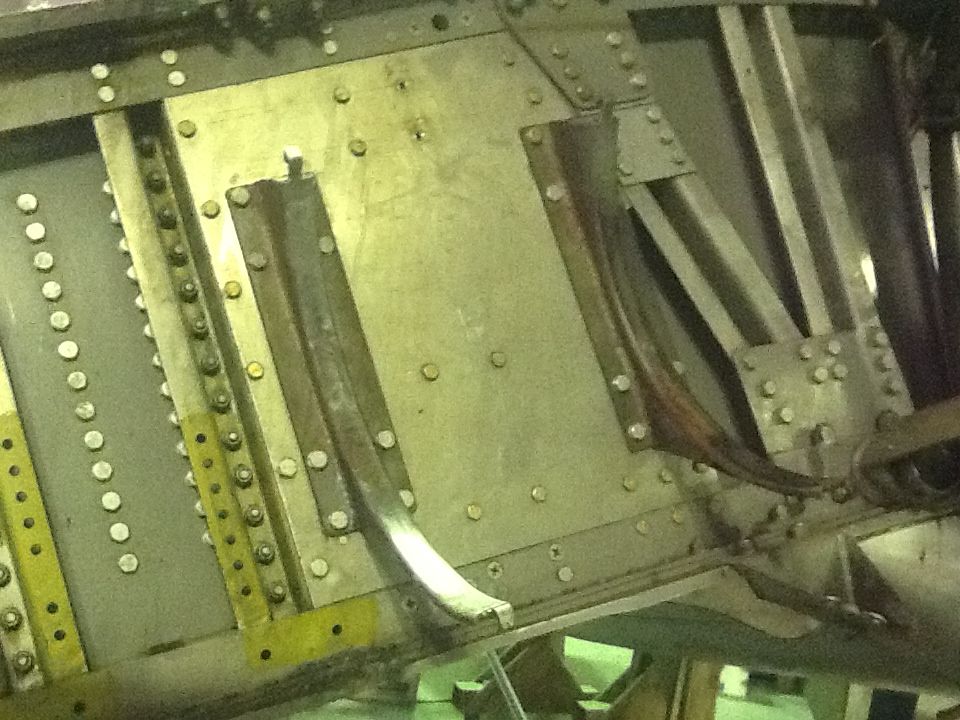
So here is another part of the project I will start and keep you up on as I get closer to the finish point. Bear in mind that with so many pieces missing from the equation, I have to do parts of some, then parts of others before I can finish any. It is a group date, so to speak. For a little background for those who may not know this aircraft. Go here: http://warbirdheritagefoundation.org/WH ... store.html to see what we are working with. Bear in mind, I am only doing a small portion of the project. Sam Taber and his team at TabAir in East Troy WI are the masterminds. The mission is to "un-hot rod" this beauty. You can see from the photos that they highly modified the air inlet portions of each wing. Effectively, they gutted them and moved the oil coolers to a rigid mount on the front of the main spar. They reduced the air opening and ducted direct to the coolers. They made all new lower skins from the leading edge down eliminating the cooler doors and outlet structure. So, that being said, I have to move the coolers back to the original location.
Here is the stock version.
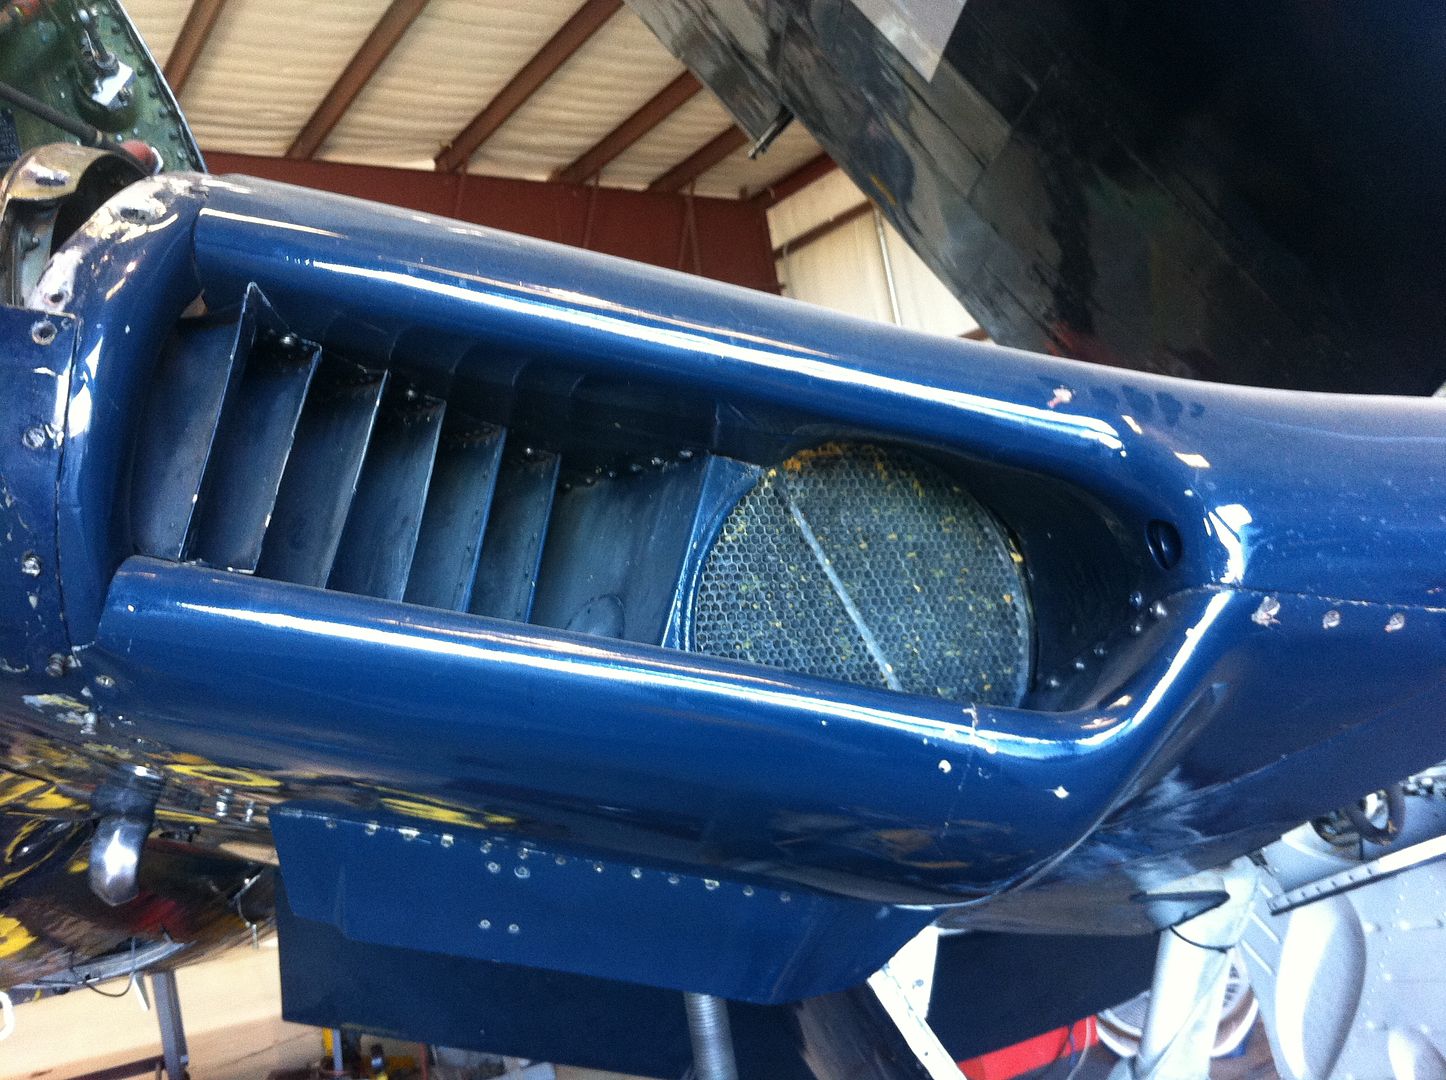
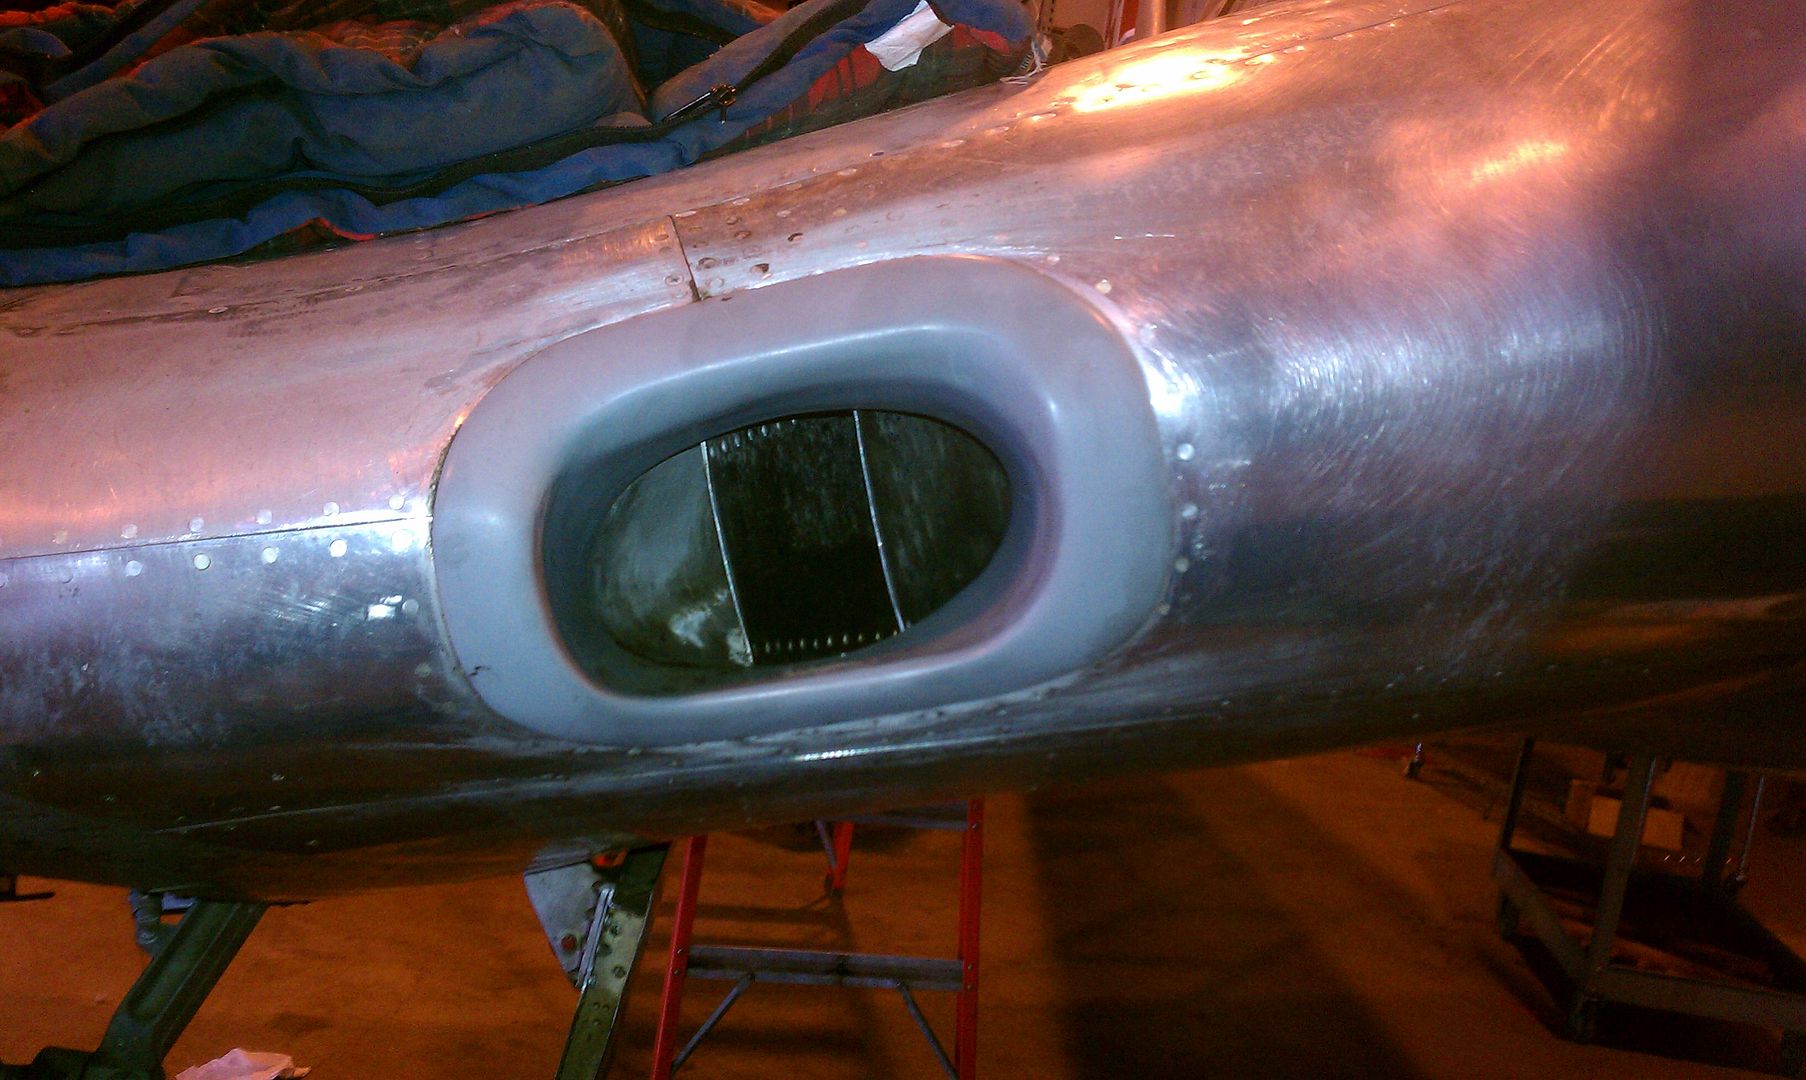
The race mod.
Stock mount.
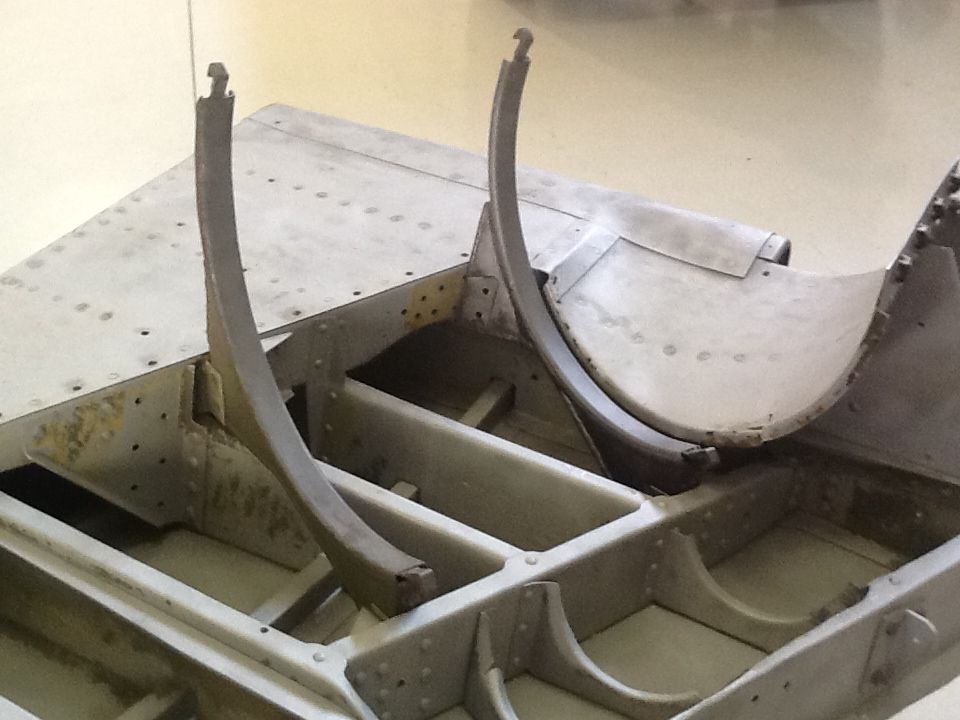
Modified mount.
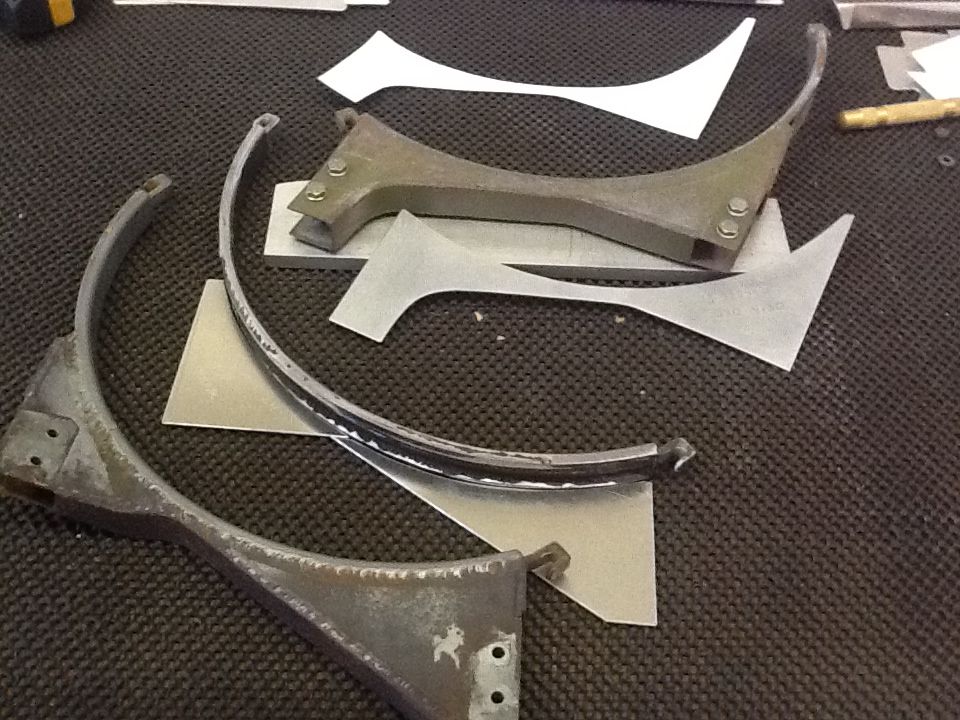
So the decision was made to do this as effectively as possible and rather than re-create the wheel, we chose to save as much of the original as possible. I cut the original saddles from the modified mounts. The race team cut the original mounts to weld to the plates to mount on the spar.
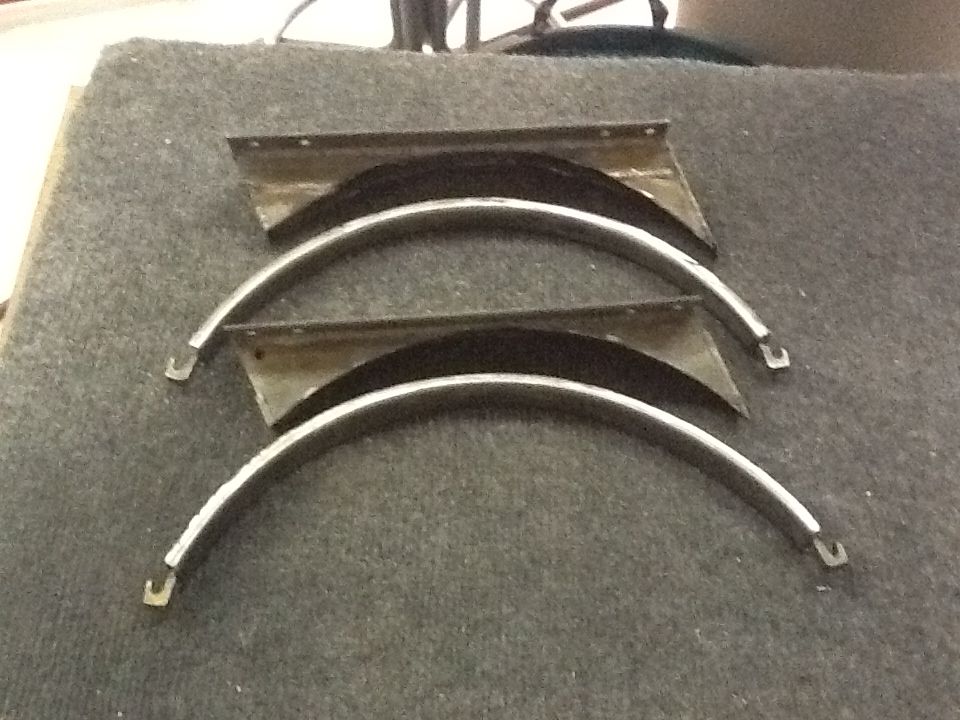
Then I made patterns, templates and fixtures to replicate the original mounts.
Then, after tacking the mounts together and fitting them to the original location, I went back to working on the other missing parts as shown in this photo. There are the missing ribs, mounts and many other bits to address.
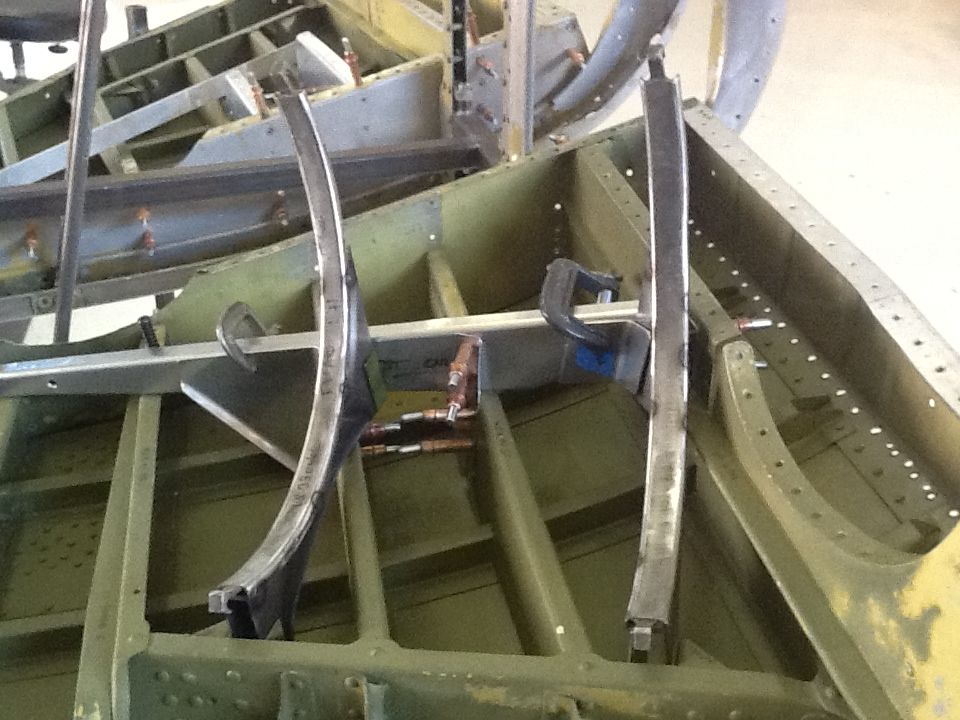
Much more to come.
Here is the stock version.

The race mod.

Stock mount.

Modified mount.

So the decision was made to do this as effectively as possible and rather than re-create the wheel, we chose to save as much of the original as possible. I cut the original saddles from the modified mounts. The race team cut the original mounts to weld to the plates to mount on the spar.

Then I made patterns, templates and fixtures to replicate the original mounts.

Then, after tacking the mounts together and fitting them to the original location, I went back to working on the other missing parts as shown in this photo. There are the missing ribs, mounts and many other bits to address.

Much more to come.
Re: Not sure, anybody interested?
Wed Feb 12, 2014 9:36 am
Great pics and thread!!! Thanks for taking the time to do it.
Metalsmithing is a true art. What little I've done I know it takes a great eye, forethought and patience. I enjoy watching the folks at American Aero Services in New Smyrna do their thing.
Metalsmithing is a true art. What little I've done I know it takes a great eye, forethought and patience. I enjoy watching the folks at American Aero Services in New Smyrna do their thing.
Re: Not sure, anybody interested?
Wed Feb 12, 2014 9:58 am
Scott, great work once again. Those junction boxes are beautiful! Tell Sam hi for me. That Corsair is a great project to be working on, although I thought it looked kind of cool with the big Aeroproducts prop...
Re: Not sure, anybody interested?
Wed Feb 12, 2014 7:36 pm
As I mentioned earlier about other parts needed in this upper center section. I apologize for not pointing this out before but in the pictures of the oil cooler saddles, the wing sections are mounted to the fixture upside down. What you are looking at is the underside of the upper wing section. The oil cooler hangs from these mounts.
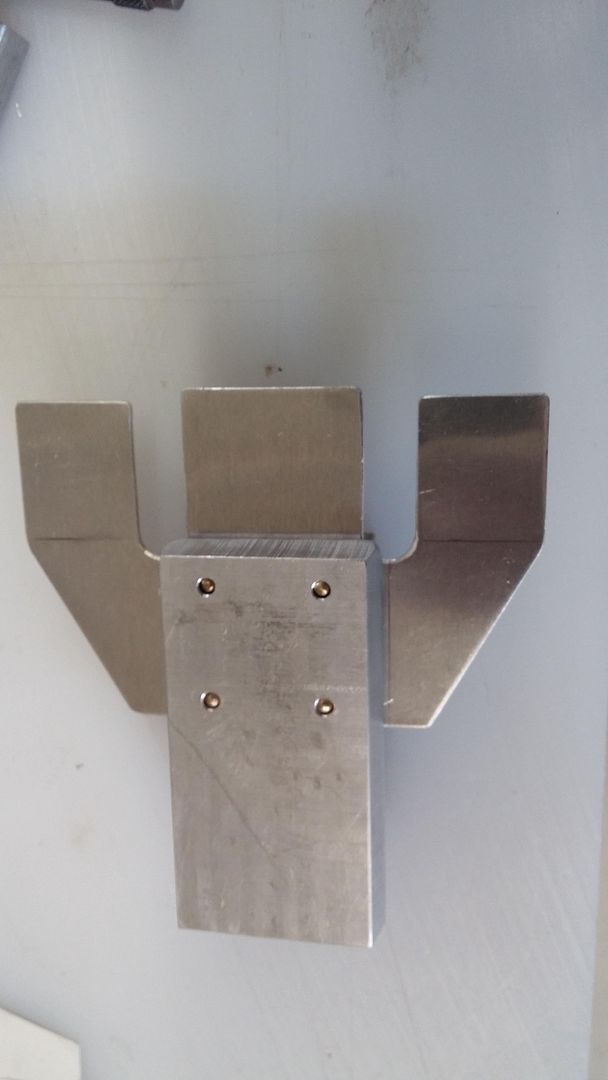
Ok, here's what is called a support angle and is missing on our aircraft. It is the little box piece in the center of the picture.
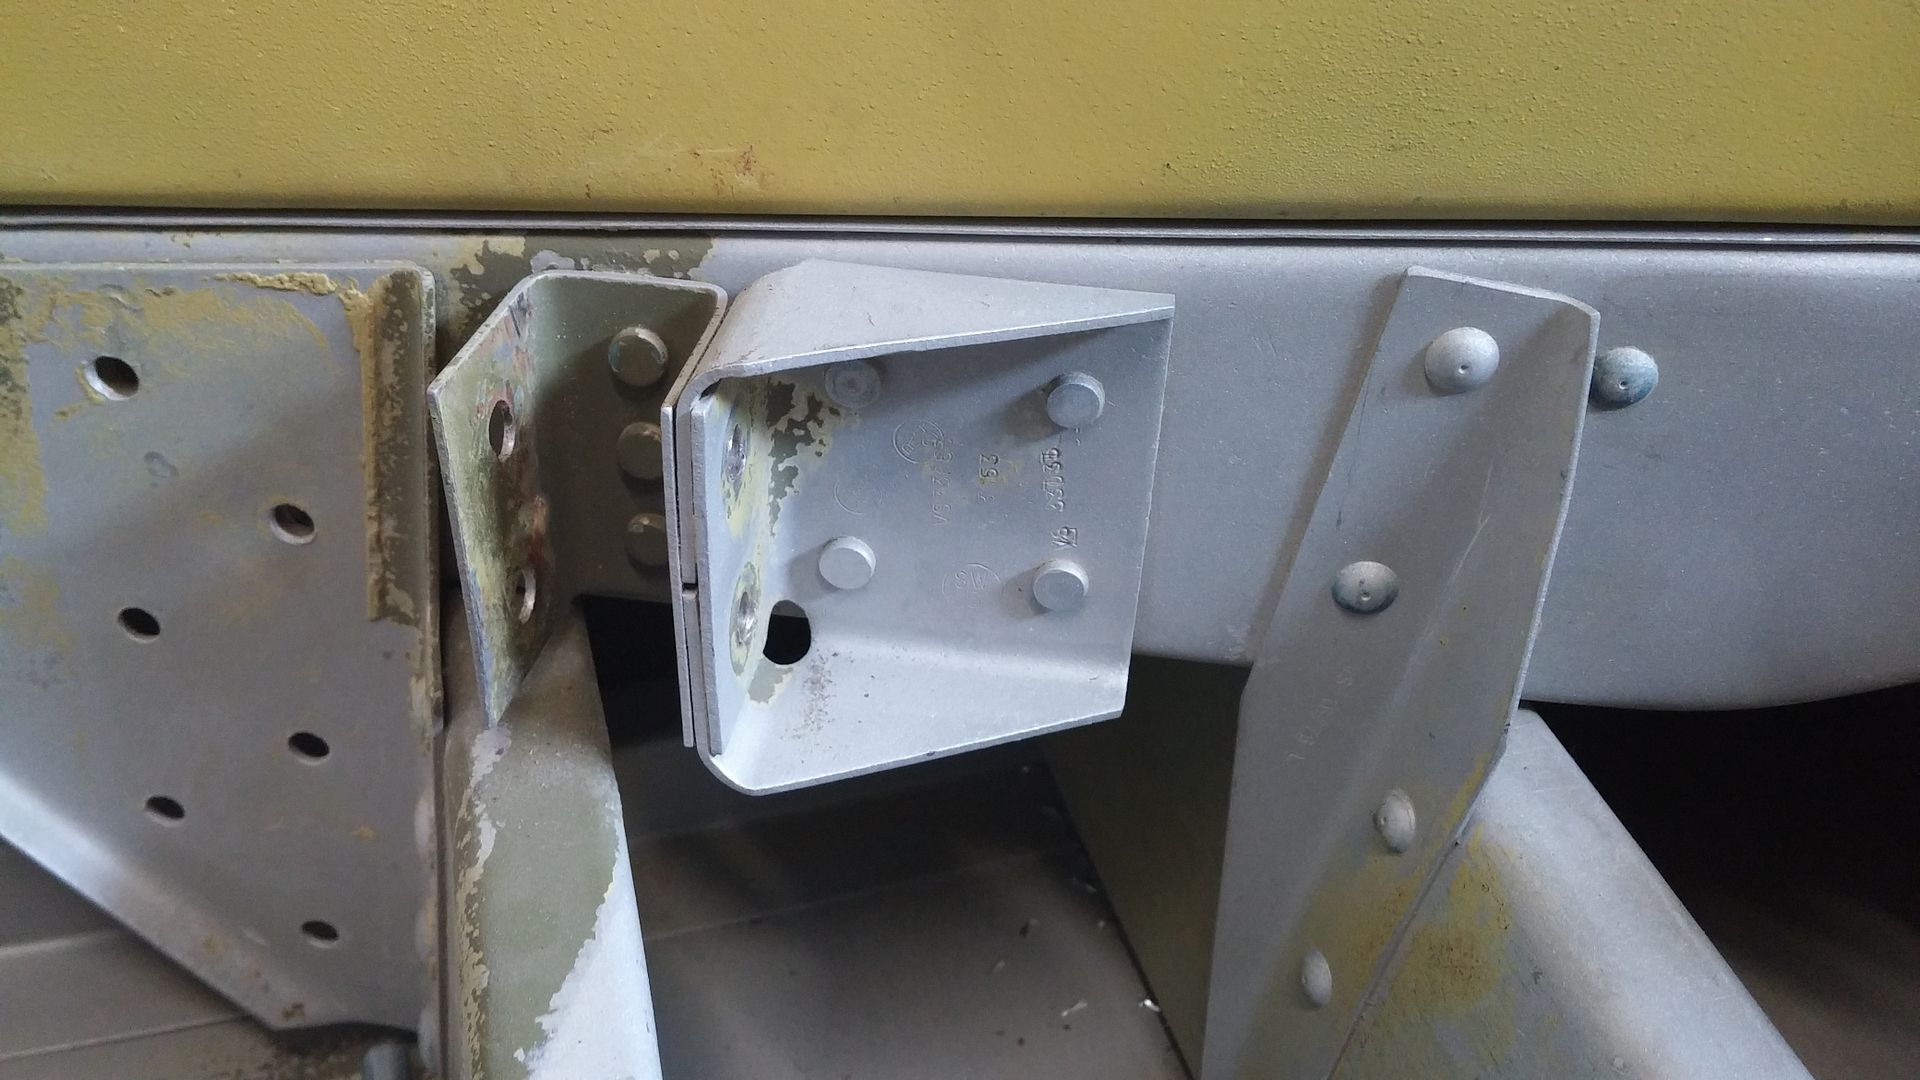
So, as with many of these parts, I still need to figure out how to make them. During the war they had really elaborate forming tools, dies and machines to do these in quantity. I need two. If you look at this piece, there are three folds required with two over-lapping the first. So, it was necessary to mentally unfold the piece to determine a pattern. The original drawings just show the finished part.
So, a paper pattern first and then a template.
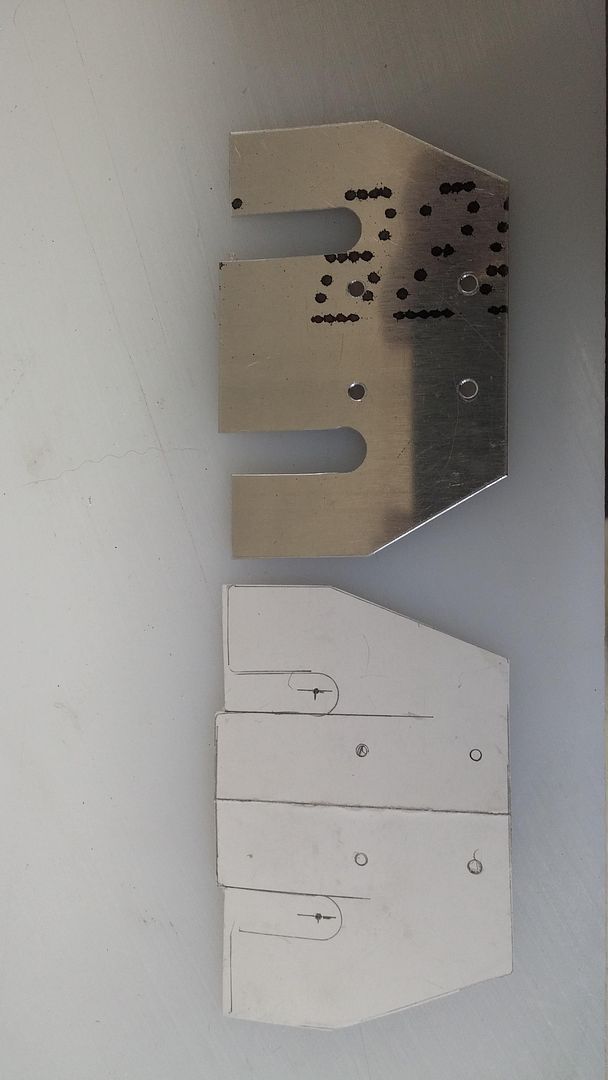
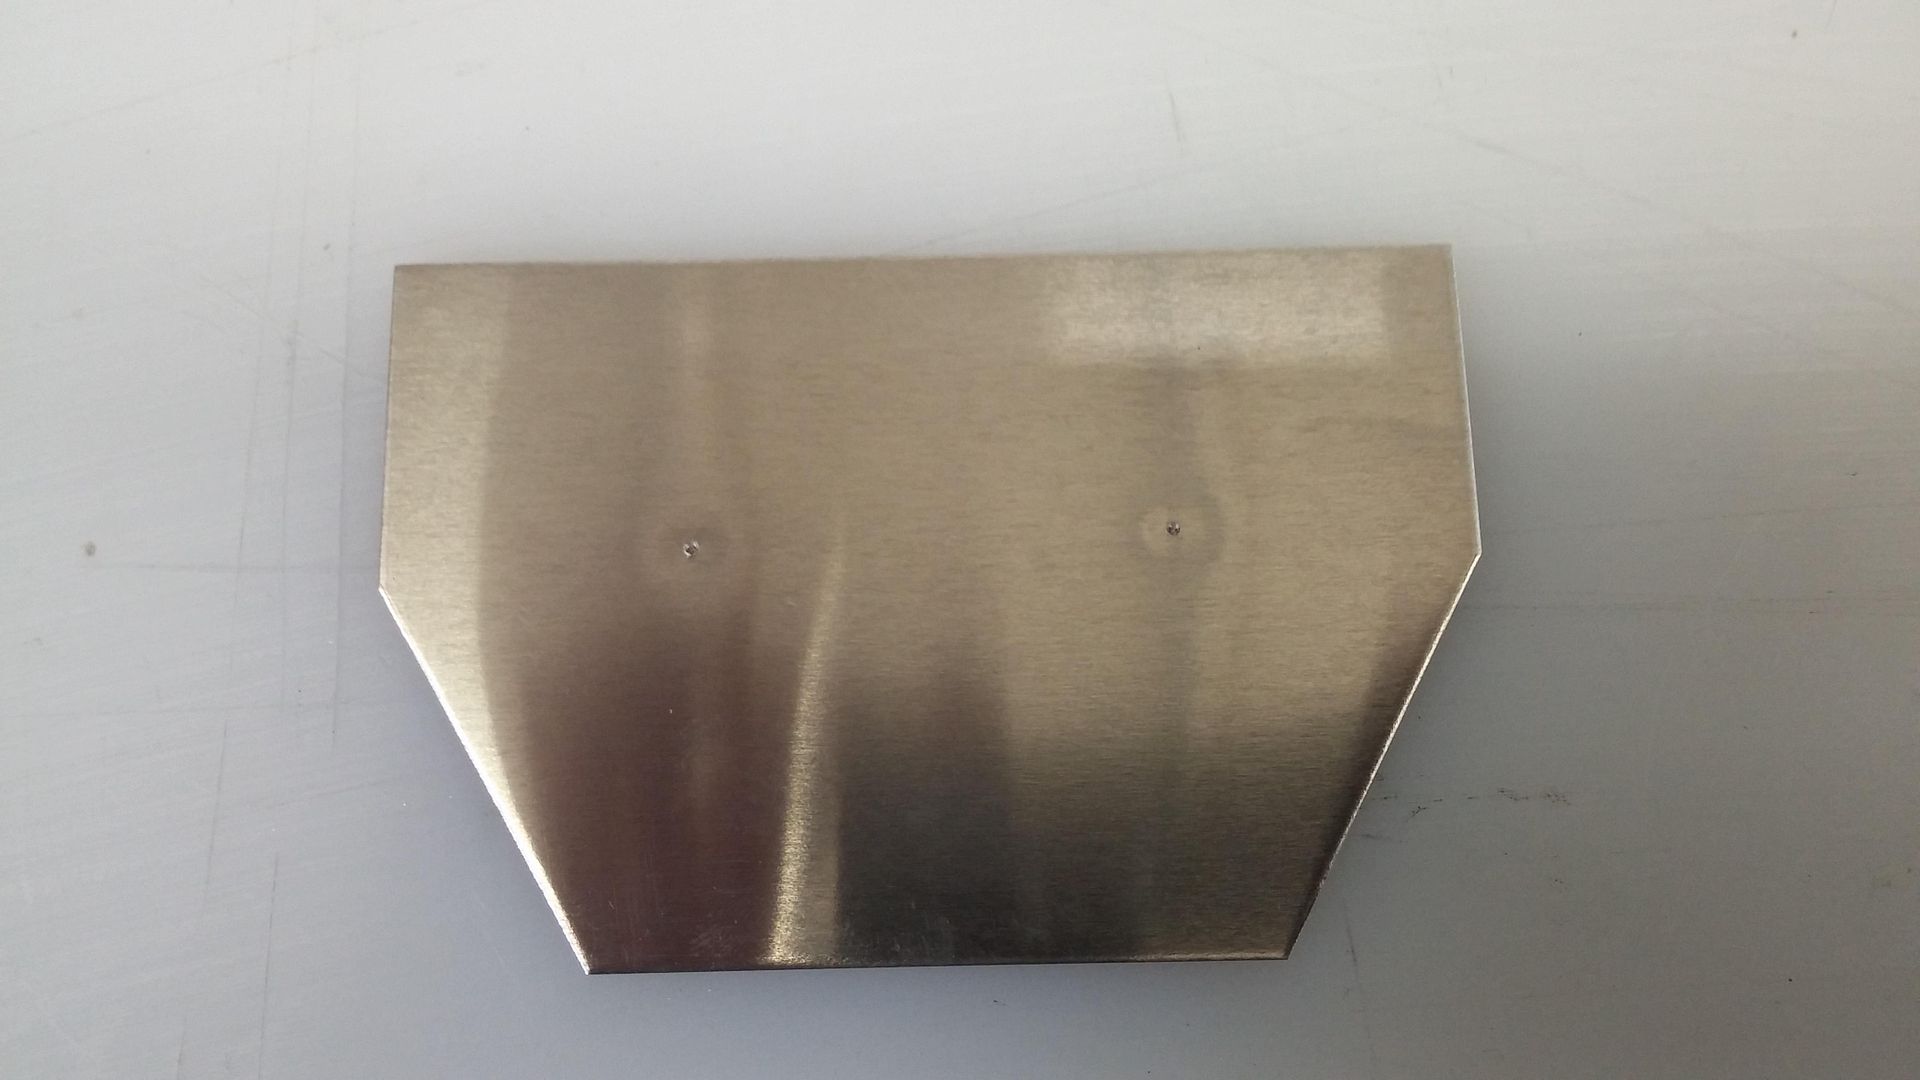
Then the blank.
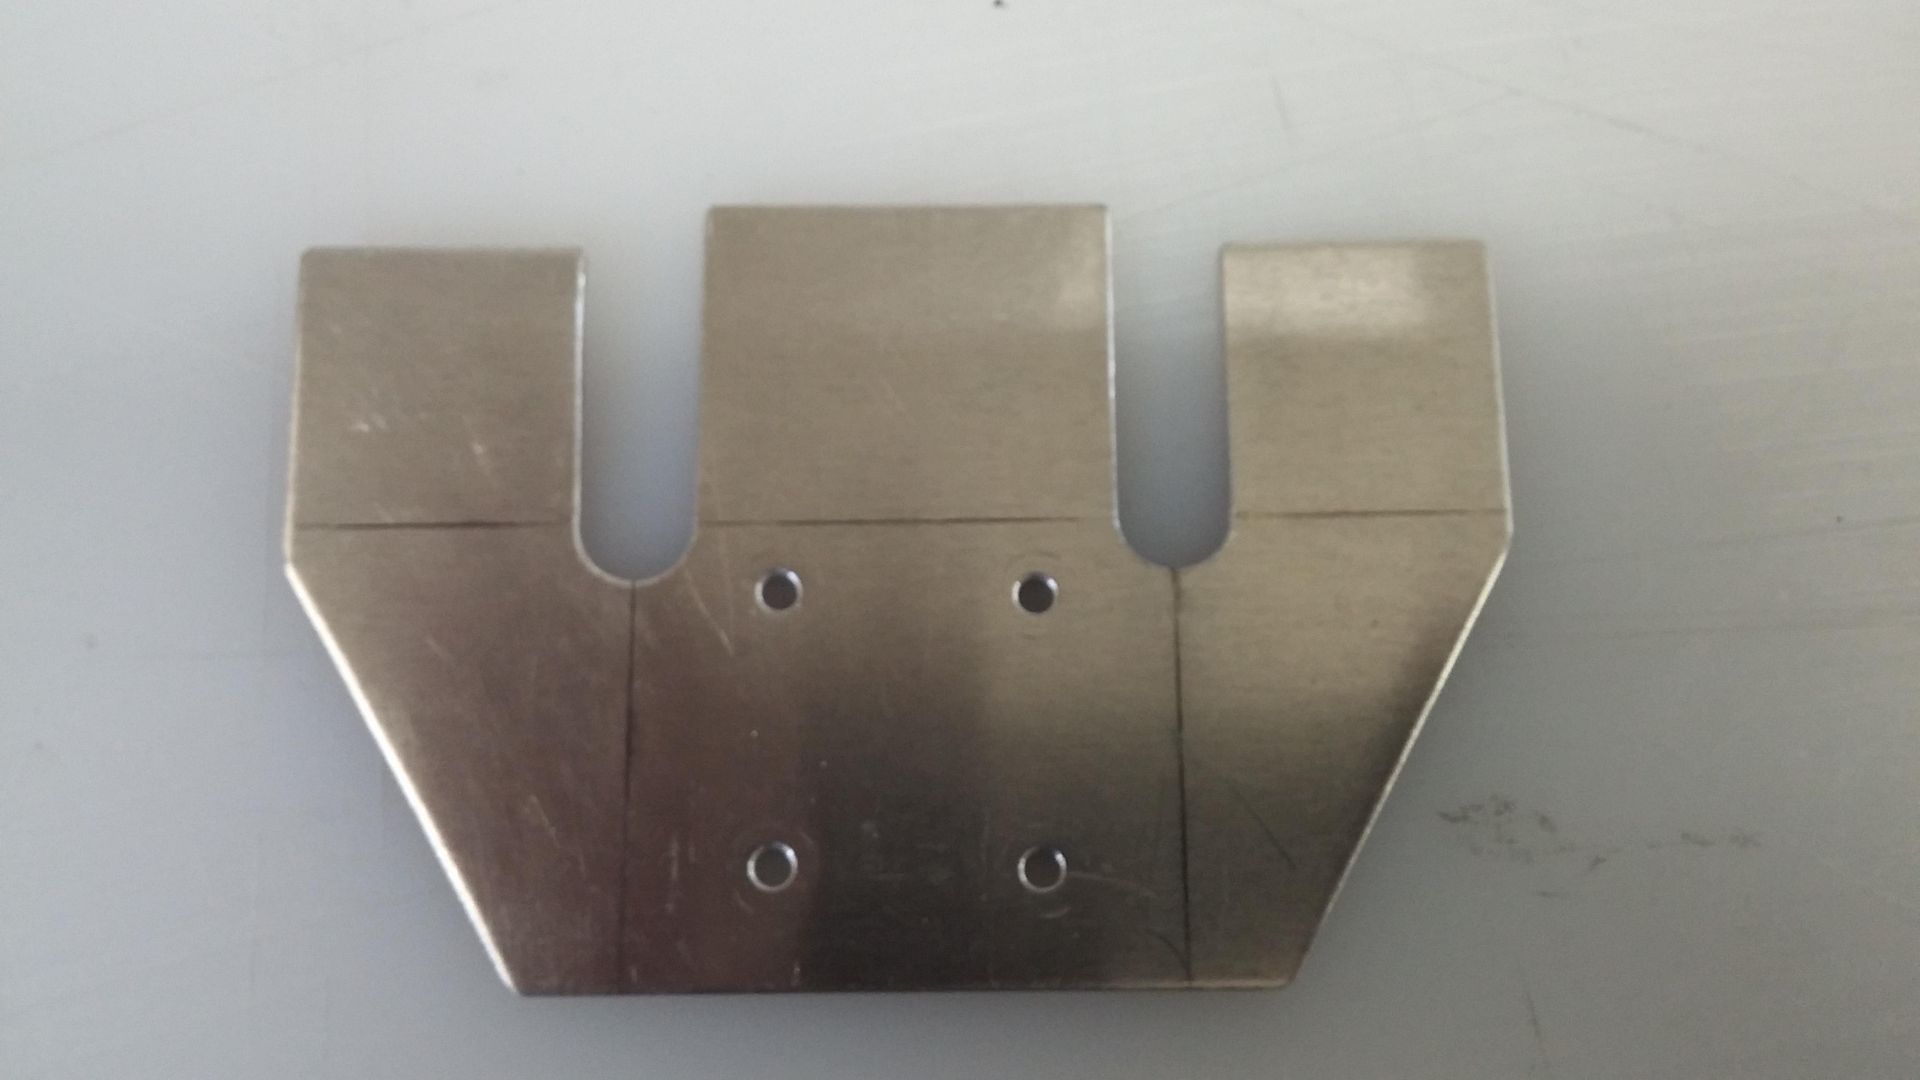
The blank trimmed.
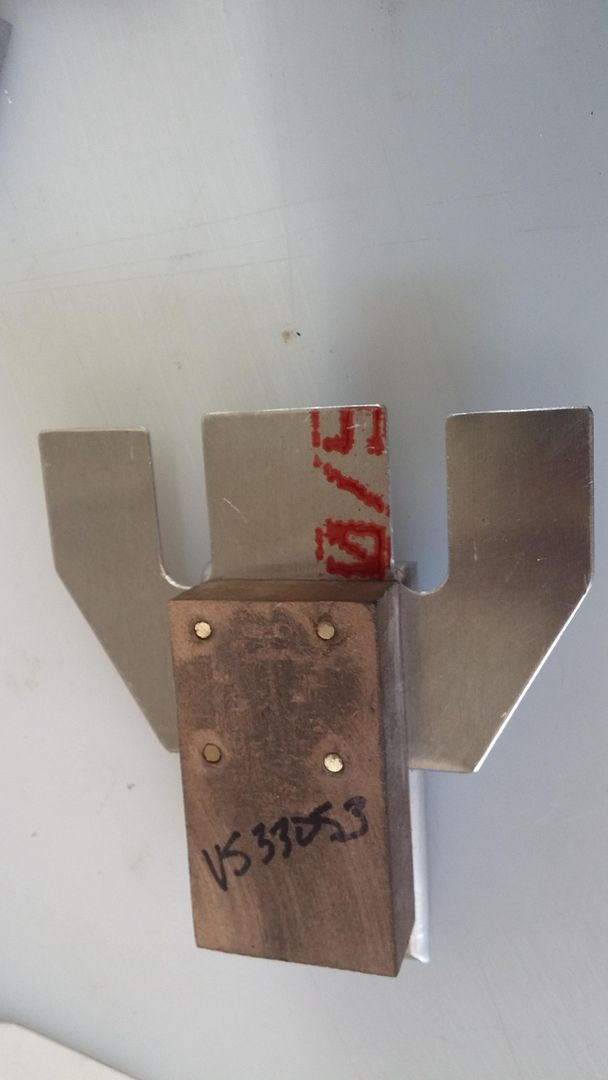
Then next with the tooling. Before I discovered the PVC, I used MDF and coupled this one with aluminum. The aluminum has the form and radii and the MDF is just for clamping. I also used brass pins to locate and hold the blank while forming.
With the first fold made of the center piece, the sides are folded in and over the center piece.
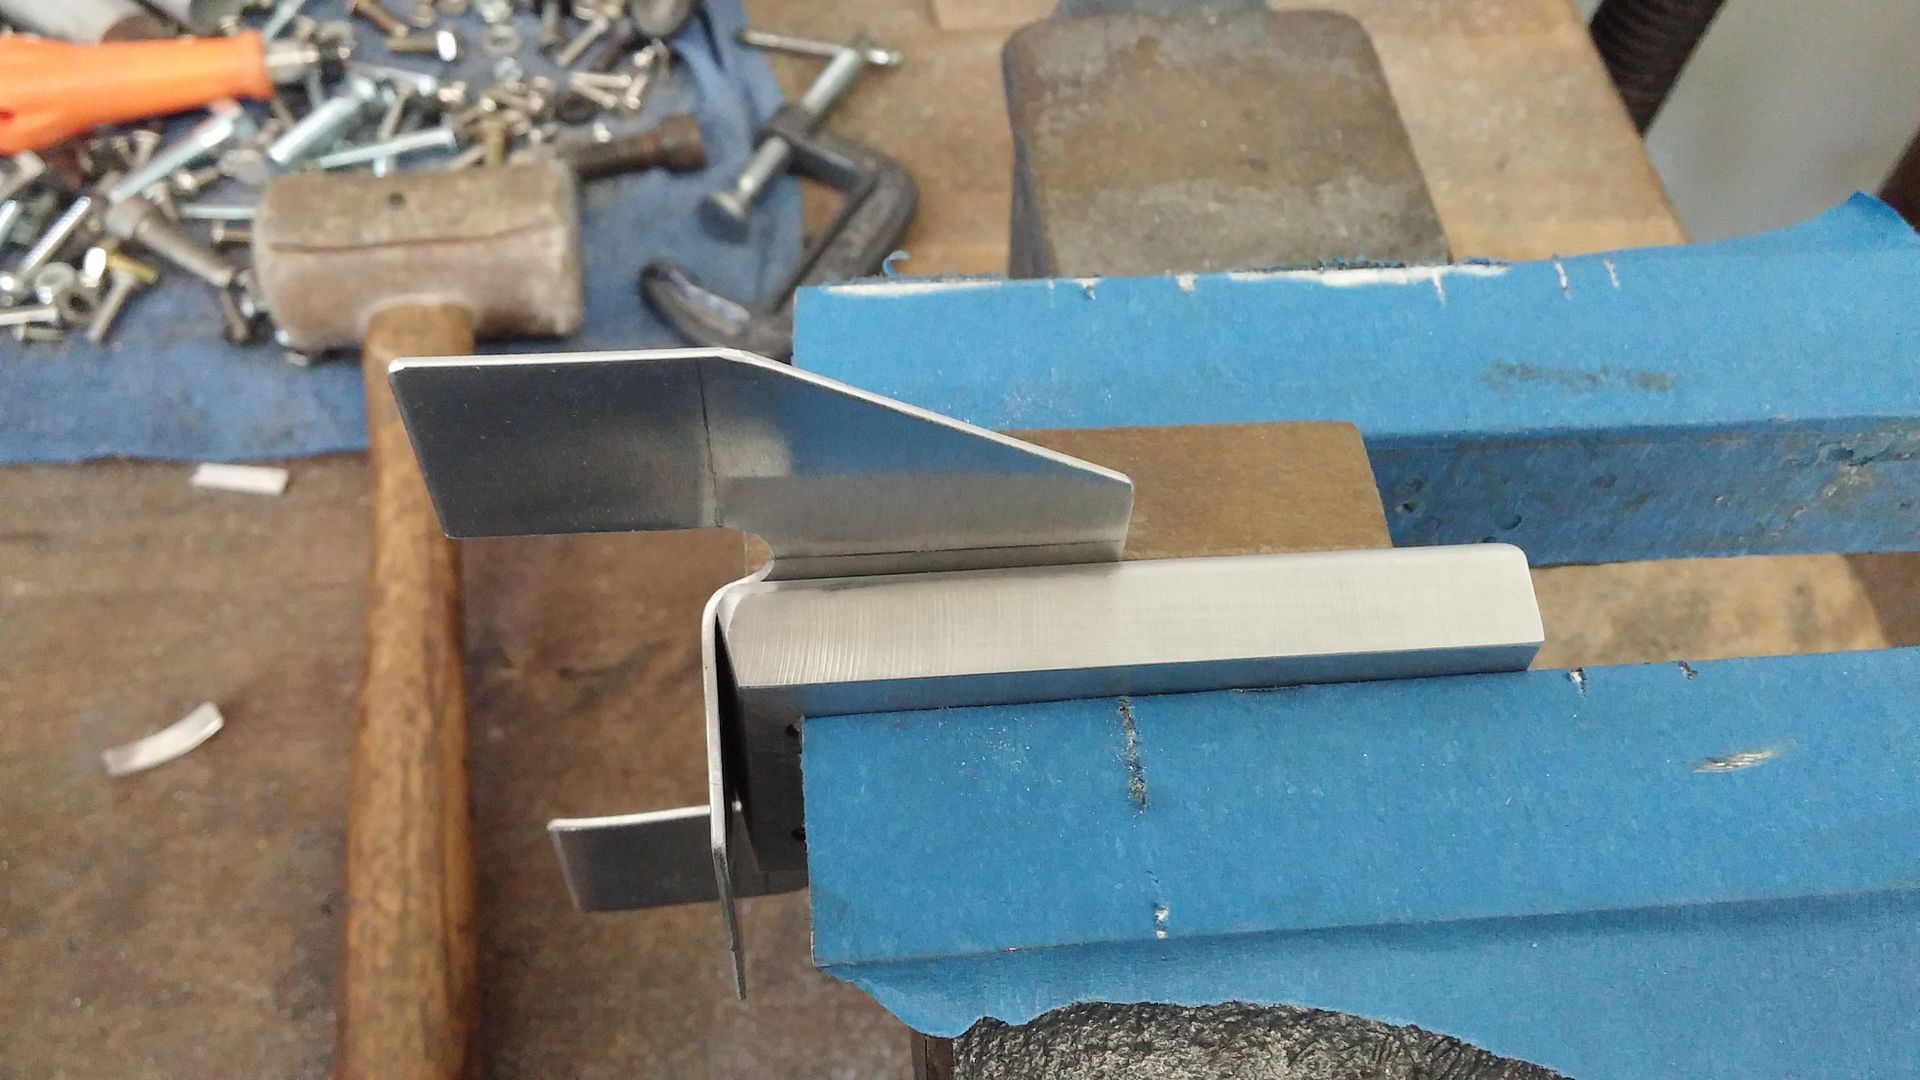
In this picture you can see the second tool used. Looking through the fold radius cut outs, you can see an aluminum block. This has the radius necessary for the side folds but is cut down to allow the center fold to be recessed. The sides then fold over neatly.
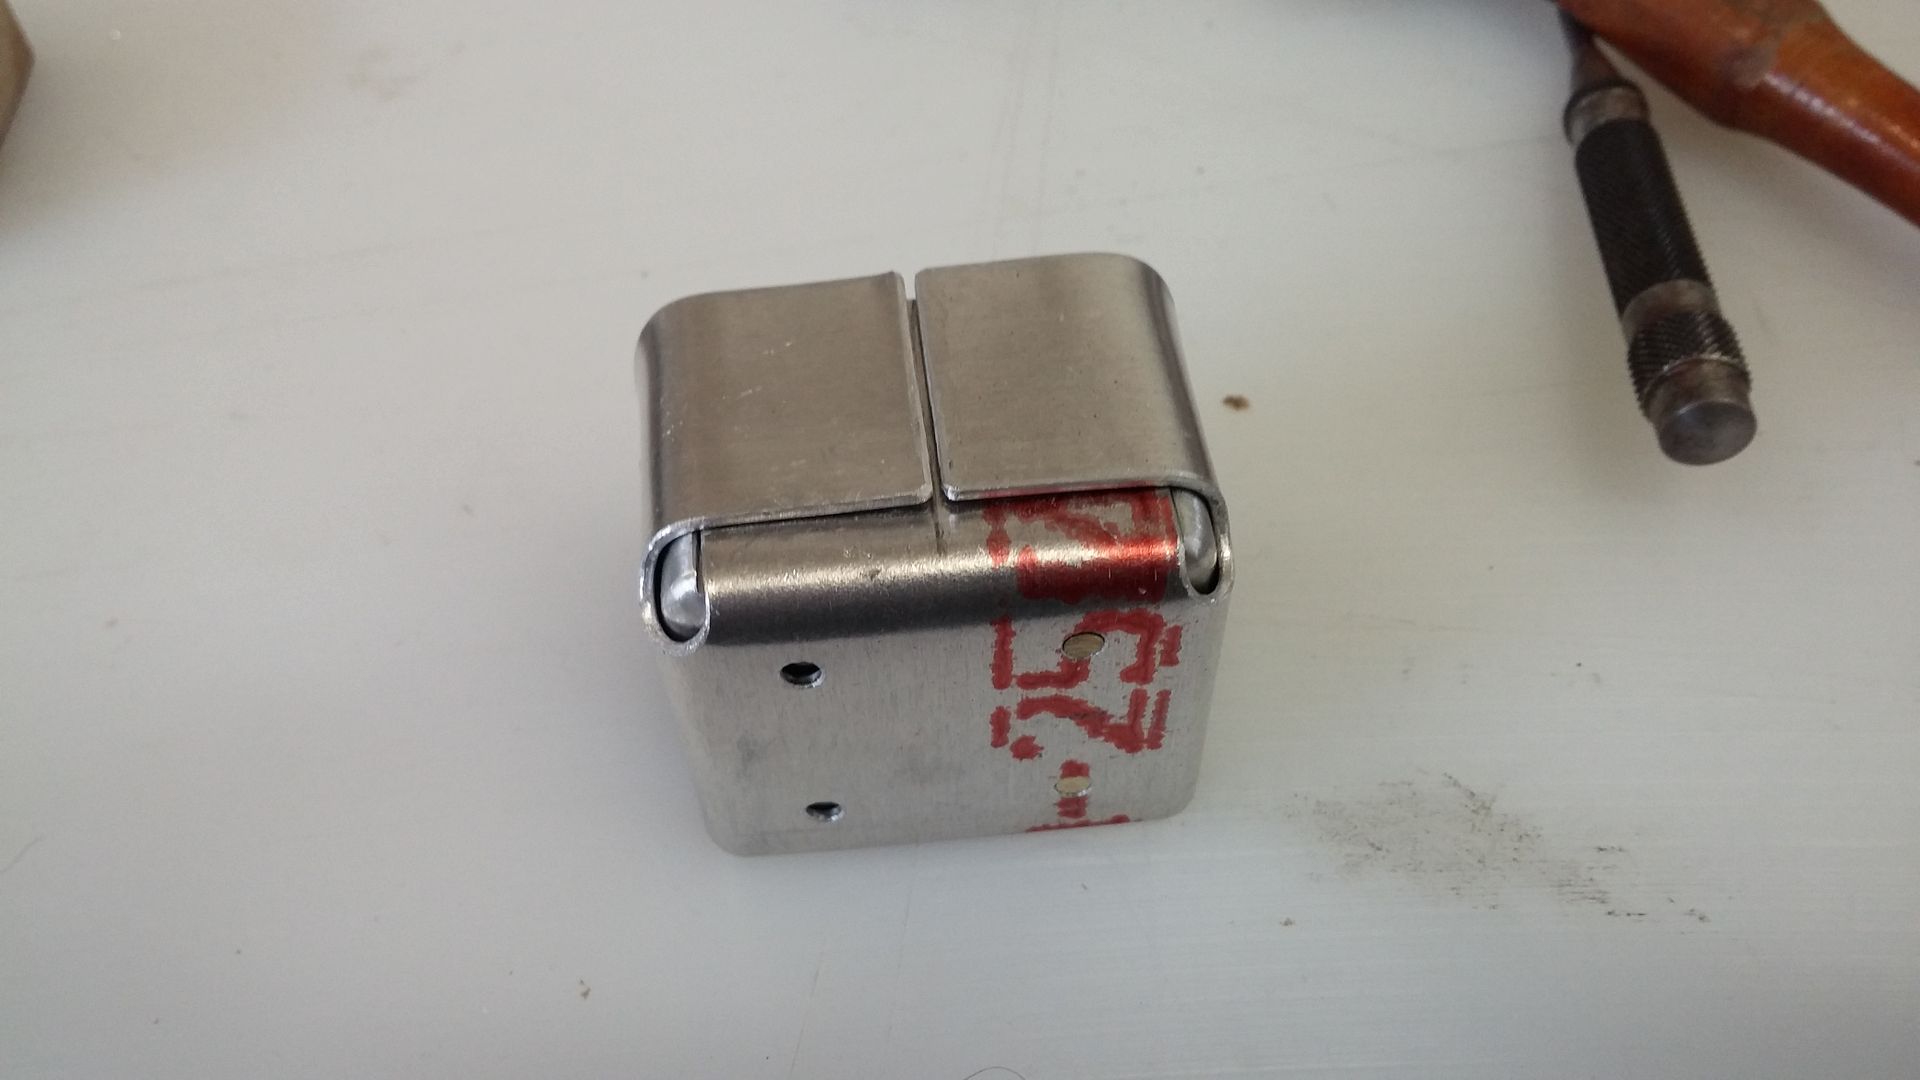
The four holes are for riveting to the rib and there will be two holes in the "top" of the box to reinforce the oil cooler saddle.
Thanks for looking.
Ok, here's what is called a support angle and is missing on our aircraft. It is the little box piece in the center of the picture.

So, as with many of these parts, I still need to figure out how to make them. During the war they had really elaborate forming tools, dies and machines to do these in quantity. I need two. If you look at this piece, there are three folds required with two over-lapping the first. So, it was necessary to mentally unfold the piece to determine a pattern. The original drawings just show the finished part.
So, a paper pattern first and then a template.

Then the blank.

The blank trimmed.

Then next with the tooling. Before I discovered the PVC, I used MDF and coupled this one with aluminum. The aluminum has the form and radii and the MDF is just for clamping. I also used brass pins to locate and hold the blank while forming.


With the first fold made of the center piece, the sides are folded in and over the center piece.

In this picture you can see the second tool used. Looking through the fold radius cut outs, you can see an aluminum block. This has the radius necessary for the side folds but is cut down to allow the center fold to be recessed. The sides then fold over neatly.

The four holes are for riveting to the rib and there will be two holes in the "top" of the box to reinforce the oil cooler saddle.
Thanks for looking.