Warbird Information Exchange

DISCLAIMER: The views expressed on this site are the responsibility of the poster and do not reflect the views of the management.
It is currently Thu Apr 18, 2024 10:46 pm

All times are UTC - 5 hours


Classic Wings Magazine WWII Naval Aviation Research Pacific Luftwaffe Resource Center
When Hollywood Ruled The Skies - Volumes 1 through 4 by Bruce Oriss


Post new topic Reply to topic  [ 506 posts ]  Go to page Previous  1, 2, 3, 4, 5, 6, 7, 8 ... 34  Next
Author Message
 Post subject:
PostPosted: Tue May 19, 2009 12:27 pm 
Offline
3000+ Post Club
3000+ Post Club
User avatar

Joined: Thu Sep 28, 2006 12:56 pm
Posts: 3442
Location: North of Texas, South of Kansas
I've had a hard time getting back in the groove with doing updates. I must be getting lazy. Here is a little information on rigging a B-17.

I started the project by making sure I knew what the airplane had been doing the last time it flew. With Doc, Pat, and Steve in the hangar I was able to quiz them about any odd trim issues that might have existed so I wouldn't be surprised by anything I found.

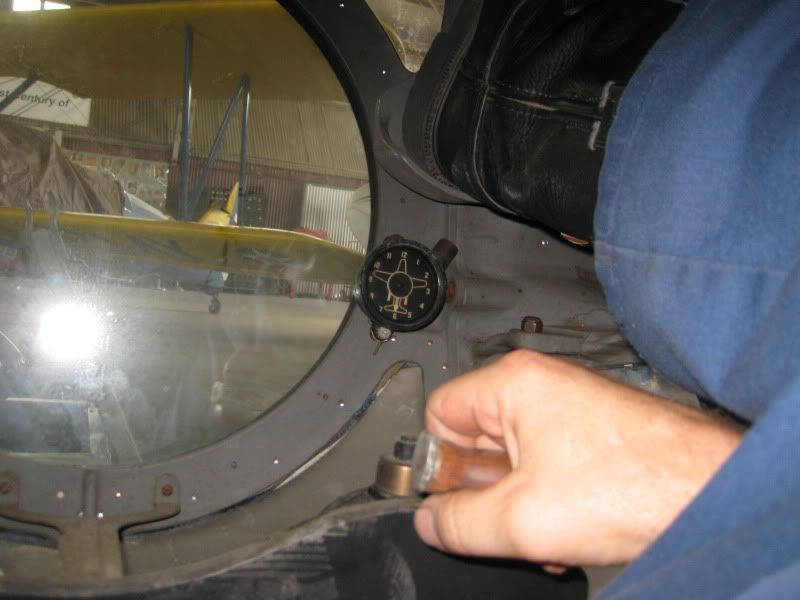
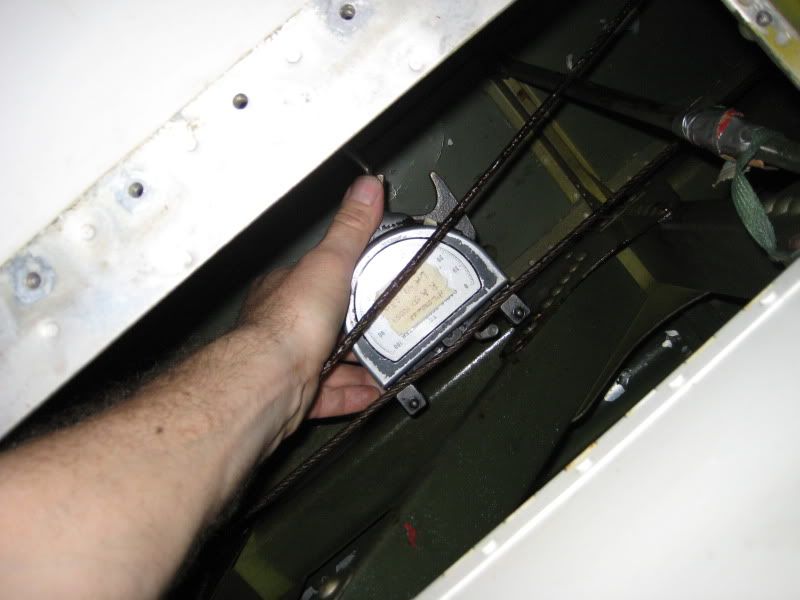
Since there weren't any problems of note I was able to begin the process by checking the tensions of all flight control primary cables and the associated trim cables. Here is a shot of the tensiometer attached to a right aileron control cable:
Image
I found all of the aileron, elevator, and rudder primary cables within the Boeng specifications. The trim cables were another matter, the elevator and rudder cables needed some adjustment. In fact, as I was checking the angular limits of the elevator trim system I managed to get the cables to jump off the drum in the throttle pedestal. :roll:
Image
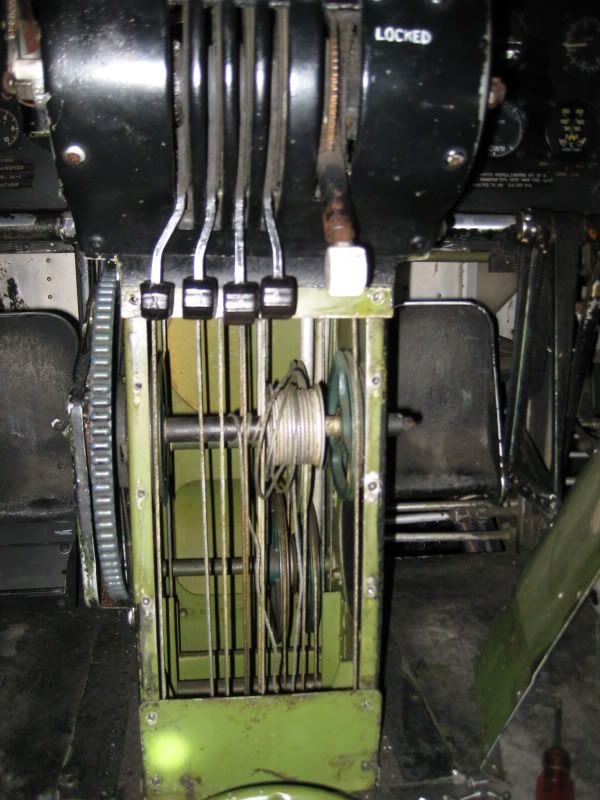
I spent a little while getting the birdsnest untangled and then ran the cables up to the nominal tension. Everything works great when the cables are tight. :oops: I probably should have brought the tension up first, but I wanted to see what the angles of travel were, in order to correct any issues while adjusting the cables.

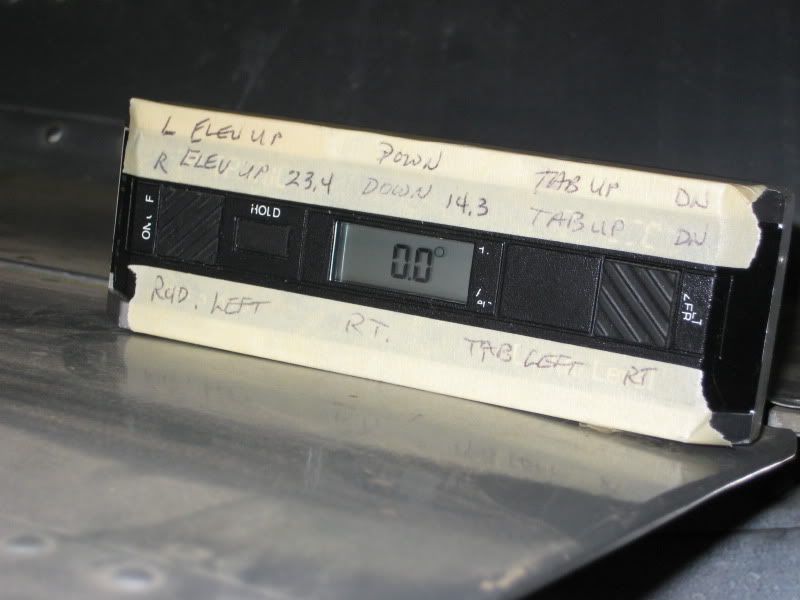
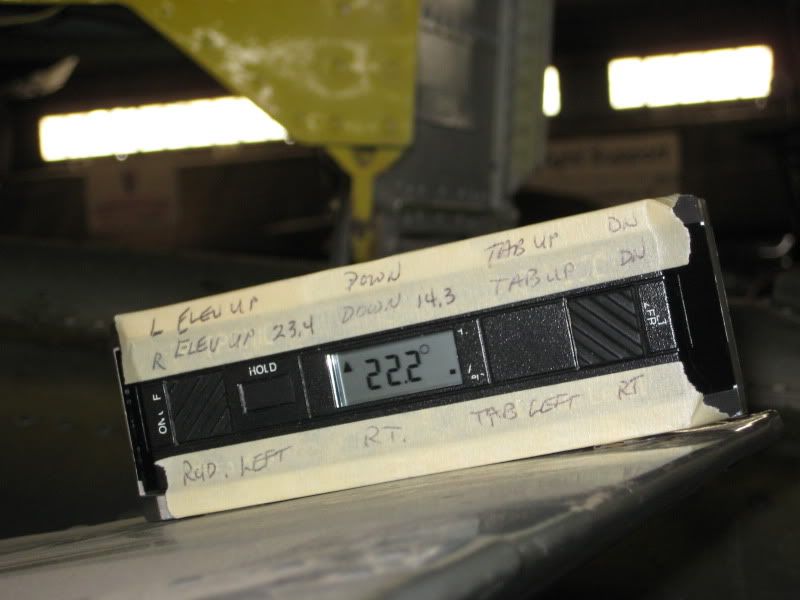
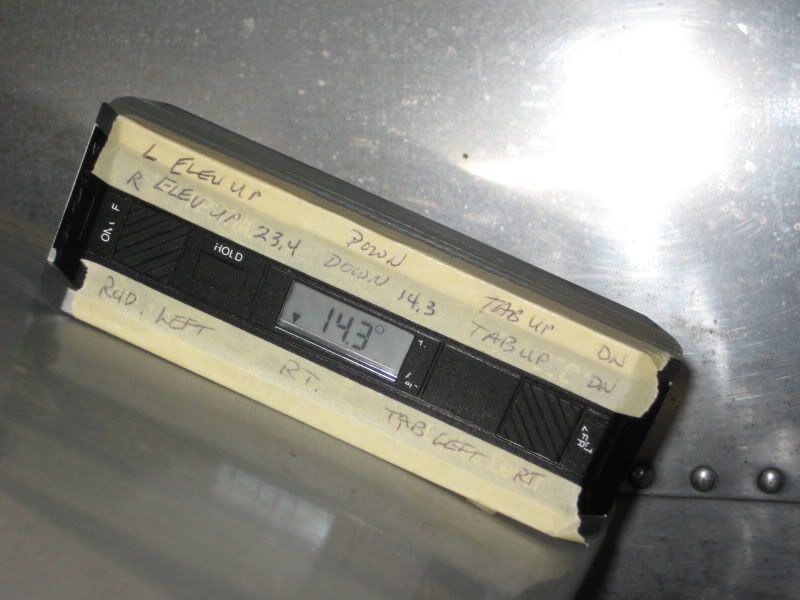
The next step was to examine the "throws" of each flight control. The manufacturer designs in an angular limit for the up-and-down or left-to-right movement of each control surface and trim tab that must be checked and adjusted as needed. Here are a few photos of the protractor being used to check the throws on the left elevator; all the surfaces are measured in this fashion:
First we start with the neutral position:
Image

Next, Ellen pulls the yoke back to the full nose-up stop and I check the dimension:
Image

Finally, she goes full nose-down with the yoke and I get the degrees of travel again:
Image

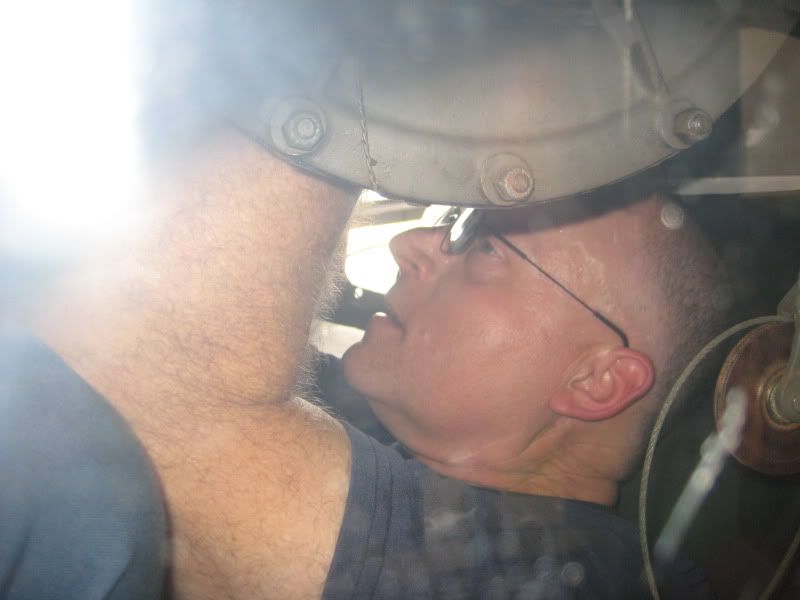
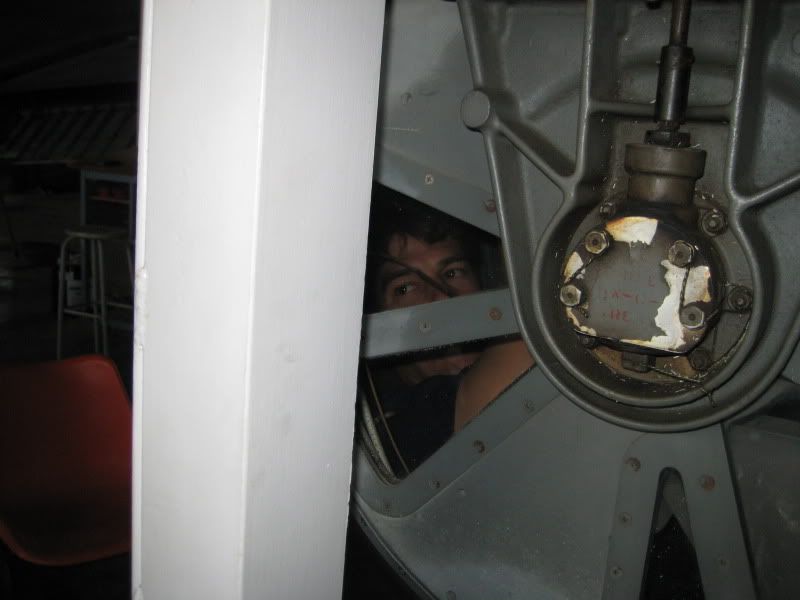
These same steps must be done with all the main surfaces and all four trim tabs. In our case, everything was within the Boeing specification as far as the angular travel was concerned. I did have a little issue with the rudder trim cables that had to be corrected. It was fairly simple to correct by disconnecting the right cable:
Image

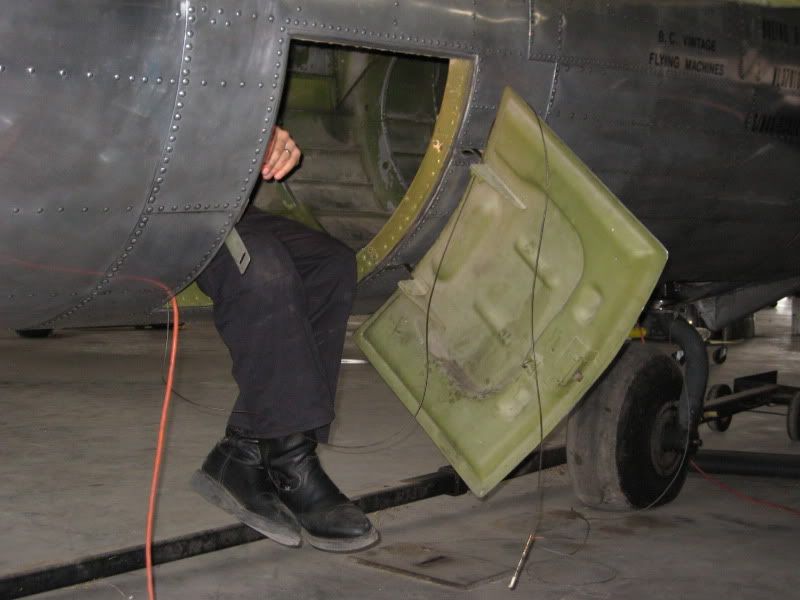
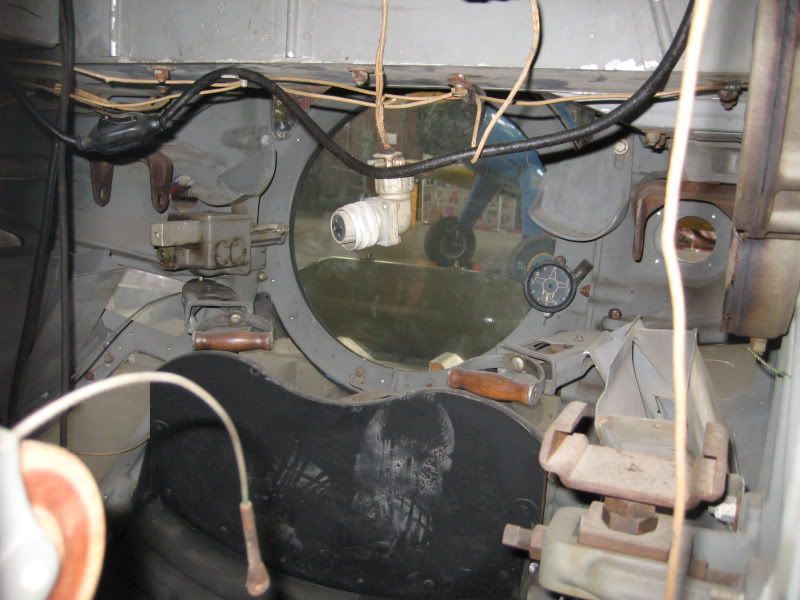
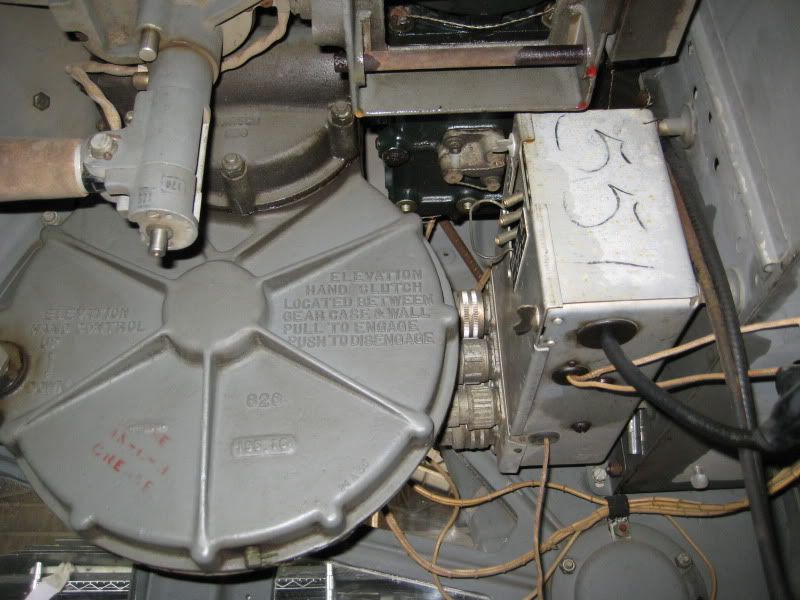
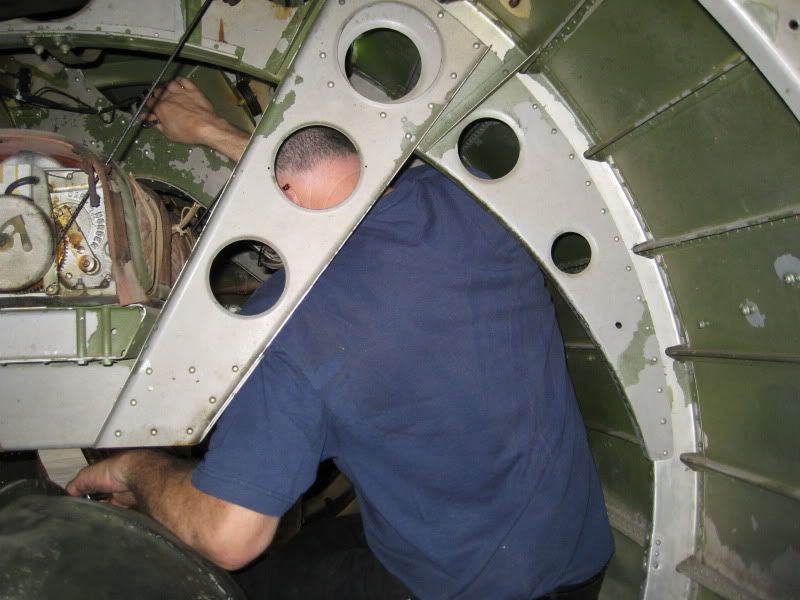
And here I am rerouting and connecting the same cable. I left a little skin back in there.......That big box next to my head is the autopilot servo unit for the tail.
Image

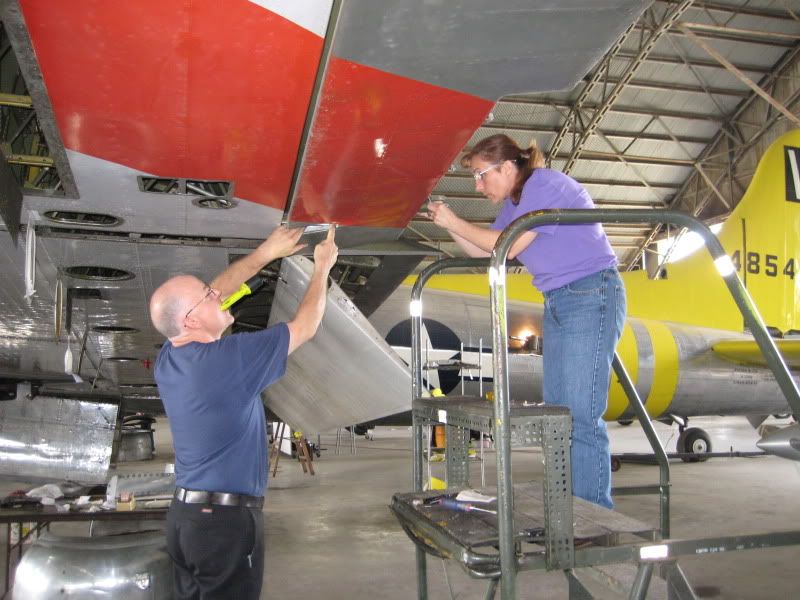
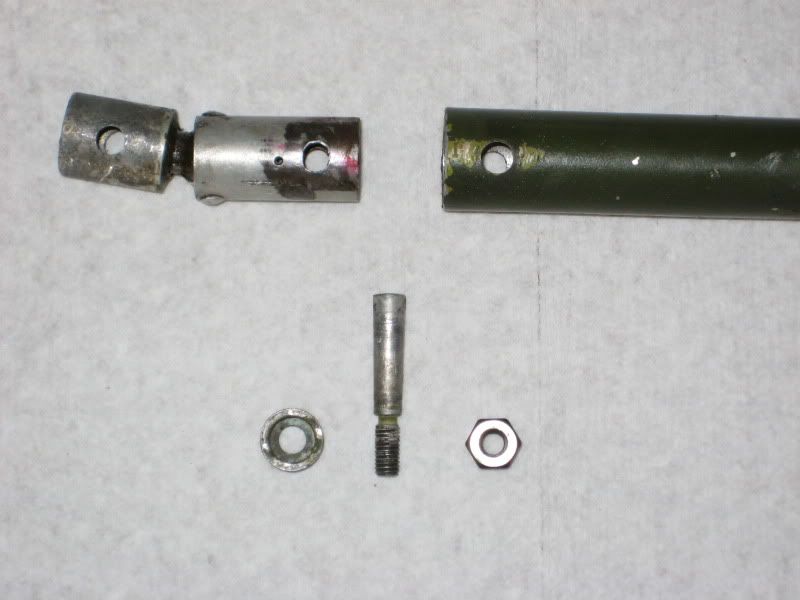
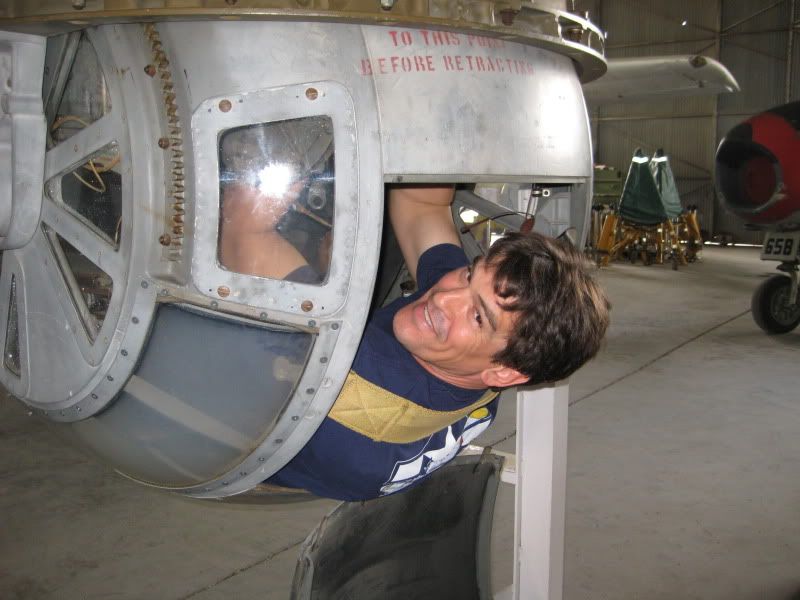
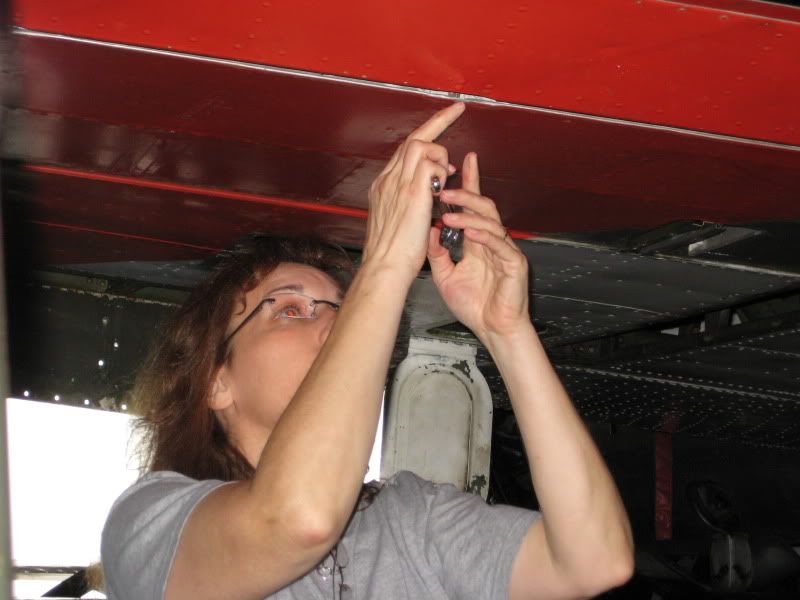
There is also a measurement that must be taken of trim tab freeplay. The elevator and rudder tabs are nice and snug, but the aileron tab had a little too much play. I wrote it up two weekends ago, and James Kelly went to the warehouse and found us a nice, fresh trim actuator. Here's Elly removing the tab from the aileron so we can get at the actuator:
Image

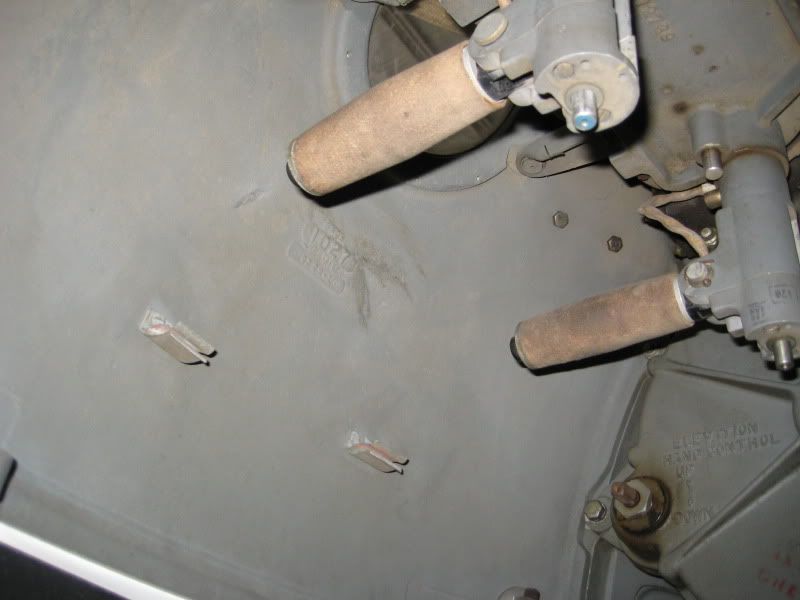
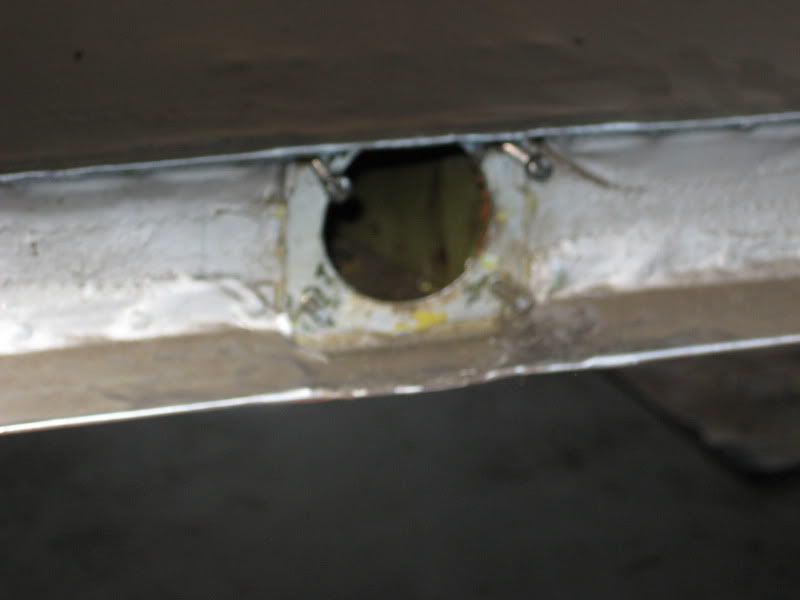
This is the mounting hole in the aileron:
Image

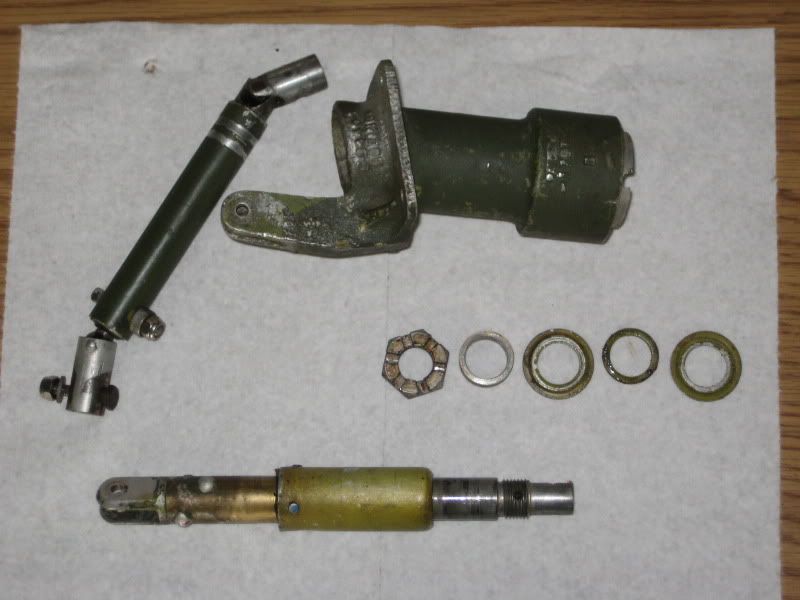
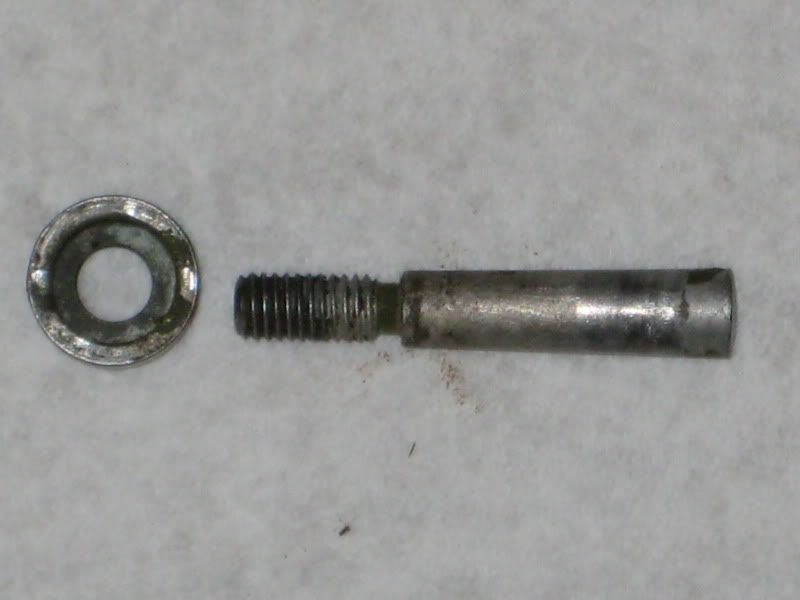
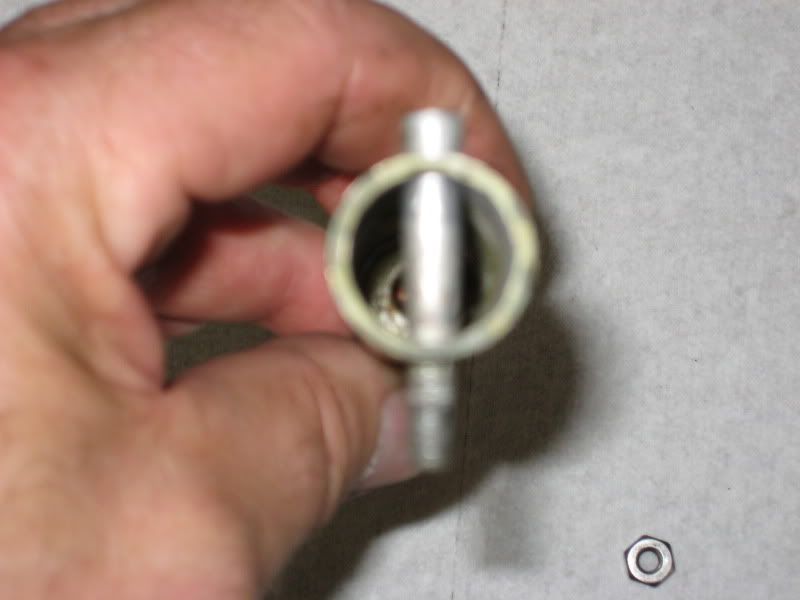
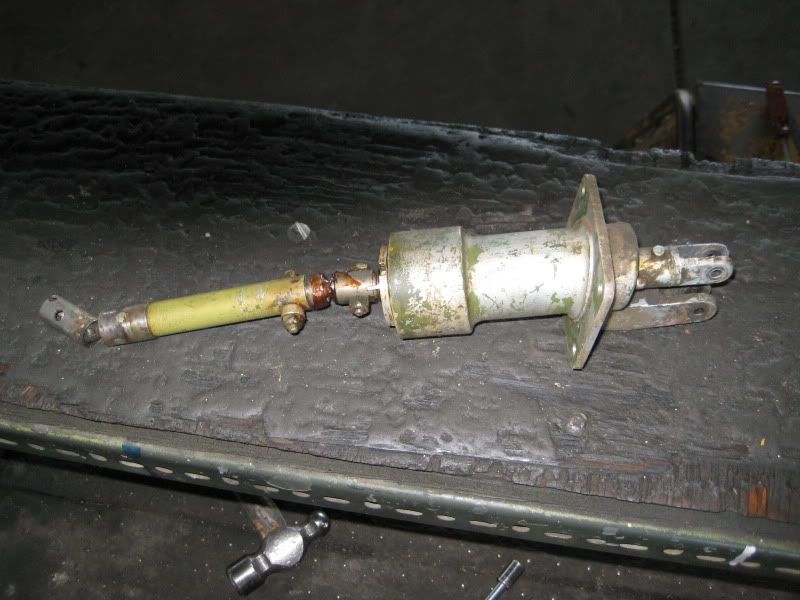
And this is the unserviceable trim jackscrew after we got it out of there:
Image

Next weekend we'll go forward with installing the new actuator and fully examining and lubricating the control system components.

Scott


Top
 Profile  
 
 Post subject:
PostPosted: Tue May 19, 2009 1:53 pm 
Offline
Account Suspended
User avatar

Joined: Wed Nov 14, 2007 3:06 pm
Posts: 2713
wow, how sick of a ba$tard am I if I say that looks like a lot of fun!!!!!!!!!!!!! :shock:

_________________
S.


Top
 Profile  
 
 Post subject:
PostPosted: Tue May 19, 2009 3:06 pm 
Offline
3000+ Post Club
3000+ Post Club
User avatar

Joined: Thu Sep 28, 2006 12:56 pm
Posts: 3442
Location: North of Texas, South of Kansas
YOU'RE HIRED. :D


Top
 Profile  
 
 Post subject:
PostPosted: Tue May 19, 2009 10:11 pm 
Offline
User avatar

Joined: Fri Mar 27, 2009 5:30 pm
Posts: 472
Location: Dallas/Fort Worth Texas
Scott,
You're doing a heck of a better job of keeping up on the posts than I am! :oops:

I will do a full update tomorrow, but for now I'll just say thanks to Scott, Ellen, Brad, and Dean (all WIXers) for all of the help. Along with the rest of our crew Mike, Rick, John, Leo, and the incomparable James Kelly our own in-house B-17 Tech Rep/Consultant who is a veritable walking encyclopedia of B-17 and aviation knowledge. They are the ones who are making the job of returning Chuckie to the air possible.

We pulled the #4 prop feathering pump off Sunday because the motor is just plain worn out. We're sending it out and will get a yellow tagged overhauled unit to replace it. Once that is done and the engine inpsection is completed we can start troubleshooting the oil pressure drop that we saw the last time we ran it a couple of months ago. Each time we cycled the prop, the oil pressure dropped 10 psi or so and did not come back up. Steve and Pat wisely shut it down before it dropped too low. Right now we suspect the oil pressure transmitter and/or the ferrule for the capillary line coming from the transmitter, which is cracked. That will be step #1 is to fix the ferrule.

Hopefully next weekend I can get more pictures to post, last weekend I spent most of my time in some very productive staff meetings and didn't get to work on the plane as much as I would have liked.

_________________
Bill Gorin
Vintage Flying Museum
http://www.vintageflyingmuseum.org
https://www.facebook.com/#!/group.php?gid=57513906106


Top
 Profile  
 
 Post subject:
PostPosted: Tue May 19, 2009 10:53 pm 
Offline
1000+ Posts!
1000+ Posts!
User avatar

Joined: Thu Apr 29, 2004 10:30 pm
Posts: 1129
I was cheating on FiFi with Chuckie...

_________________
Brad


Top
 Profile  
 
 Post subject:
PostPosted: Wed May 20, 2009 9:18 pm 
Offline
User avatar

Joined: Mon Dec 05, 2005 7:10 pm
Posts: 883
Location: Burlington, WI
Great job guys!! Keep the pictures coming. I have to say you are teasing me with the pictures of the VFM Sabre. What a time capsule. I can't wait to come on down and visit.

David
WHF Maint


Top
 Profile  
 
 Post subject:
PostPosted: Thu May 21, 2009 12:59 am 
Offline
3000+ Post Club
3000+ Post Club
User avatar

Joined: Thu Sep 28, 2006 12:56 pm
Posts: 3442
Location: North of Texas, South of Kansas
It was fun opening up the gun bays, David. The airplane has that great "vintage warbird smell" that I always enjoy but can't quite describe. I really didn't expect the bays to look so fresh after all the time the airplane has been idle. Hopefully the balance of the airframe is in similar condition.

Scott


Top
 Profile  
 
 Post subject:
PostPosted: Sat May 23, 2009 10:01 pm 
Offline
3000+ Post Club
3000+ Post Club
User avatar

Joined: Thu Sep 28, 2006 12:56 pm
Posts: 3442
Location: North of Texas, South of Kansas
I have to start off with another picture for Sabremech. I used a bit of elbow grease this morning to see what was underneath the Bolivian warpaint on the F-86.
Image
Notice that I went through an outer layer of gray-green, then greener green, then silver, then some goldish material, and finally the alclad. I later polished the NMF a little and it looks pretty good. I'm wondering if F-86s were ever painted silver during their time in the Air National Guard or if this is paint applied during her foreign service?

On to the bomber:
We removed the aileron trim actuator last week because of a bit of extra endplay in the unit.
Image
I wanted to see what makes the thing tick, so I disassembled the one we removed to examine it, with the idea of rebuilding it as a spare. Other than a worn bearing, it is in pretty good shape and won't be hard to rebuild. After inspecting and lubricating the replacement unit, Ellen and I installed it in the aileron.
Image
I'll post a photo of some of the attaching hardware later. If you've ever worked around an old Boeing product you will have heard someone cussing about taper pins.

While this project kicked my backside (I wasn't worth much today for some reason), Elly was cleaning the fairleads that the tail flight control and lock cables run through.
Image
They've accumulated dried lubricant over the years, so she disassembled each set and carefully cleaned the gunk out, cleaned the cables in the areas where they run through the fairleads, re-greased everything, and we reassembled them. She's got a bunch more to clean, but she doesn't seem to mind de-crudding them.

Steve gave us a short "tour" of the ball turret on display near the Fortress. What a time capsule this machine is, complete with wire harnesses, interphone connection wiring, etc.
Image

Scott


Top
 Profile  
 
 Post subject:
PostPosted: Sun May 24, 2009 7:44 pm 
Offline
User avatar

Joined: Mon Dec 05, 2005 7:10 pm
Posts: 883
Location: Burlington, WI
You have got to stop teasing me Scott. :D Absolutely love the Sabre. Not that I don't like the B-17. Great work by all of you on the Fort. If you find it in your heart to e-mail some more pictures of the Sabre, I'd forever be grateful.

David


Top
 Profile  
 
 Post subject:
PostPosted: Sun May 24, 2009 10:51 pm 
Offline
1000+ Posts!
1000+ Posts!
User avatar

Joined: Sun May 02, 2004 10:14 am
Posts: 1692
Location: canada
WHats the story on the sabre? Wondering if the gold paint might be an ex rcaf golden hawk?

_________________
Cheers,
Peter

________


Top
 Profile  
 
 Post subject:
PostPosted: Mon May 25, 2009 12:20 am 
Offline
3000+ Post Club
3000+ Post Club
User avatar

Joined: Thu Sep 28, 2006 12:56 pm
Posts: 3442
Location: North of Texas, South of Kansas
peter wrote:
WHats the story on the sabre? Wondering if the gold paint might be an ex rcaf golden hawk?


I don't believe so, Peter. This is a North American-built "F". I am a bit embarrased to say I don't know the USAF serial number yet, but I'm told she served with the Texas ANG for a time prior to her Bolivian service. That gold coloration seems more like a tint coat or perhaps some form of treatment prior to topcoating, but I'm not sure. It's a very thin layer of material compared to the other pigment I removed.

David, I took a few more pictures today of those things that really interest us wrench-turners. I'll share a couple here and get them all sent your way via email.

I apologize for shooting the right side of the aircraft in sections, but there wasn't enough room to get the full airplane in one shot. The hangar is pretty crowded with airplanes and GSE stuff right now.
Image
Image
Image

It struck me today that the Bolivian camouflage scheme is starting to grow on me. It might be kind of neat to refinish the little airplane in this paint scheme down the road rather than USAF markings.

Scott


Top
 Profile  
 
 Post subject:
PostPosted: Tue May 26, 2009 6:00 am 
Offline
2000+ Post Club
2000+ Post Club
User avatar

Joined: Sun Aug 13, 2006 7:11 pm
Posts: 2660
Location: 16 mi. N of DFW Airport
Here's what I got from the nice folks at Maxwell:

F-86F, s/n 52-4689

Manufactured by North American Aviation, Inglewood CA and delivered to the USAF on 22 Apr 1953.

Apr 1953: To 21st Fighter-Bomber Wing (Tactical Air Command), George AFB CA (deployment to Eielson AFB AK)

Mar 1954: To 401st Fighter-Bomber Group (TAC), Alexandria AFB LA

Dec 1954: To 322nd Fighter-Day Wing (TAC), Foster AFB TX

Jul 1955: To Sacramento Air Materiel Area, McClellan AFB CA

Oct 1955: Dropped from inventory by transfer to Mutual Defense Assistance Plan (Venezuela)


Cheers,

_________________
Dean Hemphill, K5DH
Lake Dallas, Republic of Texas


Top
 Profile  
 
 Post subject:
PostPosted: Wed May 27, 2009 11:04 am 
Offline
3000+ Post Club
3000+ Post Club
User avatar

Joined: Thu Sep 28, 2006 12:56 pm
Posts: 3442
Location: North of Texas, South of Kansas
Thanks for that information on the Sabrejet, Dean. She didn't spend a lot of time in USAF service, so I'm guessing the silver paint would have been applied by the Venezuelan Air Force.

I mentioned the Accursed Taper Pin earlier. Boeing assembled a good bit of the Fort with these precision fasteners, including the wing fittings and stabilizers. Most of the actuating torque tubes for the various moving parts also have them. We were swapping out the aileron trim tab actuator and I took a few photos of the pins and how they work.

Here is one of the fittings for the drive of the tab actuator assembled:
Image

This is the same item disassembled:
Image

Here is the pin and the spacer with a cutout machined into it to allow the enlarged shank of the pin to have clearance:
Image

And this is how the pin looks slid into the attachment hole. Notice that the holes are reamed with a larger diameter at the top and a much smaller diameter on the nut end:
Image

The trick to the taper pin is removing them in tight spots on the airplane. You can't just beat them out with a hammer or damage to the threads or fitting they are bolted into will occur. We've all designed our own version of a press to break them loose--I use a C-clamp and a small socket on little fittings such as this one, but you sometimes have to curse various engineering types for burying them in the bowels of the machine.


Scott


Top
 Profile  
 
 Post subject:
PostPosted: Thu May 28, 2009 8:38 am 
Offline
3000+ Post Club
3000+ Post Club
User avatar

Joined: Thu Sep 28, 2006 12:56 pm
Posts: 3442
Location: North of Texas, South of Kansas
While I was trying to catch up on some paperwork Sunday, Doc and I started to visit about the ball turret once again. Pretty soon we were unlocking it (curiosity, you know) and Steve was stuffing me inside. Here are a few photos of the interior of this time capsule.

Control handles--these are right above your head when seated inside:
Image

Hydraulic pump motor with a drip of hydraulic fluid on the bracket:
Image

Electrical control panel and junction box, just above the left gun mount:
Image

Elevation gearbox assembly and the j-box again:
Image

The right gun charging handle and turret position indicator:
Image

Here I am in the normal seating position, and my knees are, indeed, next to my elbows. Surprisingly enough it is actually very comfortable when you're buttoned up inside. Bear in mind that I had no heated suit, chest pack, etc, but I was still surprised that I fit so well. I'm 5'8" and imagine it would be a tighter squeeze with full kit, two guns, and a sight in there with me.
Image

Here is one of the hard working VFM volunteers, Mike Tolfa, taking a very rare break from work to get fit-checked.
Image

A shot looking in to the business end with Mike aboard:
Image

And one from the right side windows. Visibility is really pretty good considering that the side windows are small due to structural considerations.
Image

Scott


Top
 Profile  
 
 Post subject:
PostPosted: Thu May 28, 2009 8:57 am 
Offline
Senior Moderator
User avatar

Joined: Thu Jun 15, 2006 12:22 am
Posts: 3874
Location: DFW Texas
Quote:
I have to start off with another picture for Sabremech. I used a bit of elbow grease this morning to see what was underneath the Bolivian warpaint on the F-86.
Image
Notice that I went through an outer layer of gray-green, then greener green, then silver, then some goldish material, and finally the alclad. I later polished the NMF a little and it looks pretty good. I'm wondering if F-86s were ever painted silver during their time in the Air National Guard or if this is paint applied during her foreign service?


I helped with some of the paint removal on 52-4731 and that airplane had several layers of paint before we go to metal. It seemed to me that there was blue, gold and silver/gray paint layers. Stripping that airplane was some ugly work...The guys from American Airlines brought out there equipment and polished the bird.

Here's how she looked the last time I saw her.
Image

_________________
Zane Adams
There I was at 20,000 ft, upside down and out of ammunition.
_______________________________________________________________________________
Join us for the Texas Warbird Report on WarbirdRadio.com!
Image http://www.facebook.com/WarbirdRadio
Listen at http://www.warbirdradio.com


Top
 Profile  
 
Display posts from previous:  Sort by  
Post new topic Reply to topic  [ 506 posts ]  Go to page Previous  1, 2, 3, 4, 5, 6, 7, 8 ... 34  Next

All times are UTC - 5 hours


Who is online

Users browsing this forum: No registered users and 23 guests


You cannot post new topics in this forum
You cannot reply to topics in this forum
You cannot edit your posts in this forum
You cannot delete your posts in this forum
You cannot post attachments in this forum

Search for:
Jump to:  
Powered by phpBB® Forum Software © phpBB Group