Re: Windsor (CH2A) Lancaster Restoration
Mon Jul 08, 2013 6:32 pm
Some more photo's from today:
Here are the two landing gear door valances that we completed on June 5th. More pics of those later once I can get them off of the shelf.

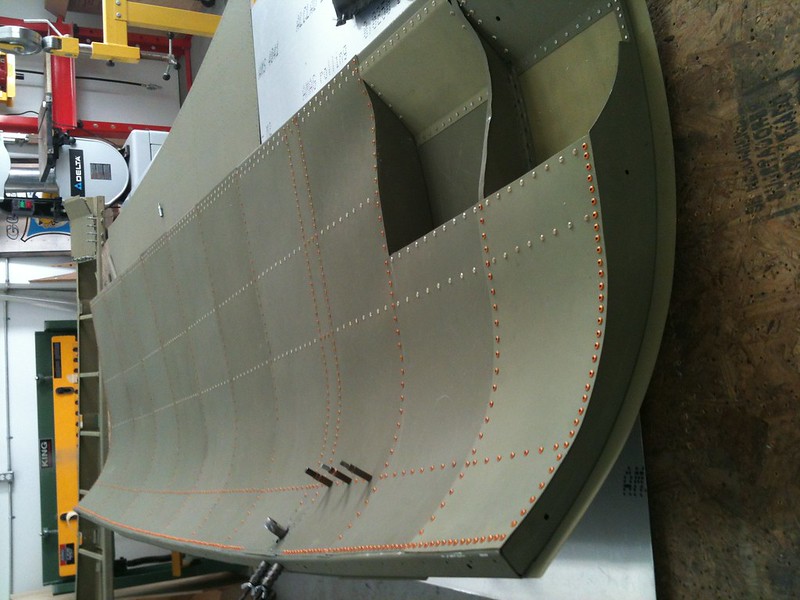
Here is one of the gear doors which is almost done, we just have to install a bearing where part of the landing gear attaches to it, and finish the blind fasteners on the bottom skins once we finally get our order, one of the other gear doors is at the same spot as this one in the amount of work left:

The third gear door is getting close to being done as well, just a few more rows of regular rivets to shoot and then on to finishing off with the blind fasteners and installing the bearing.

Finally the last door, we've just began shooting the outside skins on. We're waiting on more material (should arrive in the next day or two) to finish of two more skins we need, then we can finish buttoning this one up as well.

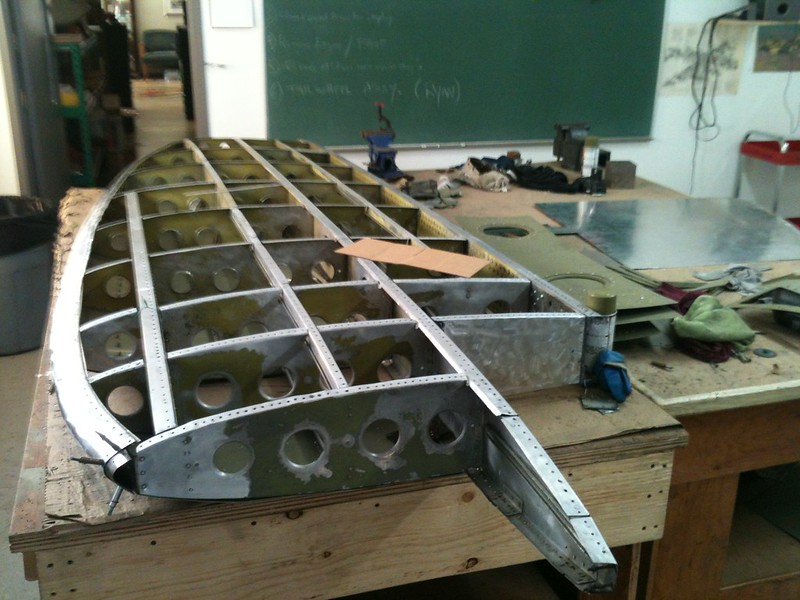
We still have two more skins to finish on the top side of the wingtip (again waiting for material). In the meantime we started shooting some of the bottom skins.

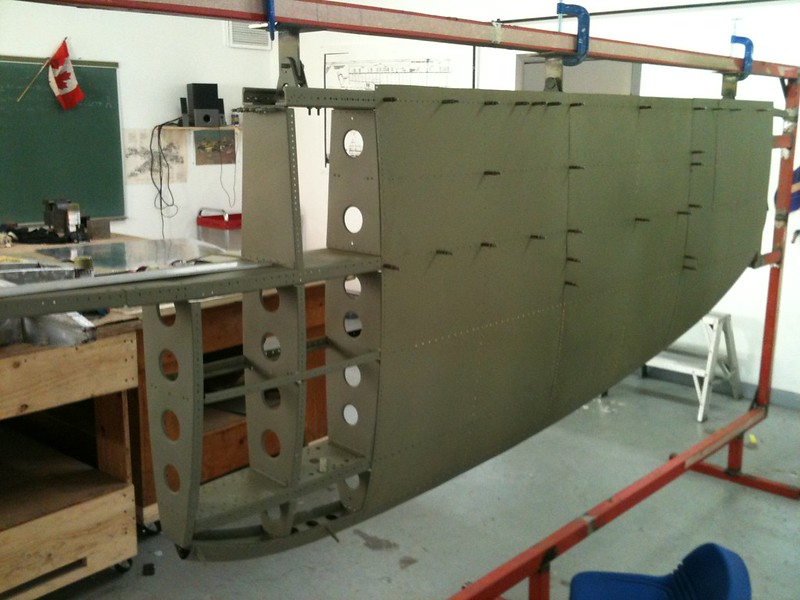
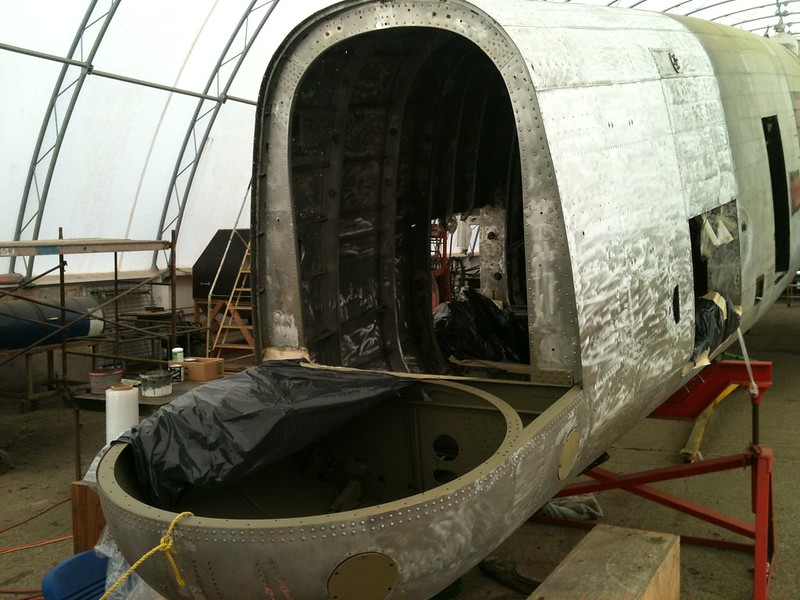
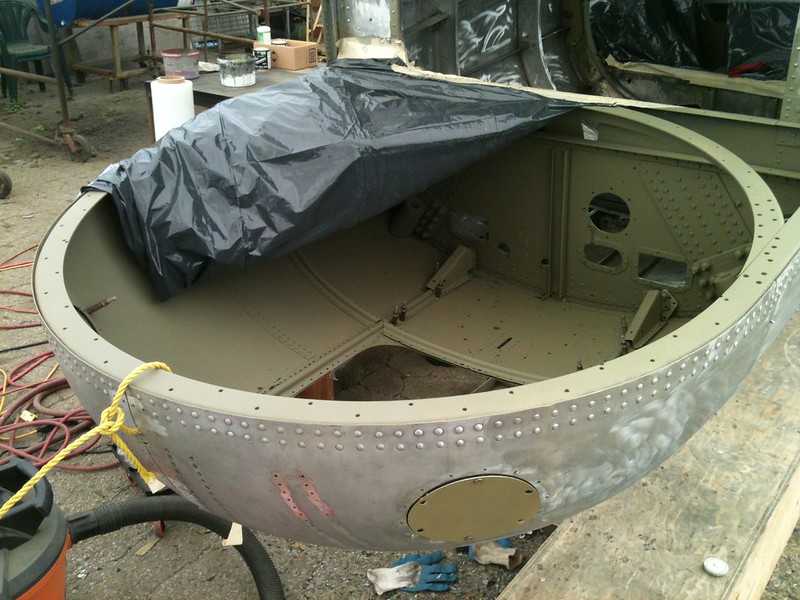
Lastly, today we started the skin removal on both vertical stabilizers. Most of that should be done by tomorrow or Wednesday then we can start replacing what needs to be replaced. From what we can see so far the structure looks to be a absolutely great shape which is good news!


(Lots of little reinforcing strips randomly installed on this one when we opened it up)

I think that's about it for now, more to come later!
Here are the two landing gear door valances that we completed on June 5th. More pics of those later once I can get them off of the shelf.

Here is one of the gear doors which is almost done, we just have to install a bearing where part of the landing gear attaches to it, and finish the blind fasteners on the bottom skins once we finally get our order, one of the other gear doors is at the same spot as this one in the amount of work left:

The third gear door is getting close to being done as well, just a few more rows of regular rivets to shoot and then on to finishing off with the blind fasteners and installing the bearing.

Finally the last door, we've just began shooting the outside skins on. We're waiting on more material (should arrive in the next day or two) to finish of two more skins we need, then we can finish buttoning this one up as well.

We still have two more skins to finish on the top side of the wingtip (again waiting for material). In the meantime we started shooting some of the bottom skins.

Lastly, today we started the skin removal on both vertical stabilizers. Most of that should be done by tomorrow or Wednesday then we can start replacing what needs to be replaced. From what we can see so far the structure looks to be a absolutely great shape which is good news!


(Lots of little reinforcing strips randomly installed on this one when we opened it up)

I think that's about it for now, more to come later!
Re: Windsor (CH2A) Lancaster Restoration
Thu Jul 11, 2013 9:12 pm
Over the last two days we finsihed opening up one side of each of the vertical stabs.
Starboard:

Port:

We also removed all of the steel components from the Port stab (starboard will be done as well). We removed all of the surface corrosion and are sending them out to be powder coated and then we'll prime them. Just as an extra corrosion preventative measure for the furture.

Our sheets of .025 material finally came in today so we began making the last of the skins for the wing tip and the last gear door. As well we'll be starting all of the skins for the opened up sides of the stabs. Once those are done and temporarily in place, and our jigs arrive, we'll removed the skins from the other side and do the same thing.
Re: Windsor (CH2A) Lancaster Restoration
Thu Jul 11, 2013 9:42 pm
A couple days ago I had to fly down to Windsor for work and thanks to a dispatching mixup I found I was going to be there for an hour or so. I had been in the hangar once before but had never seen the Lanc in its enclosure so my copilot and I went for a walk to see if anyone was around. We ended up finding our way into the workshop where we met an aircraft structures gentleman (I managed to forget his name, of course) who offered to take us on a tour of the projects they have on the go. The Mosquito was impressive but the Lancaster just blew us both away, just a mountain of an airplane. What a machine, I wish you guys all the best with the restoration and if I were closer (Thunder Bay is a bit of a commute) I'd volunteer to help in a heartbeat.
Next time you see our tour guide (jeez I wish I could remember his name) thank him again from the two air ambulance pilots that dropped in with the MU-2 this past week.
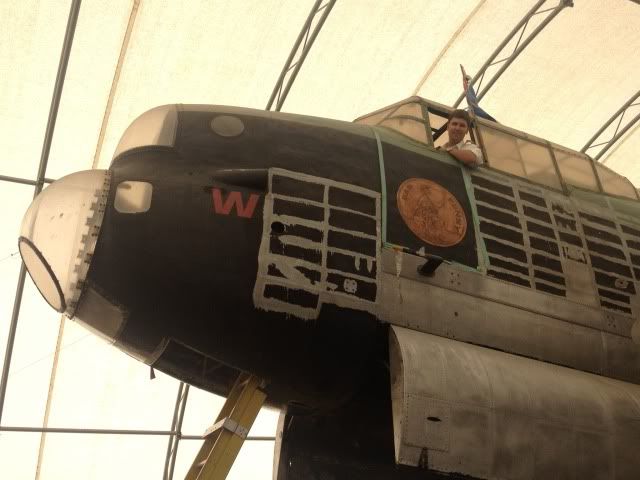
-Tim
Next time you see our tour guide (jeez I wish I could remember his name) thank him again from the two air ambulance pilots that dropped in with the MU-2 this past week.
-Tim
Re: Windsor (CH2A) Lancaster Restoration
Thu Jul 11, 2013 10:00 pm
Hey Tim, thanks for stopping by! That would be Nicholas who gave you guys to the tour, I'll be sure to pass the thank you along.
Feel free to come by again next time your down and see the progress!
Feel free to come by again next time your down and see the progress!
Re: Windsor (CH2A) Lancaster Restoration
Tue Aug 06, 2013 5:40 pm
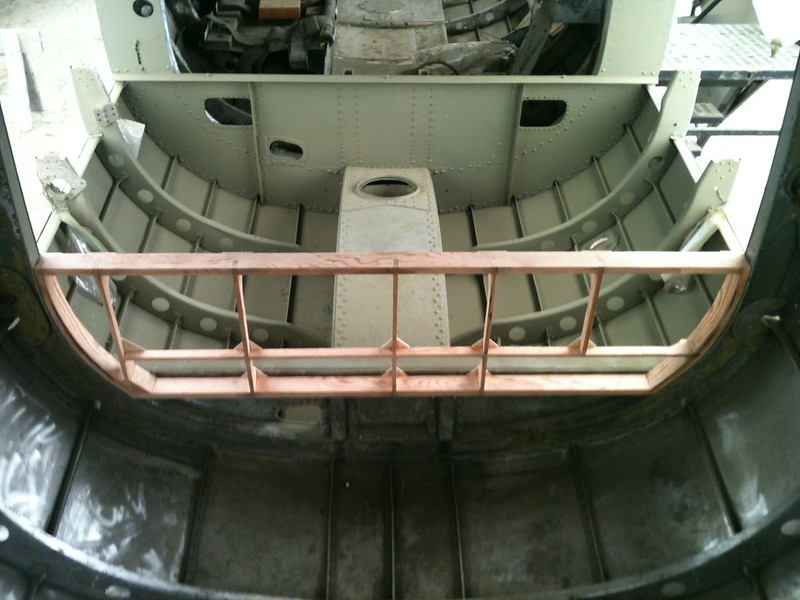
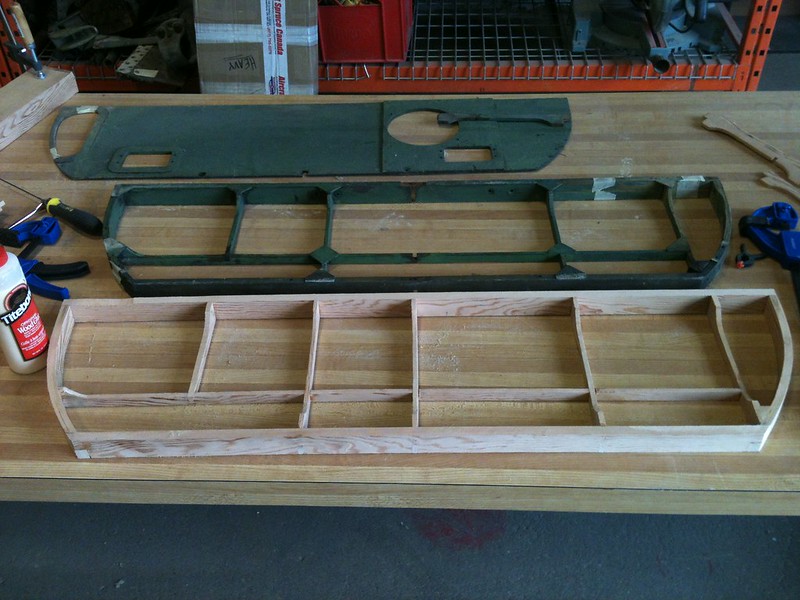
Finally made some progress on that rear door frame. Work has put a huge kink in my volunteer time but I now have the frame all glued up and sanded. It looks larger than the original in this pic but it is just the camera angle.
Re: Windsor (CH2A) Lancaster Restoration
Wed Aug 07, 2013 4:39 pm
Looks great!
I know what you mean, this having to go to work nonsense wreaks havoc with my aeroplane restoration time too
Some great progress on the ol' girl. Looks like first class work
Andy Scott
I know what you mean, this having to go to work nonsense wreaks havoc with my aeroplane restoration time too
Some great progress on the ol' girl. Looks like first class work
Andy Scott
Re: Windsor (CH2A) Lancaster Restoration
Thu Aug 08, 2013 5:10 am
DH82EH wrote:Looks great!
I know what you mean, this having to go to work nonsense wreaks havoc with my aeroplane restoration time too
Some great progress on the ol' girl. Looks like first class work
Andy Scott
Thanks, Andy. What are you working on?
BTW, Creemore Creek is one of my favourite beers!!
Don
Re: Windsor (CH2A) Lancaster Restoration
Fri Aug 16, 2013 5:48 pm
I almost live close enough to the brewery to put in a pipeline!
I agree. It's good beer
viewtopic.php?f=3&t=50253
Here's a link to my Tiger moth project. We are getting so close.....
Andy Scott
I agree. It's good beer
viewtopic.php?f=3&t=50253
Here's a link to my Tiger moth project. We are getting so close.....
Andy Scott
Re: Windsor (CH2A) Lancaster Restoration
Sat Aug 17, 2013 7:41 am
DH82EH wrote:I almost live close enough to the brewery to put in a pipeline!
I agree. It's good beer
viewtopic.php?f=3&t=50253
Here's a link to my Tiger moth project. We are getting so close.....
Andy Scott
Just checked out your build thread, Andy. You have done a fantastic job on the Tiger Moth!! Looking forward to seeing her some day.
Cheers,
Don
Re: Windsor (CH2A) Lancaster Restoration
Mon Aug 26, 2013 4:56 pm
Work is progressing quickly on the vertical stabs and tail section of FM212. The guys are cleaning them up, replacing skins, painting and riveting like maniacs.
This pic is from Saturday morning and when I went in this aft, this puppy was all primed and almost ready to be buttoned up.
Another gear door near completion.
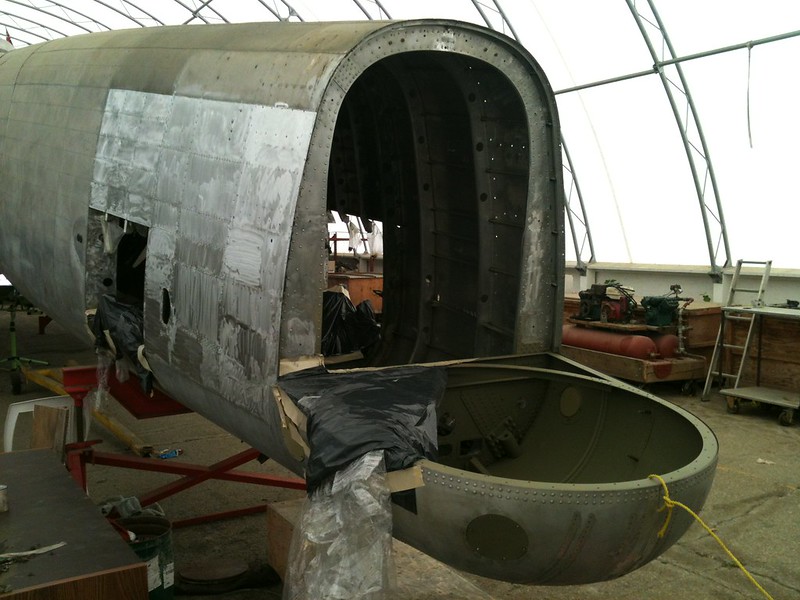
The tail section is also seeing some real improvement. Old paint has been completely removed, surfaces have been prepared for paint, some even getting some primer already.
We are still looking for a rear turret if anyone has any leads!!! Hint! Hint!
This pic is from Saturday morning and when I went in this aft, this puppy was all primed and almost ready to be buttoned up.
Another gear door near completion.
The tail section is also seeing some real improvement. Old paint has been completely removed, surfaces have been prepared for paint, some even getting some primer already.
We are still looking for a rear turret if anyone has any leads!!! Hint! Hint!
Re: Windsor (CH2A) Lancaster Restoration
Mon Aug 26, 2013 7:53 pm
Thanks for the pictures Don! I'm going to hold off until the end of the week on any more of them, she's going to look quite different by Friday afternoon if we keep things on schedule! 
Work is definitely progressing well! More to come soon!
Work is definitely progressing well! More to come soon!
Re: Windsor (CH2A) Lancaster Restoration
Mon Aug 26, 2013 7:55 pm
Lightning fast progress guys... Really pleased to see the vertical fins were not too bad inside..
Re: Windsor (CH2A) Lancaster Restoration
Fri Aug 30, 2013 7:24 pm
Well here are the photos as promised!
After two weeks pushing hard to get the outside of the tail section done, we finally reached that goal today, we're also coming along quite well on the interior! Lots of paint, parts and corrosion removal completed to get to this point!


Now that everything is primed we can go ahead with several of the patches we have to do on the skins and then continue on the interior.
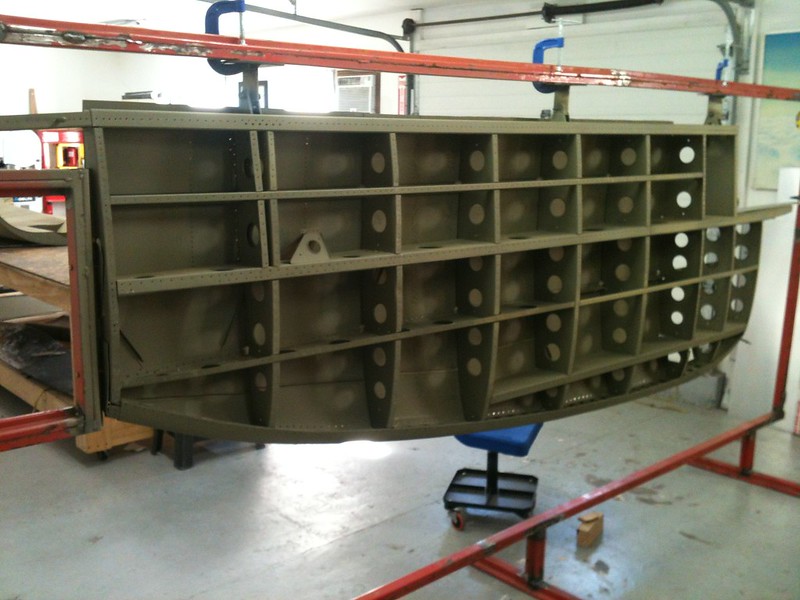
The vertical stabilizers are also coming along very well! The port fin is nearly finished on one side, once that's done we can rivet the new skins on the other side.

The starboard stabilizer is now in the jig with all of the skins removed and new ones made and being fitted. The structure will be cleaned up this week and then primed so we can begin riveting the skins on this one as well.

After two weeks pushing hard to get the outside of the tail section done, we finally reached that goal today, we're also coming along quite well on the interior! Lots of paint, parts and corrosion removal completed to get to this point!


Now that everything is primed we can go ahead with several of the patches we have to do on the skins and then continue on the interior.
The vertical stabilizers are also coming along very well! The port fin is nearly finished on one side, once that's done we can rivet the new skins on the other side.

The starboard stabilizer is now in the jig with all of the skins removed and new ones made and being fitted. The structure will be cleaned up this week and then primed so we can begin riveting the skins on this one as well.

Re: Windsor (CH2A) Lancaster Restoration
Sun Sep 01, 2013 7:51 pm
Looks great you guys.
Keep it up!
Andy Scott
Keep it up!
Andy Scott
Re: Windsor (CH2A) Lancaster Restoration
Tue Sep 03, 2013 5:27 pm
Had my first test-fit of the new bottom frame for the rear turret doors. Fits like a glove! Woohoo! Just need to skin it with some 3 mil plywood and paint it up. Next up, the top frame.