Fri Dec 21, 2007 4:39 am
Hi Dan, greeting from not-so sunny England!-amazing project- never heard of the Seawolf myself, but having looked it up, all that glazing would've put me off building one, even if i knew what the heck i was doing!
Fri Dec 21, 2007 10:47 am
OXCART wrote:Hi Dan, greeting from not-so sunny England!-amazing project- never heard of the Seawolf myself, but having looked it up, all that glazing would've put me off building one, even if i knew what the heck i was doing!
Thanks Ox, and greetings from snow-and-ice-encrusted Wisconsin.
Without a doubt, the biggest key to the success of this project is that I obviously don't know what the heck I'm doing.
Tue Jun 17, 2008 11:51 am
Hi Dan,
Just wondered if there had been any update on your amazing project? What you are doing is totally brilliant and a bit mad ( in a good way ) All the best.
Just wondered if there had been any update on your amazing project? What you are doing is totally brilliant and a bit mad ( in a good way
Tue Jun 17, 2008 1:18 pm
Yeah, I'm mad. I don't even try explaining anymore. A few visitors get it and smile. Most shake their heads and wander off.
I did promise everyone progress reports once summer got here (and technically it's still spring ), but I've been spending the last week helping friends and community sandbag our little burg against unusually high water. My home and project are all high and dry, but a couple of homes closer to the river are in danger of being washed away.
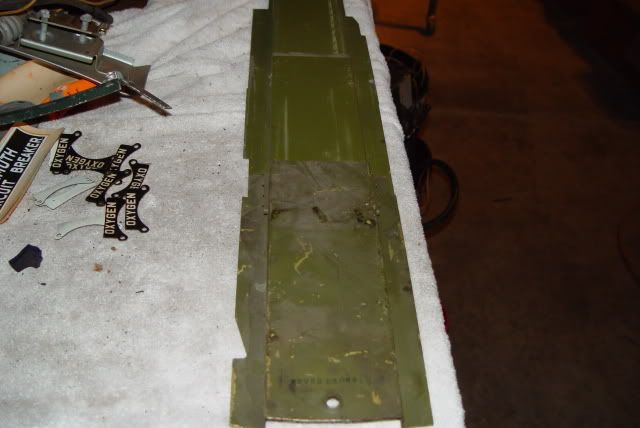
The daunting part of this project (can't avoid any longer) is creating the four forward truss/longerons. The drawings call for creating these channels out of .125" aluminum plate...particularly stubborn stuff to work with. As she'll be static, I'll be improvising a bit here. Material has been ordered--hope to have a thumbs up on the process in a couple of weeks.
I did promise everyone progress reports once summer got here (and technically it's still spring
The daunting part of this project (can't avoid any longer) is creating the four forward truss/longerons. The drawings call for creating these channels out of .125" aluminum plate...particularly stubborn stuff to work with. As she'll be static, I'll be improvising a bit here. Material has been ordered--hope to have a thumbs up on the process in a couple of weeks.
Tue Jun 17, 2008 2:21 pm
Thanks very much for the reply. I hope the waters recede before they do any more damage. Take care.
Wed Jun 18, 2008 7:47 am
Dan K wrote:Yeah, I'm mad. I don't even try explaining anymore. A few visitors get it and smile. Most shake their heads and wander off.
Dan, dont worry, we here on WIX get it
I think its an awsome project.
Hope the water dosent get any higher and you can get back to your project.
ET VS2 550891 Sliding Thingy
Mon Aug 25, 2008 12:22 am
Dan,
I've found a strange part that's marked ET VS2 550891 that I don't see in the parts manual you sent me for the TBY's turret. It's made of steel, not aluminum and it slides from a short piece into a long hinged cover of some type. ET just stands for Emerson Turret and I assume that any VS2 p/n is for the Seawolf right? Any ideas?

I've found a strange part that's marked ET VS2 550891 that I don't see in the parts manual you sent me for the TBY's turret. It's made of steel, not aluminum and it slides from a short piece into a long hinged cover of some type. ET just stands for Emerson Turret and I assume that any VS2 p/n is for the Seawolf right? Any ideas?
Mon Aug 25, 2008 9:10 am
Thanks Al,
Here's a quick (but incomplete) answer for you.
I didn't find the part in the turret manual either, but I did find it listed in the TBY engineering drawings index for the turret installation. Strange. Here's the nomenclature for part #VS2-550891:
"Slide Assem.-Case Eject.-G.T."
It is listed as a subpart of:
"Chute Install.-Case Eject.-G.T."
A microfilm index number is listed, so the next time I can get near a projector I'll try to find out where this little bugger actually fits.
Sea Wolf Hunt
Mon Sep 08, 2008 1:18 am
Dan,
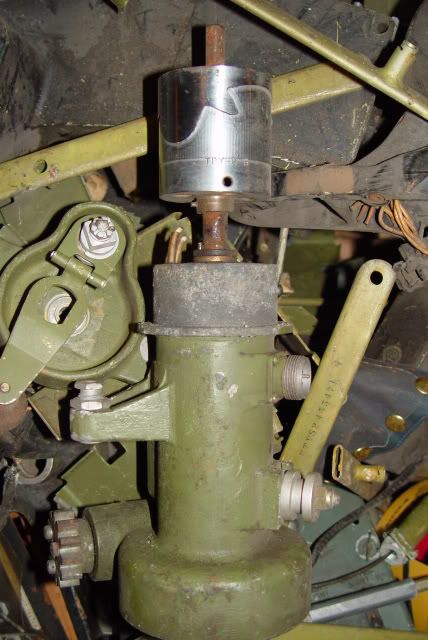
Just thought I would update you on the search for TBY turret parts down here at Creve Coeur. Over the holiday weekend I had to make room for some new arrivlas at the museum's restoration shop, two Stinson SR-5 projects, a PA-11 project, four UPF-7 wings on a wing trailer, a Ranger engine, and a Jabobs engine. In order to fit it all in, I had to put up some more pallet rack so I can keep sorting parts. I did turn up some interesting TBY turret parts in the process inlcuding three more control yokes and for the first time, a gun interrupter profile drum. It's the first time I've seen the a/c type on a TBY turret part. The interrupter drum is stamped TBY-2B. I've got enough parts to nearly fill a second pallet so I'll start working on that next week. Enjoy
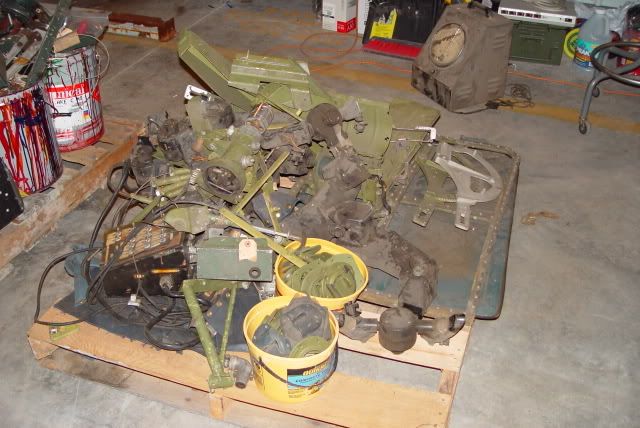
Just thought I would update you on the search for TBY turret parts down here at Creve Coeur. Over the holiday weekend I had to make room for some new arrivlas at the museum's restoration shop, two Stinson SR-5 projects, a PA-11 project, four UPF-7 wings on a wing trailer, a Ranger engine, and a Jabobs engine.
Mon Sep 08, 2008 1:31 am
More pieces to the puzzle! Keep it up guys!
Mon Sep 08, 2008 12:06 pm
It's looking really good. I have a couple of thoughts. One, I had a chance to recently view the all wood Heinkel 100 replica at Chino this summer and it was awesome. Have you considered a joint effort with that guy on the east coast that is building those full scale replicas of extinct warbirds?
It could be pretty neat because it could also house all the items and work you have already completed.
Second thought, I am restoring a navy jeep called a V-35. It is part WWII MB, part Korean War M-38 and part civilian CJ-3A . I made a list of all the parts that go on the jeep that come from those three categories.
I am now about 75% done and the jeep when finished will be about 75-85% authentic. If any of those rare to nonexistent parts come along then great, I can buy those later.
So my point is can you give a list that has parts that were used on other aircraft of the time? Propellor blades, wheels and tires, instruments, seat cushions, radios, magnetos, etc. There's a lot of the common stuff laying around with people not sure what to do with it.
Good luck!
Sat Oct 18, 2008 9:27 pm
Warbird Kid wrote:Dan K wrote:muddyboots wrote:Dan, I know this has been asked, but...What the heck are you going to DO with it?
I suppose that if (and that's an extremely big IF) I would ever get it to a point resembling display quality, it might wind up in a museum somewhere. But who on earth would want to display a one-of-a-kind naval aircraft from WWII? Suggestions welcome!
Oh I could think of a museum that be suited for it perfectly.
Last edited by gary1954 on Wed Oct 29, 2008 7:57 am, edited 1 time in total.
Tue Oct 28, 2008 6:34 pm
Hello Dan ,
Do you have any new pics or info on your project. Would be really interested to know the stage you are at just now. All the best.
Do you have any new pics or info on your project. Would be really interested to know the stage you are at just now. All the best.
Tue Nov 04, 2008 12:45 am
I truly appreciate everyone's interest in this project.
Being involved in both the administrative and instructional ends of education, as well as chasing my kids around to various and sundry activities, doesn't leave much free time during the school year to work on this project.
I've also reached a bit of a "fork" as well. My original plan was to recreate the cockpit & crew area of the TBY, using as much original material as I could get my hands on and recreating the rest in metal--basically learning metal forming skills as needed as the project progressed. The biggest obstacles to progress are the price for aluminum sheet/plate, lack of complete structural drawings, and my personal limitations in certain metal-forming techniques (oh yeah, and the free time thing ).
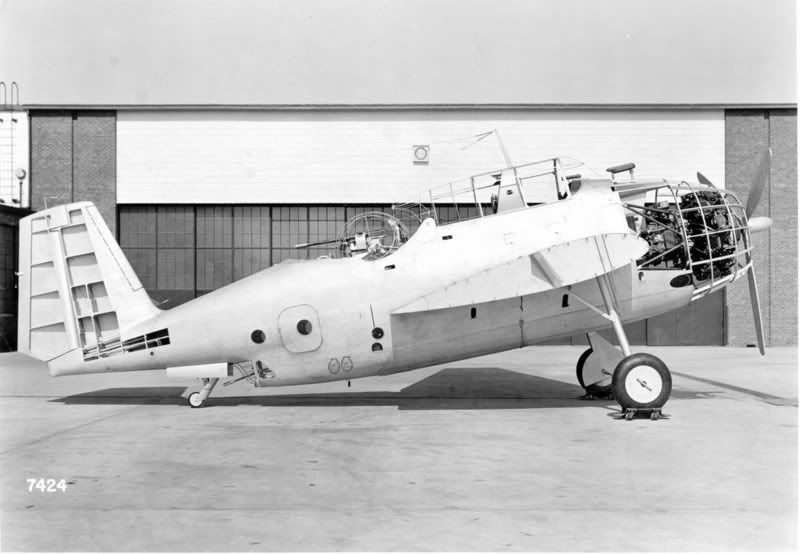
Because progress has been slow, I've been considering more and more going the route of creating a TBY mock-up in wood--much in the same way the manufacturers developed proof-of-concept designs in the 1930's & '40's. Pics like the TBF mock-up below make much more sense to me in a financial sense than working exclusively in metal (as well as maintaining personal sanity). Since serious gaps exist in my collection of engineering drawings, I would think working extensively with wood might give me a more cost-effective means of getting the whole dimension headache resolved as well.
Always open to suggestions (and monetary donation! ).
Being involved in both the administrative and instructional ends of education, as well as chasing my kids around to various and sundry activities, doesn't leave much free time during the school year to work on this project.
I've also reached a bit of a "fork" as well. My original plan was to recreate the cockpit & crew area of the TBY, using as much original material as I could get my hands on and recreating the rest in metal--basically learning metal forming skills as needed as the project progressed. The biggest obstacles to progress are the price for aluminum sheet/plate, lack of complete structural drawings, and my personal limitations in certain metal-forming techniques (oh yeah, and the free time thing
Because progress has been slow, I've been considering more and more going the route of creating a TBY mock-up in wood--much in the same way the manufacturers developed proof-of-concept designs in the 1930's & '40's. Pics like the TBF mock-up below make much more sense to me in a financial sense than working exclusively in metal (as well as maintaining personal sanity). Since serious gaps exist in my collection of engineering drawings, I would think working extensively with wood might give me a more cost-effective means of getting the whole dimension headache resolved as well.
Always open to suggestions (and monetary donation!
Tue Nov 04, 2008 9:48 am
Dan K wrote:I truly appreciate everyone's interest in this project.
Being involved in both the administrative and instructional ends of education, as well as chasing my kids around to various and sundry activities, doesn't leave much free time during the school year to work on this project.
I've also reached a bit of a "fork" as well. My original plan was to recreate the cockpit & crew area of the TBY, using as much original material as I could get my hands on and recreating the rest in metal--basically learning metal forming skills as needed as the project progressed. The biggest obstacles to progress are the price for aluminum sheet/plate, lack of complete structural drawings, and my personal limitations in certain metal-forming techniques (oh yeah, and the free time thing
Because progress has been slow, I've been considering more and more going the route of creating a TBY mock-up in wood--much in the same way the manufacturers developed proof-of-concept designs in the 1930's & '40's. Pics like the TBF mock-up below make much more sense to me in a financial sense than working exclusively in metal (as well as maintaining personal sanity). Since serious gaps exist in my collection of engineering drawings, I would think working extensively with wood might give me a more cost-effective means of getting the whole dimension headache resolved as well.
Always open to suggestions (and monetary donation!
I think that is an excellent idea, considering you are going for a static display piece. It makes perfect sense.