Re: PV-2D Harpoon 84062 (Tanker 101) comes back to life
Wed Jun 06, 2012 2:36 pm
Taigh Ramey wrote:Chappie wrote:Taigh...do you still have Joe Hudson's former AT-11 in the hangar?
Chappie
I have Allen Chorman's old AT-11 here and four other AT-11's but Joe Hudson doesn't ring a bell.
Okay, that'd be the same aircraft. A lot of the AT-11s that were owned by Hudson went to Chorman.
Chappie
Re: PV-2D Harpoon 84062 (Tanker 101) comes back to life
Wed Jun 06, 2012 4:31 pm
Yes that AT-11 is what I call my good airplane. Allan Chorman used to play in that Beech when he was a kid and I have even found his name scratched in it on the escape hatch. He wants it back!
This AT-11 is one of the most stock and original/uncut AT-11's around today. I have collected parts and pieces for decades to build that Kansan into an authentic gun toting, bomb dropping Beech with all of its original gear.
There is no excuse for not having worked on it but the one I use is that all of my customers aircraft have taken a priority, you know paying the bills and such. The Harpoon has taught me how to manage both so I think when the Harpoon is further along then I will start hammering on the AT-11.
The AT-11 has wear marks on the bomb racks where the bomb shackles rattled for many hours on bombing runs out of Midland Army Air Field training fledgling bombardiers. There are also countless scratch marks in the aft bulkhead where the student Navigator wedged himself between the nav table and the bulkhead getting into the seat and his parachute hardware gouged the skin. Awesome historical wear that I can't wait to remove and replace with new sheet metal! Just kidding. I love that stuff and the fact that it is still there and unmolested after all these years. Someday she will have her turn and we will get her back in the air just as she was.
Re: PV-2D Harpoon 84062 (Tanker 101) comes back to life
Thu Jun 07, 2012 7:42 pm
Taigh- PM inbound on the AT-11. Don't want the thread to get off track.
Chappie
Chappie
Re: PV-2D Harpoon 84062 (Tanker 101) comes back to life
Fri Jun 15, 2012 2:00 am
A bit more progress inside the Harpoon lately. First was making the radar station more complete. The APS-3 modulator was fixed up and mounted on the floor forward of the radar ops station. The fins were bent up pretty badly but they straightened out okay. The unit is not in the best of shape inside so a better one is on the list to get the APS-3 operational. Anyone have any AN/APS-3 parts especially connectors?
Here is the modulator in its original location
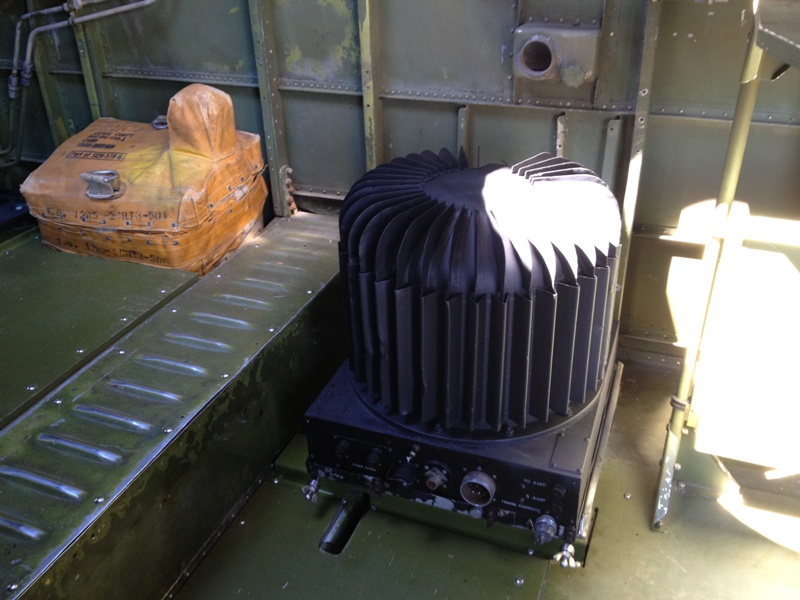
This modulator came from the Pima Air Museum radio pile about 30+years ago and it has a special guard mounted on the front panel. This guard is unique to the PV-2 as it prevented the connectors from being damaged while air and ground crew walked by the set near the foot path in the main cabin or mid body. This means that this modulator was actually mounted in a Harpoon in an earlier life. The guard was painted red just like it is now. Nice of the Harpoon interior designers to add a splash of color accents such as these. Also the PV-2 feng shui is in constant flux with the addition of these kinds of disturbances

The air vent just above the modulator was for a canvas cooling cap that fitted on the top of the unit.
I dug into the storage hangar for a crate of radar gear to pull a non radar APN-4 loran set.
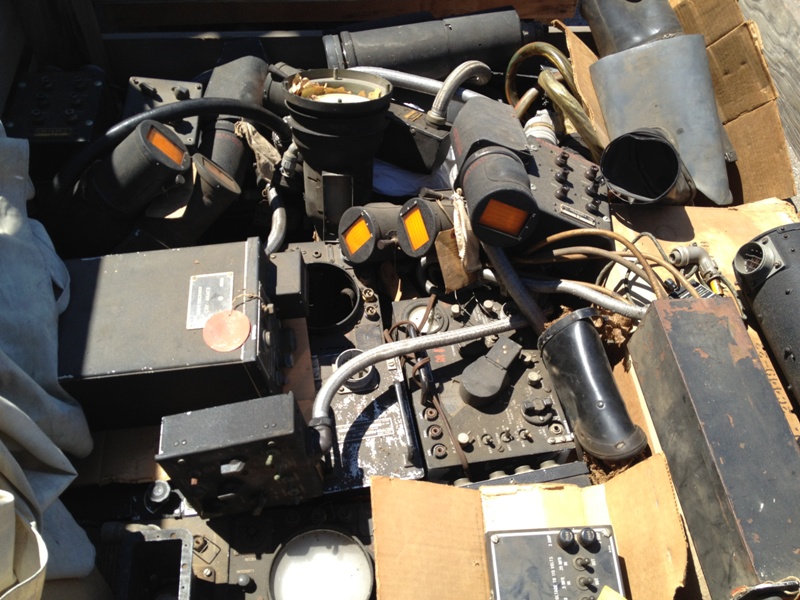
The APN-4 was a two part set with a receiver and an indicator. The receiver mounted on the catwalk under the navigators seat. More things to trip over and bleed on. As the aircraft fills up with its original equipment it sure gets crowded. Most every aircraft in WWII especially the bombers were crammed full of gear like this and walking around required you to be a contortionist to not snag your clothing or slice your skin right through your clothing. Its happening more and more to us that's for sure which is what has prompted our new rule: NO BLEEDING ON THE AIRCRAFT PLEASE!
Here is the APN-4 loran receiver
And the loran indicator to be mounted near the navigators station as soon as I can make the rack for it
Hey Scott, see anything familiar in the background?
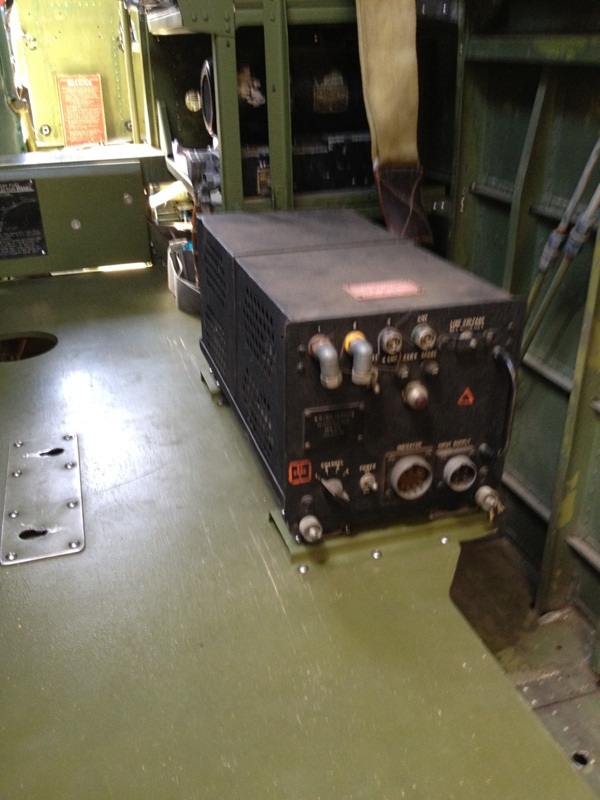
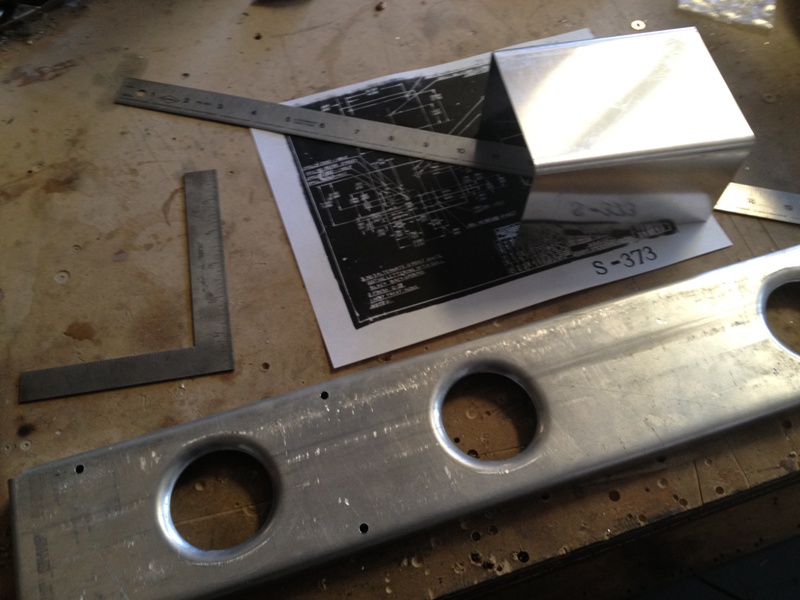
The next project was to fabricate the mount channel under the radar ops window. This channel was the support for the APX-2 control box, an electrical panel and an AIA-2A intercom station box.
The bracket is cut, bent and the lightening and mounting holes punched then the nut plates are riveted in place
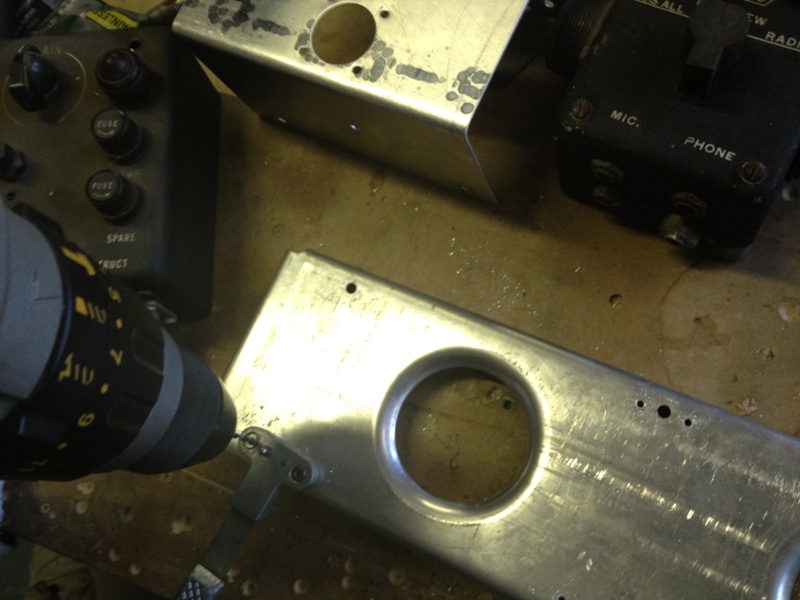
The control panel was fabricated and the channel fitted to the existing mounting holes in the bulkheads

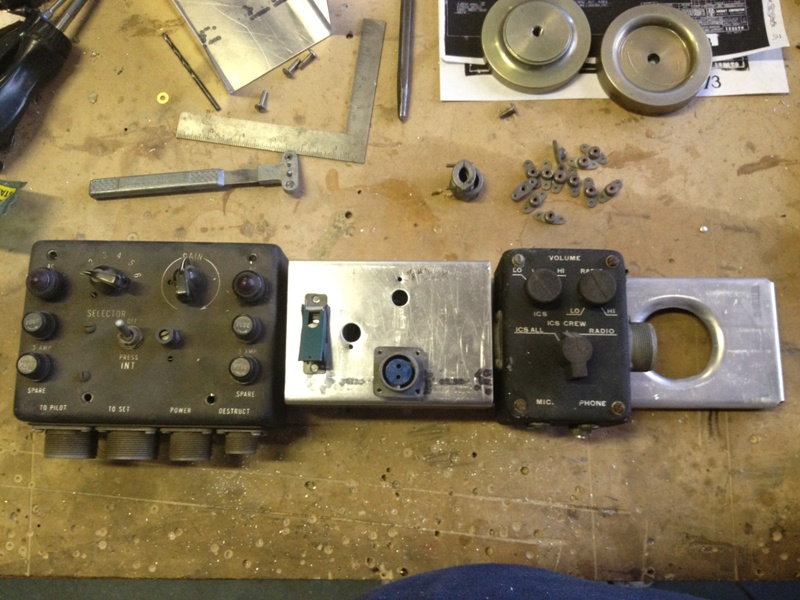
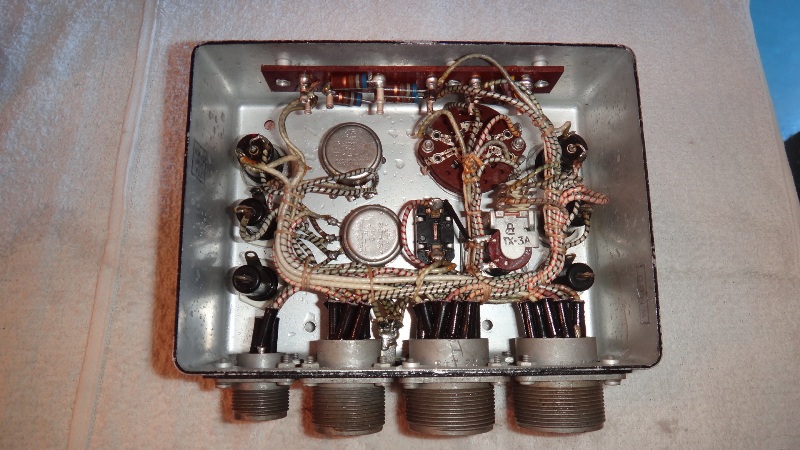
The boxes are cleaned up and fitted to the painted channel. This is the C-56A/APX-2 control head for the IFF set.
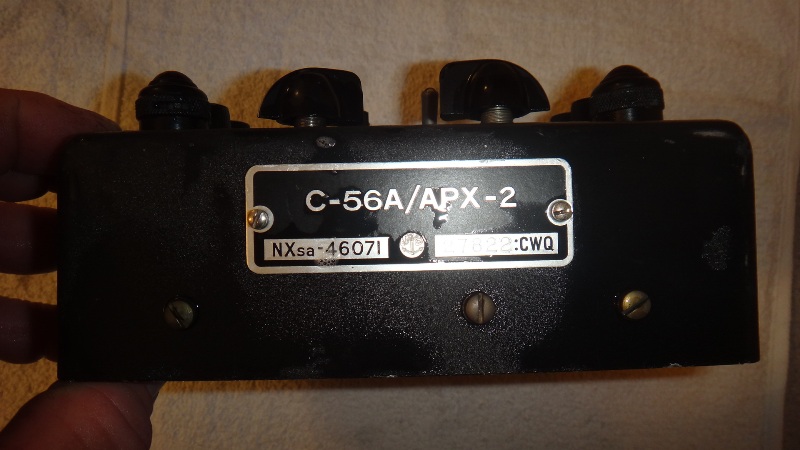
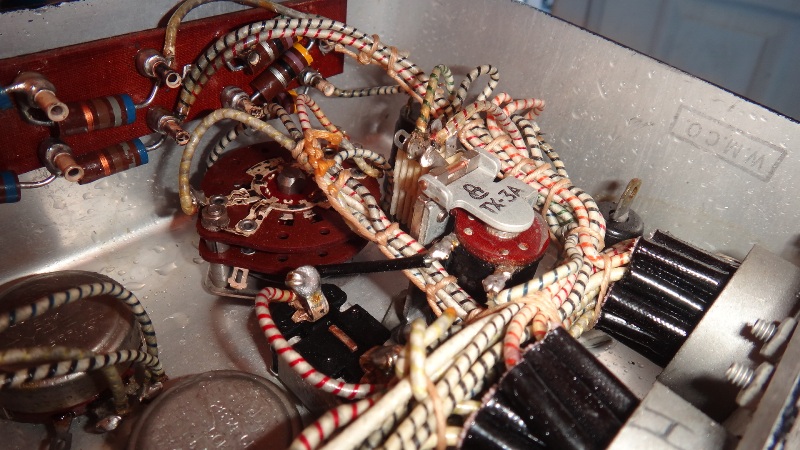
The wiring inside is just as beautiful as it was the day it was manufactured. A work of art to me
The IFF or Identification Friend or Foe and was an early transponder that would send out interrogation signals to other aircraft and ships. The interrogated set would respond with the code of the day and would then be identified as a friendly aircraft. No code of the day or the incorrect code would get you labeled as a foe and a not so friendly reception.
The IFF was tied into the radar and other equipment which would present the coded replies on the radar screen.
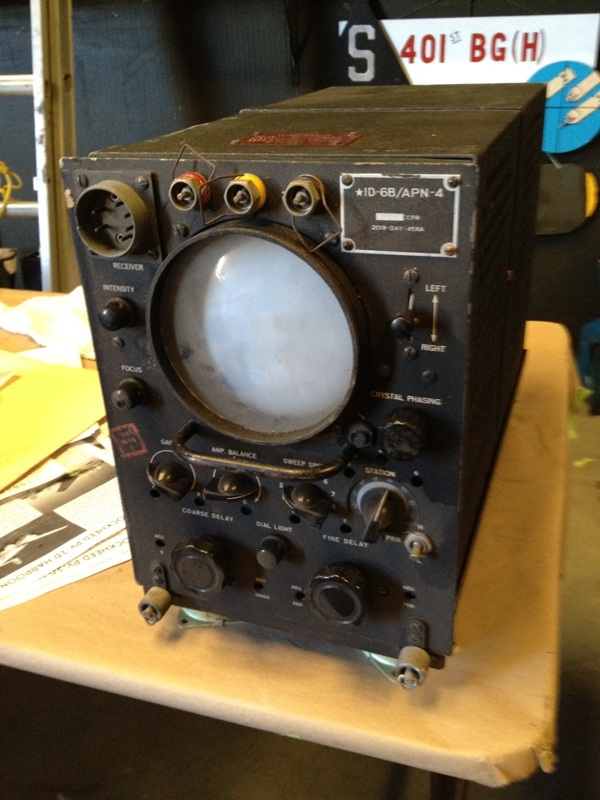
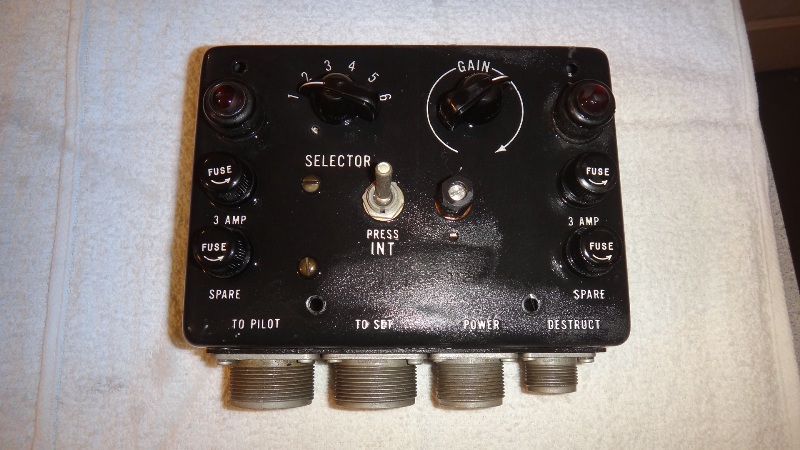
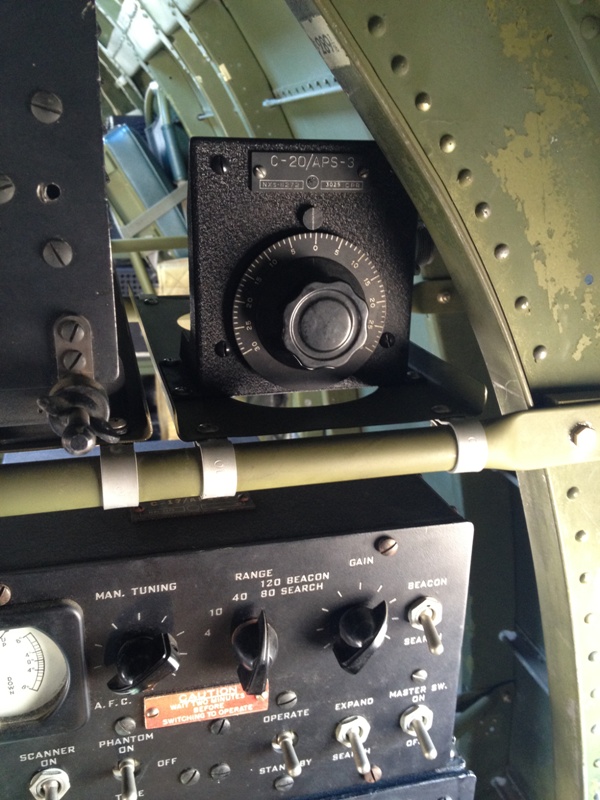
Then I fabricated the mount for the azimuth calibrator for the radar. Besides the antenna in the nose and the wiring harnesses this is the last part of the radar set and it makes the radar station complete. This control was identified by a WIX member who alerted me to it on eBay and the seller was kind enough to give me a great price on it and end the auction early. Lots of people helping in many different ways sure helps this project come together nicely. It really is a community project
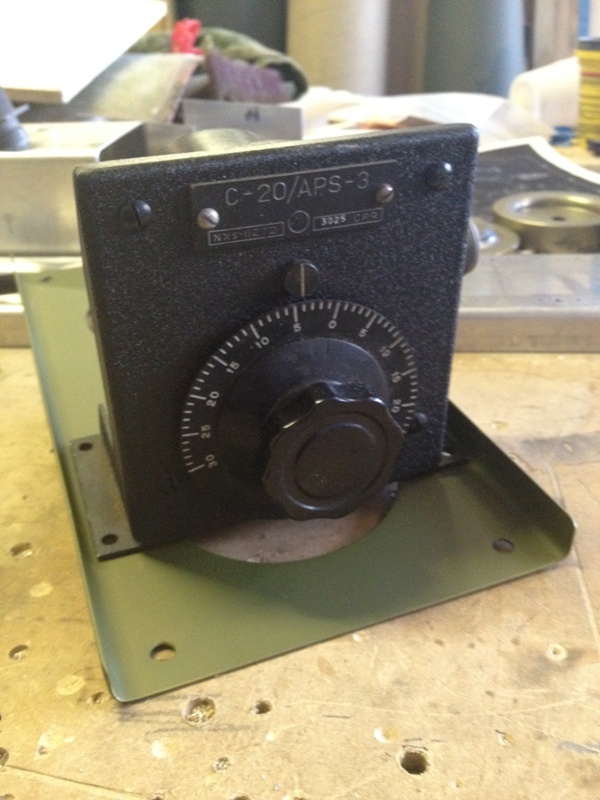
The last part to make the radar station more complete
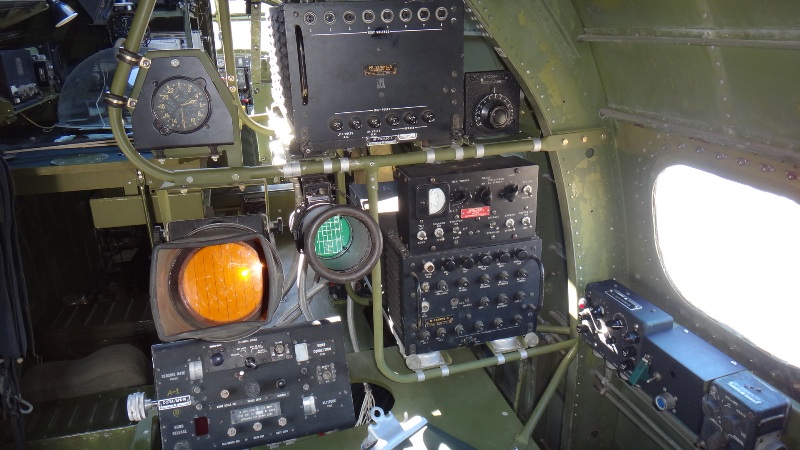
Also installed was the indicator for the AN/APX-8 system. The scope sits right next to the APS-3 scope and gives detailed information about the IFF returns and their relative bearing. Lots going on at this station
Jon came up last weekend and donated his whole Saturday. He is an electrical engineer who tackled the azimuth drive problem on the Martin 250CE turret. He dove right in to it and soon identified that the azimuth drive motor was kaput and we pulled a replacement from storage. Changing the drive motor required pulling the gear box and manual crank handle assembly as a unit. Not an easy task to do this while bending around the turret seat and armor plate. He prevailed and the azimuth part of the turret is working beautifully. Sorry I didn't get a photo of Jon at work but I will post a video of his efforts soon. Thanks Jon!
Here is the modulator in its original location
This modulator came from the Pima Air Museum radio pile about 30+years ago and it has a special guard mounted on the front panel. This guard is unique to the PV-2 as it prevented the connectors from being damaged while air and ground crew walked by the set near the foot path in the main cabin or mid body. This means that this modulator was actually mounted in a Harpoon in an earlier life. The guard was painted red just like it is now. Nice of the Harpoon interior designers to add a splash of color accents such as these. Also the PV-2 feng shui is in constant flux with the addition of these kinds of disturbances
The air vent just above the modulator was for a canvas cooling cap that fitted on the top of the unit.
I dug into the storage hangar for a crate of radar gear to pull a non radar APN-4 loran set.
The APN-4 was a two part set with a receiver and an indicator. The receiver mounted on the catwalk under the navigators seat. More things to trip over and bleed on. As the aircraft fills up with its original equipment it sure gets crowded. Most every aircraft in WWII especially the bombers were crammed full of gear like this and walking around required you to be a contortionist to not snag your clothing or slice your skin right through your clothing. Its happening more and more to us that's for sure which is what has prompted our new rule: NO BLEEDING ON THE AIRCRAFT PLEASE!
Here is the APN-4 loran receiver
And the loran indicator to be mounted near the navigators station as soon as I can make the rack for it
Hey Scott, see anything familiar in the background?
The next project was to fabricate the mount channel under the radar ops window. This channel was the support for the APX-2 control box, an electrical panel and an AIA-2A intercom station box.
The bracket is cut, bent and the lightening and mounting holes punched then the nut plates are riveted in place
The control panel was fabricated and the channel fitted to the existing mounting holes in the bulkheads
The boxes are cleaned up and fitted to the painted channel. This is the C-56A/APX-2 control head for the IFF set.
The wiring inside is just as beautiful as it was the day it was manufactured. A work of art to me
The IFF or Identification Friend or Foe and was an early transponder that would send out interrogation signals to other aircraft and ships. The interrogated set would respond with the code of the day and would then be identified as a friendly aircraft. No code of the day or the incorrect code would get you labeled as a foe and a not so friendly reception.
The IFF was tied into the radar and other equipment which would present the coded replies on the radar screen.
Then I fabricated the mount for the azimuth calibrator for the radar. Besides the antenna in the nose and the wiring harnesses this is the last part of the radar set and it makes the radar station complete. This control was identified by a WIX member who alerted me to it on eBay and the seller was kind enough to give me a great price on it and end the auction early. Lots of people helping in many different ways sure helps this project come together nicely. It really is a community project
The last part to make the radar station more complete
Also installed was the indicator for the AN/APX-8 system. The scope sits right next to the APS-3 scope and gives detailed information about the IFF returns and their relative bearing. Lots going on at this station
Jon came up last weekend and donated his whole Saturday. He is an electrical engineer who tackled the azimuth drive problem on the Martin 250CE turret. He dove right in to it and soon identified that the azimuth drive motor was kaput and we pulled a replacement from storage. Changing the drive motor required pulling the gear box and manual crank handle assembly as a unit. Not an easy task to do this while bending around the turret seat and armor plate. He prevailed and the azimuth part of the turret is working beautifully. Sorry I didn't get a photo of Jon at work but I will post a video of his efforts soon. Thanks Jon!
Re: PV-2D Harpoon 84062 (Tanker 101) comes back to life
Fri Jun 15, 2012 6:20 am
Taigh Ramey wrote: NO BLEEDING ON THE AIRCRAFT PLEASE!
Thanks for providing this morning's chuckle. Having worked on a sister moons ago, it was never IF you would bleed on the Harpoon, but WHEN...
And a ditto of appreciation for the updates. Sure would be swell to see you folks parked next to AW for some good old-fashioned Oshkosh gemuetlichkeit.

Re: PV-2D Harpoon 84062 (Tanker 101) comes back to life
Fri Jun 15, 2012 9:02 am
OUTSTANDING! Hey, that sign behind the APN-4 looks VERY FAMILIAR??? I wonder where IT came from? LOL GREAT WORK GUYS!!
Last edited by cco23i on Fri Jun 15, 2012 2:34 pm, edited 1 time in total.
Re: PV-2D Harpoon 84062 (Tanker 101) comes back to life
Fri Jun 15, 2012 9:07 am
Wow the old girl is filling up fast!
Re: PV-2D Harpoon 84062 (Tanker 101) comes back to life
Fri Jun 15, 2012 2:52 pm
Um... Taigh.... Ken.... I already bled in the plane. Just sayin'.
Re: PV-2D Harpoon 84062 (Tanker 101) comes back to life
Sat Jun 16, 2012 3:57 pm
Dennis7423 wrote:Um... Taigh.... Ken.... I already bled in the plane. Just sayin'.
But it WAS worth it wasn't it!!
Re: PV-2D Harpoon 84062 (Tanker 101) comes back to life
Sat Jun 16, 2012 8:01 pm
It MOST definitly is! I think a few of us are eligible for the "1 gallon donor" Poon license plate ring! Still, I think I'll try for that 2 gallon sticker! Everyone who's ever shed some blood on one of these beautiful metal birds knows what I'm talking about. She has bled herself into me more than I could ever bleed into her.
Re: PV-2D Harpoon 84062 (Tanker 101) comes back to life
Sat Jun 16, 2012 9:23 pm
AMEN brother! Seems all the military aircraft I worked while I was in STILL are a part of me all but one are in the boneyard sad to say.
Re: PV-2D Harpoon 84062 (Tanker 101) comes back to life
Sun Jun 17, 2012 1:45 am
Heck yeah it is! Worth every drop. Can't wait to get back down there and pour some more sweat and blood into the gal. It's amazing how much has been done since we were down there, and it's only been 5 months! Glad to see the progress updates, and the amazing work that is being done. For those of you who are thinking about going down and turning a wrench or two on the gal, stop hesitating and go do it! I have little to no experience working on these things, but Taigh, Ken and the gang found plenty to keep us busy with, and it was one of the most enjoyable experiences of my life.
Re: PV-2D Harpoon 84062 (Tanker 101) comes back to life
Sun Jun 17, 2012 11:52 pm
Amazing work as always.
And proof that there are really time machines out there!
And proof that there are really time machines out there!
Re: PV-2D Harpoon 84062 (Tanker 101) comes back to life
Tue Jun 19, 2012 3:33 pm
Redtracer wrote:She has bled herself into me more than I could ever bleed into her.
I feel the same way about a certain yellow-tailed B-17 that I used to crew...
Great work on the 'Poon, guys! Keep those updates coming. For a radio nerd like me, seeing all of the electronics coming together is a real treat!
Oh... one more thing... bring her to Texas some day, will ya?
Re: PV-2D Harpoon 84062 (Tanker 101) comes back to life
Tue Jun 19, 2012 7:24 pm
HEY! The CAF show in Midland 