Well, it has been a while since I last updated the community on my Stinson L-5G Sentinel 45-35050 project so here goes!
As some of you know, we missed OSH 08 due to our final O.D. coat of paint coming out way too glossy. We could have cut corners to get there, but I'd rather it be done right the first time.
I'm trying to be as close to original as possible, so any and all comments, suggestions etc are more than welcome!

This photo was taken tonight after we put the wings on the aircraft. Notice the Forrest green scallop camo scheme on the wings and tail. This design was implemented in hopes of making the plane indistinguishable from its surroundings. We replicated this scheme to EXACT factory spec using original blueprints. All O.D. L-5's came out of the factory with this camo.

Tail camo. Notice the AN-104 antenna sticking out of the top of the fuselage. This was used with the SCR-274N radio command set made by American Radio Company (ARC-5).

Side view of the tail. We still have to paint the S/N and all stencils.

Side view of the fuselage. The cowlings are done and the 1st Cav emblem has been painted on them, but all of you who have ever installed an L-5 cowling know that they don't go on easily, so we are waiting to put them on until we're ready to fly (so they don't get scratched).

Firewall / Engine... I love the way the yellow brake fluid reservoir tank stands out against the green.

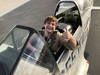
Doors open ready for a patient.

Notice folding litter deck with bare metal top. It was left bare metal to make the blood easier to wipe off... Morbid, but understandable. Look at that panel peeking out of the front seat!

Left and Middle sections of the panel, restored to original spec. All guages were O/H'd and painted to match... Of course we can no longer use radium paint, but to get the "Glow-in-the-dark" effect, we had them use an illuminescent (spelling?) paint.

Right side of panel. Notice the original WWII compass correction card.

My all-time favorite placard... It's funny because you know someone did this at some point to make them put the placard in the a/c!

Under the panel. You can see the main junction box to the left, the black battery mount in front, new brake lines below, fuel selector to the right, and the original boot-cowl data plate and rigging data decal off the far right.

Inside of the Main Junction Box. All NOS equipment was used.

The NOS voltage regulator set-up.


Main Switch box, restored to spec. Notice the cloth wiring and the s/n and inspection stamps.

Here is an example of the aircraft wiring. We had all of our modern wiring and every aircraft wire covered in original style cream colored fabric and we stamped EVERY WIRE with it's accurate schematic code.

Here's the folding litter deck as of now. We still have some things to add to it, but the paint on the wood came out wonderfully!

This is the original style shade that can be pulled to cover the greenhouse glass to keep the sun out of a litter patient's eyes.

Radio racks minus the radios. The silver ring is the mount for the K-20 Arial Camera.


NOS radio set installed. Notice the ceramic insulation beads and the phenolic tube insulation. Done per mil-spec.

We had to have the aluminum carb intake box made from scratch... it looks better than the original!
Well, that's it for now. I hope you've enjoyed. I hope to see you all at my airplanes first airshow at the Commemorative Air Force AIRSHO in Midland, TX the weekend of Sept. 21st...