Re: 1/48th Scale B-17C/D Conversion
Fri Jan 15, 2010 1:15 pm
I think the airplane was actually the General's personal C-97 in the movie. Regardless, it does seem vintage LeMay, doesn't it? On the subject of Gen. LeMay's personal aircraft, does anyone know the serial number of The Outlaw, the B-29 that LeMay used at the end of the war? I have a poor photo of her, black belly and a Grand Island tail code. The thinking is that she was used as a trainer for the 502nd Bomb Group and then acquired for the General's use later.
If you get a chance, read General Chuck Sweeney's excellent book War's End. He writes about how he got the assignment of checking LeMay out in the B-29 at Grand Island in '44. From his account of the briefings and checkride, Gen. LeMay was pretty much the man we've read about all these years, few words and all business.
Scott
Re: 1/48th Scale B-17C/D Conversion
Tue Feb 02, 2010 12:31 pm
It's been a while since I worked on the YB project, but we got some ice/sleet/snow late last week and I finally made a bit of progress.
The first thing I attacked was the left flap well. I did the right one a long time ago and actually kept measurements, materials, and pictures so the second would not be a completely new project:
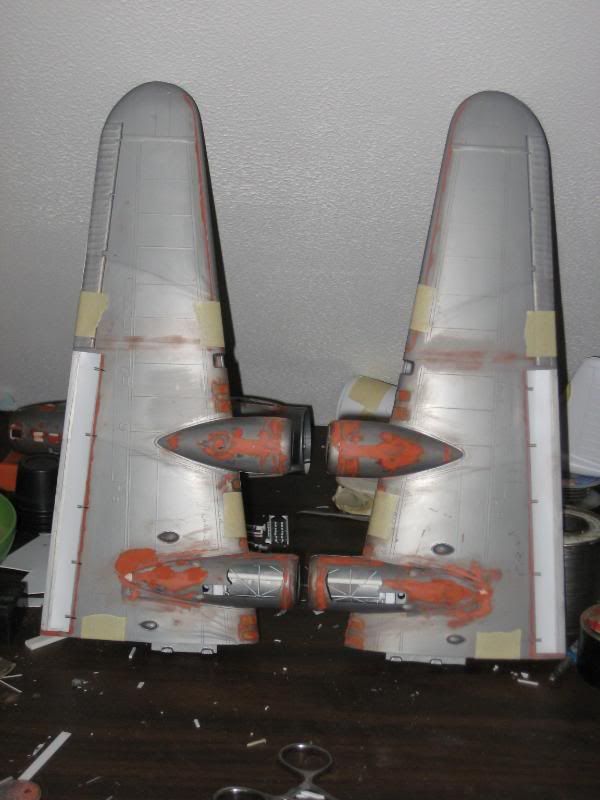
Next was the #2 and 3 nacelle interiors. The 299 and YBs used a totally different engine/nacelle support structure than all the later models. On the B and forward the nacelle is fully monocoque with the skin, stringers, and frames supporting the entire load. On the 299/YB there is a truss from the wing structure to the firewall that supports the engine mounts. Here are a couple of reference photos to show the truss. The bottom picture is the development of the Y1B-17A showing the early turbocharger mounting on top of the wing.

Here are both nacelles with the trusses constructed. All the plumbing and gizmology will be installed just before the wing halves are glued together. The long white half-tube at the top of the nacelles is the trough that housed the exhaust system on the real airplane.

Scott
The first thing I attacked was the left flap well. I did the right one a long time ago and actually kept measurements, materials, and pictures so the second would not be a completely new project:

Next was the #2 and 3 nacelle interiors. The 299 and YBs used a totally different engine/nacelle support structure than all the later models. On the B and forward the nacelle is fully monocoque with the skin, stringers, and frames supporting the entire load. On the 299/YB there is a truss from the wing structure to the firewall that supports the engine mounts. Here are a couple of reference photos to show the truss. The bottom picture is the development of the Y1B-17A showing the early turbocharger mounting on top of the wing.

Here are both nacelles with the trusses constructed. All the plumbing and gizmology will be installed just before the wing halves are glued together. The long white half-tube at the top of the nacelles is the trough that housed the exhaust system on the real airplane.

Scott
Re: 1/48th Scale B-17C/D Conversion
Tue Feb 02, 2010 12:45 pm
woooowwww!!!
Very cool!!!!
That is going to be one VERY impressive model!!!!!
Very cool!!!!
That is going to be one VERY impressive model!!!!!
Re: 1/48th Scale B-17C/D Conversion
Sun Feb 14, 2010 10:17 pm
I had some spare time this evening so I worked on the main gear actuators. The gearboxes and motors came from a Monogram B-29.
I also fabbed up the little strut fairings peculiar to the YB-17s. The fairings end up about where the brake deboosters would go on later airplanes. The YBs had pneumatic brakes so didn't require the debooster assemblies.


Scott
I also fabbed up the little strut fairings peculiar to the YB-17s. The fairings end up about where the brake deboosters would go on later airplanes. The YBs had pneumatic brakes so didn't require the debooster assemblies.


Scott
Re: 1/48th Scale B-17C/D Conversion
Sun Feb 14, 2010 11:56 pm
Awesome work Scott, I can't wait to see it finished!
I found this Y1B-17 photo on Ebay tonight and thought you might be interested in seeing it. Somehow at this price I think the seller will be staying the proud owner of it.
http://cgi.ebay.com/BOEING-PHOTO-Y1B-17 ... 48395a69ea
Greg
I found this Y1B-17 photo on Ebay tonight and thought you might be interested in seeing it. Somehow at this price I think the seller will be staying the proud owner of it.
http://cgi.ebay.com/BOEING-PHOTO-Y1B-17 ... 48395a69ea
Greg
Re: 1/48th Scale B-17C/D Conversion
Mon Feb 15, 2010 9:03 am
LOL, yah he is really proud of that photo!!!!!
Re: 1/48th Scale B-17C/D Conversion
Mon Feb 15, 2010 12:49 pm
Maybe that seller got his decimal point in the wrong place, huh?
I also worked on the ring cowls for a little while last night. I was originally going to make a mold and cast these in resin, but it's just as fast to crank out four of them from kit pieces.

The o.d. ring is from the first B-17 kit I ever built, just after Monogram released it. I decided to incorporate it just for the sake of nostalgia.
S
I also worked on the ring cowls for a little while last night. I was originally going to make a mold and cast these in resin, but it's just as fast to crank out four of them from kit pieces.

The o.d. ring is from the first B-17 kit I ever built, just after Monogram released it. I decided to incorporate it just for the sake of nostalgia.
S
Re: 1/48th Scale B-17C/D Conversion
Sat Mar 06, 2010 11:23 pm
We had to stay close to home this weekend and that gave me a chance to start on the intake/exhaust fairings that are a distinctive part of the Y1B-17 nacelle. On the real machine the intake for the carburetor is at the leading edge of the long fairing. Here is a really good photo from the Amarillo Mechanic School showing the intake duct and part of the exhaust system with the fairing removed:
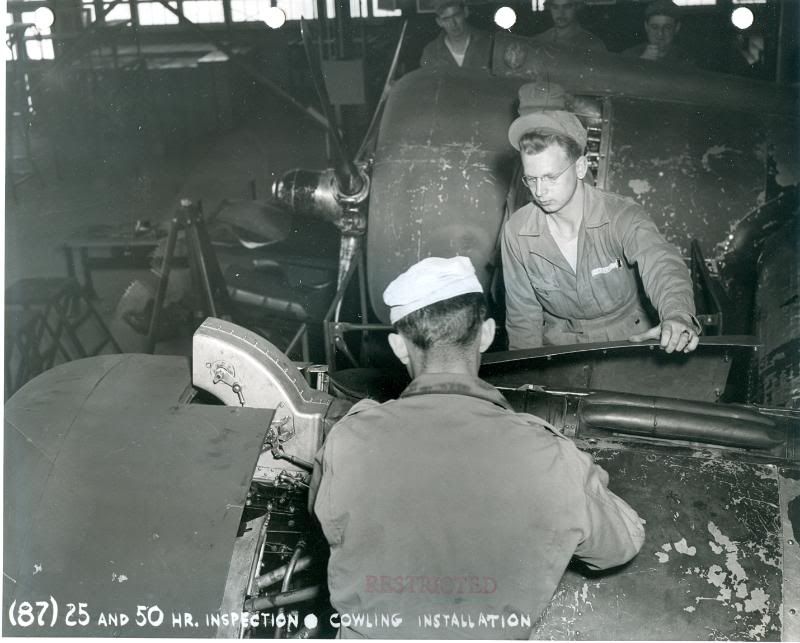
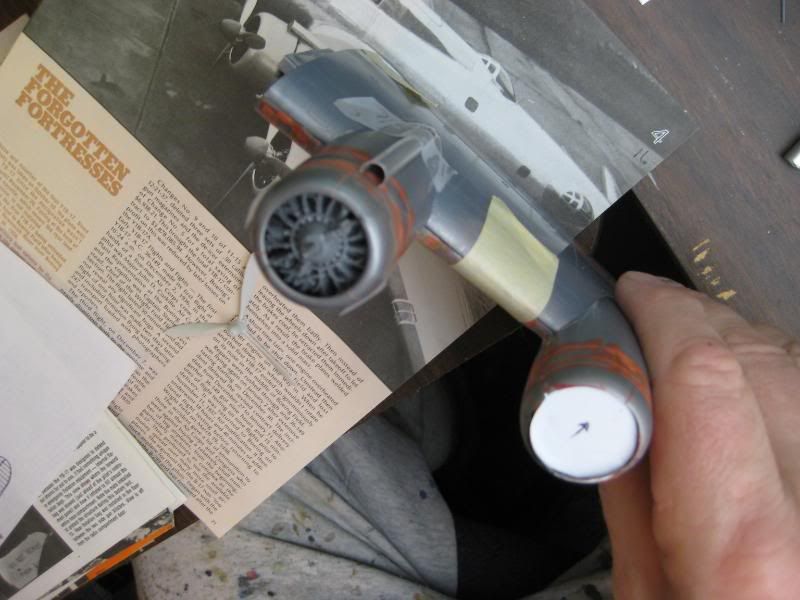
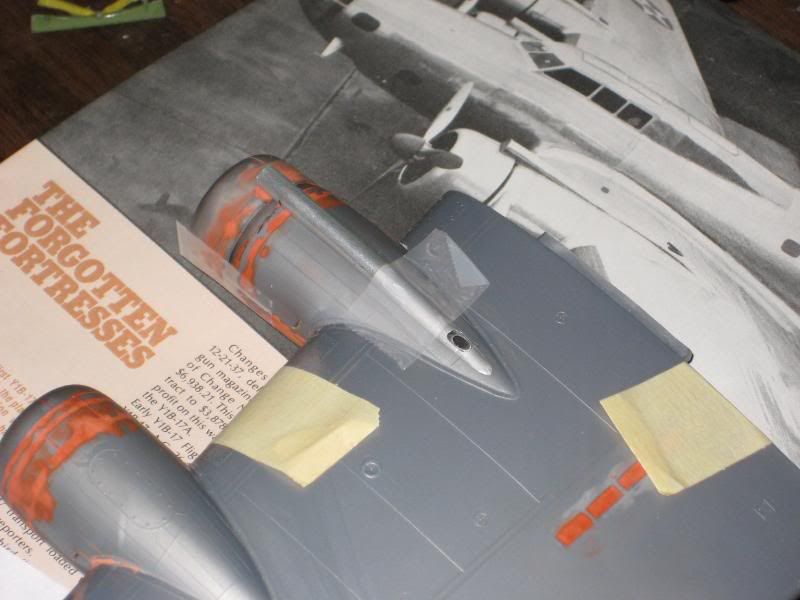
The air that didn't go into the carb intake was ducted aft and appears to have acted as an augmenter, or at least as cooling air, for the exhaust. The collector ring exhaust pipe came up the right side of the nacelle, was routed into the long duct, and dumped at the end of the nacelle fairing. These two photos show the first fairing on #2 nacelle. I made the duct by splitting an aluminum tube lengthwise and shaping it as needed. To complete the installation I still need to build the intake duct and the collector ring exhaust pipe:
Scott

The air that didn't go into the carb intake was ducted aft and appears to have acted as an augmenter, or at least as cooling air, for the exhaust. The collector ring exhaust pipe came up the right side of the nacelle, was routed into the long duct, and dumped at the end of the nacelle fairing. These two photos show the first fairing on #2 nacelle. I made the duct by splitting an aluminum tube lengthwise and shaping it as needed. To complete the installation I still need to build the intake duct and the collector ring exhaust pipe:


Scott
Re: 1/48th Scale B-17C/D Conversion
Sun Mar 07, 2010 2:42 am
Very cool! That system looks very similar to the exhaust setup on the B-18.
SN
SN
Re: 1/48th Scale B-17C/D Conversion
Mon Mar 08, 2010 1:03 am
You're right, Steve. I hadn't even thought about the B-18--they are similar!
Another nacelle update. I had a little free time again this evening to devote to the exhaust system so I built the fairing for #1.
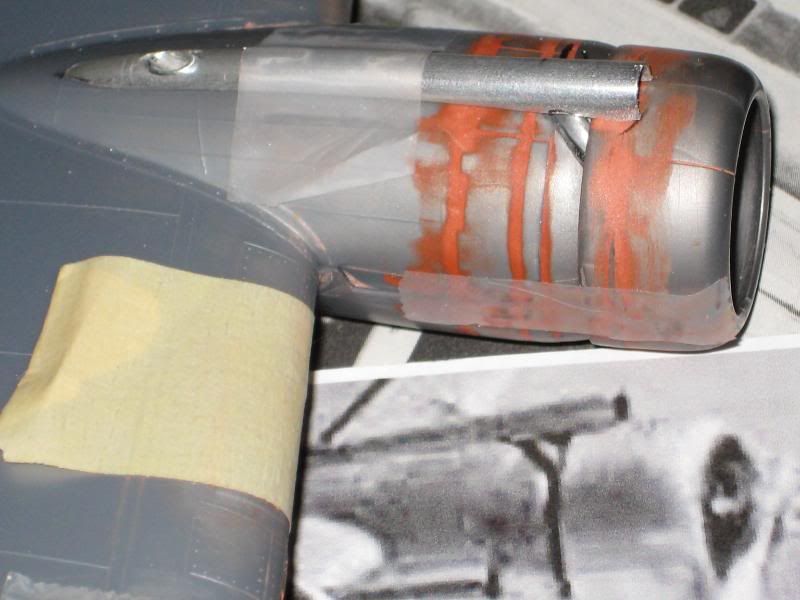
One of the little details on the YBs was the exhaust stack that runs at an angle from the engine collector ring up into the exhaust fairing. You can see the #1 exhaust pipe is installed in this photo and the trough for the #2 installation is marked with black ink. The outboard engines used a different routing than the inboards for some reason, and all four angled exhaust stacks are on the right side of the engines. The inboard ring cowls are cut back to allow room for the exhaust while the outboards are not.
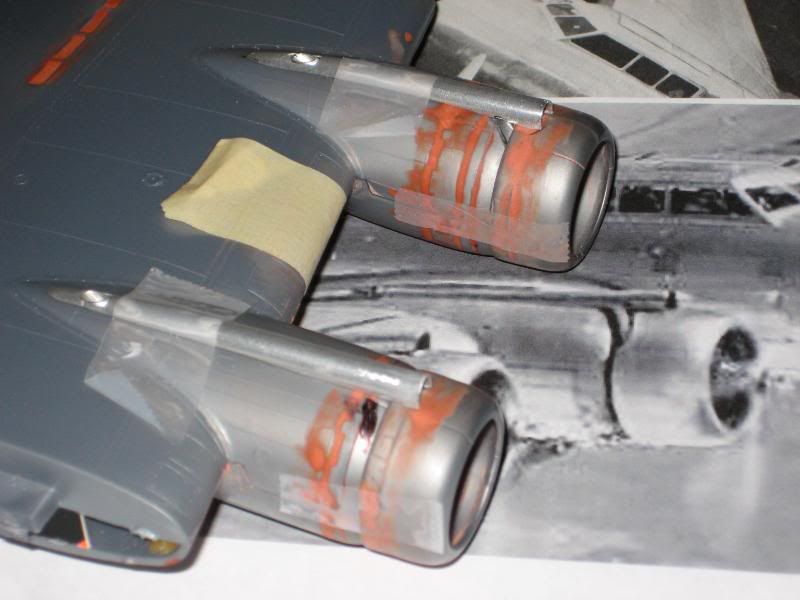
And here's a close-up of #1 that shows the exhaust pipe more clearly, with a photo of a "real" #1 nacelle below the model.
Scott
Another nacelle update. I had a little free time again this evening to devote to the exhaust system so I built the fairing for #1.
One of the little details on the YBs was the exhaust stack that runs at an angle from the engine collector ring up into the exhaust fairing. You can see the #1 exhaust pipe is installed in this photo and the trough for the #2 installation is marked with black ink. The outboard engines used a different routing than the inboards for some reason, and all four angled exhaust stacks are on the right side of the engines. The inboard ring cowls are cut back to allow room for the exhaust while the outboards are not.

And here's a close-up of #1 that shows the exhaust pipe more clearly, with a photo of a "real" #1 nacelle below the model.

Scott
Re: 1/48th Scale B-17C/D Conversion
Tue Mar 09, 2010 3:59 pm
What did you make that out of? It looks pretty good so far.
Re: 1/48th Scale B-17C/D Conversion
Wed Mar 10, 2010 6:03 pm
This is one of the best build I have seen last time 
Re: 1/48th Scale B-17C/D Conversion
Thu Mar 11, 2010 2:04 am
Django wrote:What did you make that out of? It looks pretty good so far.
Just good ol' aluminum tubing split lengthwise and gently bent at the aft end to fit the nacelle. The exhaust stacks are the same stuff. I thought about using brass tubing but the aluminum is easier to cut and shape. I'll probably use brass rectangular tubing for the carb intakes, providing I find the correct size tubing. Otherwise I'll use plastic sheet.
Thanks Mgawa........but I may never get it done at the pace I'm going!
S
Re: 1/48th Scale B-17C/D Conversion
Thu May 27, 2010 1:13 pm
Its time to put sticker on your room door:
Bevare of Mickey
Bevare of Mickey
Re: 1/48th Scale B-17C/D Conversion
Thu May 27, 2010 1:23 pm
Hmm......that might be a good idea. I'll see if I can get her "seal of approval"! 

As far as the damage I did to the model, I found most of the pieces and a couple of them were still intact. It'll be pretty easy to redo.
Scott

As far as the damage I did to the model, I found most of the pieces and a couple of them were still intact.
Scott