Re: Not sure, anybody interested?
Sun Oct 26, 2014 11:08 pm
avenger2504 wrote:Very interesting. Regarding the "shrinkles". Did you use the air gun to work them out?
Yes Sir. works wonders.
Re: Not sure, anybody interested?
Tue Oct 28, 2014 7:18 pm
Scott I'm a bit lost. (Not unusual) Too lazy to back up a few pages and re-figure out what the h*ll your creating. Can you re-explain the big picture again? Sorry for being a knucklehead, it's been some loooong days lately 
Re: Not sure, anybody interested?
Tue Oct 28, 2014 7:27 pm
So, I put this one off for a while whilst I ruminated about how to make these. In this cap strip, I have to move the metal in multiple directions. All the rest of the parts so fat have been flat blanks with the flanges formed in one dimension. Straight forward. This cap has to match the contour of Former #3 and have flanges turned along that curve.
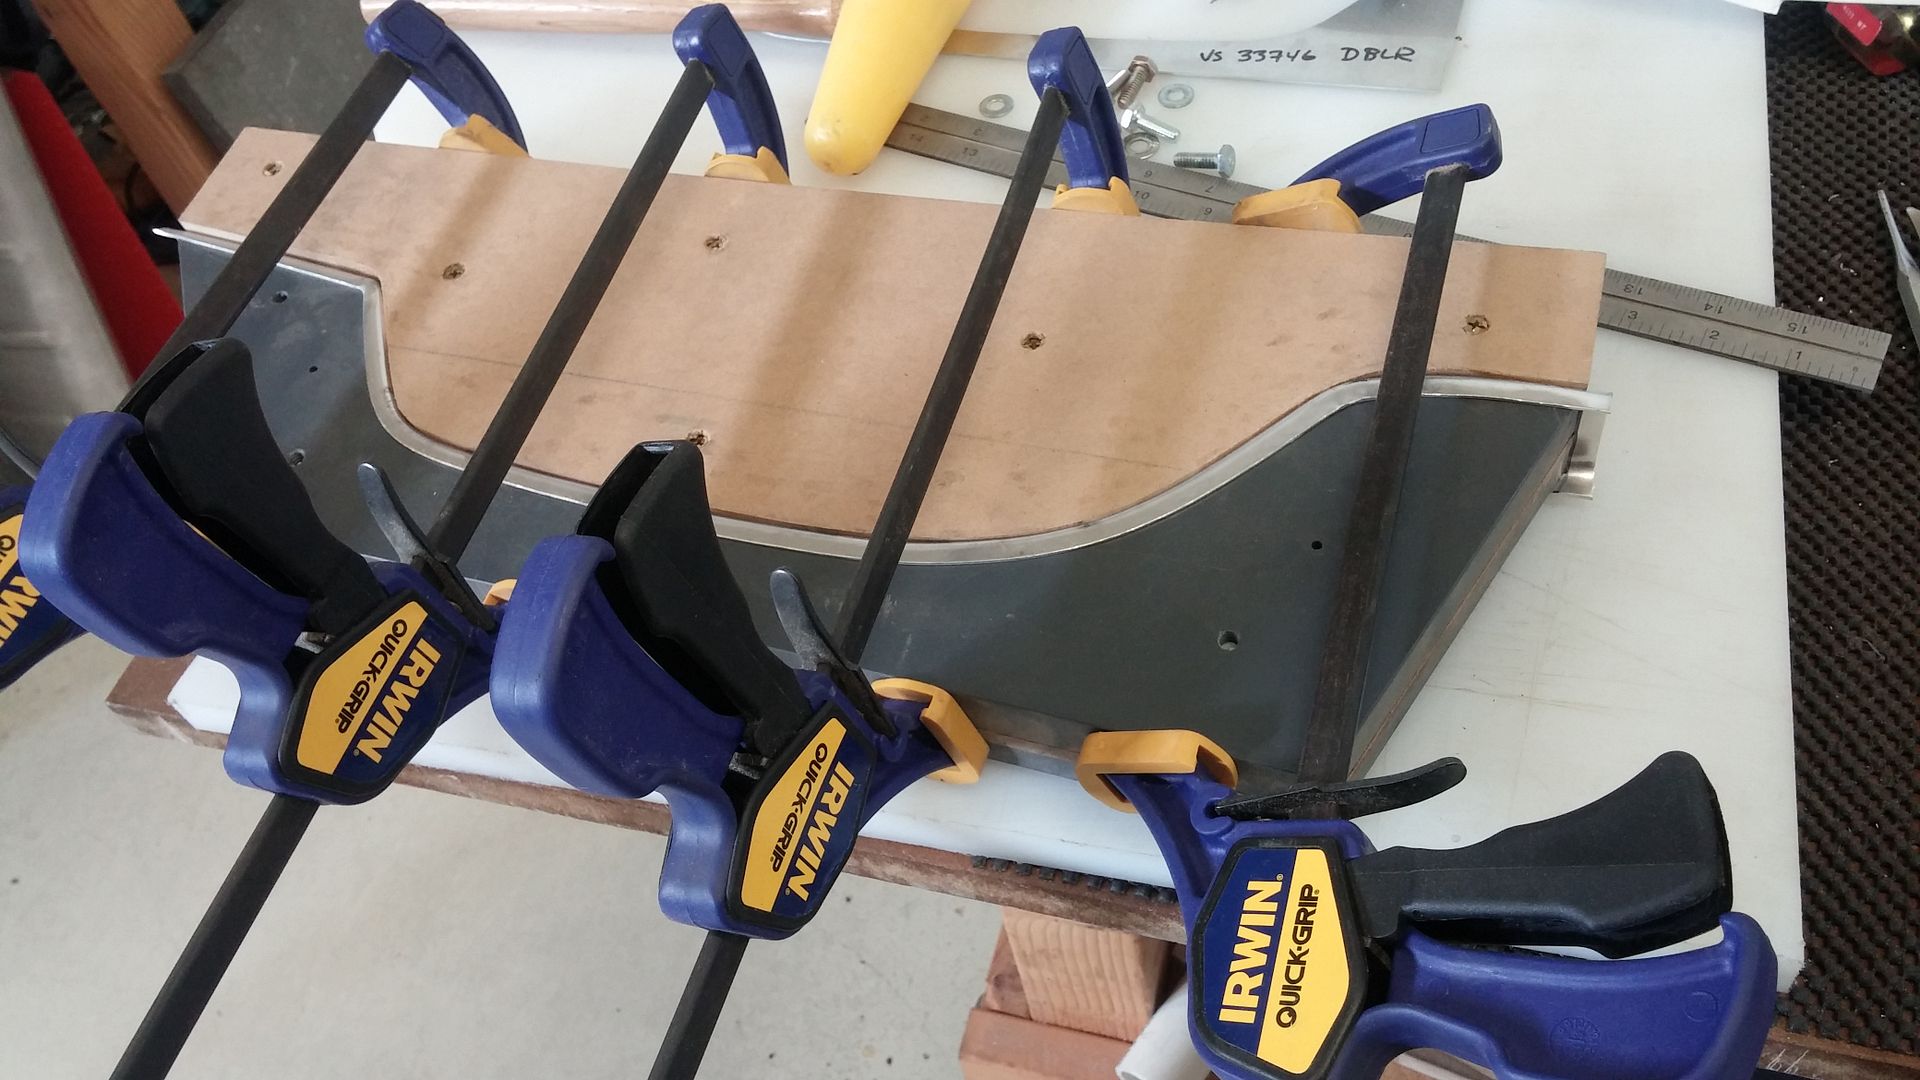
So, I had to take a new approach to the tooling. I used the template from Former #3 to establish the curve. Then I made an upper and lower form block set.
Template for the cap
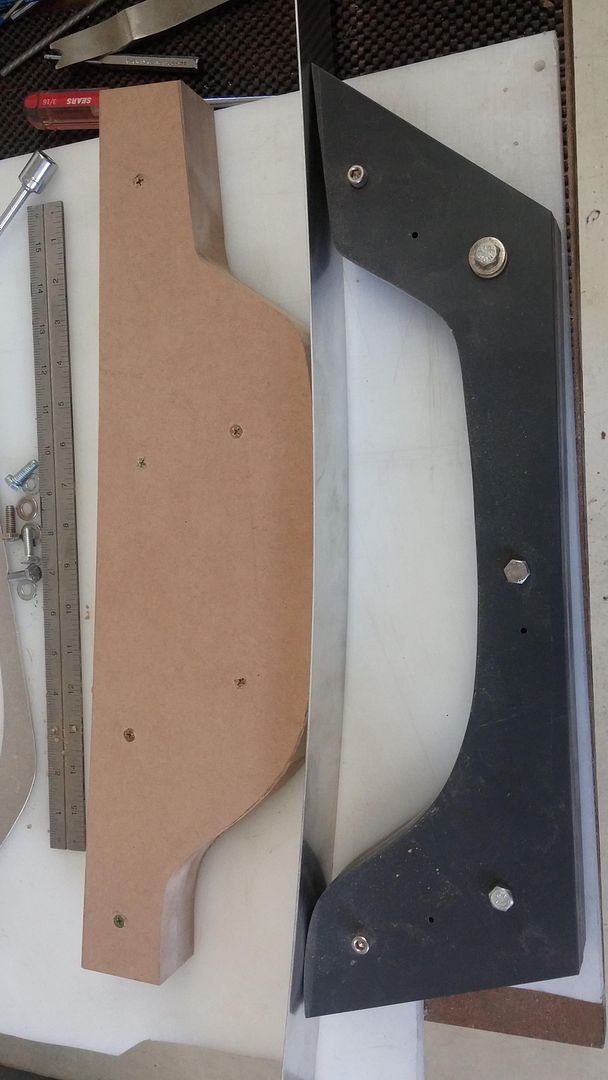
Form blocks
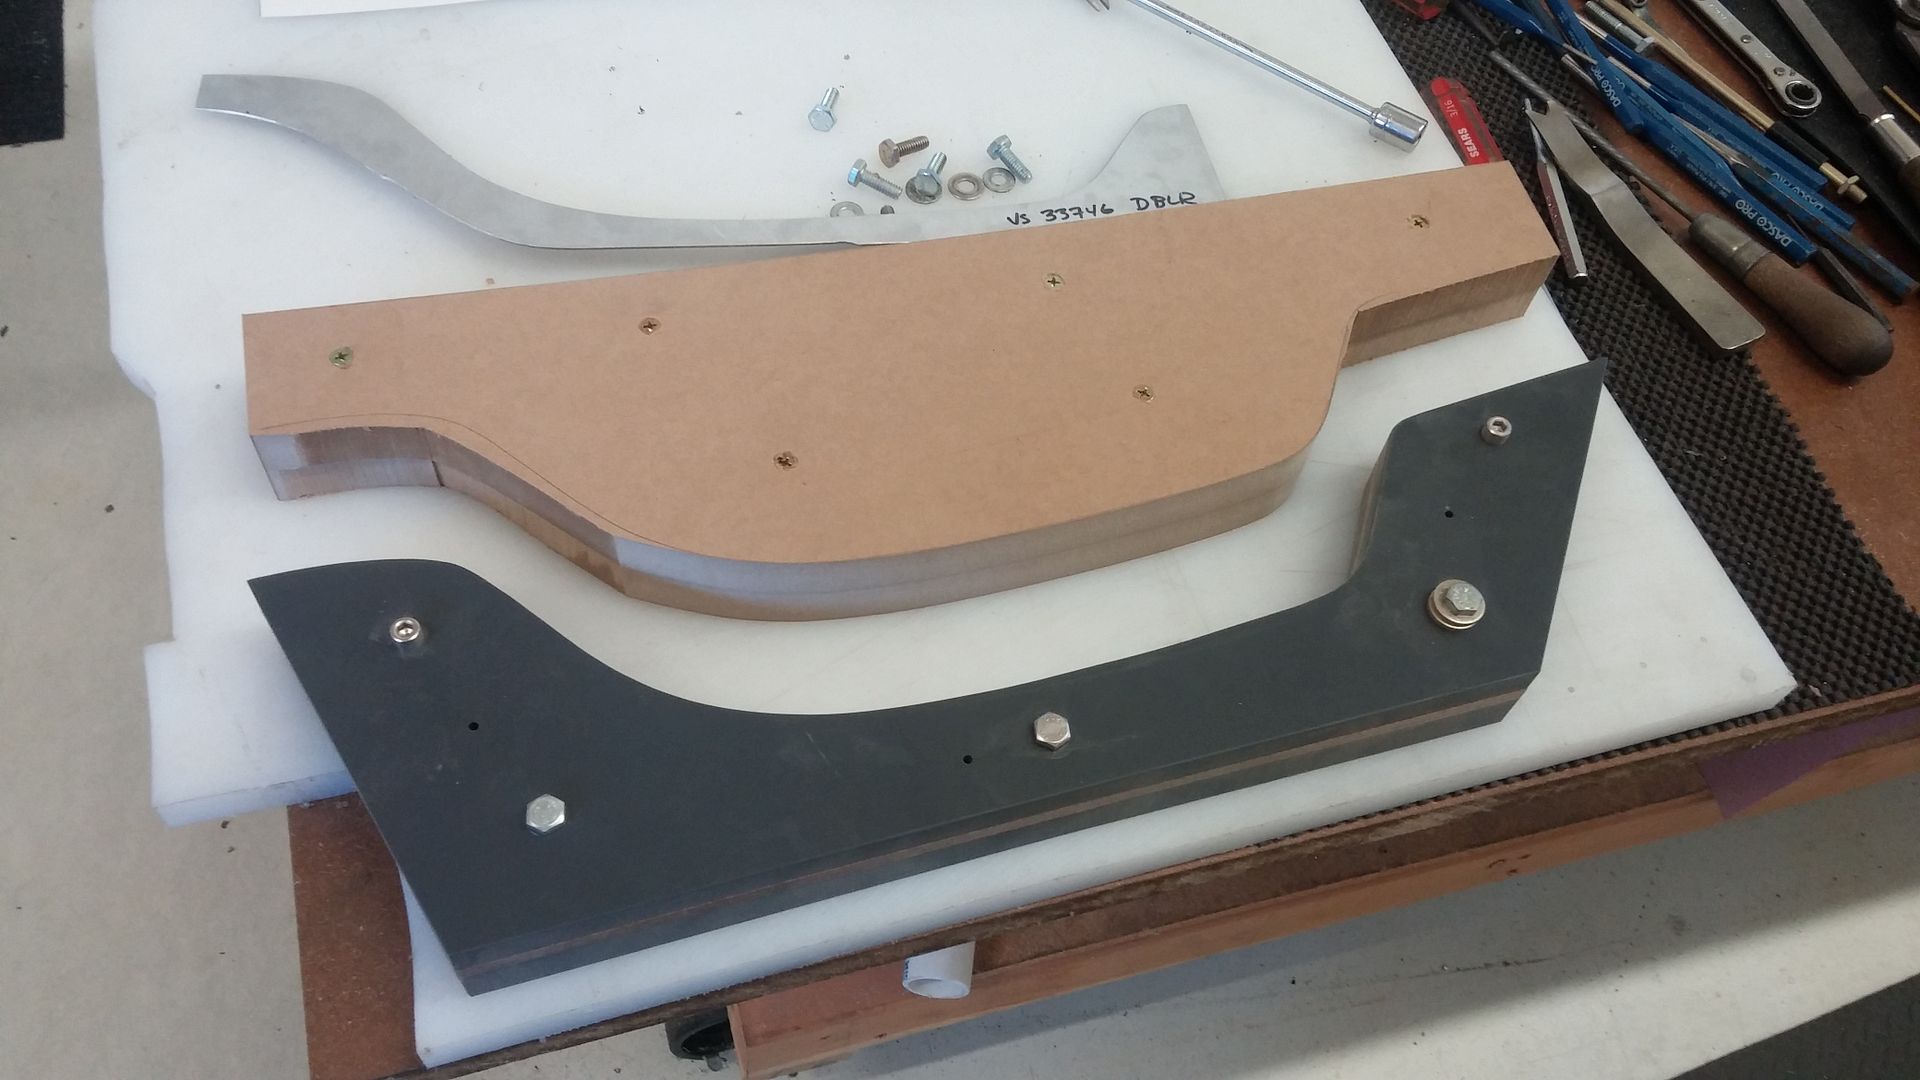
Strip to be clamped in between these form blocks
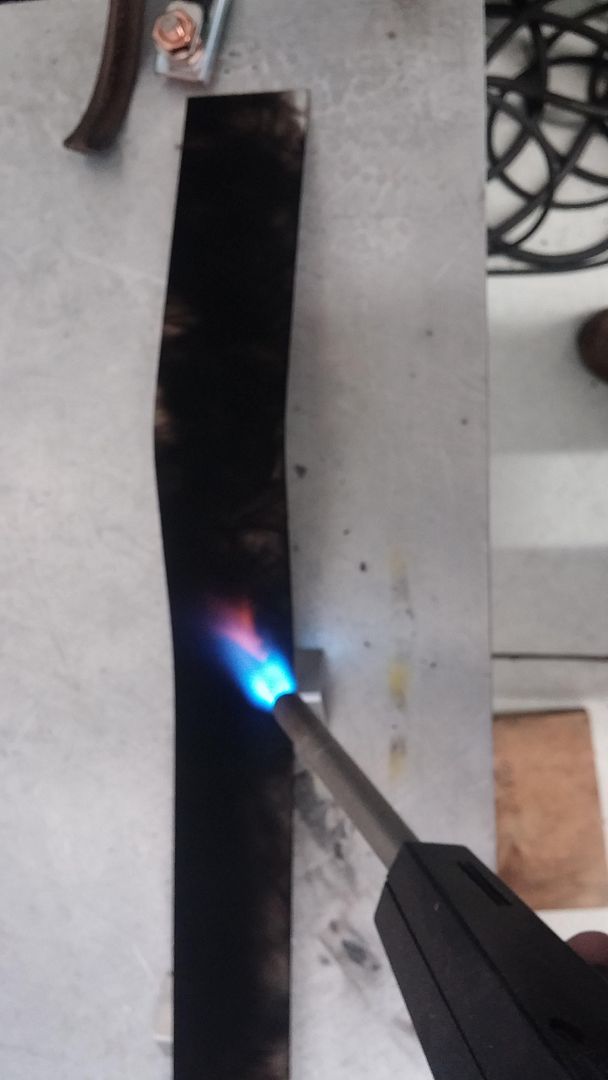
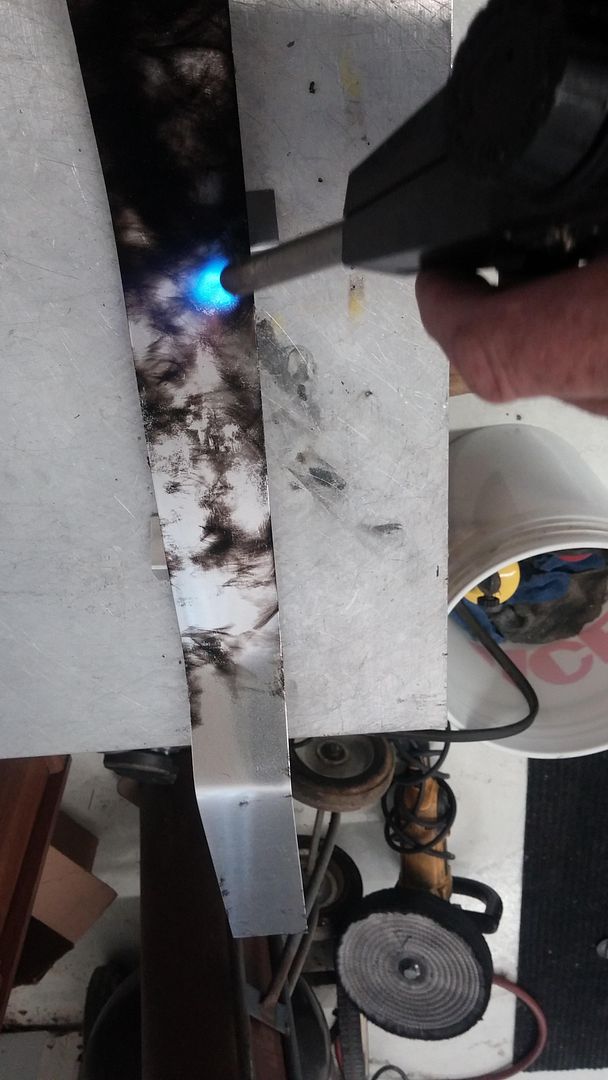
To make the test piece, I used 3003-H14 but annealed it to dead soft. Most may know but for those who do not. The test piece will be 3003-H14 (half hard) so it needs to be annealed to dead soft. Using a rich flame (fuel gas without 02) lay down a thin but even coat of carbon. Then with a neutral flame, evenly heat the metal until the carbon "burns" off or disappears. You have reached the proper temperature. Allow to air cool and you have 3003 dead soft.
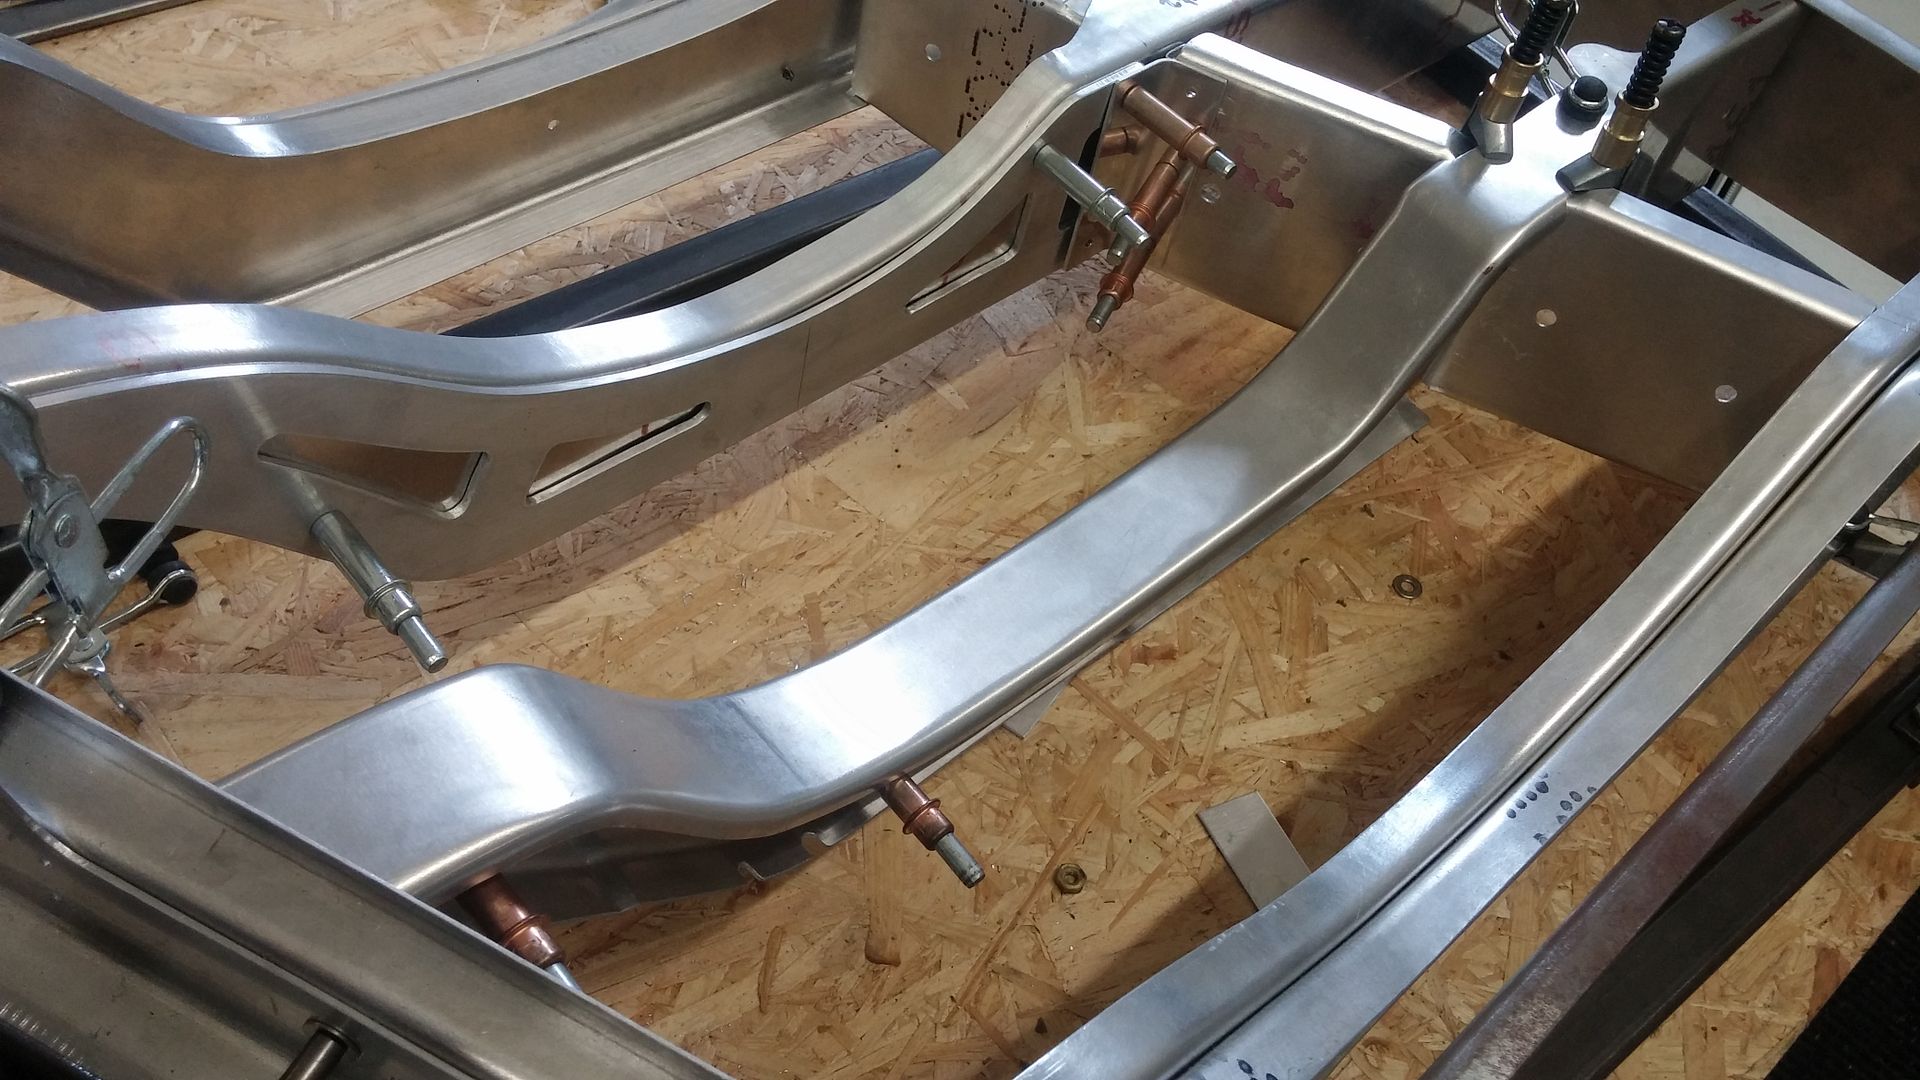
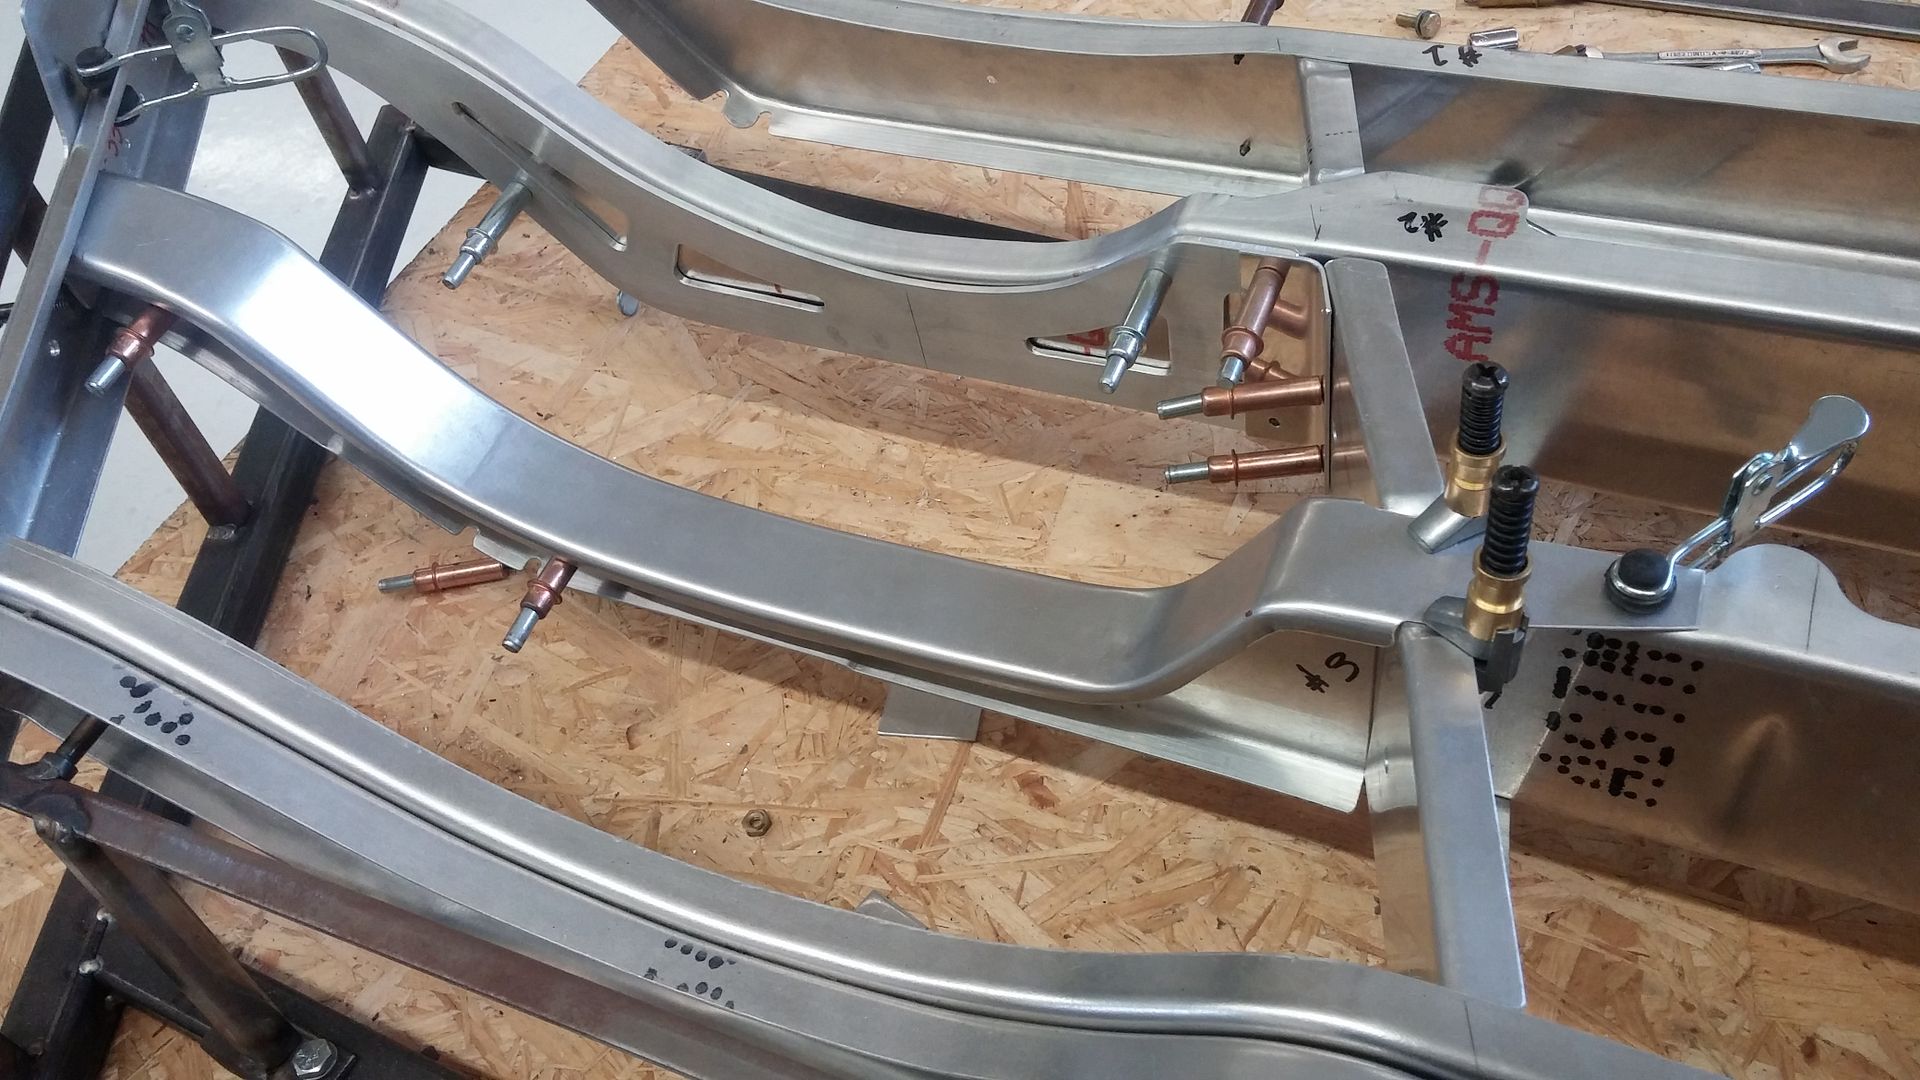
Once clamped in between the two form blocks, I could turn the edges. Trim and finish hammer and file the edges. Then fit to the lower wing section. Test pieces are good as I found that I was too harsh with one of the radius and can modify the form blocks before making the real pieces.
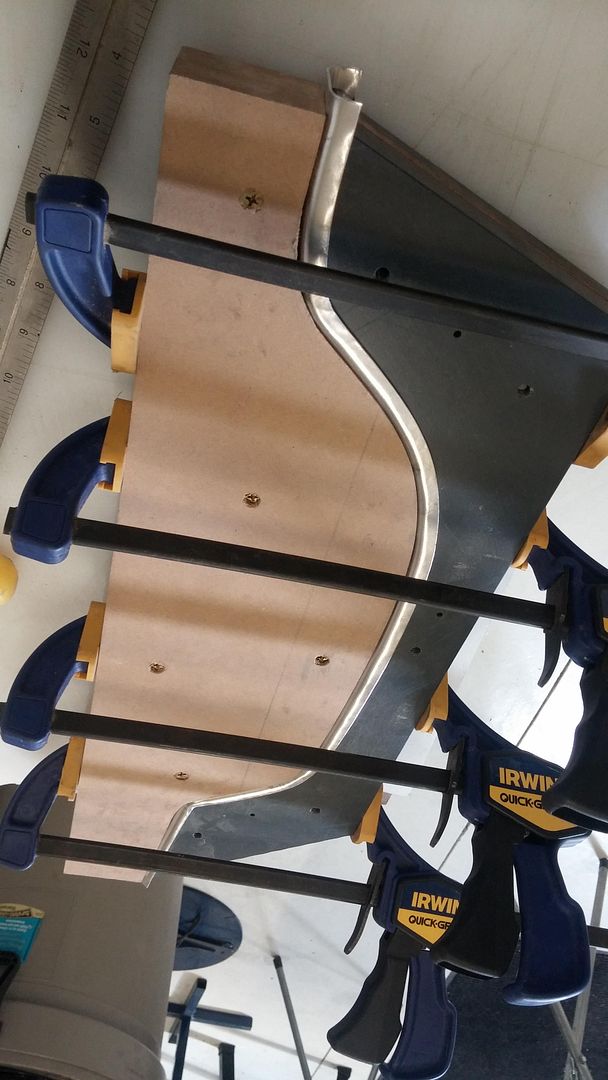
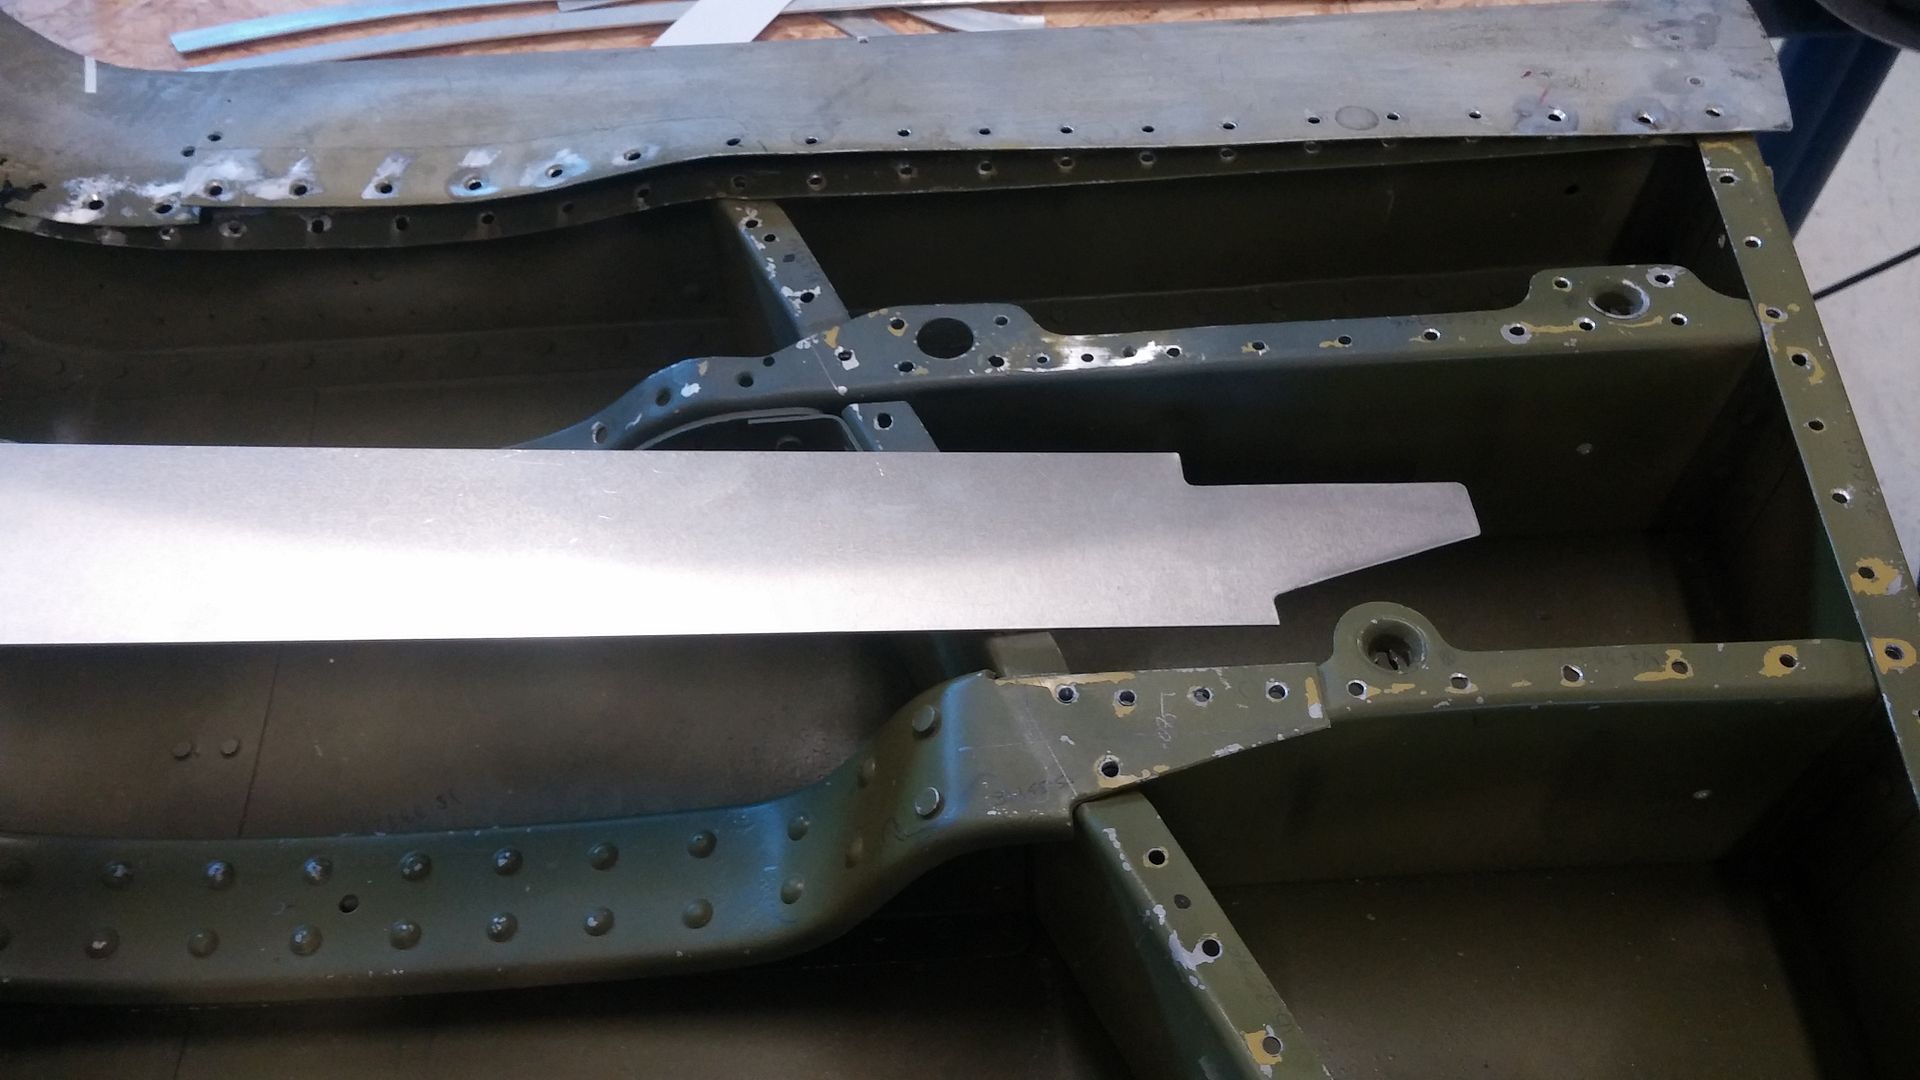
Fit to the lower section in the fixture

So, I had to take a new approach to the tooling. I used the template from Former #3 to establish the curve. Then I made an upper and lower form block set.
Template for the cap

Form blocks

Strip to be clamped in between these form blocks

To make the test piece, I used 3003-H14 but annealed it to dead soft. Most may know but for those who do not. The test piece will be 3003-H14 (half hard) so it needs to be annealed to dead soft. Using a rich flame (fuel gas without 02) lay down a thin but even coat of carbon. Then with a neutral flame, evenly heat the metal until the carbon "burns" off or disappears. You have reached the proper temperature. Allow to air cool and you have 3003 dead soft.


Once clamped in between the two form blocks, I could turn the edges. Trim and finish hammer and file the edges. Then fit to the lower wing section. Test pieces are good as I found that I was too harsh with one of the radius and can modify the form blocks before making the real pieces.


Fit to the lower section in the fixture


Re: Not sure, anybody interested?
Tue Oct 28, 2014 7:34 pm
Mark Allen M wrote:Scott I'm a bit lost. (Not unusual) Too lazy to back up a few pages and re-figure out what the h*ll your creating. Can you re-explain the big picture again? Sorry for being a knucklehead, it's been some loooong days lately
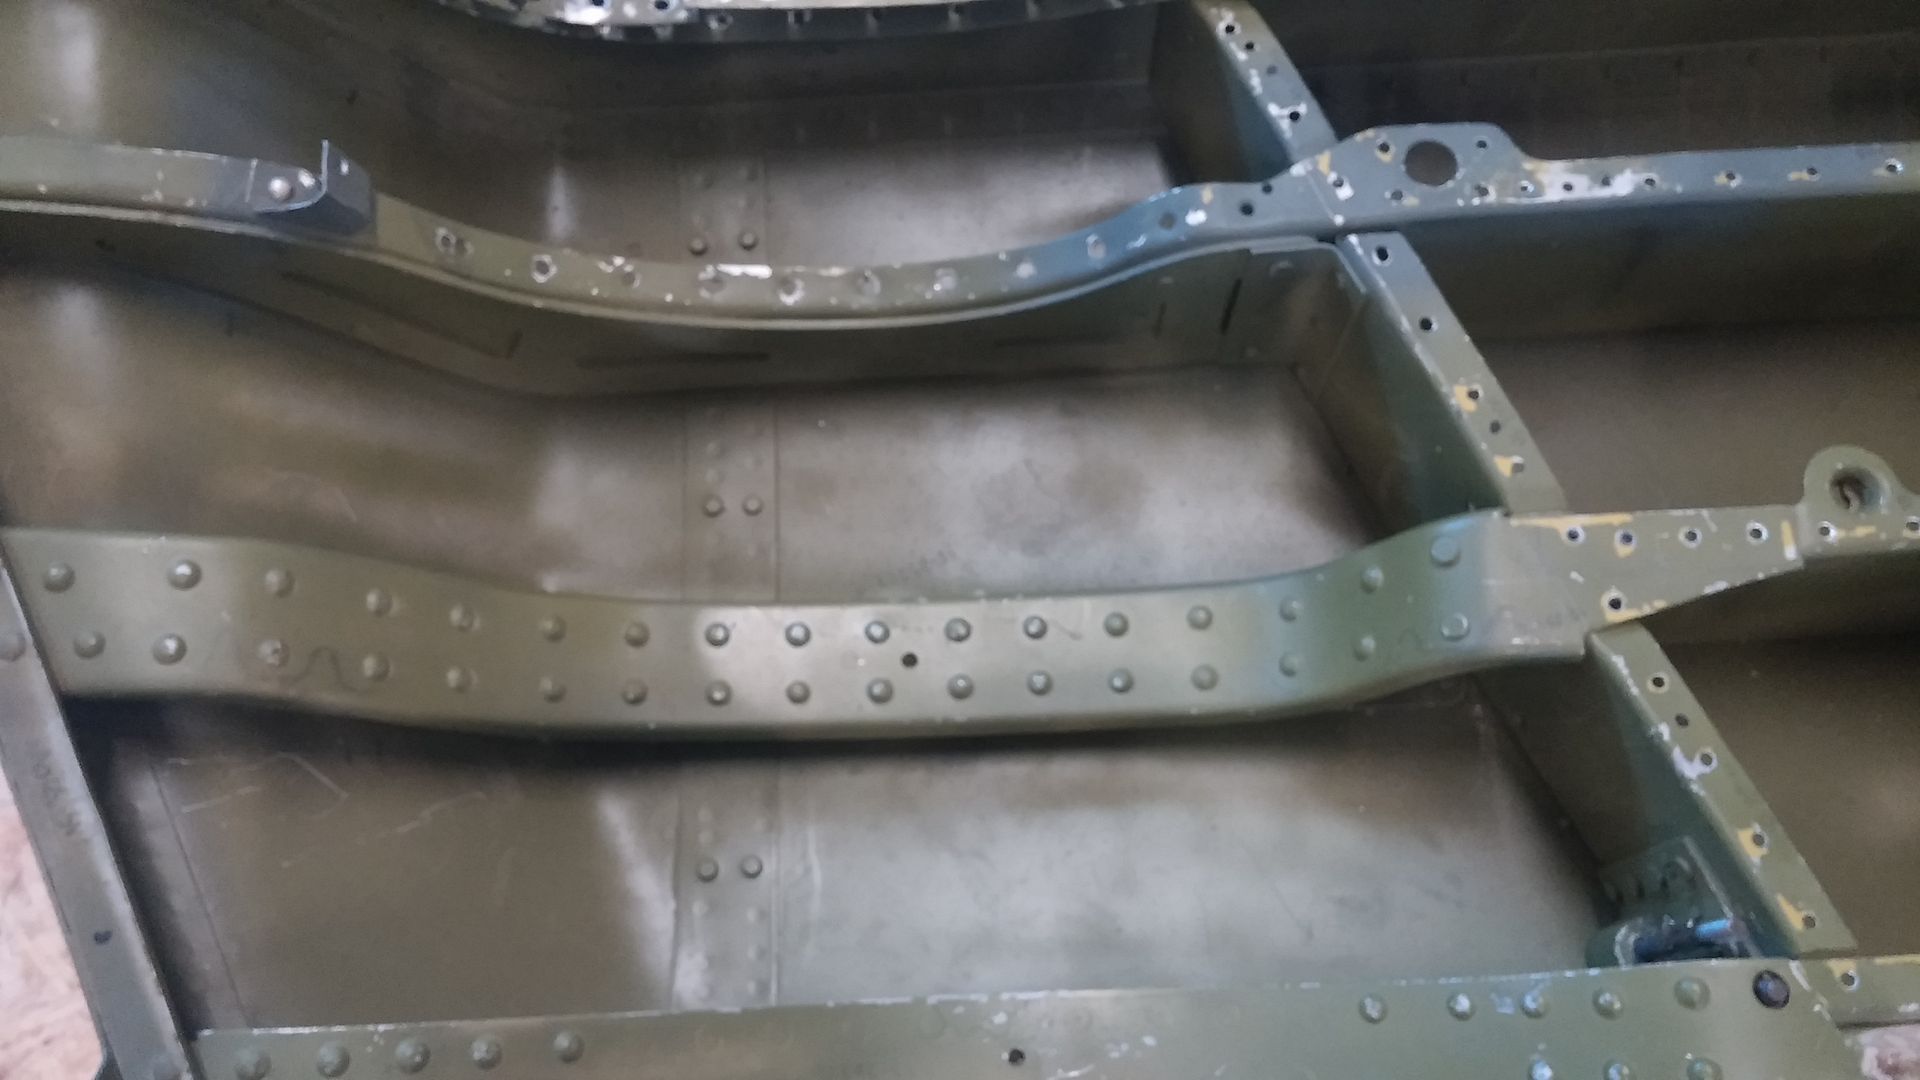
Knucklehead would imply a Harley, no Harley here. Corsair FG-1D lower inlet sections for the wings RH and LH to un-race modify and return to stock configuration.
Before

After, this is not a picture of my work. Belongs to Ezell on the Brewster but conceptually, what I need to match

Re: Not sure, anybody interested?
Wed Oct 29, 2014 7:09 am
' ... Most may know but for those who do not ..."
well I for one know I know nothing but feel like I'm learning something every time you post, Scott.
Hoping there are no dumb questions here; having softened what i assume is steel (? - which bits are what metal is another thing ...) so as to work it - does it need to get re-tempered or is all the strength in the assemblage, much like laminated timber I-beam?
steven
Re: Not sure, anybody interested?
Wed Oct 29, 2014 8:37 am
fnqvmuch wrote:' ... Most may know but for those who do not ..."
well I for one know I know nothing but feel like I'm learning something every time you post, Scott.
Hoping there are no dumb questions here; having softened what i assume is steel (? - which bits are what metal is another thing ...) so as to work it - does it need to get re-tempered or is all the strength in the assemblage, much like laminated timber I-beam?
steven
No dumb questions Steven. All the actual pieces are 2024-0 aluminum. Easy to form but will all require heat treating to achieve proper strength prior to final assembly. In the case of the cap strip, this is just to prove the tooling using a cheaper aluminum alloy.
Re: Not sure, anybody interested?
Wed Oct 29, 2014 9:07 am
Sir, Wonderful Work! Any count of how many U.S Navy birds you've worked on/for? Any F8f BearCats? British birds? Spitfires, SeaFurys? Just curious, Thank you, Tony
Re: Not sure, anybody interested?
Wed Oct 29, 2014 9:55 am
Tony, thank you for kind words but this is my first involvement with a true warbird project on this scale. I have made electrical junction boxes for a Dauntless and a Helldiver.
Re: Not sure, anybody interested?
Sun Nov 02, 2014 3:58 am
This is like being back at school......but better! Do you find when finished sheet metal parts, such as these ones, distort when re heated to make them hard again?
Re: Not sure, anybody interested?
Sun Nov 02, 2014 10:10 am
So far, if they have a lot of shape and bends, not so much. The nice thing is that you have about 3 - 4 hours after quench to re-adjust the parts before they age harden and are set. Since the heat treater is 30 minutes away, we dump the parts into a cooler of ice and chill them until i can get back to the shop. This delays the age hardening process as long as they are below 32 F. If I put them in a freezer, I could delay nearly indefinitely. This gives me time to make sure no distortion.
Re: Not sure, anybody interested?
Sun Nov 02, 2014 10:17 am
Can you tell us what grade ally you start with and what you are aiming for when you have heat treated? Also, Could you describe the heat treat process? i.e. What temp, how long for, quenching required ......etc?
Ta
Ta
Re: Not sure, anybody interested?
Sun Nov 02, 2014 11:33 am
B45 wrote:Can you tell us what grade ally you start with and what you are aiming for when you have heat treated? Also, Could you describe the heat treat process? i.e. What temp, how long for, quenching required ......etc?
Ta
I start with 2024-0 or dead soft aluminum and it is heat treated to 2024-T3 specs. Tensile strength goes from 30-32ksi to 58-62ksi, yield goes from about 14ksi to 38-40ksi with elongation going from 10-25% to 10-15%.
The process is to heat to 920 degrees F and soak for a time necessary to allow the material to reach temp. It varies with material thickness, of course. The water quench and this is the trick as it has to be quenched within 8 seconds of removal from the furnace. Our quench tank is just below the oven door so out and in immediately. Once quenched, 3 - 4 hours until fully age hardened or frozen to delay the process if shape/distortion can't be verified within that time frame.
There are true experts out there that can give greater detail than I. This is just a quick overview.
Re: Not sure, anybody interested?
Sun Nov 02, 2014 12:30 pm
A story about heat treating, a sheet metal guy made a part for the DC-3 I was taking care of, we had just gotten a heat treating furnace and this was going to be the first part that was totally fabricated and heat treated in house. He set the furnace temp, let it stabilize and put his part in to heat soak. After the allotted time, he went to get his part out, but there was no part, turns out he miss read the temperature gauge, instead of 900 degrees, he had set it for 1800 and turned his part into a puddle of aluminum. The furnace was then named, The Aluminator
Re: Not sure, anybody interested?
Sun Nov 02, 2014 11:23 pm
Oh that's funny, although I bet there were a few swear words when he saw the result! 
Re: Not sure, anybody interested?
Mon Nov 03, 2014 8:17 pm
Matt Gunsch wrote:A story about heat treating, a sheet metal guy made a part for the DC-3 I was taking care of, we had just gotten a heat treating furnace and this was going to be the first part that was totally fabricated and heat treated in house. He set the furnace temp, let it stabilize and put his part in to heat soak. After the allotted time, he went to get his part out, but there was no part, turns out he miss read the temperature gauge, instead of 900 degrees, he had set it for 1800 and turned his part into a puddle of aluminum. The furnace was then named, The Aluminator
Matt, that is a riot and tragedy all in one. Hope they didn't lose too many parts.