Warbird Information Exchange

DISCLAIMER: The views expressed on this site are the responsibility of the poster and do not reflect the views of the management.
It is currently Fri Aug 22, 2025 9:22 am

All times are UTC - 5 hours


Classic Wings Magazine WWII Naval Aviation Research Pacific Luftwaffe Resource Center
When Hollywood Ruled The Skies - Volumes 1 through 4 by Bruce Oriss


Post new topic Reply to topic  [ 21 posts ]  Go to page 1, 2  Next
Author Message
PostPosted: Wed Jan 19, 2011 9:05 pm 
Offline
1000+ Posts!
1000+ Posts!
User avatar

Joined: Thu Apr 28, 2005 10:01 am
Posts: 1126
Location: Post-Confederate People's Republic of Alabamastan, Suh!
While I wait for a larger piece to 'dry off' so I can finish the little details, I decided to do some prep work on ...

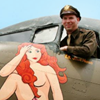
This is a small 11 x 14 in. commission. The client and I met former WWII 56th Fighter Group "Wolfpack" P-47 pilot Russ Kyler at the 2006 Warbirds Over the Rockies R/C event in Colorado where he was one of the banquet speakers. Russ is a super nice person and in fact actively helps modelers - and artists - "get it right" when it comes to his group, and particularly his gaudily-painted Republic P-47M-1-RE Thunderbolt, the markings of which are one option in an excellent 1/48 Tamiya kit. The client commissioned me to do a small painting of Russ's P-47M "Lorene", which was named for his wife. Russ tallied 3 aerial and 7 ground victories during his combat tour with the 56th's 61st Fighter Squadron.

Essentially a "hot-rodded" P-47D, the M-model took advantage of the abandoned XP-47J (the first piston-engined aircraft to exceed 500 mph in level flight) powerplant research. The P-47M incorporated the new P-47N fuselage and the production P-47D-30 wing. The limited run of 130 P-47Ms was intended as a quick and economical stopgap in the P-47 line, taking advantage of ever-increasing performance capabilities. It sported the water-injected Pratt & Whitney R-2800-57 C-series 18-cylinder 'Double Wasp' engine, a new General Electric CH5 turbosupercharger, and a few other improvements. The propeller was a massive 13' 0" diameter Curtiss Electric 836. It was the fastest propeller-driven fighter to see combat service with the Allies in WWII, and could reach 30,000 feet five minutes quicker than the P-47D. With the C-series engine cranking out a War Emergency rating of 2800 hp, the P-47M clocked 473 mph at 32,000 ft. Normal cruising speed was 246 mph at 20,000 ft. at 1800 RPM. The R-2800C was a redesigned version of the reliable R-2800B used in earlier models of the Thunderbolt as well as in other fighters such as the twin-engined P-61 Black Widow and US Navy Hellcats and Corsairs. It incorporated stronger key components to withstand higher manifold pressures with the same cubic inches as the previous versions. Based on extensive engine testing by Republic engineers, a fair number of 56th FG P-47Ms were 'tweaked' locally to allow maximum horsepower ratings well in excess of 3000 hp. This allowed some Ms to easily top 500 mph in level flight at altitude. (Note 1)

The three squadrons of the 56th each chose a distinctive - and very gaudy - scheme for it's aircraft. The colors were to be applied over the natural metal finish the aircraft were delivered in. The undersides were left unpainted. The exact hue of the 61st Fighter Squadron P-47Ms has been long-debated, but after reading pretty much all there was to read on the subject I chose to go with two sources: Russ Kyler himself has stated categorically that his P-47M and most of the others in the 61st FS were painted a "dead flat black", period. Esteemed 8th AF historian the late Roger Freeman, who happened to grow up near Boxted and spent many hours around the planes when the ground crews could spare the time, gives the color as "matte black - with a decidedly purplish tinge". Other sources put the color as anything from Midnight Blue to dark purple ... take your pick! We all know how much light can affect perceived color. I'm still working on my local color concoction, but for the most part it will be black ... with a 'tinge' of artistic license thrown in.

This is a small piece, but rather than just throw Russ and his Thunderbolt up against a bunch of clouds, I decided to do something a little different and show them on the ground taxiing out for a mission. This enables me to better highlight the 200-gallon belly tank, developed in late 1944 as a replacement for the 150-gallon version. The 150s were usually carried in twos on the wing pylons, and the new 200-gallon tank allowed P-47 units to remove the wing pylons to help improve performance and at the same time elimate the considerable drag of two big tanks. The wing pylons were seen on and off in photos, and I chose to leave them on to add 'interest'. Seems like I did a lot of work just for a small painting, but I do have plans for a larger piece.

Here's the WIP progression so far -


Lorene Kyler - this photo was the inspiration for the nose art painting -
Image


Russ Kyler in "Lorene" circa Spring 1945 (photo courtesy http://www.56thfightergroup.co.uk/index.html)-
Image


Overall view of Lorene - the Thunderbolt! She was all black on the topsides with red code letters outlined in white, and featured the 56th Fighter Group's red nose and the 61st Fighter Squadron's red rudder. The leading edges of the wings and horizontal stabs were left in their natural metal finish. The portrait of Lorene was painted on Russ's previous D-model. The cowling panel with the portrait was transferred to this M-model when it was assigned to Russ. The fuselage and upper wing national insignias were outlined in light blue to set them apart from the black paint. Note that the normal P-47 55 in. depot applied national insignia under the left wing was not applied -
Image


Russ signing a Spitfire R/C model at the 2006 event -
Image


Wartime photo of Raydon, not Boxted, but I like the landscape. The trees and hills on the horizon will be incorporated into my painting -
Image


The key with all my work with models is to think full size, just as if I had a real P-47M taxi by my camera as I stand by the peri track. That way everything 'sings' to the same scale, and the final painting "looks right". It's a laborious process, but there just ain't no way to cheat when you are composing scenes like this from scratch. To begin, I first set my camera eye at just over 6 scale feet to get a good horizon (red) line. The balsa height markers (approximately 6' 2" in 1/48 scale) were placed relatively far apart, which helps ensure that the camera is looking "straight". Notice the faint perimeter track lines -
Image


Now that the viewer's eye is set, and keeping the camera position stationary, I then slid the foamcore "landscape" over to put the model in front of the lens. One last measurement to put the longitudinal axis of the P-47 at the calculated distance (for correct perspective as the image appears in the 11 x 14 in. 'window'), and I shot several photos. This one came out the best. The scale figure will be used to help place the model correctly against the horizon in the vertical -
Image


The model in the 11 x 14 "window". Looks bare, but we'll have the rolling landscape on the horizon, and an "interesting" cloud formation will take up all that sky space. The lighting will be low. All that's left to do is take the model outside early one morning and shoot the lighting study. I'll be doing a drawing then I'll go right to canvas panel.
Image

Note (1): Performance figures and P-47M description sourced from Republic Aviation Report No. ES-300, dated October 14, 1944, and a wartime Inter-Office Memorandum from Lt. Col. J. H. Carter, Chief of the Fighter Branch at Wright Field.


Break -


I started cutting and pasting background layers and moved the plane/peri track up a little. I have a plain vanilla blue sky up there now just to help me with this "pre viz" comp. This is ONLY a mockup - the pencil drawing will be where I refine and tweak the final look of everything in preparation for the oil painting.

I have yet to select the "interesting" distant cloud formation(s), which will largely drive the direction of light for later shooting the model, but I may go back to my Bassingbourn files as I've done a few times in the past. During my visit in 2002 I stood at the intersection of the runways and shot a bunch of gorgeous English cloudscapes in all directions as the weather was moving out ... I knew those pics would come in handy one day.


Image


Cheers!
Wade

_________________
Website: http://www.wademeyersart.com
Facebook: http://www.facebook.com/Wade.Meyers.Studios

Image


Last edited by Chicoartist on Wed Jan 26, 2011 8:24 pm, edited 4 times in total.

Top
 Profile  
 
PostPosted: Wed Jan 19, 2011 9:25 pm 
Offline
Been here a long time

Joined: Sun May 02, 2004 1:16 am
Posts: 11330
I find the process as interesting as the eventual result!


Top
 Profile  
 
PostPosted: Wed Jan 19, 2011 10:47 pm 
Offline
Long Time Member
Long Time Member

Joined: Sat Dec 22, 2007 12:36 am
Posts: 7961
Location: Mt. Vernon, WA.
Me too. it's amazing how much preamble goes into doing a piece of art. Who'da thunk it?

_________________
Don't make me go get my flying monkeys-


Top
 Profile  
 
PostPosted: Thu Jan 20, 2011 12:04 pm 
Offline
3000+ Post Club
3000+ Post Club
User avatar

Joined: Thu May 18, 2006 3:08 pm
Posts: 4542
Location: chicago
Very cool Wade. I look forward to seeing how this one works out.

_________________
.
.
Sure, Charles Lindbergh flew the plane... but Tom Rutledge built the engine!

Visit Django Studios online or Facebook!


Top
 Profile  
 
PostPosted: Thu Jan 20, 2011 9:02 pm 
Offline
User avatar

Joined: Thu Jul 19, 2007 9:32 pm
Posts: 446
Location: NC
interesting how the process progresses, great work!

_________________
documenting restored B-17s and those undergoing restoration to flight:


Top
 Profile  
 
PostPosted: Fri Jan 21, 2011 11:04 am 
Offline
2000+ Post Club
2000+ Post Club
User avatar

Joined: Sat Oct 04, 2008 6:57 pm
Posts: 2716
Location: St Petersburg FL, USA
Looking good! I have seen some nicely painted painting botched by not paying close attention to scale, perspective, lighting and distance (none of yours Wade!) Always fun to "watch" you work. Looking forward to the next installment!

_________________
Image
Aviation Illustration Website
http://shepartstudio.com/illustration/


Top
 Profile  
 
PostPosted: Wed Jan 26, 2011 8:09 pm 
Offline
1000+ Posts!
1000+ Posts!
User avatar

Joined: Thu Apr 28, 2005 10:01 am
Posts: 1126
Location: Post-Confederate People's Republic of Alabamastan, Suh!
Thanks for the kind words! A small update -

As promised, I swiped the sky from one of my "Bassingbourn" photos. BTW, I am finally building a small album on my Facebook page from my 2002 visit to this historic station - see link below:
Image


The sun is coming from the left in the shot above. I needed/desired the sun to be off our right shoulder ... sooo, exercising my artist's control over nature, I flipped the photo. The concept is to have heavy cloud from some just-departed weather, but the P-47 will be well lit. Need to make sure I have some cloud shadows streaking the ground and hills to add interest and as 'directional' motifs to move the eye. In that vein, notice how the 'movement' (shape) of the cloud mass helps "push" the direction of movement of the Jug forward. The cloud shapes also aid slightly in focusing the eye on the P-47 itself, aka the 'center of interest'. Paintings are, or should be, "designed" in this manner. That's one reason Composition & Design are stressed early and heavily in art curricula:
Image


The model remains in place for positioning/size only. Next step is to completely redraw the Jug by hand, refining the outline and adding and changing a few things - the pilot being one - to get some life in there and to make sure all is correct for a taxiing bird. I'll then lay in my outline over this model. After that, the pencil drawing to work out the tonal structure of the composition before I proceed with the canvas. This one's going slow because it's a 'night' project.

Wade

_________________
Website: http://www.wademeyersart.com
Facebook: http://www.facebook.com/Wade.Meyers.Studios

Image


Top
 Profile  
 
PostPosted: Wed Jan 26, 2011 10:32 pm 
Offline
User avatar

Joined: Sat Sep 02, 2006 1:54 pm
Posts: 326
Location: Little Rock, AR
Bloody nice work Wade...can't wait to see the final.

-Brandon

_________________
ATC: "Oscar 2, cleared to engage wildlife at your discretion..."


Top
 Profile  
 
PostPosted: Thu Jan 27, 2011 9:34 am 
Offline
Account Suspended
User avatar

Joined: Wed Nov 14, 2007 3:06 pm
Posts: 2713
Chicoartist wrote:
Thanks for the kind words! A small update -
The sun is coming from the left in the shot above. I needed/desired the sun to be off our right shoulder ... sooo, exercising my artist's control over nature, I flipped the photo. The concept is to have heavy cloud from some just-departed weather, but the P-47 will be well lit. Need to make sure I have some cloud shadows streaking the ground and hills to add interest and as 'directional' motifs to move the eye. In that vein, notice how the 'movement' (shape) of the cloud mass helps "push" the direction of movement of the Jug forward. The cloud shapes also aid slightly in focusing the eye on the P-47 itself, aka the 'center of interest'. Paintings are, or should be, "designed" in this manner. That's one reason Composition & Design are stressed early and heavily in art curricula:
Image


The model remains in place for positioning/size only. Next step is to completely redraw the Jug by hand, refining the outline and adding and changing a few things - the pilot being one - to get some life in there and to make sure all is correct for a taxiing bird. I'll then lay in my outline over this model. After that, the pencil drawing to work out the tonal structure of the composition before I proceed with the canvas. This one's going slow because it's a 'night' project.

Wade


I personally love the style of WWII Combat Artists. The sketches they would crank out in the field. Like 'Two thousand yard stare' by Tom Lea.

I had a cousin who was an "artist".. she would travel to exotic destinations, take photos, bring them home and project them onto a canvas on the wall. Then trace over them and paint them. Where was the talent?

The end justified the means. Problem was the end was bad as they looked like a painted photograph. She had no talent other than tracing. It looked like a giant paint by numbers. All she did was trace the turtle in the back of the comic book and mailed it in.., thinking she was then an artist.

I am very much looking forward to seeing the finished work. I know YOU have talent!!!!

_________________
S.


Top
 Profile  
 
PostPosted: Thu Jan 27, 2011 11:21 am 
Offline
1000+ Posts!
1000+ Posts!
User avatar

Joined: Thu Apr 28, 2005 10:01 am
Posts: 1126
Location: Post-Confederate People's Republic of Alabamastan, Suh!
Thanks - I love Tom Lea's work. He traveled the world for a major magazine (Life? - easy enough to look up) sketching everyone and everything from Chennault to 8th AF fighter pilots.

As for "the process", I use models if a semi-accurate one is available (as with the P-47M above) as a starting point. I also have "Perspective Projection by Descriptive Geometry" (DG) at my disposal. DG allows me to literally 'build' an aircraft or group of aircraft, or even an entire airfield if need be, from any chosen point in space relative to the subject. I wrote a manual on the topic which I sell in my eBay store. The disadvantage of DG is that it takes a while to wrap your brain around the concept, but once you harness the Zen of DG you can plot projections from scratch - or you can use that knowledge to properly (correct perspective) photograph models - or even real objects - you wish to include in your painting.

For those interested, here is a Work in Progress Facebook album showing the complete workflow for my "Mission from Debden" painting, which is a complex ground scene utilizing a combination of models and 'real' people (me, mainly!). You do not have to be a Facebook member or sign up for anything to view this album:
http://www.facebook.com/album.php?aid=1 ... 8187731075

To see my 'primer' on using the principles of DG to properly photograph models, see:
http://www.facebook.com/note.php?note_id=405482972156

Thx again!
Wade

_________________
Website: http://www.wademeyersart.com
Facebook: http://www.facebook.com/Wade.Meyers.Studios

Image


Top
 Profile  
 
PostPosted: Thu Jan 27, 2011 11:51 am 
Offline
User avatar

Joined: Sun Aug 06, 2006 7:14 pm
Posts: 466
Location: Cincinnati, OH, USA
I'm curious, Wade...why would the perspective of a photographed model differ from real life? Wouldn't a camera using a lens with a field of view comparable to the cone of vision of the human eye show the same perspective, once you account for lens distortion?

_________________
What is red, furry and on your six?
Image


Top
 Profile  
 
PostPosted: Thu Jan 27, 2011 1:11 pm 
Offline
1000+ Posts!
1000+ Posts!
User avatar

Joined: Thu Apr 28, 2005 10:01 am
Posts: 1126
Location: Post-Confederate People's Republic of Alabamastan, Suh!
fritzthefox wrote:
I'm curious, Wade...why would the perspective of a photographed model differ from real life? Wouldn't a camera using a lens with a field of view comparable to the cone of vision of the human eye show the same perspective, once you account for lens distortion?


Let's put your curiosity to rest. Well, right off the bat you agreed with my core argument in the first place for shooting models in lieu of the real thing (assuming no access to the real thing) ...

Second, if you read my article(s) carefully you'll see that the very heart of my method involving photographing models depends on there being little to no difference between shooting a real B-24 (to use my example cited in the link above) standing 144 feet from the astrodome and shooting an accurate 1/48 scale model 3 feet from the same point on the plastic airframe. Overlaid, the two images should match precisely - in apparent perspective. With models, there are, heh heh, usually slight model kit or builder (OK, I'm impatient) errors - those are handled by me in the "refining the outline" stage as shown in the "Mission from Debden" link above where I took the P-51 model photograph and spent a bit of time carefully refining the complete outline to better match the real aircraft vs. the slightly inaccurate model and my relatively sloppy building of the kit.

But no, there is little to zilch difference between, as you say, "the perspective of a photographed model [as compared to] real life."

That said, it is entirely possible and quite easy to shoot models - AND - real life objects incorrectly in the context of later adding those shapes to a painting. For example, say that I wanted to do a painting of a B-17 on the ground. Lucky me, I attend an airshow and there's one over there in the grass about the same angle I want to show a Fort in my painting. The real B-17 is, for the sake of argument, 150 feet away. Later, I decide to have the B-17 in my painting sitting 500 feet away, i.e., the size of the B-17 in my painting will change: it will be smaller, agreed? Can I just 'reduce' the 100-foot-away B-17 image I shot at the airshow in size on the canvas to "look" farther away? No. Why? Because for any - any - object, as you change your distance from an object the apparent perspective of the object (how the shape appears to your eye) will change. Many artists - some well known - do not understand or they ignore this basic concept of presenting complex shapes within the defined 'window' of a frame. The result looks goofy to all but the most aircraft-illiterate, no matter how well painted artistically. The entire concept of the artist's canvas being merely a transparent 'picture plane' (a window to the world beyond) escapes some, but to my mind it's thinking/seeing just as you view objects in real life, whether you have access to the real thing or mere models. These principles are the very core of Descriptive Geometry, whether it's the laborious method I use or as some do it with the computer. You can then take your understanding of reality and easily apply the concepts to shooting models. The key is to understand how your object, no matter what it is, 'fits' in the window of the picture plane or it's going to look 'off' in some way. And in the case of aviation art, most of our clientele are indeed used to looking at the real thing so we better get it right - because they will notice perspective errors.

... then there's also the 'artistic' part whereby you try to convince your viewer that aircraft A is 100 feet way and smaller-in-the-painting aircraft B is 250 feet away when both are actually flat on a piece of textile 2.5 feet away. That's a topic for the next class ~ :rolleyes:

Hope that's all as clear as mud! :lol:

Cheers!
Wade

_________________
Website: http://www.wademeyersart.com
Facebook: http://www.facebook.com/Wade.Meyers.Studios

Image


Last edited by Chicoartist on Thu Jan 27, 2011 1:17 pm, edited 1 time in total.

Top
 Profile  
 
PostPosted: Thu Jan 27, 2011 1:17 pm 
Offline
3000+ Post Club
3000+ Post Club
User avatar

Joined: Thu May 18, 2006 3:08 pm
Posts: 4542
Location: chicago
I've experienced the frustration of trying to find that just right photo of an object for reference that is as close as possible to the object in my artwork that it will reside beside in my composition. It's tough! And I agree, I know of some well known car artists that ignore the perspective issue of mulitple objects, and it really drives me crazy!

_________________
.
.
Sure, Charles Lindbergh flew the plane... but Tom Rutledge built the engine!

Visit Django Studios online or Facebook!


Top
 Profile  
 
PostPosted: Thu Jan 27, 2011 1:22 pm 
Offline
User avatar

Joined: Sun Aug 06, 2006 7:14 pm
Posts: 466
Location: Cincinnati, OH, USA
Thanks, Wade, I always appreciate the time and energy you devote to explaining your processes! :D

_________________
What is red, furry and on your six?
Image


Top
 Profile  
 
PostPosted: Thu Jan 27, 2011 1:34 pm 
Offline
1000+ Posts!
1000+ Posts!
User avatar

Joined: Thu Apr 28, 2005 10:01 am
Posts: 1126
Location: Post-Confederate People's Republic of Alabamastan, Suh!
Time-tested principles - they work every time. :wink:

Then you have Frank Wootton and R. G. Smith. Two of the 'best' - whatever that means, maybe in terms of getting the point across 'better' than almost everybody else who's tried - aviation artists there every was. But both men bent and distorted and did what they wanted to to their aircraft. Their amazing results speak for themselves. Did they use DG? Doubtful, but R. G. was an engineer for Douglas so he certainly understood the concepts. No, both men did things to their aircraft that no other aviation artist to date has gotten away with. Maybe add Michael Turner to that list now that I think about it. They are the exception. Don't try their loose, seemingly effortless methods without YEARS of practice. For now, us mere mortals who paint need to try and get our aircraft "looking right" from they word 'go'. 8)

Wade

_________________
Website: http://www.wademeyersart.com
Facebook: http://www.facebook.com/Wade.Meyers.Studios

Image


Top
 Profile  
 
Display posts from previous:  Sort by  
Post new topic Reply to topic  [ 21 posts ]  Go to page 1, 2  Next

All times are UTC - 5 hours


Who is online

Users browsing this forum: Google [Bot], Google Adsense [Bot] and 35 guests


You cannot post new topics in this forum
You cannot reply to topics in this forum
You cannot edit your posts in this forum
You cannot delete your posts in this forum
You cannot post attachments in this forum

Search for:
Jump to:  
Powered by phpBB® Forum Software © phpBB Group